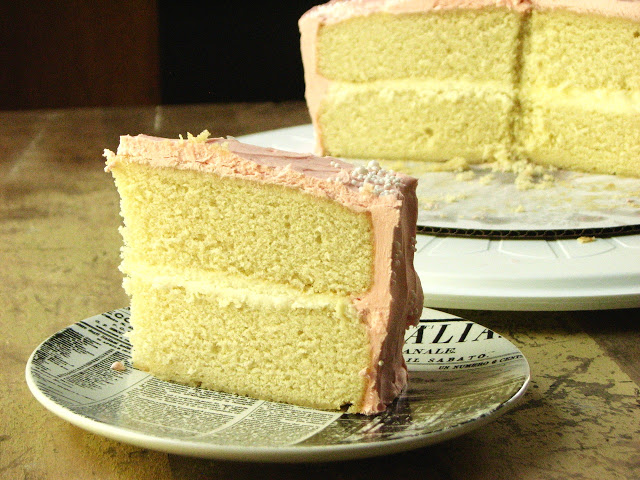
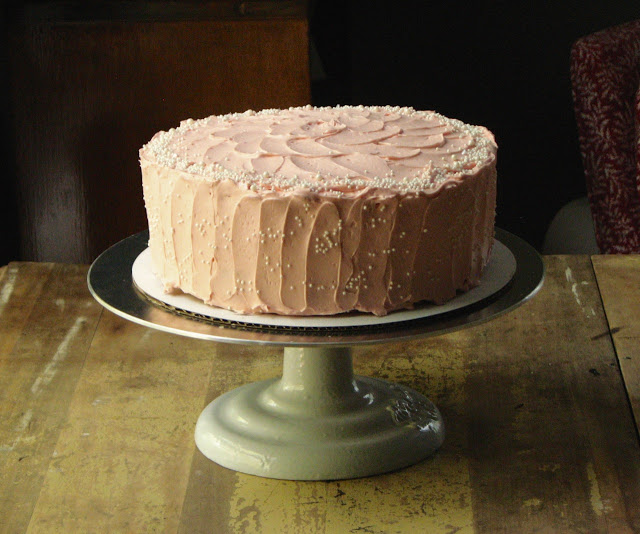
Peach Yogurt Cake

August is now officially over, which means peach season is going to be winding down soon. Excuse me while I shed a tear or two. While I try to eat most things only when in season, there are times when I bend this rule. However, with peaches I am very strict. I will not buy peaches at any other time of year except in late summer. There is nothing as disappointing as biting into a beautiful golden peach and hearing a crunch, and find yourself looking at a dry, hard and very sad piece of fruit. Peaches just don't do well at all out of season. 

To celebrate these golden beauties for a little longer, Lara whipped together a light and delicious peach cake to bring to a friends house this weekend. We enjoyed it after feasting on grilled pizzas, hot and bubbly right off the grill. It was the perfect way to end a late summer Saturday night. 

IMG_3090.jpg

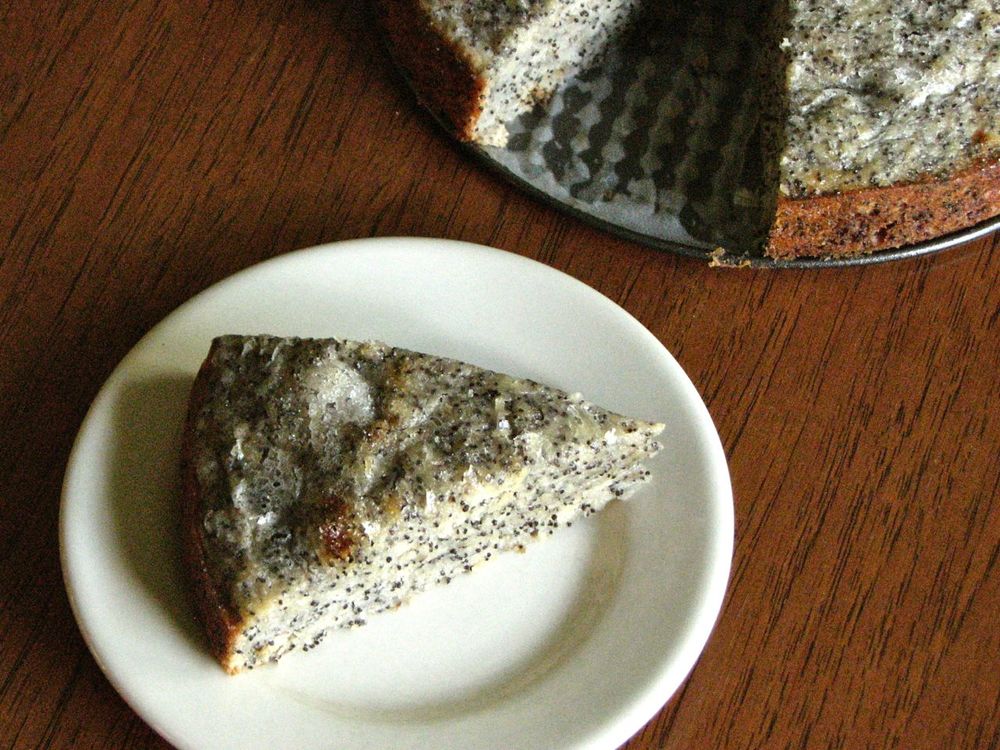
The original recipe called for figs instead of peaches, and then had you swirling mascarpone and jam into the batter before baking. This sounds absolutely divine, but unfortunately I had neither, and was not making another trip to the store so I ended up with a simpler version of the cake with only some chopped peaches. It was still absolutely wonderful, but if you're looking for something with just a bit more pizazz, I would definitely give the mascarpone and jam a try!

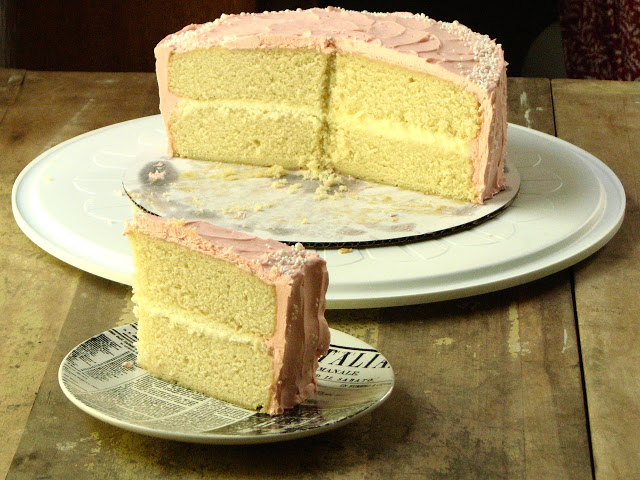
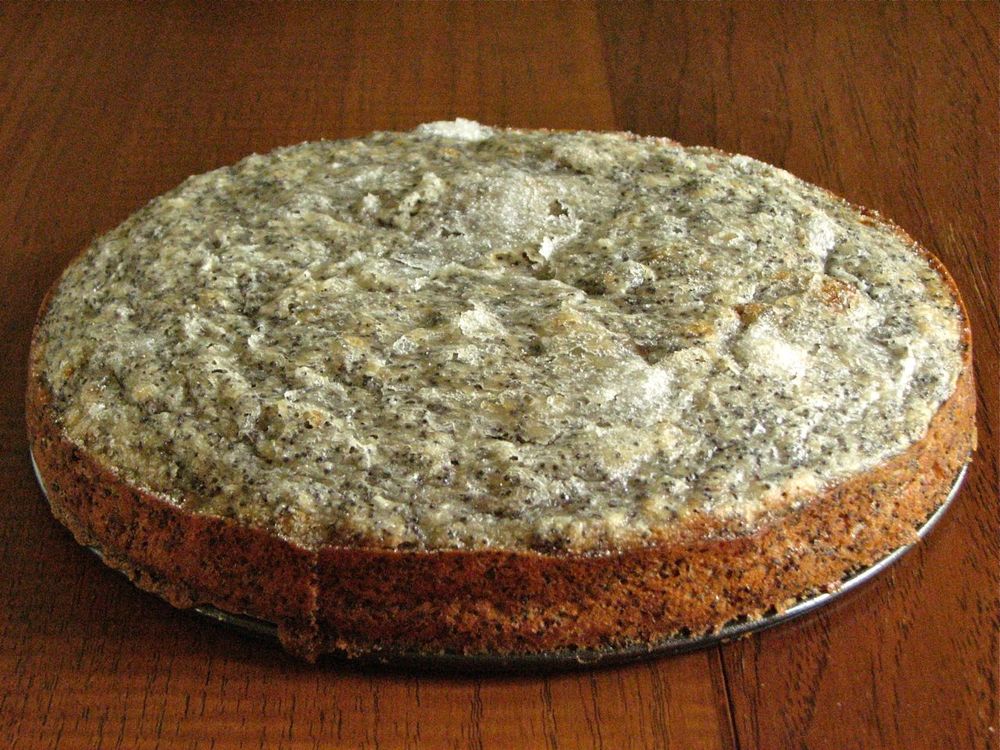
This cake baked up nice and tall, and had a lovely tender crumb. Nice and moist, and really not super sweet at all which I really like. It would be fantastic with some lightly whipped cream, or vanilla ice cream! Next time!

 
IMG_3095.jpg
 

Peach Yogurt Cake
Adapted from Joy the Baker
Ingredients

  • 2 1/2 cups all-purpose flour
  • 2 teaspoons baking powder
  • 1/2 teaspoon baking soda
  • 1/2 teaspoon salt
  • 1/2 cup granulated sugar
  • 1/4 cup unsalted butter, melted and slightly cooled
  • 2 large eggs
  • 1 1/2 cups buttermilk
  • 1 teaspoon pure vanilla extract or 1/4 teaspoon pure almond extract
  • 2 peaches, chopped

Directions
Place a rack in the center of the oven and heat oven to 350 degrees F. Butter an 8-inch wide and 3-inch tall cake pan and lightly dust with flour.

In a medium bowl, whisk together flour, baking powder, baking soda, and salt. Set aside.
In a small bowl, whisk together sugar, butter, eggs, and buttermilk. Whisk in the vanilla or almond extract.

Add the buttermilk mixture all at once to the dry ingredients. Stir until just combined and no lumps remain. Spoon batter into the prepared pan.

Bake for 35-40 minutes, or until a skewer inserted in the center of the cake comes out clean. Allow cake to cool to room temperature before slicing to serve. Serve plain or with sweetened whipped cream.

Chocolate Greek Yogurt Banana Bread

My sister served me this bread last week for breakfast and I enjoyed it quite a bit, so this weekend I decided to make myself a loaf. It's a wholesome chocolate banana bread made with whole wheat flour and Greek yogurt. When eating a breakfast bread, I like like having a nice thick slice; something I can really sink my teeth into. This bread is perfect for that. And topped with a little peanut butter for a little extra protein umph is my favorite way to finish it off! 

IMG_0682.jpg

I streamlined the original recipe here, just so I didn't have to use as many bowls! Mix the wet ingredients in one bowl, the wet in another and mix them together. Done. I also did what I seem to always do and cut back on the sugar from 1/2 c honey, to 2 tbs honey + 2 tbs brown sugar (so 1/4 cup total). Feel free to double this for a sweeter and more indulgent bread. 

 
IMG_0675.jpg
IMG_0677.jpg
 

Chocolate Greek Yogurt Banana Bread
Adapted from The Baker Mama 
Ingredients

  • 1 1/2 cups (180 grams) whole wheat flour
  • 1/2 cup (40 grams) unsweetened cocoa powder
  • 1 1/2 teaspoons baking powder
  • 1/2 teaspoon kosher salt
  • 1/2 cup plain Greek yogurt
  • 2 tablespoons (42 grams) honey
  • 2 tablespoons (25 grams) brown sugar
  • 1 large egg
  • 1 teaspoon vanilla
  • 1/2 cup (110 grams) milk
  • 1 cup (225 grams) mashed ripe banana; about 2 large bananas
  • 1/2 - 1 cup dark chocolate chips or chunks (optional)

Directions
Preheat oven to 350°F. Lightly grease and flour a 9x5-inch loaf pan and set aside. In a medium bowl, whisk together the flour, cocoa powder, baking powder and salt, set aside.

In a large bowl, beat together the remaining ingredients until well combined. Add the dry mixture to the wet mixture and mix with a spatula until mostly combined. Add in the chocolate chips or chocolate chunks if using, and continue to mix until completely combined with no more streaks of dry flour in the batter. Batter will be thick.

Spread batter evenly into prepared loaf pan. Press more chocolate chips into the top of the batter before baking, if desired. Bake on the middle rack of the oven for about 50 minutes, turning halfway through, or until a toothpick inserted in the center of the loaf comes out with a few moist crumbs. Let the bread cool in the pan for about 20 minutes before removing to a wire rack to cool completely and serve.

Yields: 8-10 slices

Lime Cornmeal Cookies

I first made these cornmeal cookies 5 years ago when I was living in Dearborn. So much has happened since that time, but one thing that has not changed is how delicious these cookies are. That first batch was back in the early years of this blog and the photos on that first post were not so hot (if you're interested in taking a look you can see it here). I thoughts it was time to revisit this recipe and give it the photos it deserves. 

It had been a little while since I'd made a batch of these cookies, but I was having some friends over for a Bible study and the food I was making was full of Mexican flavors so I thought these cookies would be the perfect dessert to finish off the night with. They are buttery and tart with a wonderful crunchy texture from the cornmeal. The lime glaze on top really finishes them off nicely. All around a great cookie that's just a little bit different than the usual. Everyone I served them to loved them, so I'm sure anyone you serve them to will love them too! 

I halved the original recipe this time, the full batch makes quite a few cookies and I didn't need that many on this occasion. When shaping them I used my scale and made each cookie 30 grams, this yielded 17 cookies that were the perfect size in my opinion. The recipe calls for 90 grams cookies but that is just massive. I'm sure they'd be awesome, but I didn't feel the need to make mine this big. I ended up chilling the dough overnight before baking which is not called for in the original recipe, but the dough was fairly soft, and I had the time to throw it in the fridge before I needed to bake. The cookies might spread a little more if you don't chill the dough, but I haven't tested this. They did spread a bit regardless of the chilling, so just make sure there is enough space between each ball of dough before putting in the oven. And if you're feeling tempted to skip the lime glaze as I was...don't! It really finishes off the cookies perfectly - the sweet and tart glaze complements the crunchy and buttery cookie and brings them up a notch. Plus, it just looks so cute! 


Lime Cornmeal Cookies
Adapted from The Sweeter Side of Amy's Bread by Toy Kim Dupree and Amy Scherber

  • 3/4 cup (3 1/2 ounces) all purpose flour
  • 1/2 cup (3 ounces) coarse cornmeal or fine grits
  • Scant 1/2 cup (2 ounces) bread flour
  • 7/8 teaspoon kosher salt
  • 1/2 teaspoon baking soda
  • 1/2 cup plus 2 tablespoons (4 3/8 ounces) granulated sugar
  • 1/2 cup (4 ounces) butter, slightly softened
  • 3/4 ime zest, finely minced
  • 1 egg
  • 1 egg yolk
  • 1 cup powdered sugar
  • 1 1/2 tablesppons lime juice

Directions
Preheat the oven to 350 degrees. Line a cookie sheet with parchment paper.

In a bowl, add the all-purpose flour, cornmeal, bread flour, salt and baking soda and whisk together. Set aside. 

In another bowl, using an electric mixer with a paddle attachment, cream the sugar, butter and lime zest together on medium speed for 2 minutes, or until light and fluffy, scraping the sides and bottom of the bowl frequently. Add the egg and egg yolk, mixing until every thing is well combined.

With the mixer on medium-low speed, add the dry ingredients in stages. Mix only until everything is well combined, scraping the sides and bottom of the bowl frequently. There should not be any pockets of dry flour left in the dough. At this point, you can refrigerate the dough overnight, or move on immediately to the next step. 

Portion the dough into individual balls, rolling them between your hands to make them uniform. Place them on the cookie sheet with an inch or two between each cookie. They will spread during baking. (The original recipe calls for you to make giant cookies, 90 grams/3.2 ounces of dough each, which is huge and wonderful. However, I made my balls of dough a little more reasonably sized at 30 grams, 1-2 tablespoons, each.) This dough will be soft, so don't flatten the dough balls at all before baking. Bake the cookies for 16-18 minutes, rotating the cookie sheet halfway through the baking time. The cookies should be lightly browned on the edges and baked all the way into the center. They should be soft, but be careful not to underbake them or the centers will collapse and be doughy.

Cool the cookies on the sheets for 5 minutes, then move them to a rack and cool completely before glazing.

Whisk together the confectioner's sugar and the lime juice to make a loose glaze. Use a 2 inch pastry brush to frost the top of each cookie, leaving an unfrosted 1/4 inch border around the edge. Let the glaze dry completely before storing the cookies in an airtight container.

Greek Yogurt Tart with Sunflower Seed Crust

Well, June is here and after a chilly start to the week, it finally feels like it has actually arrived here in Michigan. June is a wonderful month, but for all it's greatness I think my favorite thing about June may be strawberries!! We wait so long for such a short season, but I try to enjoy every minute of it. This Greek yogurt tart is the perfect way to showcase this fruit in all of its splendor. I actually made this tart a few weeks back for a Memorial Day brunch I attended, but now that local strawberries are just beginning to arrive at the Farmer's market it's the perfect opportunity to give this recipe a try. Of course, as the summer goes on and other fruits come into season this tart can be adapted to pretty much whatever fruit you have on hand in a given moment. 

I was looking for something fresh, light and delicious to make for my brunch and my mind kept focusing on some kind of fresh tart. I didn't want it to have a traditional crust, but wanted something a little different. While browsing recipes I came across a savory sunflower seed crust over at Natural Girl Modern World and was intrigued. I decided to try adapting it a bit to work for me in a sweet application. With a few tweaks it came out great! More like a giant cookie crust as opposed to a traditional tart crust, exactly what I was looking for. It was perfect topped with some yogurt and fruit, kind of twist on the more traditional fruit and yogurt parfait - delicious. 

For the filling of this tart I wanted to go very simple. I took my homemade yogurt and strained it for several days until very thick and incredibly creamy. Store-bought yogurt would work just fine too, just make sure to buy plain yogurt to strain, not the flavored stuff, you can add sugar and flavorings yourself.  To the very thick yogurt I gently added a little honey, a little brown sugar, and some lemon zest. Not a lot of sugar, but just enough to add a touch of sweetness. Just taste and adjust until the flavors are to your liking. I spooned this sweetened yogurt into the crust and topped with the sliced berries. Done! Fresh and light, exactly what I was hoping for. 


Sunflower Seed Tart Crust
Adapted from Natural Girl Modern World
Ingredients

  • 1 cup (80 grams) oats 
  • 1/2 cup (60 grams) flour
  • 3/4 cup (105 grams) sunflower seeds 
  • 3/4 tsp salt
  • 4 1/2 tablespoons (63 grams) butter, chilled
  • 3  tablespoons (63 grams) honey 
  • 1/2 teaspoon cinnamon
  • 1/8 teaspoon cardamom

Directions
In a food processor, blend oats until the texture of coarse sand. Add sunflower seeds and salt and blend until the seeds are also a crumb-like texture. This should only take 30 seconds to 1 minute. Over-blend and you'll start to make nut butter. Add the flour and pulse a few times to combine. Add the chilled butter and pulse a couple of times, until starting to come together. Add the honey and continue to pulse until a ball of dough forms. It will be sticky. Wrap dough in plastic wrap and place into the back of your freezer for about 15 minutes, or refrigerate for a couple of hours or overnight. 

While the dough chills, preheat oven to 350 degrees. 

Remove dough from freezer and press it into prepared greased 9 inch tart pan with a removable bottom. Aim for an even distribution of dough throughout the pan, pressing the dough together firmly to create a solid base. Using a fork, prick the bottom of the crust thoroughly to allow air to escape when baking. Bake for 20-25 minutes. Keep an eye on it towards the end of baking to ensure the edges don't over-brown. Set aside to cool before filling. 

Pumpkin Oat Cookies

The other week I grabbed a large can of pumpkin while at the grocery store with no specific purpose in mind. It's fall, so I knew I would have no problem finding something to do with it. One of my favorite things to do with canned pumpkin, which I have been doing all week, is to throw it in my morning breakfast smoothie. Add a couple shakes of cinnamon and nutmeg and it's pumpkin pie for breakfast - but healthy! I love added vegetables to my breakfast and not even noticing. 

As soon as I got home with the pumpkin though, the baking bug hit. I just needed to bake something pumpkin-y! After a little browsing I finally decided on this pumpkin oat cookie recipe. The oats with the pumpkin seemed like the perfect combination. I added in some pecans and dried fruit and the whole thing came together to create a soft and buttery treat, the perfect afternoon pick-me-up or after dinner snack. 

The original recipe for these cookies was described as being crisp on the outside and chewy in the middle. I actually did not find this to be the case. However, that's is not necessarily a bad thing. My cookies ended up being very soft all the way through. I did like that they didn't spread too much while baking, ending up quite puffy and beautiful. 

Had I had the choice, I would have added chocolate chips to the cookies as the original recipe called for, but since I didn't have any chocolate in the house I had to go a different route. I threw in some chopped pecans and dried fruit which did not disappoint either. I loved how the nuttiness of the pecans mixed with the toasty oats. Dried fruit for sweetness helped finish them off. A comforting fall cookie for any occasion. 

Pumpkin Oat Cookies
Adapted from Chelsea's Messy Apron
Ingredients

  • 6 tablespoons butter
  • 1/2 cup (3.5 ounces) brown sugar
  • 1/4 cup (1.75 ounces) granulated sugar
  • 1/4 cup + 1 tablespoon (3 ounces) canned pumpkin
  • 1/2 teaspoon vanilla
  • 3/4 cup (3.5 ounces) flour
  • 3/4 cup (60 grams) old fashioned rolled oats
  • 1/2 teaspoon cinnamon
  • 1/4 teaspoon nutmeg
  • 1/2 teaspoon baking soda
  • 1/4 teaspoon baking powder
  • 1/4 teaspoon salt
  • 1/2-1 cup of add-ins (chocolate, nuts, dried fruit, etc)

Directions
In the bowl of a stand mixer beat together the butter with the brown sugar and white sugar. Beat in the pumpkin, and vanilla.

In another bowl stir together the flour, oats, cinnamon, nutmeg, baking soda, baking powder, and salt.

Add the dry to the wet and mix until just combined. The mixture should pull away from the edges once all the flour is added. Stir in whatever add-ins you are using. Cover the dough and place in the fridge for at least 1 hour, preferable overnight.

On the day of baking, preheat the oven to 350 degrees. Bake for 14-16 minutes or until very lightly browned at the bottom/sides.

Remove from the oven and allow to set for another 5 minutes on the baking sheet before removing them to a wire cooling rack.

Yields: about 1 dozen cookies (I got 13)

Funfetti Cucpakes

Last month, one of my good friends threw a golden birthday party for her husband. I offered a helping hand, and so was asked if I could make some cupcakes for the party. Funfetti was the request which got me excited, I had never made a funfetti cupcake before, but have always been a big fan of sprinkles! I used my trusty go-to butter cupcake recipe and threw in a half a cup of sprinkles. Voila, funfetti cupcakes! Super easy and super fun! I frosted them with a basic American buttercream that is always a hit. As far as cupcakes go, it doesn't get much simpler than this. So if you're looking for a fun and easy way to add homemade cakey goodness to your next party, look no further. 

I believe this is the third time I've used this cupcake recipe this fall now, and all three times it has turned out wonderfully! It's a great recipe that turns out 24 perfect cupcakes. And although I love a pure white cake, sometimes I just don't want to deal with separating egg whites and yolks and then whipping the eggs whites. This recipe just used 4 whole eggs that go straight into the batter, no separating, no whipping, nice and easy. 

Funfetti Cupcakes
Ingredients

  • 3 cups (14 ounces) all purpose flour
  • 1¾ cups (12.25 ounces) granulated sugar
  • 2½ teaspoons baking powder
  • 1 teaspoon kosher salt
  • 1 cup (2 sticks) butter, softened, cut into small cubes
  • 4 eggs
  • 1 cup (8 ounces) milk
  • 2 teaspoons vanilla extract
  • 1/2 cup colored sprinkles, plus more for decorating

Directions
Preheat the oven to 350 degrees F. Place the flour, sugar, baking powder, and salt in a mixing bowl and stir to combine.

Add the butter and mix on low speed, until mixture resembles coarse crumbs (2-3 minutes). Add the eggs, one at a time, and scrape the bottom of the bowl to make sure all the ingredients are well-combined.

Combine the milk, and vanilla extract in a measuring cup. Beat half this mixture into the flour/butter/eggs. Beat on medium speed for 1½ minutes, scrape the bottom and sides of the bowl, add the remaining milk mixture, and beat for another 30 seconds. Add the sprinkles and gently mix into the batter until well combined.

Fill paper liners ⅔ full with batter, and bake for 18-20 minutes, or until a tester inserted in the center of the cupcake comes out clean.

Cool completely before topping with buttercream frosting (recipe follows) and sprinkles. 

Yields: 24 cupcakes

Whipped Vanilla Buttercream
Ingredients

  • 1½ cups (3 sticks) butter, at room temperature
  • 3 cups confectioners’ sugar, sifted
  • Pinch of salt
  • 2 tablespoons heavy cream (or 1-2 tablespoons of milk if you don't keep cream on hand, I've done this many time)
  • 2 teaspoons vanilla extract

Directions
Place the butter in the bowl of an electric mixer fitted with the whisk attachment. Whip on medium-high speed until smooth, about 1 minute. Add the confectioners’ sugar and salt to the bowl and mix on medium-low speed just until incorporated. Continue to beat on medium-high speed until smooth, about 1-2 minutes. Mix in the heavy cream (or milk) and vanilla on low speed just until incorporated. Increase the mixer speed and whip on high speed until light and fluffy, scraping down the bowl as needed, about 4-5 minutes.

Buttery Vanilla Birthday Cake

When I think birthdays, I think 2 things; presents and cake!! Two of my favorite things! I don't think I have to say anything about presents, but I do have something to say about cake. I. Love. Cake. I know I've said it before, but I am going to state it again. I truly cannot understand anyone who says they don't like cake. I find this hard to believe. I do believe that some people have never tried a really good cake, or that some people find cake too sweet or too rich to eat much more than a bite or two. But to say they actually don't like a spectacular fresh, homemade cake, never! 

Anyway, it's my birthday today, so I had to share my birthday cake. I love making layered cakes, so my birthday is the perfect time for me to pull out the cake pans and bake myself my favorite thing. While I love all cakes, I am partial to a simple, buttery white cake with a simple American buttercream, and if it's pink, even better! 

Regardless of how anyone else feels about cake, to me this one is a winner! Enjoy!

Buttery Vanilla Birthday Cake
Adapted From Delectably Mine
Ingredients

  • 3 cups (14 ounces) all purpose flour
  • 1¾ cups (12.25 ounces) granulated sugar
  • 2½ teaspoons baking powder
  • 1 teaspoon kosher salt
  • 1 cup (2 sticks) butter, softened, cut into small cubes
  • 4 eggs
  • 1 cup (8 ounces) milk
  • 2 teaspoons vanilla extract

Directions
Preheat the oven to 350 degrees F. Grease two 8 inch cake pans and line with parchment paper, set aside.

Place the flour, sugar, baking powder, and salt in a mixing bowl and stir to combine.

Add the butter and mix on low speed, until mixture resembles coarse crumbs (2-3 minutes). Add the eggs, one at a time, and scrape the bottom of the bowl to make sure all the ingredients are well-combined.

Combine the milk, vanilla extract and almond extract (if using) in a measuring cup. Beat half this mixture into the flour/butter/eggs. Beat on medium speed for 1½ minutes, scrape the bottom and sides of the bowl, add the remaining milk mixture, and beat for another 30 seconds.

Divide the batter evenly between the two cake pans. Bake for 36-38 minutes, or until a tester inserted in the center of the cupcake comes out clean. Let cool for 5-10 minutes in the pans. Invert onto wire rack to cool completely. 

Whipped Vanilla Buttercream
From Annies Eats
Ingredients

  • 1½ cups butter, at room temperature
  • 3 cups confectioners’ sugar, sifted
  • Pinch of salt
  • 1 vanilla bean, split lengthwise (optional)
  • 2 tbsp. heavy cream
  • 1 tbsp. vanilla extract

Directions
Place the butter in the bowl of an electric mixer fitted with the whisk attachment. Whip on medium-high speed until smooth, about 1 minute. Add the confectioners’ sugar to the bowl and mix on medium-low speed just until incorporated. Scrape the seeds from the vanilla bean pod (if using) into the bowl and add in the salt. Continue to beat on medium-high speed until smooth, about 1-2 minutes. Mix in the heavy cream and vanilla on low speed just until incorporated. Increase the mixer speed and whip on high speed until light and fluffy, scraping down the bowl as needed, about 4-5 minutes.

Banana Poppy Seed Cake

Simple cakes such as this banana poppy seed cake are good recipes to have in your back pocket just in case you need to whip together a quick dessert sometime. What I like about this cake is that it is a little different than the typical everyday cake. Bananas and poppy seeds are not ingredients I often use in my desserts. Although I do bake with bananas a lot, I usually don't use them in my cakes such as this one which is what initially intrigued me about this recipe. The combination of tender banana scented cake paired with the slightly bitter crunch from the poppy seeds came together in a perfect pairing making this cake a winner. Although this time I opted to pass on the cream cheese frosting that the original recipe called for, I'm sure it would be wonderful atop this cake, making it just that much more special. 

The bananas as well as a nice half cup of sour cream keep this cake moist and tender. A touch of butter is added for flavor and a little more richness and then finish it off with those cute and crunchy poppy seeds. It is a simple combination that works wonderfully to turn out this simple cake that is just unique enough to make things interesting.

Banana Poppy Seed Cake
Adapted from The View From Great Island
Ingredients

  • 2 Tbsp unsalted butter, at room temperature
  • 2/3 cup sugar plus 1 tablespoon
  • 1/2 cup sour cream
  • 1 large egg
  • 2 ripe bananas, mashed
  • 1/3 cup poppy seeds
  • 2 teaspoon vanilla extract 
  • 1 cup flour
  • 1/4 teaspoon salt
  • 1/2 teaspoon baking soda

Directions
Sift together the flour, salt and baking soda. Set aside. Cream the butter, 2/3 cup sugar and sour cream together. Beat in the egg, bananas and vanilla until smooth. 

Sift the flour mixture and poppy seeds into the wet mixture. Mix together just until just combined. Spread the batter into a greased 8-inch round cake pan and sprinkle the top with the remaining tablespoon of sugar. 

Bake the cake for 25-30 minutes at 350 degrees until a toothpick just comes out with just a few moist crumbs. Cool on a wire rack.