Gluten Free Banana Bread

Found this tasty looking banana bread online. Had all the ingredients! Yay!!

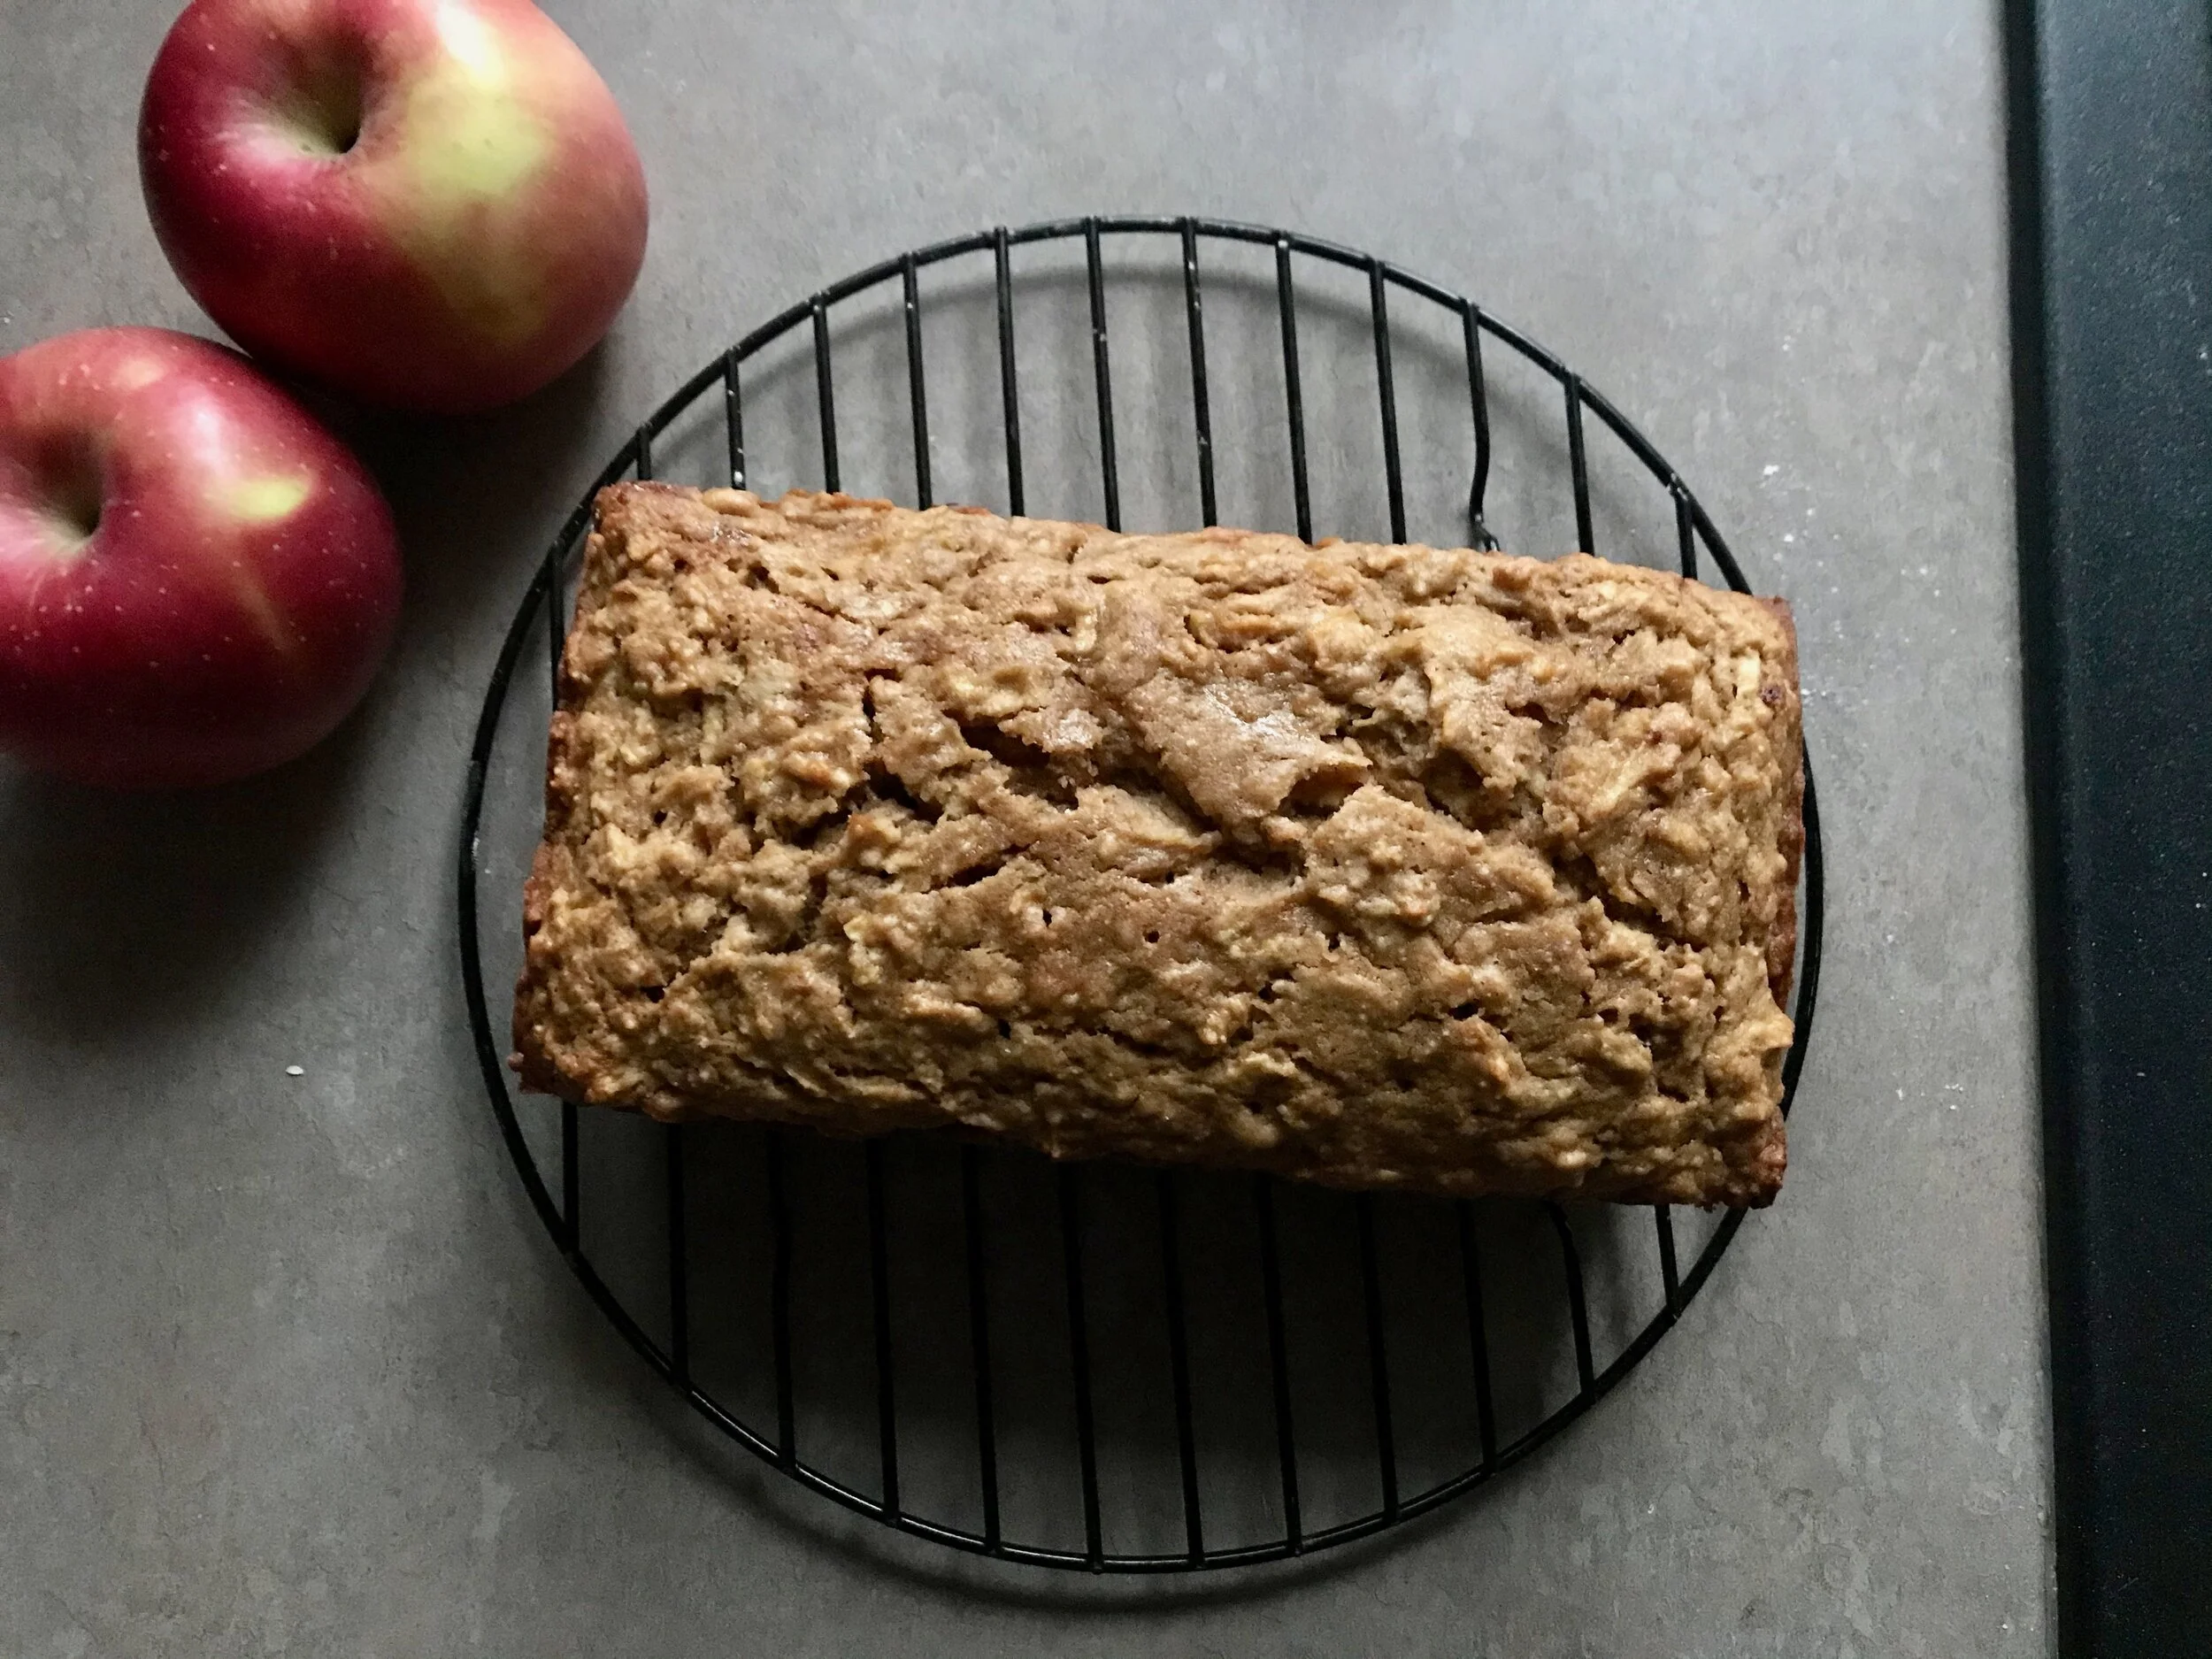
Followed the recipe pretty closely, but did cut the brown sugar in half from 1/4 cup to 2 tablespoons. My bananas were pretty big and ended up weighing 400 grams which is probably a bit more then needed, but worked fine so that’s what I’ll do! Recipe called for a pinch of salt, I used 3/8 tsp. Was debating between 1/4 and 1/2 tsp so split the difference.

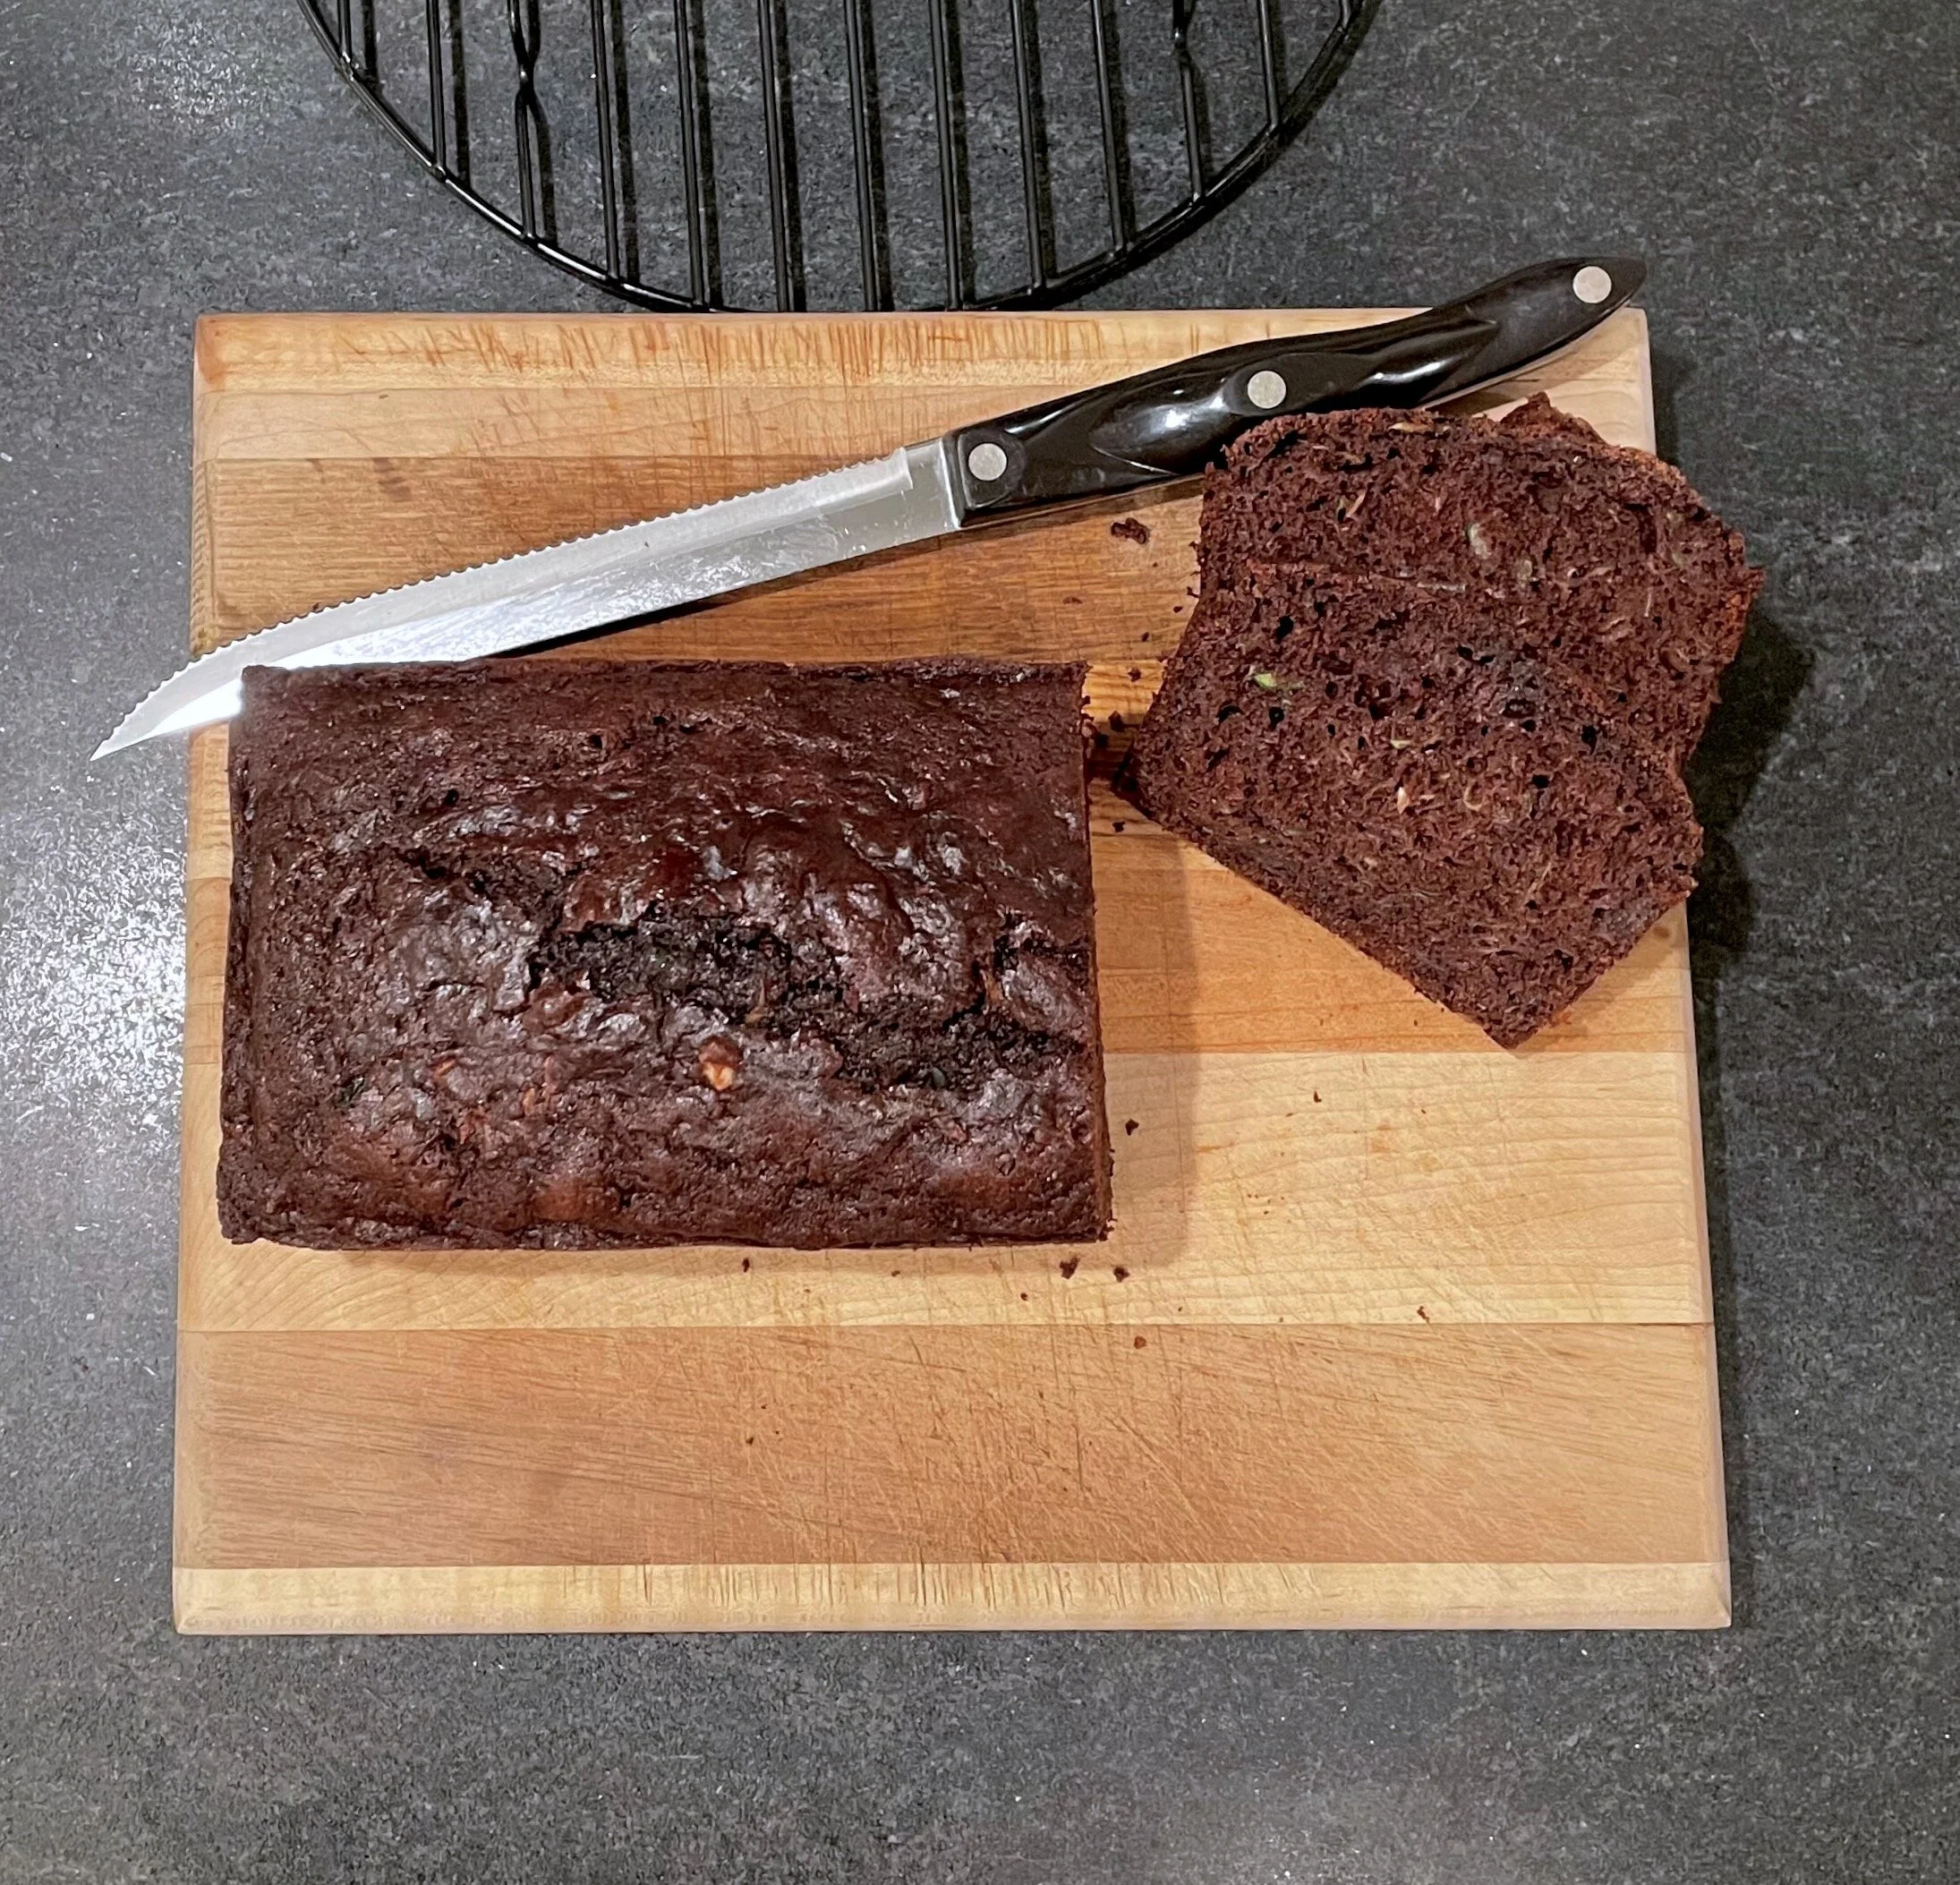
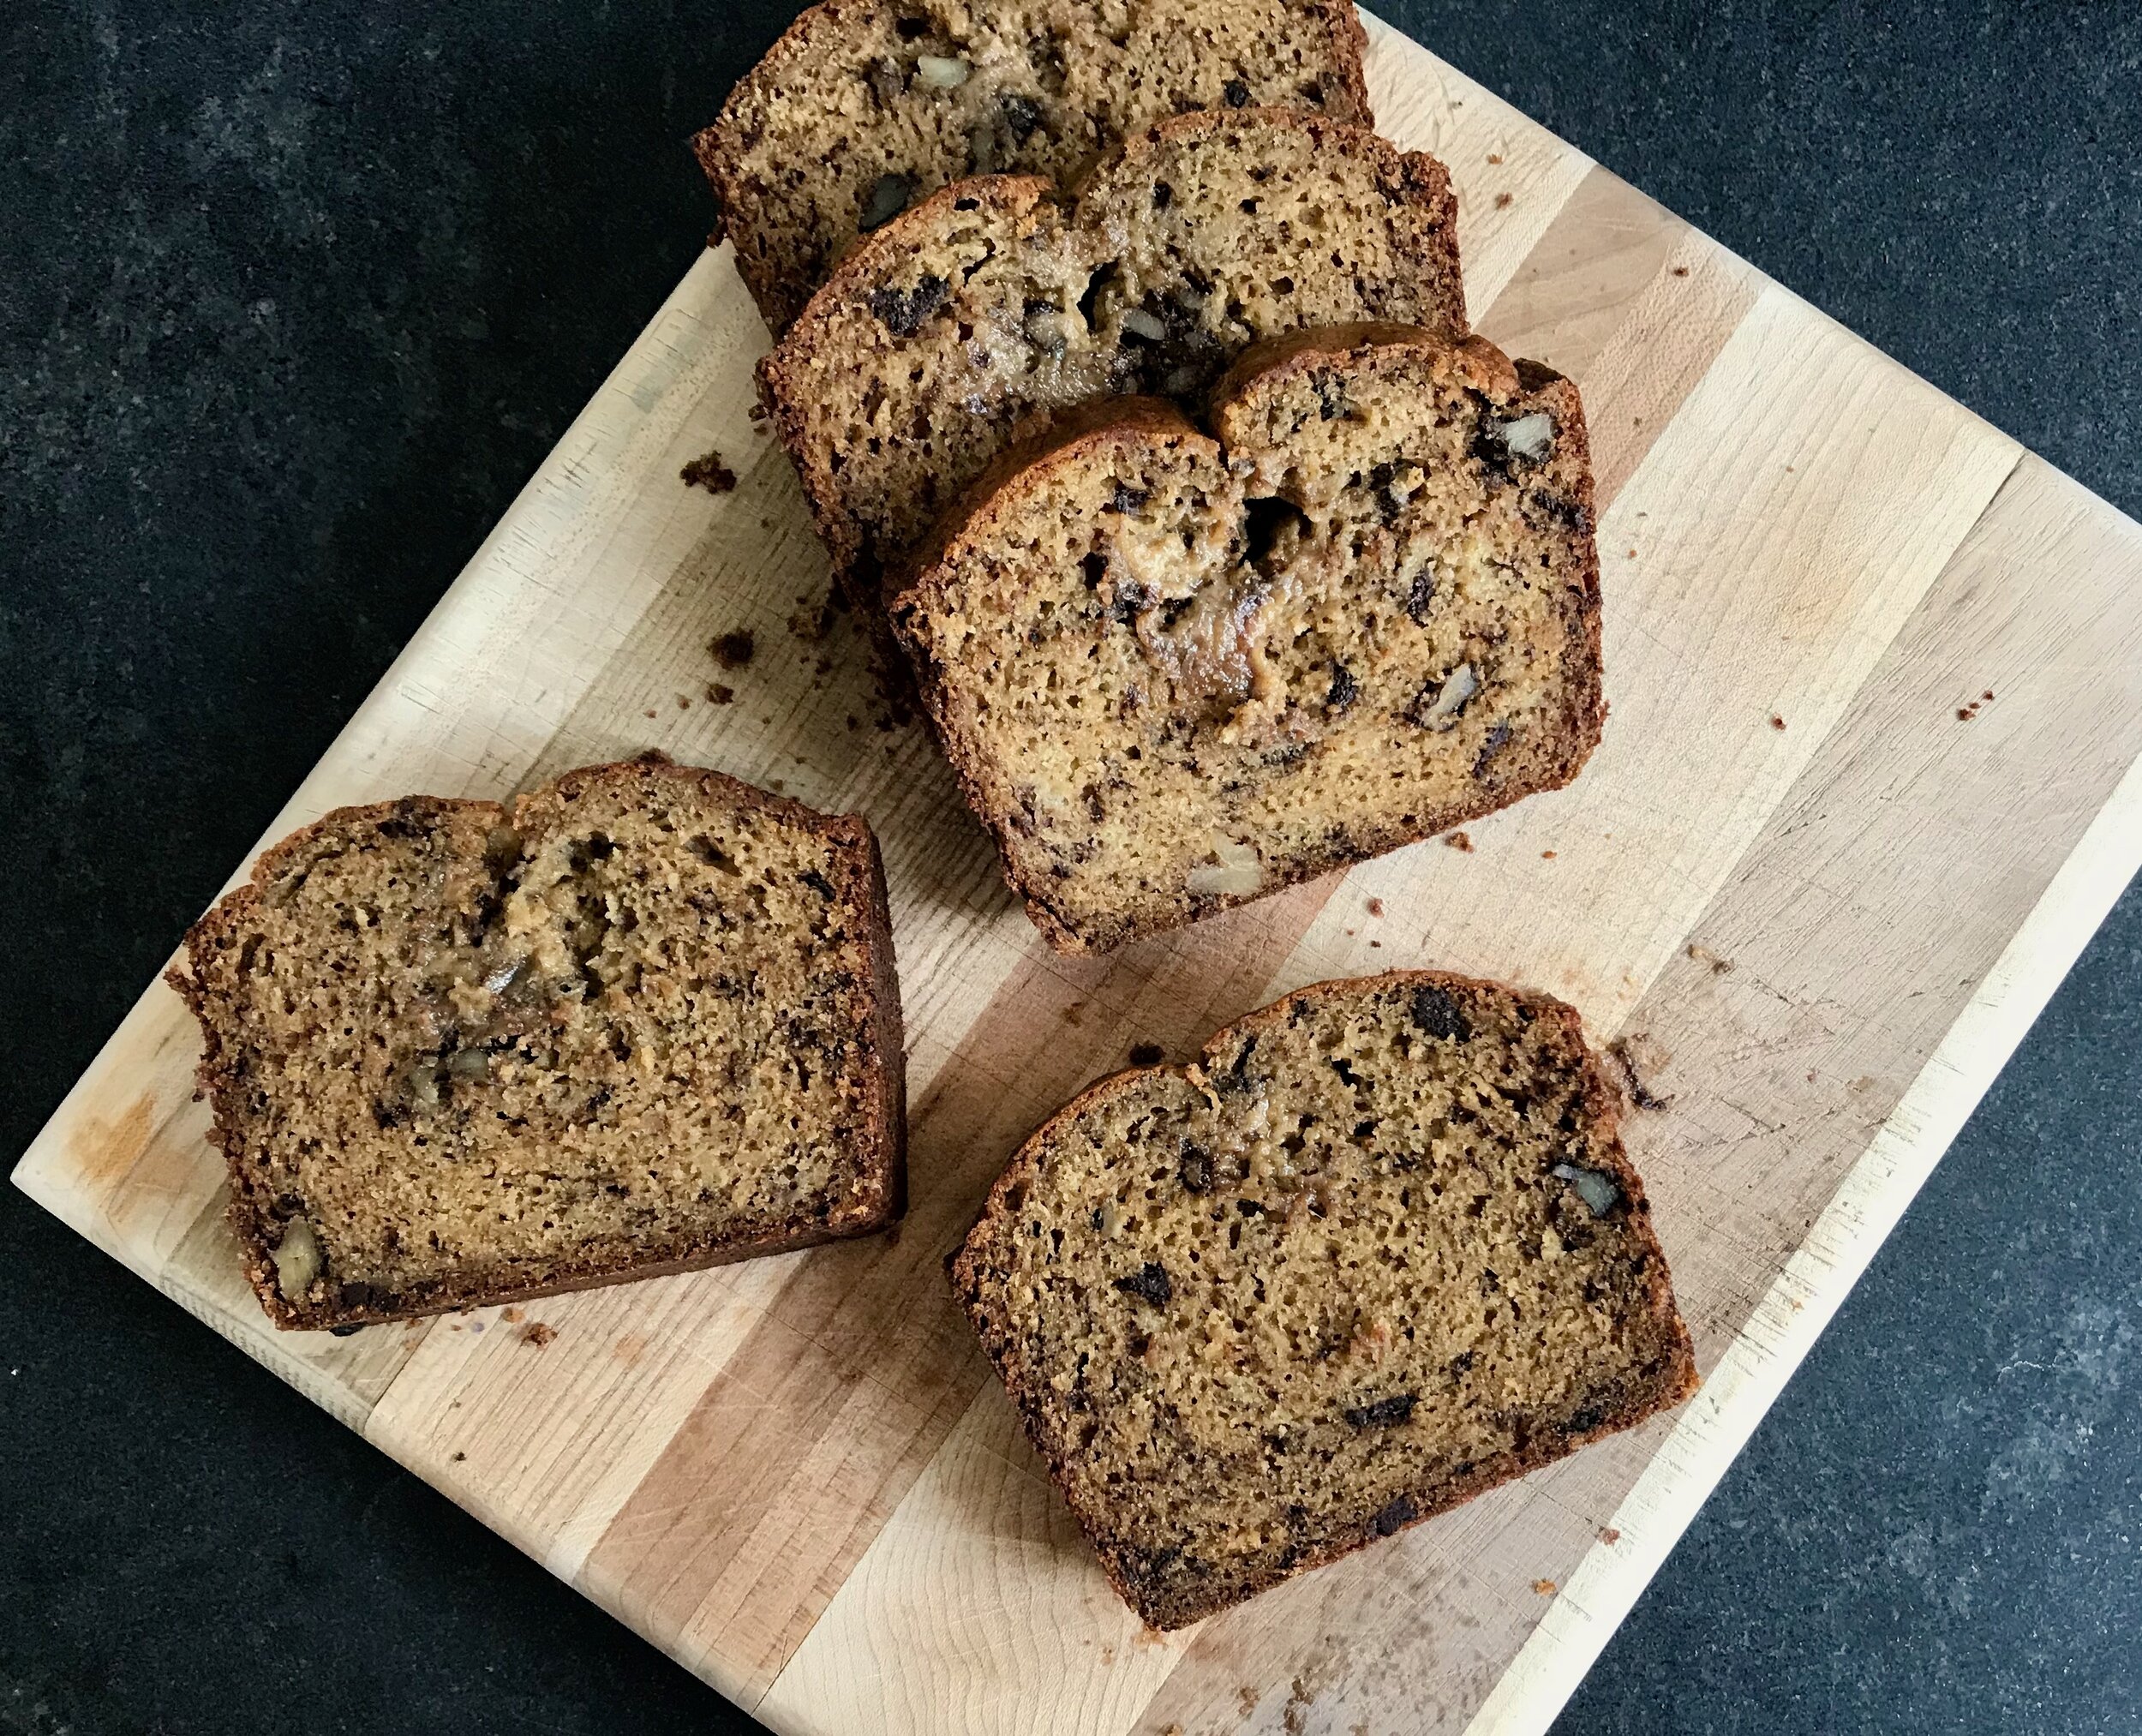
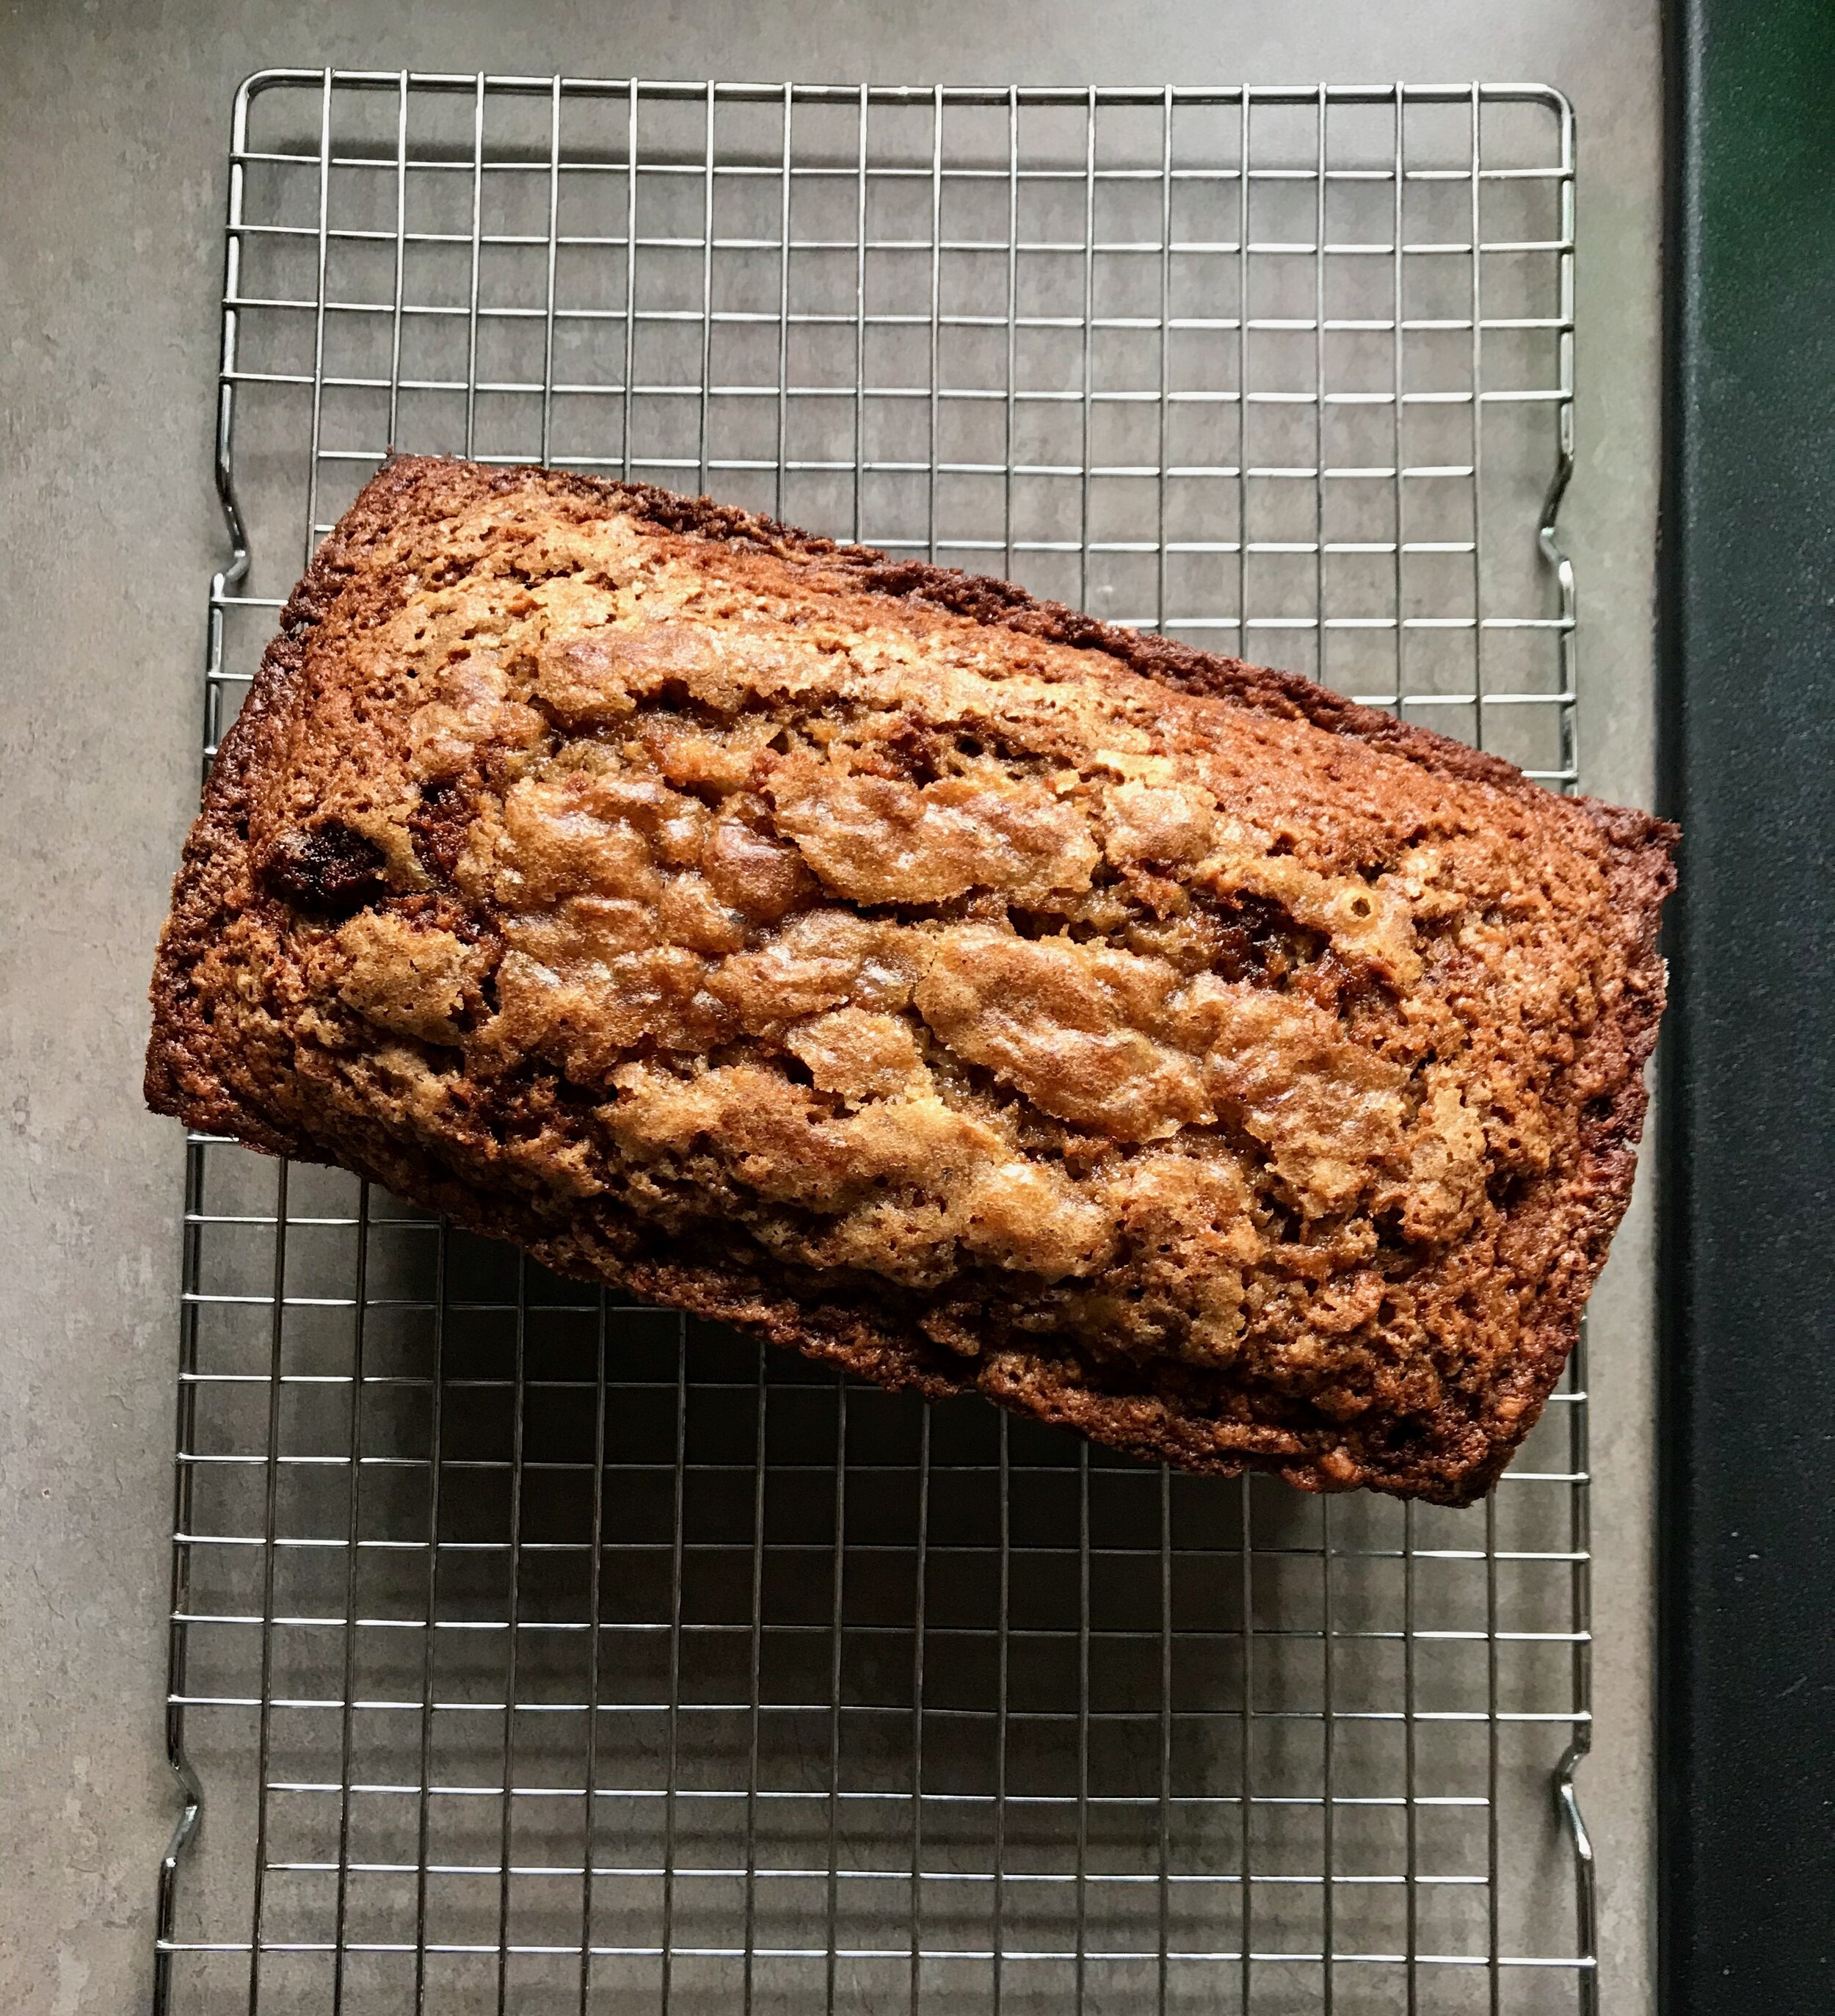
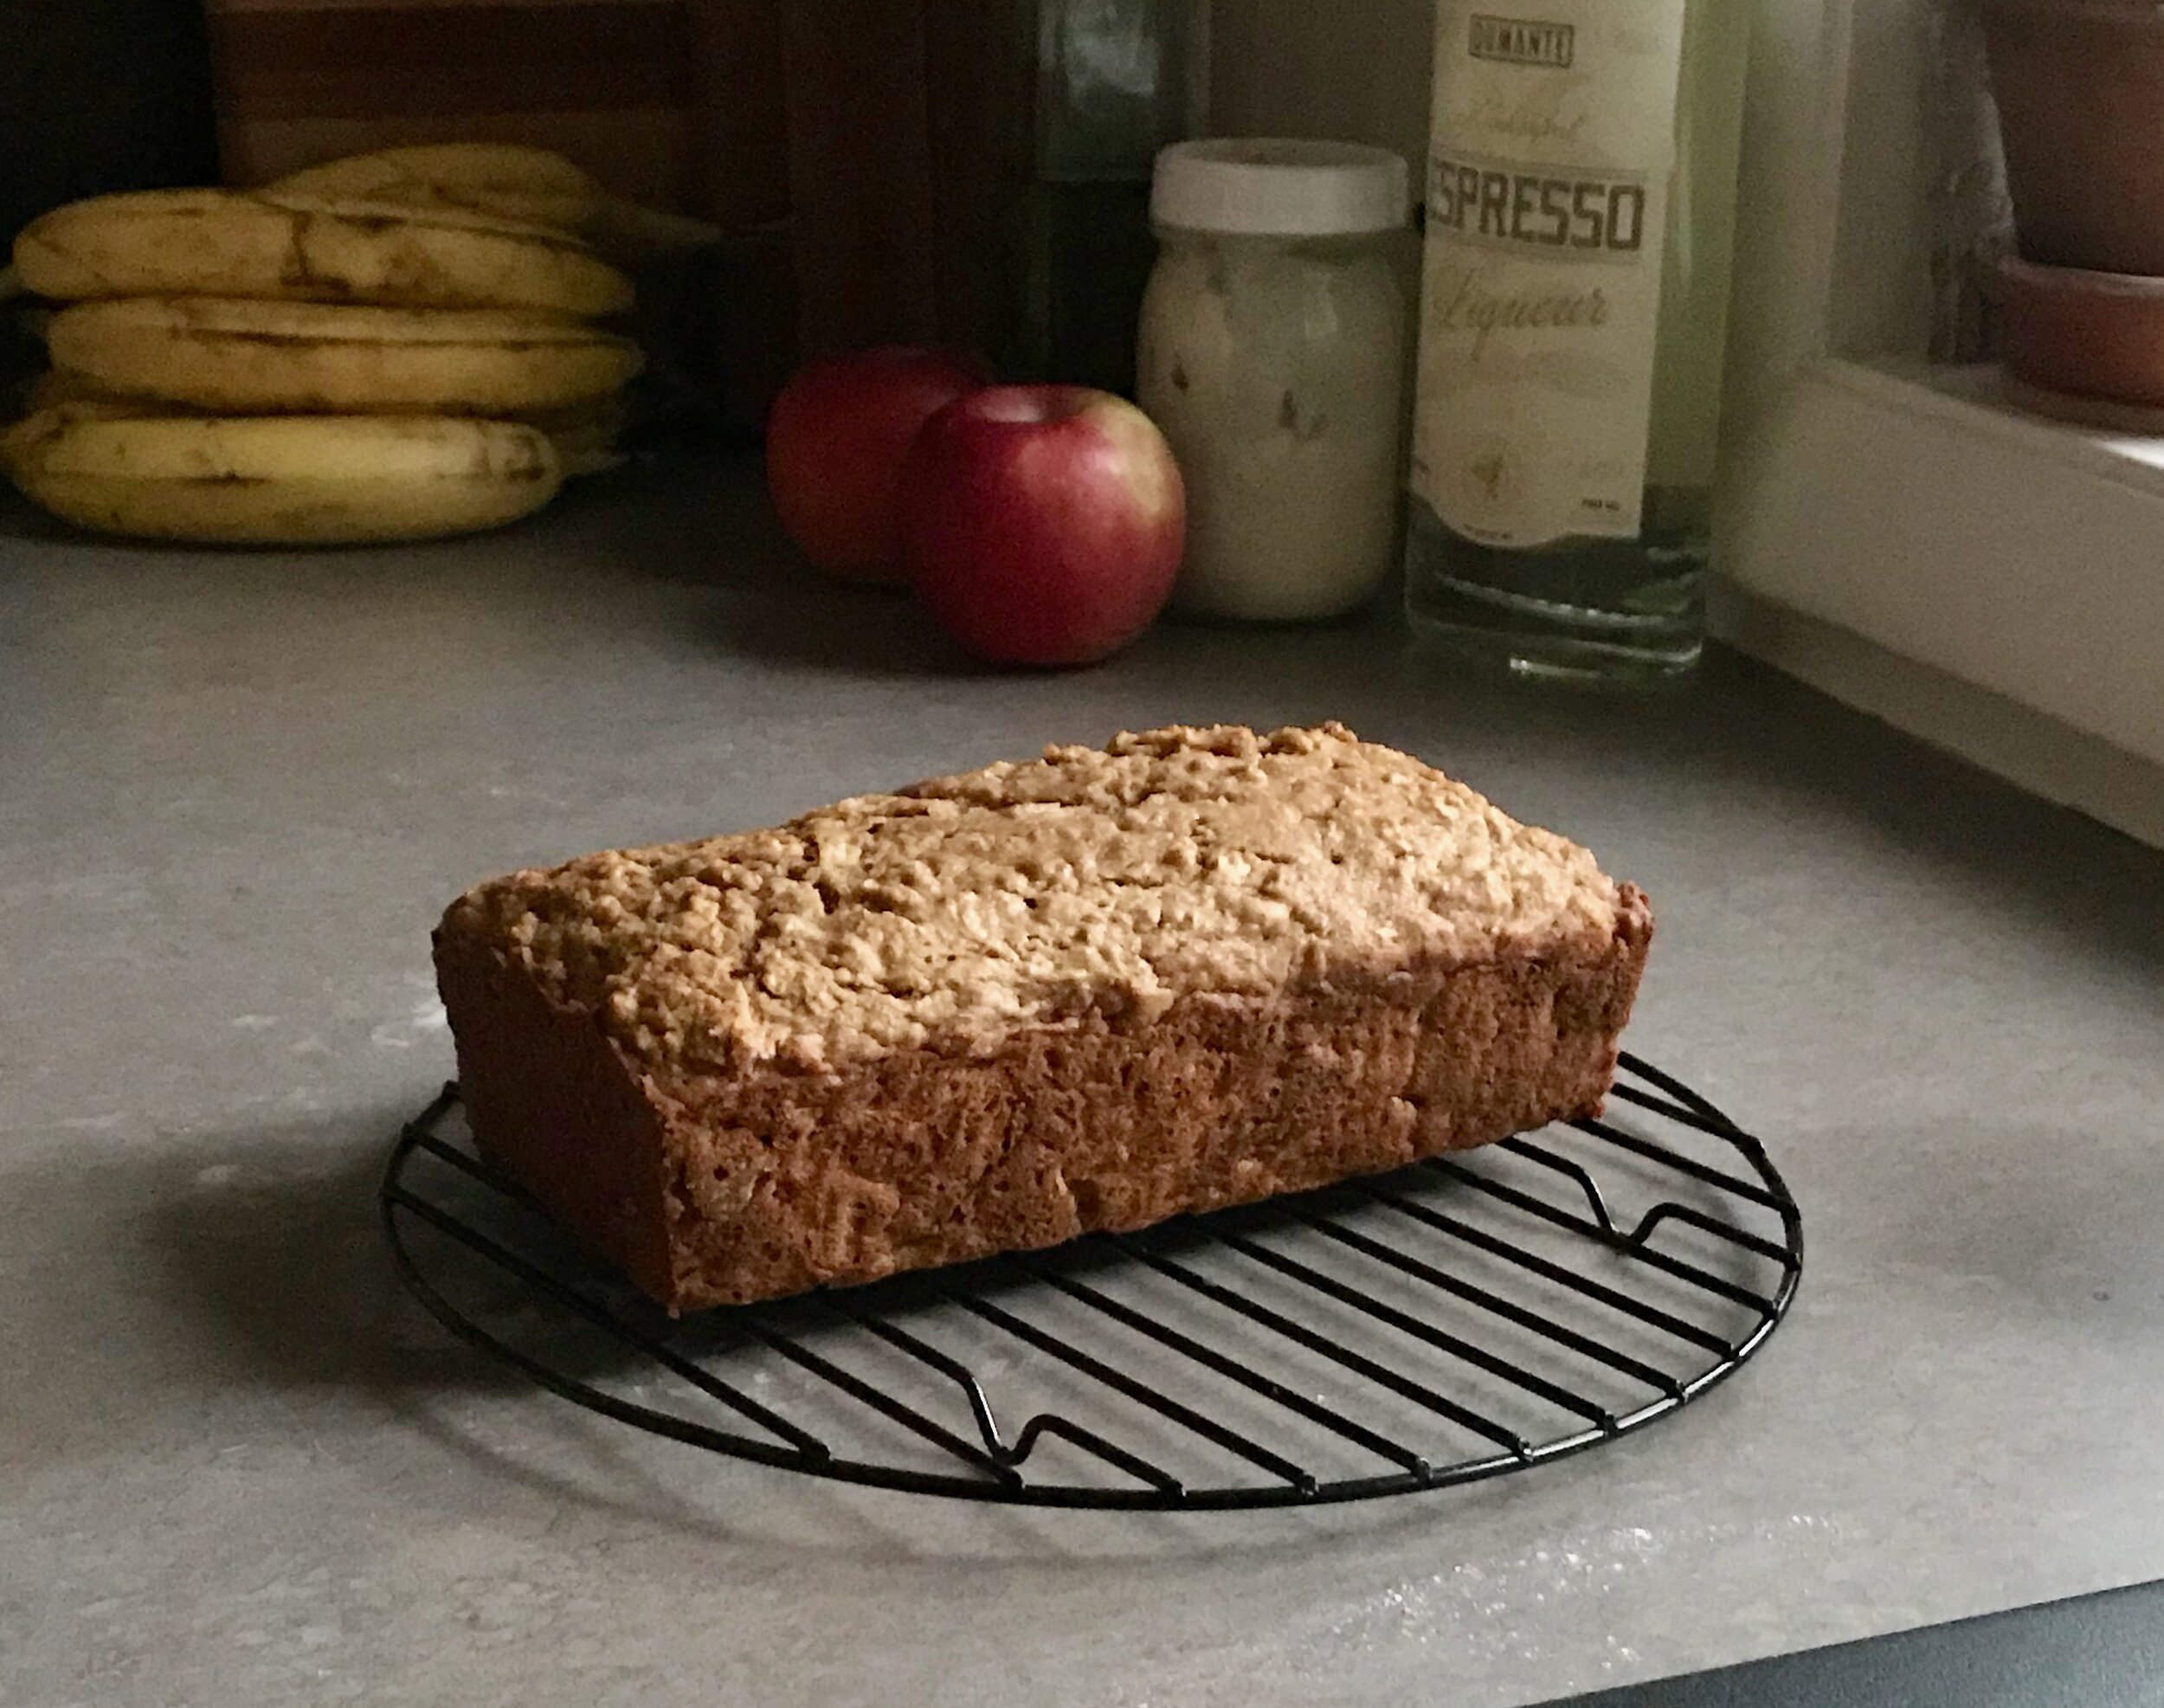
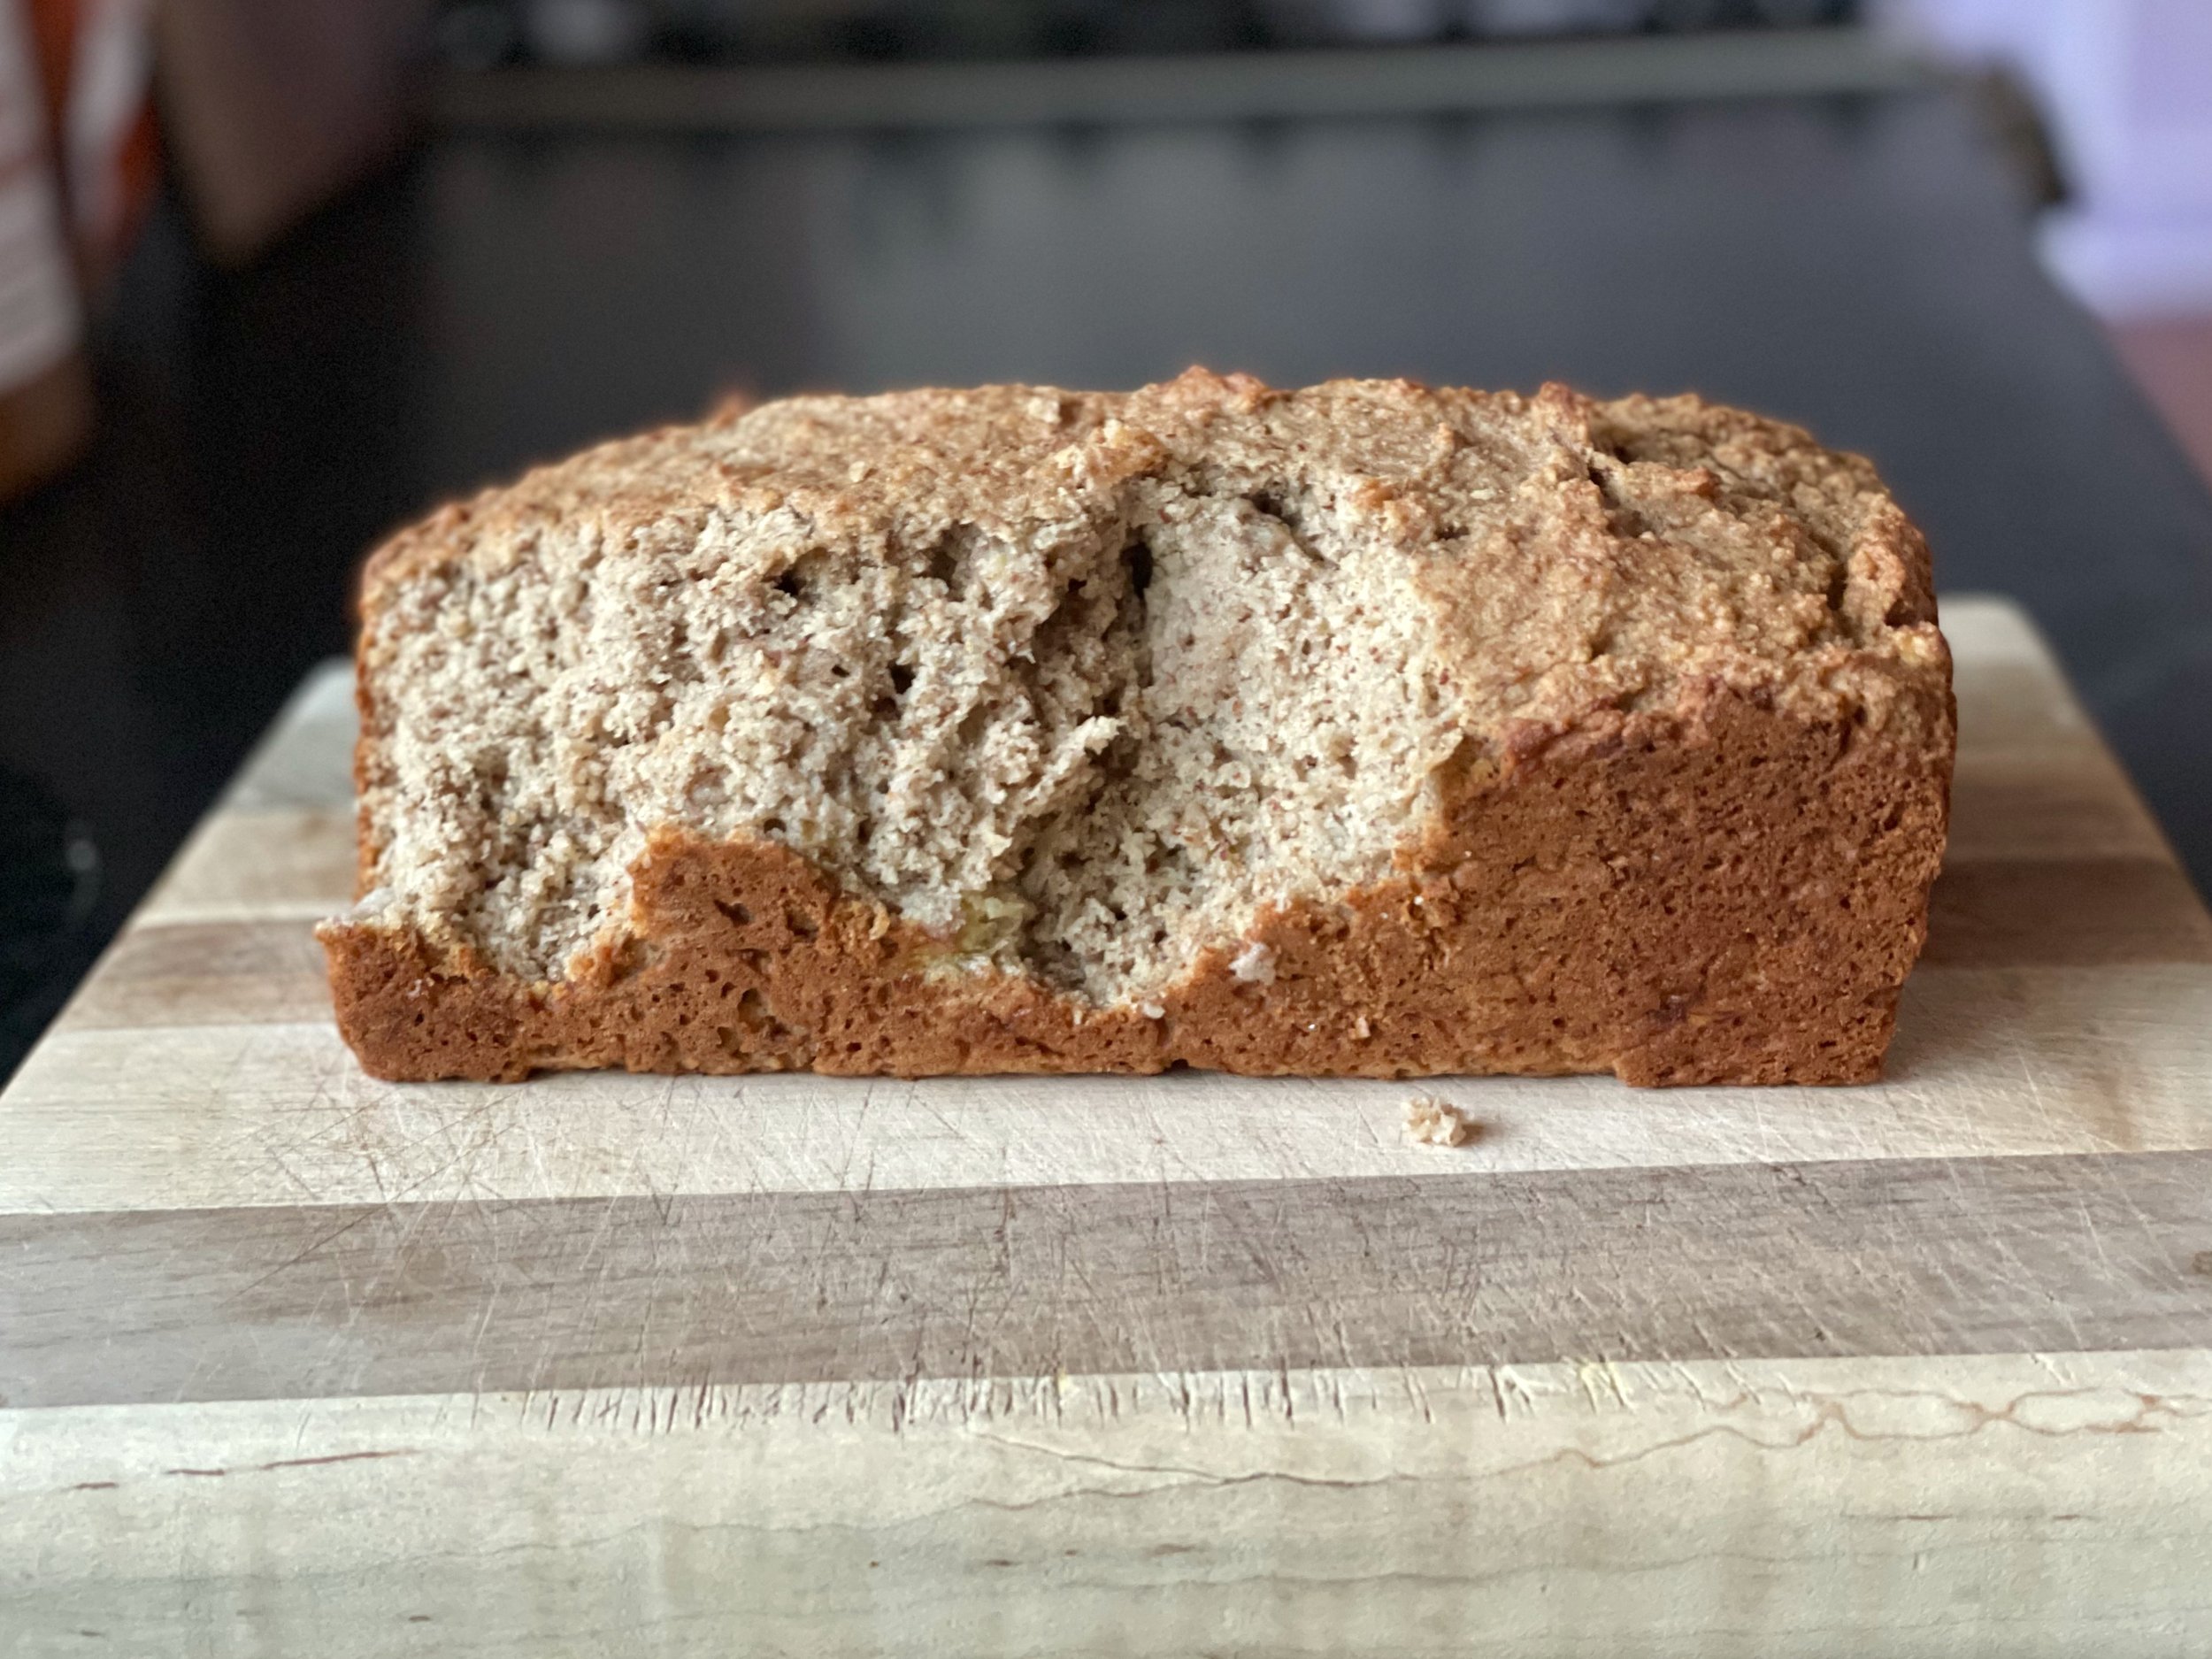
Nice texture, dense and mooshy in a good way! I like “mooshy”!! If you are one of the million people that has texture issues you probably don’t want to talk to me, I love interesting textures! This bread isn’t weird, don’t worry, but it’s a little more moist and dense than some. Doesn’t feel or taste gluten free to me!


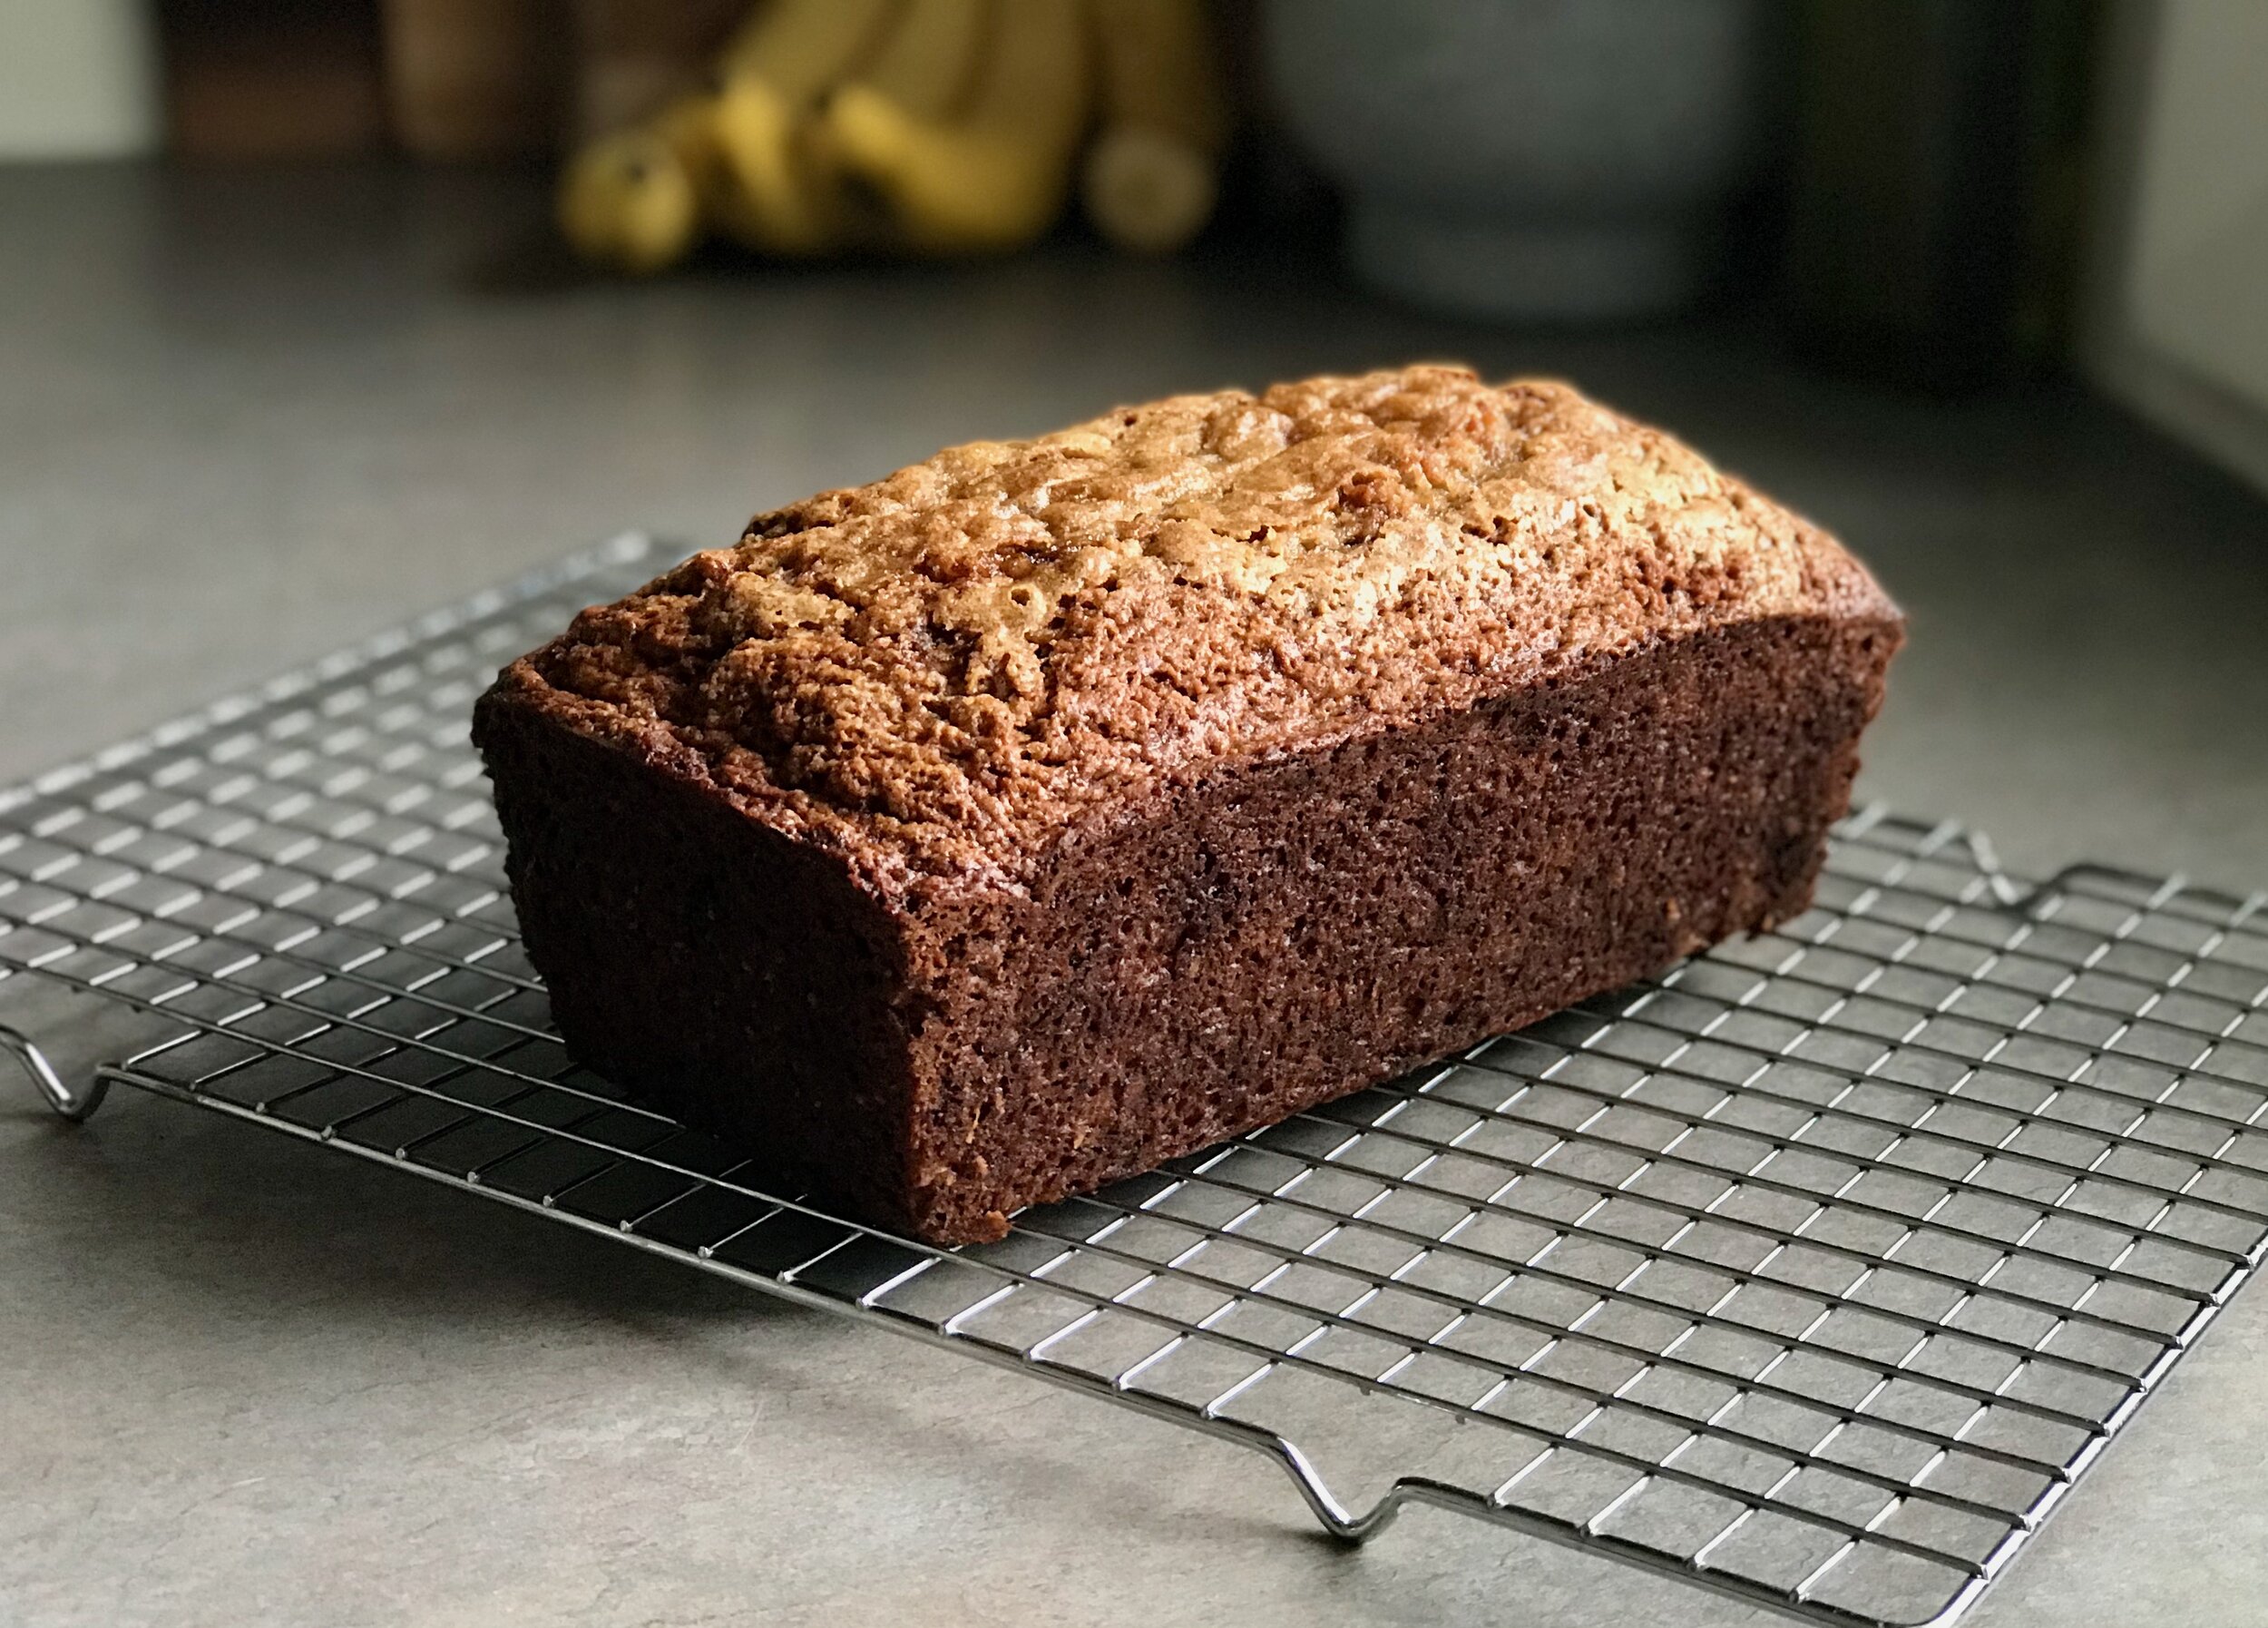
Photos can be deceiving. Before I was able to take a photo of the finished loaf, my puppy Jojo got ahold of it… Thankfully she didn’t eat it all but I was rather irritated with her. I still managed to cut some nice slices, and am just didn’t think about where her mouth may have been earlier…

Gluten Free Banana Bread
Adapted from Early Brawd
Ingredients

  • 3 medium very ripe bananas (mine were around 400 grams, but may have been closer to a “large” banana)

  • 1/2 cup milk (I used whole milk, but can sub your favorite non-dairy milk if desired/needed)

  • 1 tbsp apple cider vinegar

  • 3 tbsp (45 grams) melted coconut oil

  • 2 tbsp (40 grams) maple syrup

  • 2 tbsp (30 grams) almond butter

  • 1 tsp vanilla extract

  • 1 cup (90 grams) of oat flour

  • 1 cup (160 grams) brown rice flour

  • 3/4 cup (78 grams) almond meal

  • 2 tablespoon (25 grams) brown sugar

  • 2 tsp baking powder

  • 1 tsp cinnamon

  • A pinch of salt

Directions
Preheat your oven to 350F and grease and line a 9×5 loaf pan. In a large mixing bowl, combine the almond milk and apple cider vinegar. Stir and set aside.

Peel and mash the very ripe bananas using a fork until puree. No need to over mash it, it’s okay if the texture is not perfectly homogeneous and small bites remain. Add the coconut oil, maple syrup, almond butter and vanilla extract to the mashed bananas and stir to combine. Then the milk and whisk until well combined.

In a separate bowl, mix all the dry ingredients together. Add the dry mixture to the wet ingredients and mix using a wooden spatula until just combined. Don’t over-mix the batter, it’s okay if it’s not totally homogeneous. Transfer the batter into your prepared loaf pan and smooth the surface using a spatula.

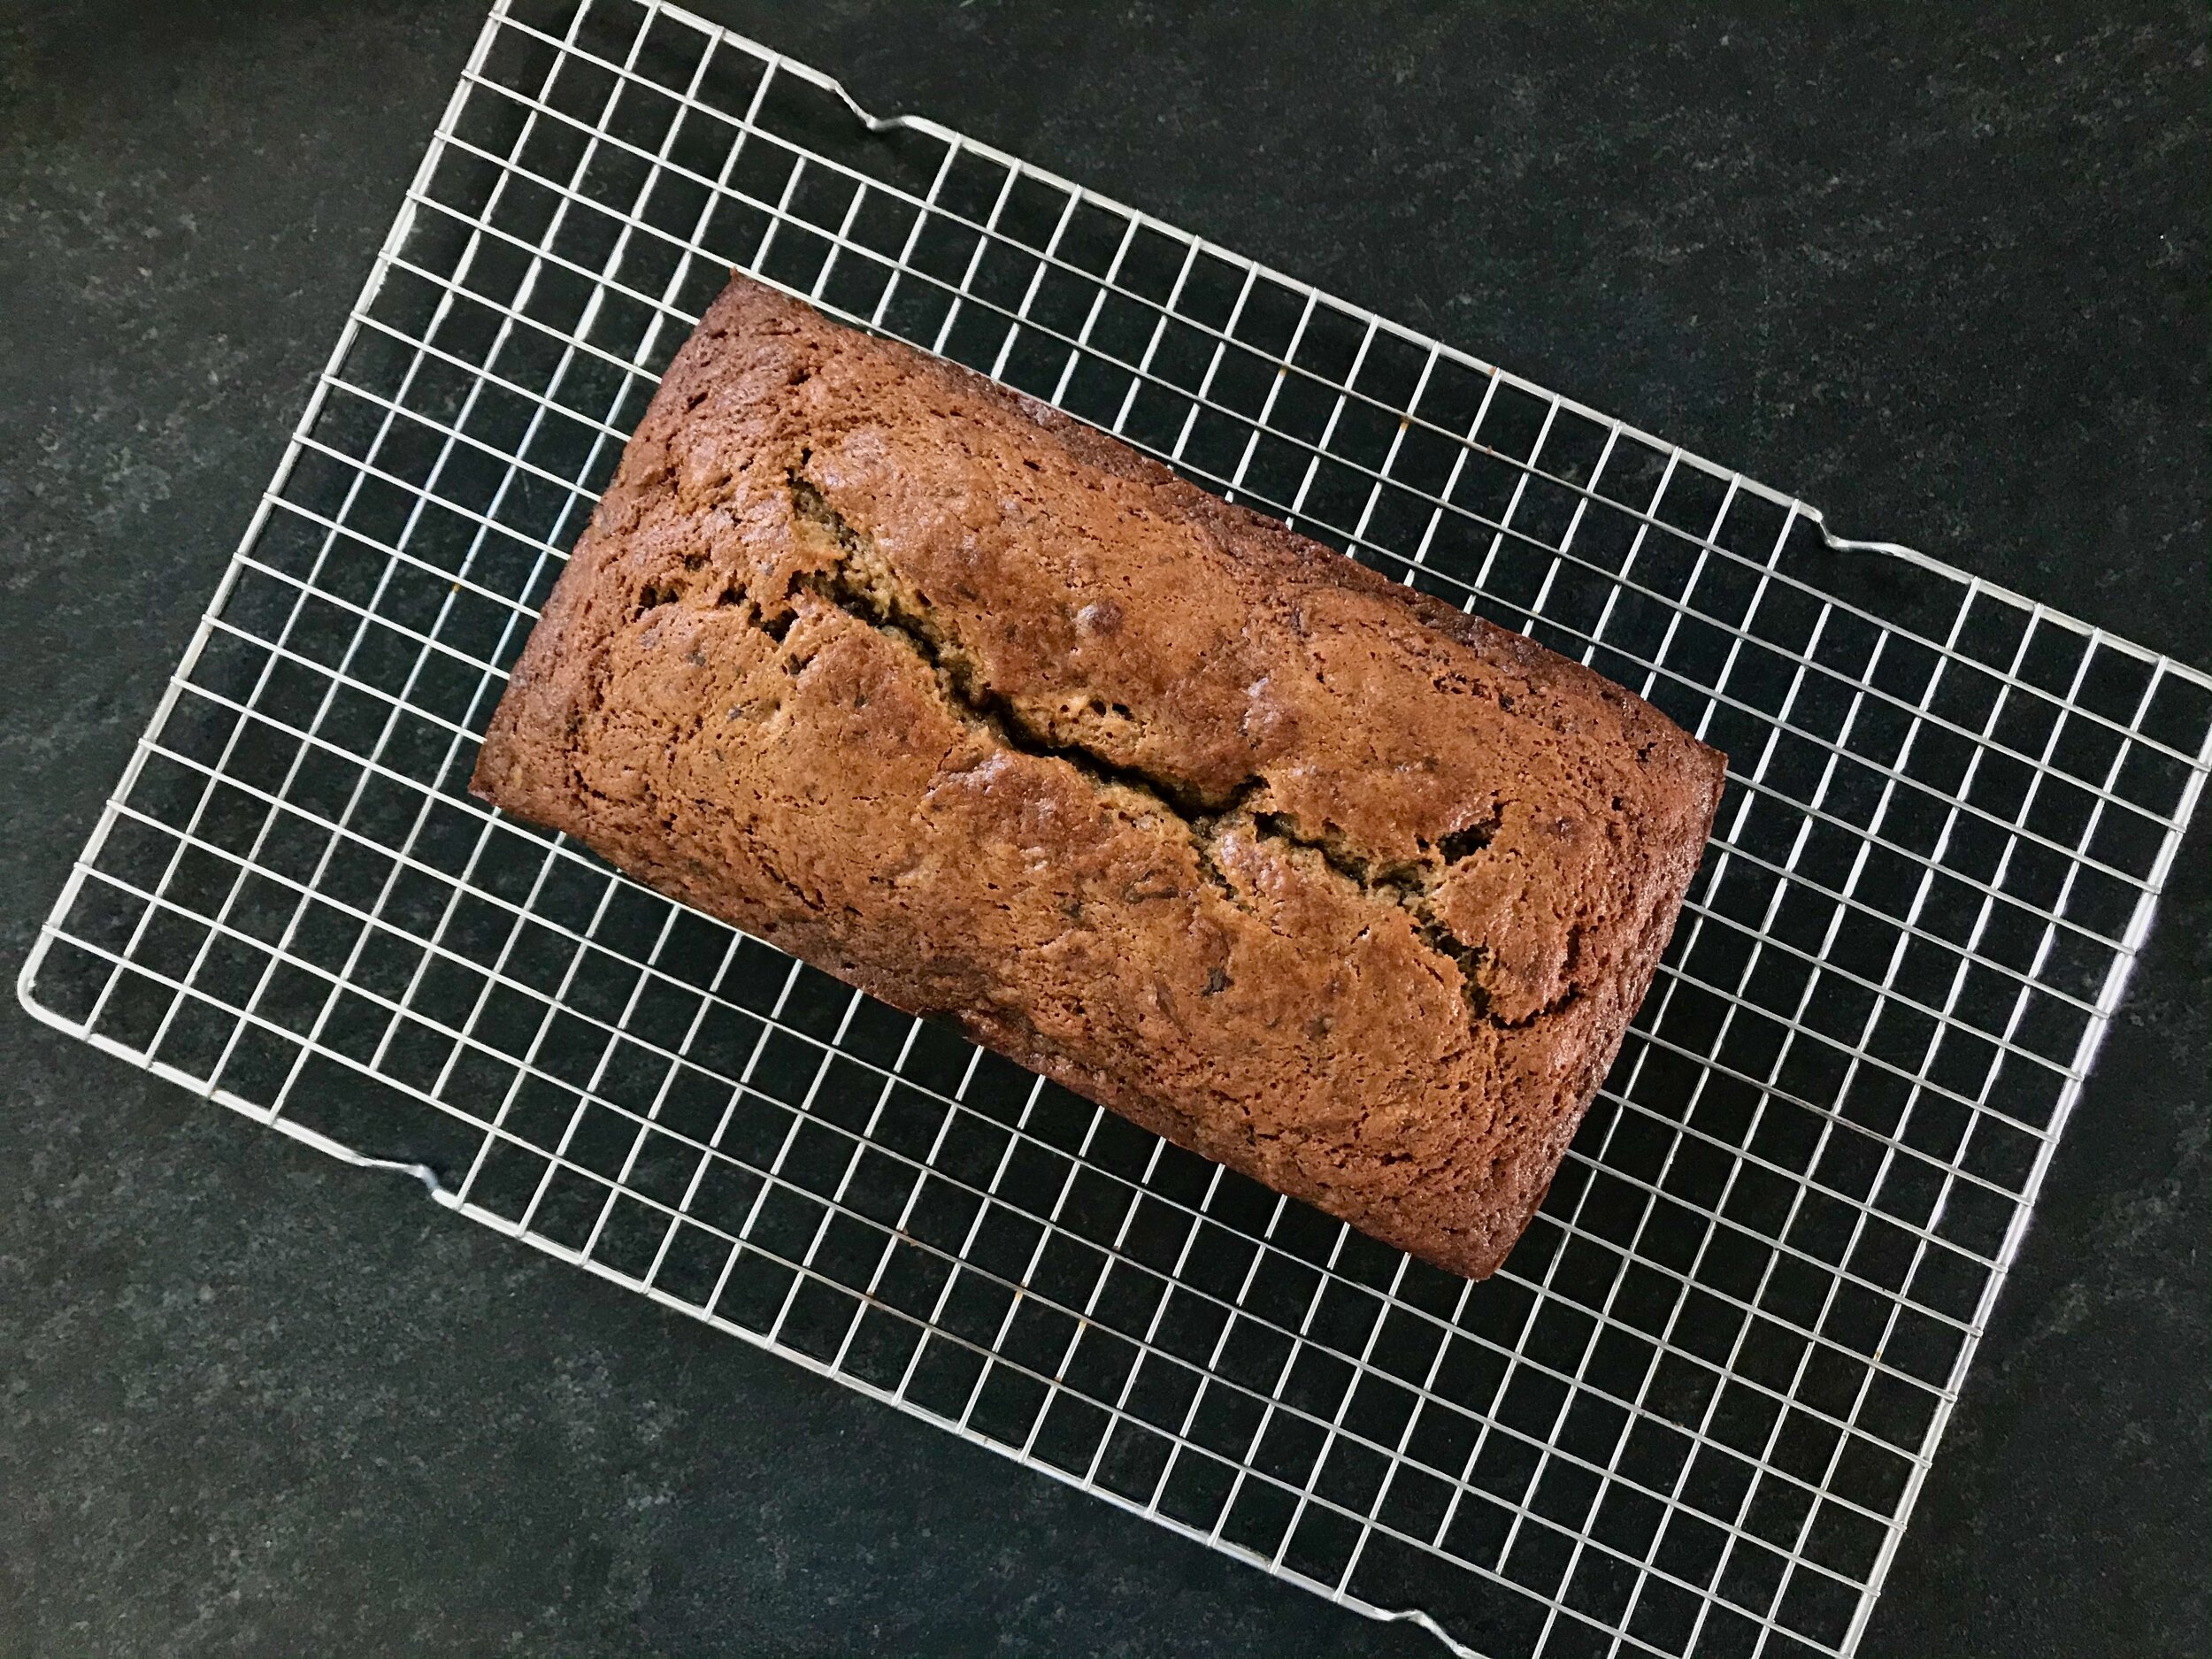
Bake for 50-60 minutes (I went closer to 50, may have been slightly undercooked but I like it that way and prefer to err on the side of under-baking vs over-baking) or until a toothpick comes out clean. Allow to cool down for 20 minutes, then remove the banana bread from the mold and allow to completely cool down, for at least 1 hour.

Chocolate Zucchini Bread

IMG_5384.jpeg

I eat a lot of zucchini in the later summer and early fall. I always am telling myself that I should bake zucchini bread with some of it, but I always end up just eating it. It’s a cold and rainy early fall day in Michigan however, and I wanted to bake something. I had 1 1/2 large-ish zucchini in the fridge so decided to finally bake with some of it! I found the following recipe on Food52, it’s from the author of my current favorite baking cookbook so I figured I’d give it a try.

IMG_5390.jpeg

I made a few small adjustments. Well, the first was kind of a big change, but I didn’t feel like getting out walnuts or chocolate, plus I was looking for a more simple bread, so I omitted all of the add-ins (yes I know this changes a TON about the final product) and “replaced” them with a few spices. I added in just a hint of clove, along with some cinnamon. I really do enjoy the cinnamon/chocolate combo.

The final bread was so nice! It is super tender and soft. You definitely taste the whole wheat flour coming through along with a nice lightly spiced chocolate flavor. I really liked the spices I added. I would most definitely make this again. I may even try bumping up the amount of ingredients to get me a slightly larger/taller loaf but otherwise wouldn’t change a thing!

Chocolate Zucchini Bread
From Food52
Ingredients

  • 2 1/2 cups (~280 grams) grated zucchini

  • 3/4 cup (90 grams) all-purpose flour

  • 3/4 cup (90 grams) whole wheat flour

  • 1/4 cup (20 grams) Dutch process cocoa powder

  • 3/4 teaspoon baking soda

  • 1/2 teaspoon baking powder

  • 1 teaspoon sea salt

  • [I added in 1/8 tsp ground cloves and 1/2 tsp ground cinnamon to the dry ingredients]

  • 1/4 cup (2 ounces) unsalted butter, melted

  • 1/2 cup buttermilk [I did 60 grams sour cream + 60 grams milk]

  • 1 large egg

  • 3/4 cup (150 grams) light brown sugar

  • 1 teaspoon vanilla extract

  • 1/2 cup walnuts, chopped and toasted

  • 1 1/4 cups bittersweet dark chocolate (at least 70%), chopped

Directions
Preheat an oven to 350° F. Grease and line a 8 1/2 x 4 1/2-inch loaf pan with parchment paper, set it aside.

Place the grated zucchini on a baking tray lined with a lint-free kitchen towel, then place another kitchen towel on top, patting it down gently to absorb any additional moisture. Set aside.

In a large bowl, use a fork to whisk together the flours, cocoa powder, baking soda, baking powder and sea salt. Stir in the chopped walnuts and 1 cup of the dark chocolate.

In a separate large bowl, whisk together the butter and buttermilk. Add in the egg, light brown sugar, and vanilla, then whisk the liquid ingredients until smooth and uniform. Gently fold in the zucchini.

Pour the liquid ingredients into the dry ingredients and stir until just combined. [It was easier for me to whisk the dry ingredients in a small bowl and add the dry to the wet]

Pour the batter into the prepared loaf pan, then sprinkle the top of the batter with the remaining 1/4 cup of chopped dark chocolate.

Bake, rotating at least once half way through baking, until a skewer inserted into the bread comes out clean, 50 to 60 minutes. [I baked mine for 50 minutes exactly and it was perfectly cooked!. I checked it at 45 and 48 minutes and it didn’t seem done yet. The final loaf was completely cooked through but without any dryness/overcooking at all]

Let cool in the loaf pan for 15 to 20 minutes before inverting out onto a cooling rack to finish cooling completely.

Sour Cream Banana Walnut Bread

IMG_2176.jpeg

I’m loving baking in the new kitchen! Have I said that before? Probably! And I’ll be saying it again, I’m in love! So here’s another banana bread recipe. I just made a fantastic tahini banana bread which was so so good, but I saw this recipe not long after and really wanted to try it too! The tahini banana bread was oil based, and this one is butter based. I like having options so gave this one a try too. I’m so glad I did. I loved this banana bread. I can’t say whether I liked this one or the tahini one better (I didn’t have any slices left of the tahini version to compare) but there were both fantastic so you can’t go wrong either way.

As I said, this recipe uses 1 stick butter, and also has 1/2 cup of sour cream, so plenty of fat. The butter adds yummy flavor and the sour cream keeps it moist and tender. I added in walnuts and chocolate because that’s my favorite in banana bread. I’d probably add a bit more from the add-in standpoint next time, but it was still very acceptable! Add as much or as little as you like. Just make it!


IMG_2172.jpeg

Sour Cream Banana Walnut Bread
From The Vanilla Bean Blog
Ingredients

  • 1 1/2 cups (213 grams) all-purpose flour

  • 1 teaspoon baking soda

  • 1 teaspoon salt

  • 1/2 cup pecan halves, toasted and chopped (57 grams) [I used a mix of raw walnuts, 30 grams, and chocolate shavings, 25 grams]

  • 1 cup (300 grams) very ripe bananas (about 3 bananas)

  • 1 tablespoon pure vanilla extract

  • 1/2 cup (120 grams) sour cream

  • 8 tablespoons unsalted butter (1 stick, 113 grams) room temperature

  • 1/2 cup granulated sugar (100 grams)

  • 1/2 cup packed brown sugar (100 grams)

  • 2 large eggs

Directions
Adjust an oven rack to the lower middle position. Preheat the oven to 350F. Grease an 8x4 inch loaf pan and line with a parchment sling.

In a small bowl, whisk the flour, baking soda, salt and pecans together. In a separate bowl, mash the bananas. Add vanilla and sour cream and mix until combined.

In the bowl of a stand mixer fitted with a paddle, cream the butter and sugar together until fluffy, 2-3 minutes. Add the eggs and mix on medium until combined. Add the flour mixture and mix on low until almost incorporated. Add the banana mixture and mix on low until completely combined. Scrape down the sides of the bowl and finish mixing with a spatula until the batter is completely combined

Pour the batter into the prepared pan and bake 45 to 55 minutes, until the top is dark brown and a wooden skewer or toothpick inserted into the center comes out clean. [I baked mine for 53 minutes and it was cooked well, for banana bread at least. I can’t think of a time when a banana bread I’ve made has baked all the way through in the center without being dry on the edges. My loaf had a small gooey center, but the edges were all cooked well, and even the end piece wasn’t dry. I wouldn’t want to bake it any longer. I like the gooey center the best!]

Transfer the pan to a wire rack and let cool for 20 minutes. Using the parchment sling, lift the loaves out of the pan, peel off the paper, and let the bread finish cooling on the wire rack.

Dark Chocolate and Walnut Tahini Banana Bread

It’s quite fitting that one of the first things I made in my functioning kitchen was a loaf of banana bread, since it was the last thing I made in the old kitchen! The photos I saw of this recipe looked so yummy - a little gooey with big chunks of dark chocolate! I love baking with butter, but a good-old oil based banana bread is classic, and good to have a go-to version which I did not. This may be it! It uses vegetable oil, but also adds a little tahini for more fat which I love. The flavor of the tahini is super strong. The recipe did call for adding 1/2 teaspoon of sesame oil as well which would be lovely and I’m sure would bring out the tahini/sesame flavor. I did’t have any though so I just skipped it. Next time!

IMG_1935.jpeg

Brown sugar, buttermilk, a couple of eggs, round out the main ingredients. She calls for dark chocolate as the mix in. I used a combo of dark chocolate and walnuts which I think was great, but I would probably add a bit more chocolate next time. I used about 1/2 of the amount called for, and substituted the other 1/2 with the walnuts. I think next time I will leave the amount of walnuts the same, but amp up the chocolate.

IMG_1932 2.jpeg

Mine baked a little longer (I think!) than the recipe said, and it was fairly well cooked other than the very center of the top which was still a bit gooey. I like that part the best so I’m always okay with that in banana bread! The rest was well cooked but not dry which is nice. I think my pan was a bit smaller than what the original recipe calls for so that may be why.

Final verdict: Recommended!


Dark Chocolate and Walnut Tahini Banana Bread
From Butter and Brioche
Ingredients

  • 2 cups (240 grams) all-purpose flour

  • 1 ¼ teaspoons baking powder

  • ¾ teaspoon baking soda

  • ½ teaspoon salt

  • 350 grams ripe bananas

  • 1 cup (200 grams) brown sugar - I used 150 grams, 3/4 cup

  • 100 ml neutral vegetable oil

  • 70 g tahini

  • 1 teaspoon vanilla bean extract

  • ½ teaspoon sesame oil - I didn’t have any so I just skipped it

  • 2 large eggs, at room temperature

  • 190 ml buttermilk, at room temperature

  • 125 g dark chocolate, roughly chopped - I used about 65 grams dark chocolate and 65 grams chopped walnuts

  • 2 tablespoons granulated sugar, for sprinkling on top

Directions
Pre-heat the oven to 350 degrees Fahrenheit. Grease and line a 9 x 5 1/2 inch loaf tin with non-stick spray and line with parchment paper. Let the paper slightly over-hang the sides.

In a medium-size mixing bowl, sift together the flour, powder, soda, and salt. Set aside until needed.

Add the bananas into the bowl of a stand mixer fitted with the beater attachment. Beat until roughly mashed, about 30 seconds. Pause mixing and add in the light brown sugar and vegetable oil. Beat, on medium speed, until light in color and well combined, 3 more minutes. Add in the tahini, vanilla bean extract and sesame oil until incorporated. Add in the eggs, one at a time, beating well after each addition. Set the mixer speed to low and slowly stream in the buttermilk. Add in the dry ingredients and mix until just incorporated, no more than 15 seconds. Some dry flour pockets should remain throughout the batter. Add in the dark chocolate chunks (and walnuts if using), then, using a large wooden spoon, gently fold them throughout the batter until evenly incorporated.

Pour the batter into the prepared loaf pan. Scatter the granulated sugar on top.

Bake for 50 minutes, or until risen, golden brown, and fragrant (I believe mine took a little long, 55-60 minutes or so, although I can’t remember for sure!). A skewer inserted into the middle should come out with a few moist crumbs attached. Remove from the oven and leave the bread to cool in its pan for 15 minutes before transferring it out and onto a wire rack to cool further before slicing and serving.

Sourdough Banana Bread

IMG_1126.jpeg
IMG_1125.jpeg

Last week I made my last baked good in my old kitchen. The day I was baking it was the first day of demo for my kitchen reno! That’s right, Lara and I are renovating our kitchen/dining room! We started thinking about this in June of last year. It was something we thought about doing “someday”, but then in June we decided to just go for it. Not sure exactly why the light switch flipped, but definitely think COVID had a lot to do with it, being stuck at home all the time. It also helped so much that the federal government changed the interest rate on all federal student loans to 0%. Yes, 0%. No interest has been collecting on my loans for months and months now. That has been so nice to see.

Anyway, I knew I had only a few days left in my kitchen so I did some baking and cooking. I had quite a bit of leftover sourdough starter in the fridge that I wanted to use up. I wanted a recipe that used a lot of it, but wasn’t difficult or didn’t take too long.

I wasn’t really even searching for a recipe that morning, but this sourdough banana bread recipe just popped up on my Instagram feed. I knew it was meant to be. I was able to get it whipped together and baked before the demolition crew showed up. Used up almost all of my leftover starter which was great.

It smelled amazing, as banana bread does, while baking. I heard the demo crew immediately comment that it smelled really good! Later in the day as they were heading out, the final loaf was still sitting on the counter and they commented again, “it’s the banana bread!”. :) When I cut it later that night I just had to set aside a few pieces for the guys the next day. I heard later that they really appreciated it!

Other than having the sourdough starter, this was a pretty basic banana bread. It was quick and easy to put together and it baked up beautifully. The baking time was actually pretty accurate, it rose well, and developed a lovely rounded and crackly crust. I am a big fan. It also taste delicious. I would probably up the cinnamon and other spices next time just because I like more of them in my banana bread, as written the spices are quite subtle.

A few specifics on what I did; I used 1/2 cup (100 grams) brown sugar instead of 2/3 cup as stated in the recipe. Since there is also 1/4 cup honey I thought this would be fine, and it was. I didn’t notice any missing sugar/sweetness. I also added a few additional spices, just a pinch of allspice and cloves. But as stated above I would probably add more spices next time, if nothing else I would increase the cinnamon. I used about 3 + 1/3 medium/average sized bananas to get to 397 grams required in the recipe. I also added a little whole wheat flour, using a little under a cup of home ground white winter wheat that I ground before the kitchen was gone and am storing in the freezer. I also added in walnuts, about half of what the recipe recommends, I threw in about 45-50 grams. It was a nice addition. I could definitely add more next time.

All in all this one is a keeper. I will be using this to use up sourdough starter in the future I have no doubt!


Sourdough Banana Bread
From King Arthur Baking Company
Ingredients

  • 8 tablespoons (113g) unsalted butter, at cool room temperature

  • 2/3 cup (142g) brown sugar, packed

  • 1 teaspoon vanilla extract

  • 1 teaspoon cinnamon

  • 1/4 teaspoon nutmeg

  • 1 teaspoon baking soda

  • 1 teaspoon baking powder

  • 1 teaspoon salt

  • 1 3/4 cups (397g) mashed ripe banana (from about 1 3/4 pounds unpeeled bananas) - I was too lazy to actually mash up the bananas, so I just chopped them up and through them in in chunks. They never really smoothed out in the batter, they stayed chunky, but once it was baked up it didn’t seem to matter. No chunks or weird spots in the final bread - Yay for lazy success!

  • 1/4 cup (85g) honey

  • 2 large eggs

  • 1/2 cup (113g) sourdough starter, unfed/discard

  • 2 cups (240g) Unbleached All-Purpose Flour - I used some whole wheat, a little under a cup

  • 3/4 cup (85g) chopped nuts, optional

Directions
Preheat the oven to 325°F. Lightly grease a 9" x 5" loaf pan, set aside.

In a large bowl, combine the butter, sugar, vanilla, cinnamon, nutmeg, baking soda, baking powder, and salt, beating until smooth. Add the mashed bananas, honey, eggs, and sourdough starter, again beating until smooth. Add the flour then the nuts, stirring just until smooth.

Transfer the batter to the prepared loaf pan, smoothing the top. Let it rest at room temperature for 10 minutes.

Bake the bread for 45 minutes, then gently lay a piece of aluminum foil across the top to prevent over-browning.

Bake for an additional 20-25 minutes. Remove the bread from the oven; a long toothpick or thin paring knife inserted into the center should come out clean, with a few wet crumbs clinging to it.

Allow the bread to cool for 10 minutes in the pan. Remove it from the pan and cool completely on a rack.

Sesame-Walnut Manoushe with Zucchini And Yufka Flatbread

My friend Ilana recently let me borrow a cookbook of hers that she thought I would like. Soframiz by Ana Sortun and Maura Kilpatrick. They run a restaurant called Sofra Bakery and Cafe in Cambridge, Massachusetts which Ilana has been to and highly recommends.

The cookbook has a lot of good breakfast and lunch options, as well as a great dessert section. There is a whole section of sandwiches/flatbreads which is definitely what I am drawn too. Most of these are made on a homemade flatbread called Yufka which from what I can tell is very similar to a tortilla (and similar to other homemade tortillas I’ve made). It’s a simple dough of flour, salt, water and olive oil. You do have to let the dough sit for about 4 hours before rolling out but it’s so quick and easy to put together this isn’t a big deal. Mix it all up and let it sit!

IMG_3858.jpeg
IMG_0366.jpeg

Rolling out the dough: with all flatbreads the question is always, how well/easily will the dough roll out? This one wasn’t too bad. It’s 100% white flour which helps, and it’s enriched with olive oil which also helps. After it sat for about 4 hours it was fairly easy to roll out. I shaped the dough into 6 balls. I then went through and did an initial rolling out of the six pieces during which they didn’t roll out very thin, they definitely wanted to spring back as I went. However, I just went through all six pieces and gave them this initial roll, and then I went back around to roll them out again. After this initial roll and short rest they then rolled out very nicely without much problem at all. I cooked them up in a 12 inch cast iron skillet which worked great. I really like how this recipe calls for you to only cook one side of the flatbreads. I’ve never tried that before but I feel like it really helped keep them from drying out which sometimes happens with thin flatbreads. I’ll probably do this with other recipes in the future.

IMG_8222.jpeg

I did not follow the filing recipe exactly as it is written below from the cookbook, but I used it as a loose guide using what I had on hand, not measuring everything. I started with grating about 1/2 an onion and a fairly large zucchini which I squeezed to get rid of excess water before adding to the pan. Towards the end of cooking I added a minced clove of garlic, and two bunches of Tatsoi from my CSA that I needed to use followed by a couple tablespoons of ricotta once it was off the heat. I mixed this all together and then add nice chunks of deliciously creamy French feta and folded in gently to maintain the large pieces. I didn’t have any haloumi so I skipped this, and instead of pomegranate molasses I used balsamic vinegar. I didn’t have any Maras pepper or sesame seeds. As for herbs, I threw in what was on the counter; a little basil, mint and Italian parsley.

The filling turned out wonderfully! It was a fun mix of different things that I eat, but maybe wouldn’t typically put together this way! It was delicious and perfect to fill the flatbreads with. I put down a nice layer of my favorite red pepper sauce to start, and then topped with the filling. I finished with extra feta. Then fold in the dough on both sides and press to hold in place. I then grilled these up on the grill. This was a tiny bit tricky to make sure the filling didn’t all out when I flipped them over (I probably over filled them a bit too) but in the end I was very successful, just had to be careful. You could definitely just bake in the oven for a few minutes, or fry up in a pan as the recipe stated. Just get them heated up and warmed through.

I had the leftovers for lunch the next few days and it was delicious! Definitely not as crispy as day-of, but still wonderful, and easy for a nice lunch! If I was at home would have reheated in either a skillet or the oven and I imagine it would have been just as good as the day they were made!

Sesame-Walnut Manoushe with Zucchini
Ingredients

  • Yufka Dough (recipe below)

  • 2 cups grated zucchini or cousa squash

  • 1/2 teaspoon kosher salt

  • 1 Spanish onion

  • 2 tablespoons plus 2 teaspoons extra-virgin olive oil

  • 1/4 cup cup walnuts, lightly toasted and finely ground in a food processor

  • 1/2 cup grated haloumi cheese

  • 3 to 4 ounces crumbled feta, or 4 ounces buffalo milk mozzarella, broken up into small pices

  • 1 tablespoon pomegranate molasses

  • 3/4 teaspoon Maras pepper

  • 2 tablespoons toasted sesame seeds

  • 2 tablespoons chopped fresh flat-leaf parsley

  • 1/4 cup sliced fresh basil leaves

Directions
Follow the directions to make the yufka dough, transfer to a plastic bag and store at room temperatures. Sprinkle the zucchini with the salt and let stand in a colander or a bowl for 5 minutes to draw out water.

Using the large holes of a box grater, grate the onion over a plate with sides. Place in a strainer and rinse with cold water. Squeeze dry by placing it in the palm of your hand, making a ball and then flattening it as hard as you can to get the water out. Repeat the squeezing with the zucchini. Sweat the zucchini with 2 teaspoons olive oil in a spall saute pan over medium heat until it is barely tender, about 3 minutes.

In a large mixing bowl, combine the onion, zucchini, walnuts, haloumi, feta, pomegranate molasses, Maras pepper, sesame seeds, remaining 2 tablespoons olive oil, parsley and basil. Mix until the filling is spreadable.

When you are ready to assemble, put about 1/3 cup filling on each yufka and smooth it to the edges in a very thin layer. Fold the left side in towards the middles and then the right sides towards the middle, overlapping by about 1/2 inch, to form a rectangle shape with an open top and bottom.

When the manoushe are assembled, heat an 11-to-12 inch cast iron or nonstick pan over medium-low heat. Place two manoushe at a time, seam side down, in the pan. Cook until the filling is hot and the bread is lightly toasted on one side but still soft on the other, 3 to 4 minutes. Flip to the other side and cook 1 minute more to heat through. Place on a tray and cover with aluminum foil to keep warm while you cook the remaining four manoushe. Cut into halves or strips and serve immediately.


Yufka Dough
Ingredients

  • 1 2/3 cup (200 grams) all purpose flour

  • 1 teaspoon kosher salt

  • 2/3 cup (150 grams) warm water

  • 2 tablespoons extra virgin olive oil

Directions
In a medium bowl, whisk together the flour and salt. Make a well in the center and pour in the water and olive oil. Using your fingers, draw the flour in from all sides, working the mixture until it’s sticky and forms into a ball. Turn the dough onto a floured surface and knead until smooth and elastic, about 3 minutes. Transfer back to the bowl, drizzle with a little bit of oil and turn to coat. Cover with plastic wrap and let rest at room temperature for at least 4 hours, or up to overnight.

Divide the dough in half, then divide each half into three equal pieces; you should have six equal pieces, each weighting about 2 ounces of 60 grams.

Roll out each yufka ball into a very thin 8-to-9-inch round, using plenty of flour to keep the dough from sticking to the rolling pin.

Heat an 11-to-12 inch cast-iron or nonstick pan over medium heat and cook the yufka on one side until it starts to bubble up and lightly brown on the bottom, about 2 minutes. You only need to partially cook each flatbread at this stage; don’t get them too crispy or they will be dry and hard to work with. Stack them on top of each other as you cook each one so that they lightly steam and keep each other soft and pliable.

Transfer the warm yufka to a large zip-top plastic bag and store at room temperature up to overnight, or freeze for later use.

Cider Glazed Apple Cake

IMG_0802.jpg
IMG_4597.jpg

I saw this recipe pop up recently on my Instagram feed, perfect for the fall! The original was a beautiful bundt cake, but I generally don’t need an entire bundt cake at once, that’s a lot of cake! I searched the internet to find the recipe (it’s from America’s Test Kitchen and their recipes can be tough to find!) and thankfully I was able to find it without too much difficulty, and the recipe even stated that it could also be made into two loaves pans, perfect! Just cut in half and it’s a much more manageable size for me.

The only issue with halving the recipe was that the original called for 3 eggs, I ended up just using 1 egg to make things easier. I also cut back on the sugar when making it for myself which seemed to work out fine. With all the apples for added sweetness I found half a cup of sugar was plenty.

IMG_2453.jpg

I have now made this recipe twice, the first time I used apple cider as called for which really helped amped up the apple flavor, however, I usually don’t have apple cider in the house and if I want to make a quick and delicious apple bread I don’t always want to have to go out and buy it. I was thinking about making a quick simple syrup, but then I remembered that I had some fun liqueur in the basement that would probably work. I ended up using a sweetened espresso liqueur. I didn’t end up really tasting it in the finished product but it still worked out well and if I had a stronger flavored liqueur it might shine through.

——————————————————————————————

Cider Glazed Apple Cake
Original recipe from America’s Test Kitchen

The original recipe was double the recipe found below and called for a bundt pan, but could also be made into two 9x5 inch loaf pans. I halved the recipe and made one 8.5x4.5 loaf.

Ingredients

  • 2 cups apple cider (reduced to 1/2 cup) the second time I made this I didn’t have any cider so I used some coffee liqueur instead, straight up without reducing it any

  • 1 7/8 cups (9 3/8 ounces) all purpose flour

  • 3/4 teaspoon salt

  • 3/4 teaspoon baking powder

  • 1/4 teaspoon baking soda

  • 1/2 teaspoon cinnamon

  • 1/8 teaspoon all spice

  • 3/8 cup (1 1/2 ounces) powdered sugar

  • 1 stick butter

  • 3/4 cup (5 1/4 ounces) dark brown sugar I cut back on the sugar and only used 1/2 cup (3.5 oz)

  • 1 1/2 eggs - I used 1 egg to make things easier on myself

  • 1 teaspoon vanilla extract

  • 3/4 pound of Granny Smith or Honeycrisp apples, shredded - I shredded up two medium sized Fuji apples and it was almost exactly 12 ounces, shredded, and that worked great. I also did not peel my apples although the original recipe said to peel before grating.

Directions
Bring cider to boil in large skillet over high heat; cook until reduced to 1/2 cup, 20 to 25 minutes. If you accidentally over-reduce, just add a bit of water to make sure you have 1/2 cup of liquid in total.

While cider is reducing, adjust oven rack to middle position and heat oven to 350° F. Grease and flour your pan. Whisk flour, salt, baking powder, baking soda, cinnamon, and allspice in large bowl until combined.

Place powdered sugar in small bowl. Add 1 tablespoons cider reduction to powdered sugar and whisk to form smooth icing. Cover with plastic wrap and set aside.

Set aside 3 tablespoons of the remaining cider reduction. You will use this later to brush on the baked cake.

Pour remaining 1/4 cup cider reduction into large bowl; add melted butter, brown sugar, eggs, and vanilla and whisk until smooth. Pour cider mixture over flour mixture and stir with rubber spatula until almost fully combined (some streaks of flour will remain). Stir in apples and any accumulated juice until evenly distributed.

Transfer mixture to prepared pan(s) and smooth top. Bake until skewer inserted in center of cake comes out with just a few moist crumbs, 40-45 minutes. (mine took closer to 50 minutes)

Transfer pan to wire rack set in rimmed baking sheet. Brush exposed surface of cake lightly with 1 tablespoon reserved cider reduction. Let cake cool for 10 minutes. Invert cake onto wire rack and remove pan. Brush top and sides of cake with remaining 2 tablespoons reserved cider reduction. Let cake cool for 20 minutes. Stir icing to loosen, and then drizzle evenly over cake. Let cake cool completely, at least 2 hours, before serving.

Chocolate Hazelnut Zucchini Bread

I try to make at least one zucchini bread every zucchini season. What usually ends up happening is I buy what I think is a lot of zucchini expecting to use some of it for a zucchini bread, but then I get busy and by the end of the week I've eaten all the zucchini and have none left to bake with! This week I decided that it was time to ensure that I got to the zucchini for baking before it was all eaten up. I found a recipe for zucchini bread with walnut oil. I didn't have any walnut oil, but I did have some hazelnut oil leftover from a recipe that I need to use and so this was perfect choice. With some added chopped hazelnuts and dark chocolate chunks studding the batter, this was the a wonderful breakfast treat for the week, and something I would make over and over again. 

IMG_3072.jpg

The recipe is simple, and I made just a few changes to suit my needs. I cut the sugar in half because I prefer my morning treats be less sweet, and then I replaced half of the oil with yogurt to lighten it up, a bit but still maintain moisture and flavor. It baked up beautifully and full of flavor. The hazelnut oil scented the batter just enough, and the addition of chopped hazelnuts really helped this flavor shine. I ended up baking it for only about 40 minutes, as opposed to the 55 minutes originally called for, and was happy with that. Overall a perfect breakfast treat for zucchini season!

IMG_3053.jpg
IMG_3064.jpg
IMG_3071.jpg

Chocolate Hazelnut Zucchini Bread
Adapted from Dishing Up the Dirt
Ingredients

  • 1/4 cup (50 grams) hazelnut oil
  • 1/4 cup (60 grams) plain Greek yogurt
  • 1/4 cup (84 grams) honey
  • 2 eggs, lightly beaten
  • 1 teaspoon pure vanilla extract
  • 1 1/2 cups (160 grams) coarsely grated zucchini - about 1 medium-sized zucchini
  • 3/4 cup (90 grams) all purpose flour
  • 3/4 cup (90 grams) whole wheat flour
  • 1/2 teaspoon baking powder
  • 1/2 teaspoon baking soda
  • 1/2 teaspoon salt
  • 1/4 cup dark chocolate chips
  • 1/4 cup coarsly chopped ha
  • Turbinado sugar, for topping (optional)

Directions
Place an oven rack in the middle position of your oven and pre-heat the oven to 350F. In a large bowl, beat together the oil and honey. Stir in the eggs, vanilla and zucchini. Mix until well combined.

In a separate bowl, whisk together the flours, baking powder, baking soda, and salt. Stir the dry ingredients into the wet ingredients (being careful to not over-mix) and add the chocolate chips. and hazelnuts. 

Pour the batter into a lightly greased 8 1/2-by-4 1/2-inch loaf pan. Sprinkle the top of the loaf with the turbinado sugar. Bake until a toothpick inserted in the center of the bread comes out clean, 35-40 minutes. Cool the zucchini bread in the pan for about 15 minutes, then transfer it to a wire rack to cool completely.

Yield: 10 slices
Approximate Nutrition: 223 calories/slice