Christmas 2020

I know for a lot of people Christmas was different this year. Smaller gatherings, less travel, the inability to see everyone, etc. I am thankful that for me a whole lot didn’t change. I don’t have a huge family, and I have several family members that live out of state so every year Christmas is different. This year was just another variation. No extended family gathering.

 
FullSizeRender.jpeg
 
IMG_0885.jpeg

On Christmas Eve this year, my dad actually invited Lara and I over for a prime rib dinner that he ordered from one of his favorite restaurants (The Alpen Rose in Holland. Sadly, it is closing at the end of the year so this is the last time I will eat anything from there). He ordered a 7 lb rib roast, red skin potatoes, a seasonal salad, and a charcuterie platter. It was all so lovely! I rarlely eat prime rib, but it is so good! And they did a great job with this one, it was cooked perfectly!

IMG_0877.jpeg
IMG_0881.jpeg

The four of us then headed to church for an 11:00 candlelight service. I was afraid we weren’t going to have any in-person services for Christmas because our church has been watching the COVID case trends carefully to decide which Sundays in-person services are safe. The two Sundays before Christmas we did not have in-person church, but thankfully the infection rates were looking better so we were able to have a Christmas service! I have to be honest, staying up past midnight was rough for me :) I’ve typically been in bed for hours at that point! But it was totally worth it. Beautiful music, candlelight, meditations, and being able to do this all in person - what an extra special blessing for Christmas this year.

IMG_9922.jpeg

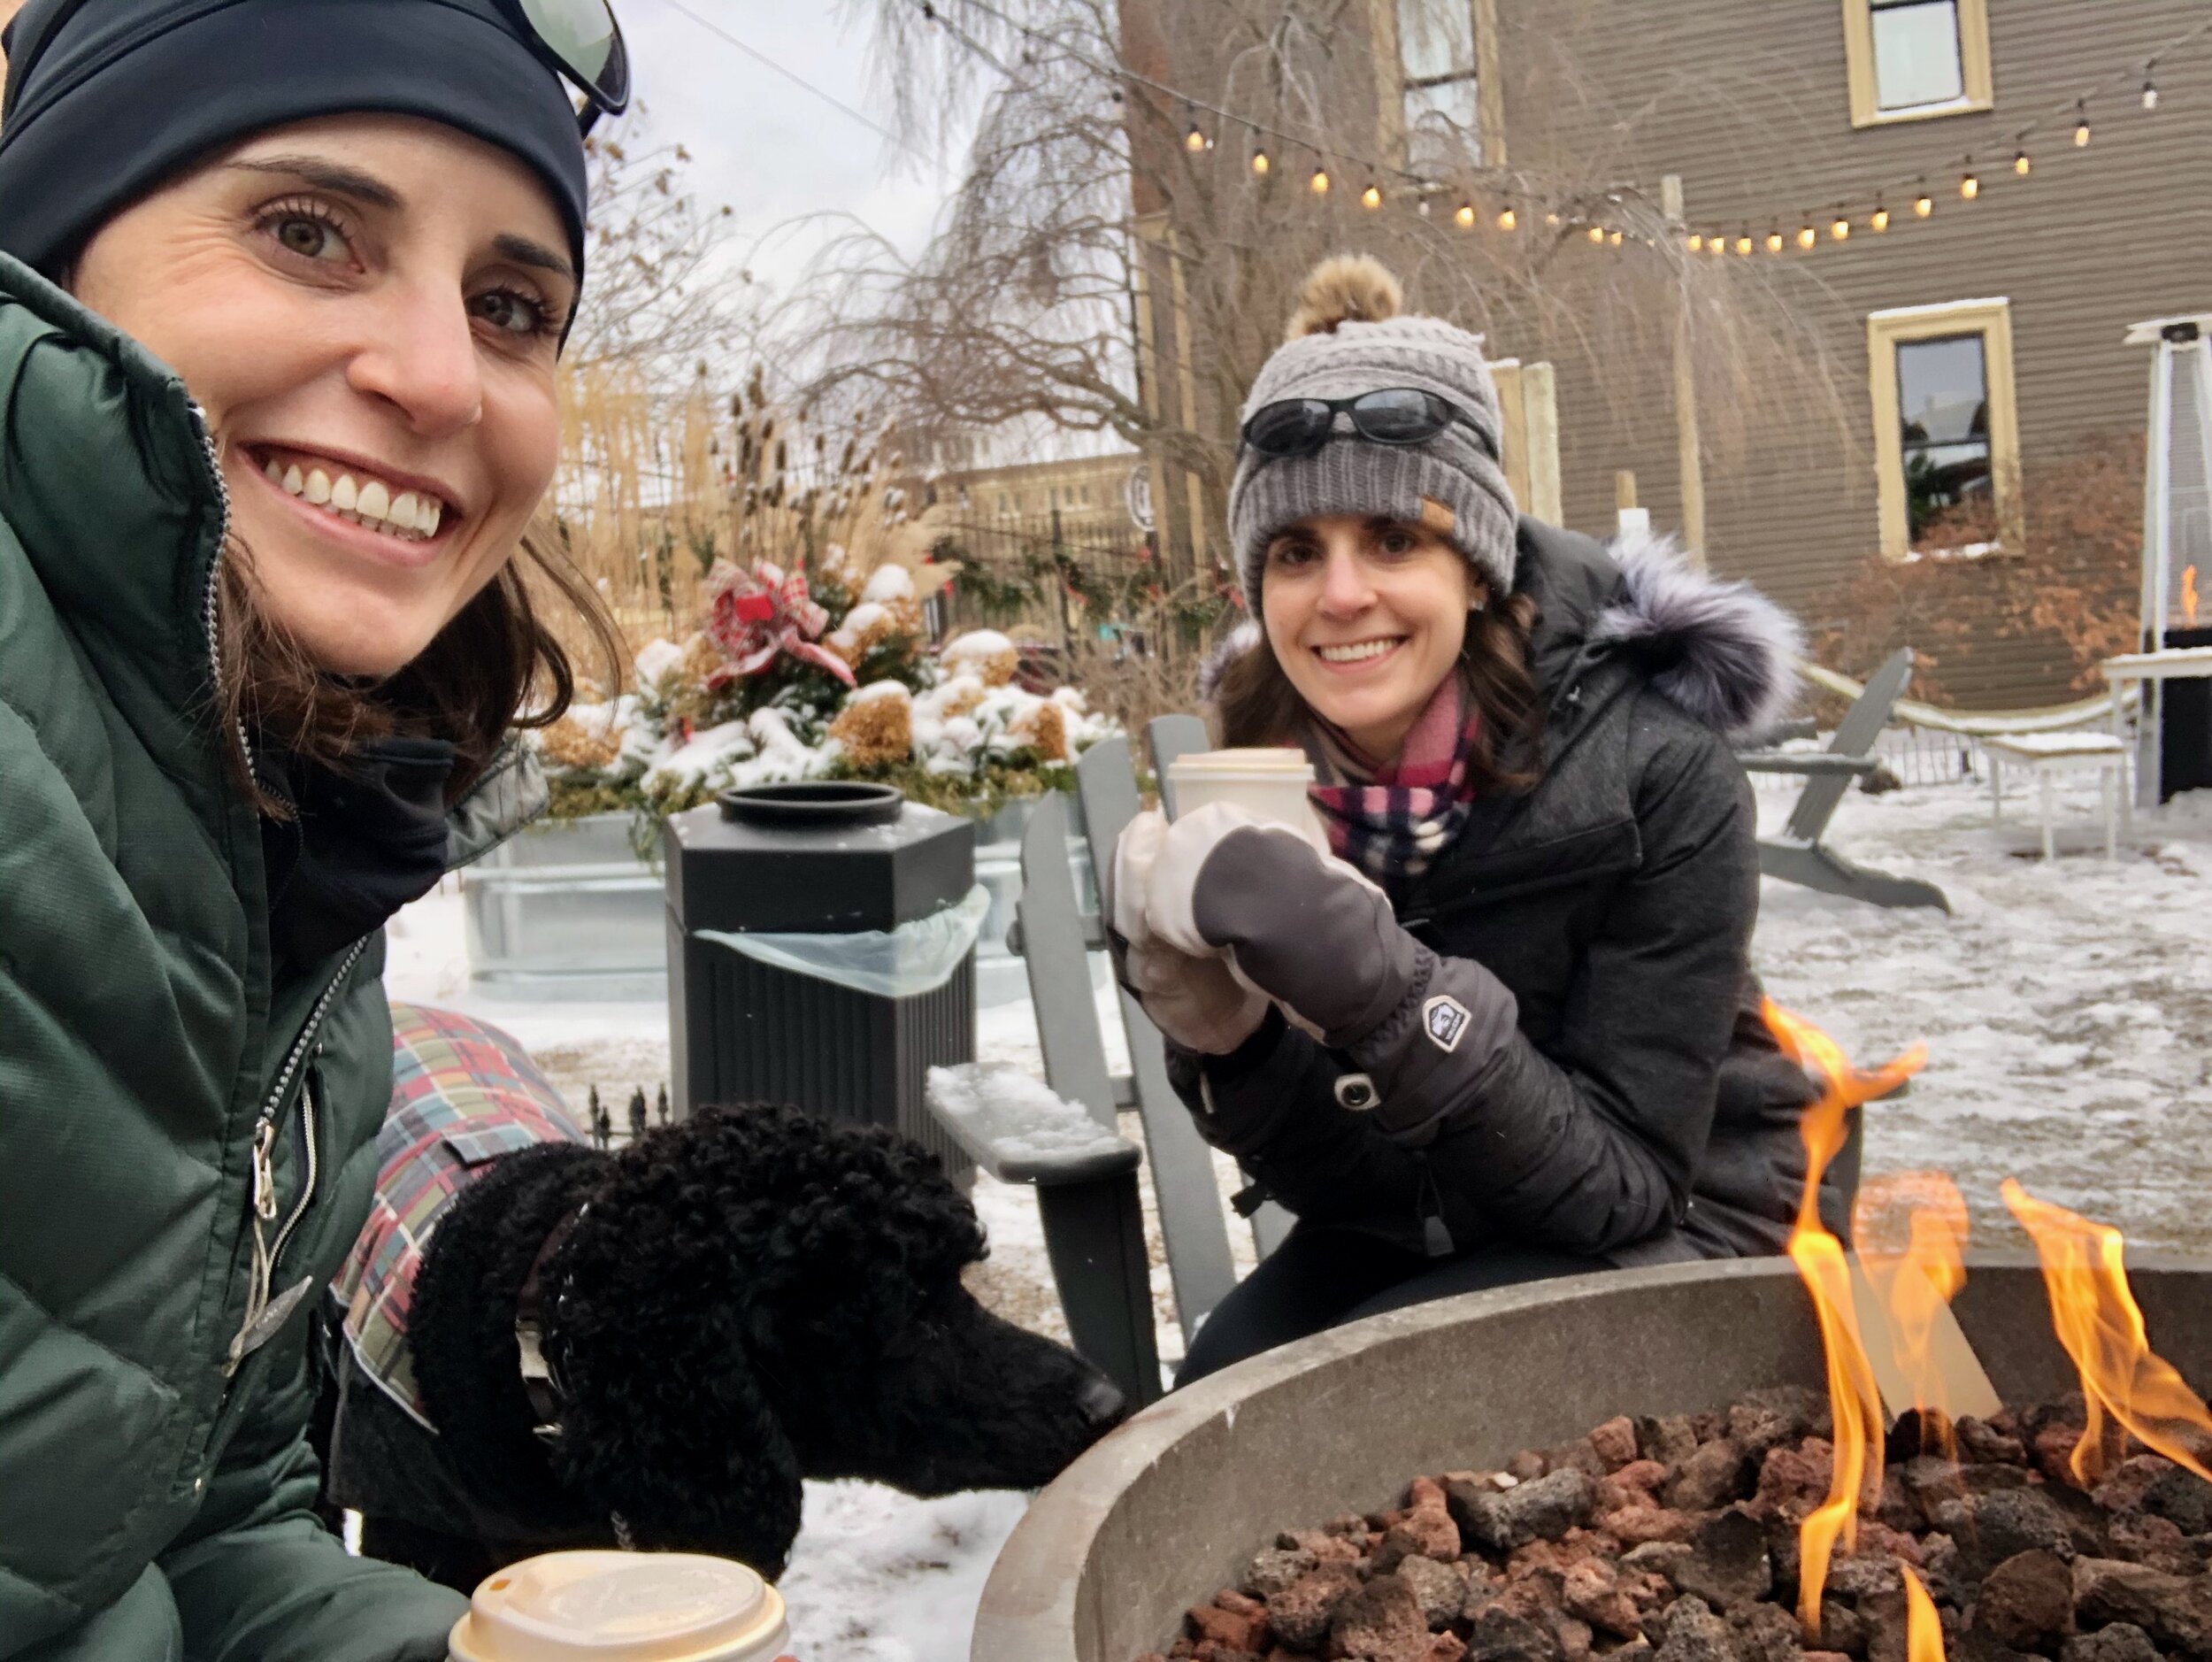
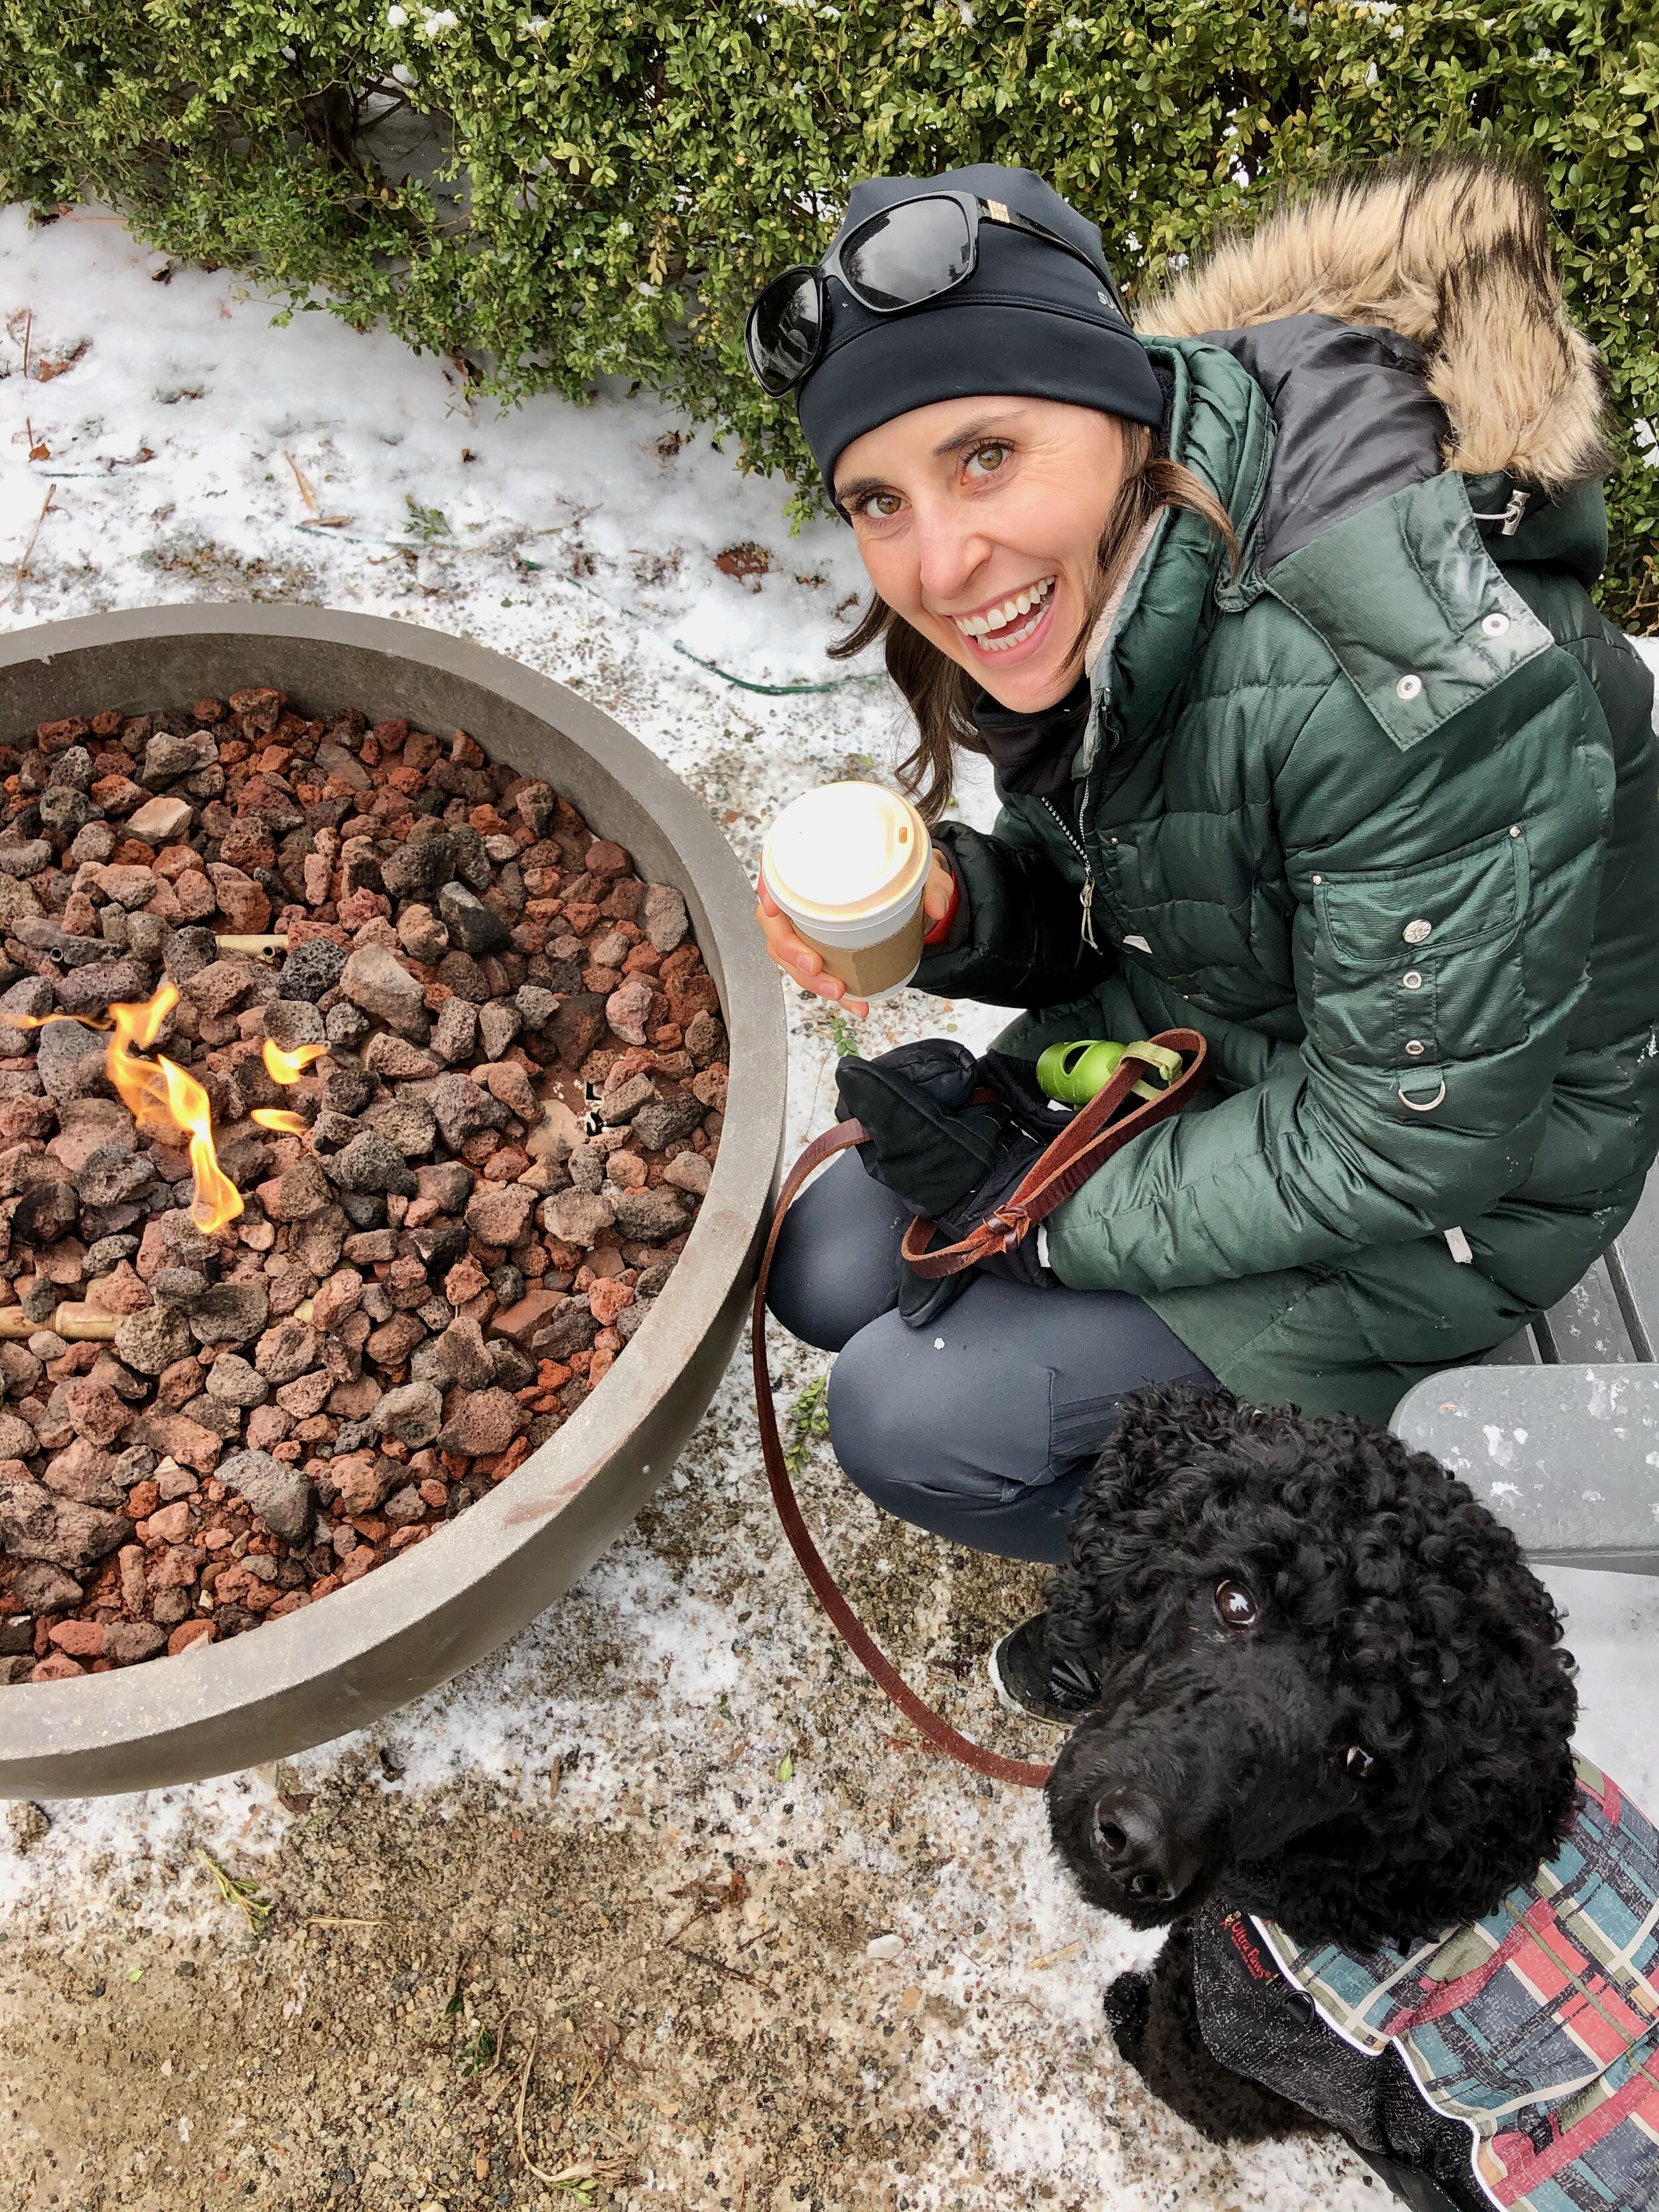
Prior to dinner at my parent’s that evening, Lara and I took a Christmas Eve walk to Outside Coffee Co (a coffee shop place that has always been all outdoor all year! They were ahead of their time. They’ve had their igloos and fire pits since opening several years ago, way before COVID) for Christmas Eve lattes. It was cold, and a little windy, but perfect! A light dusting of snow, a fire pit, and a latte. Perfect.

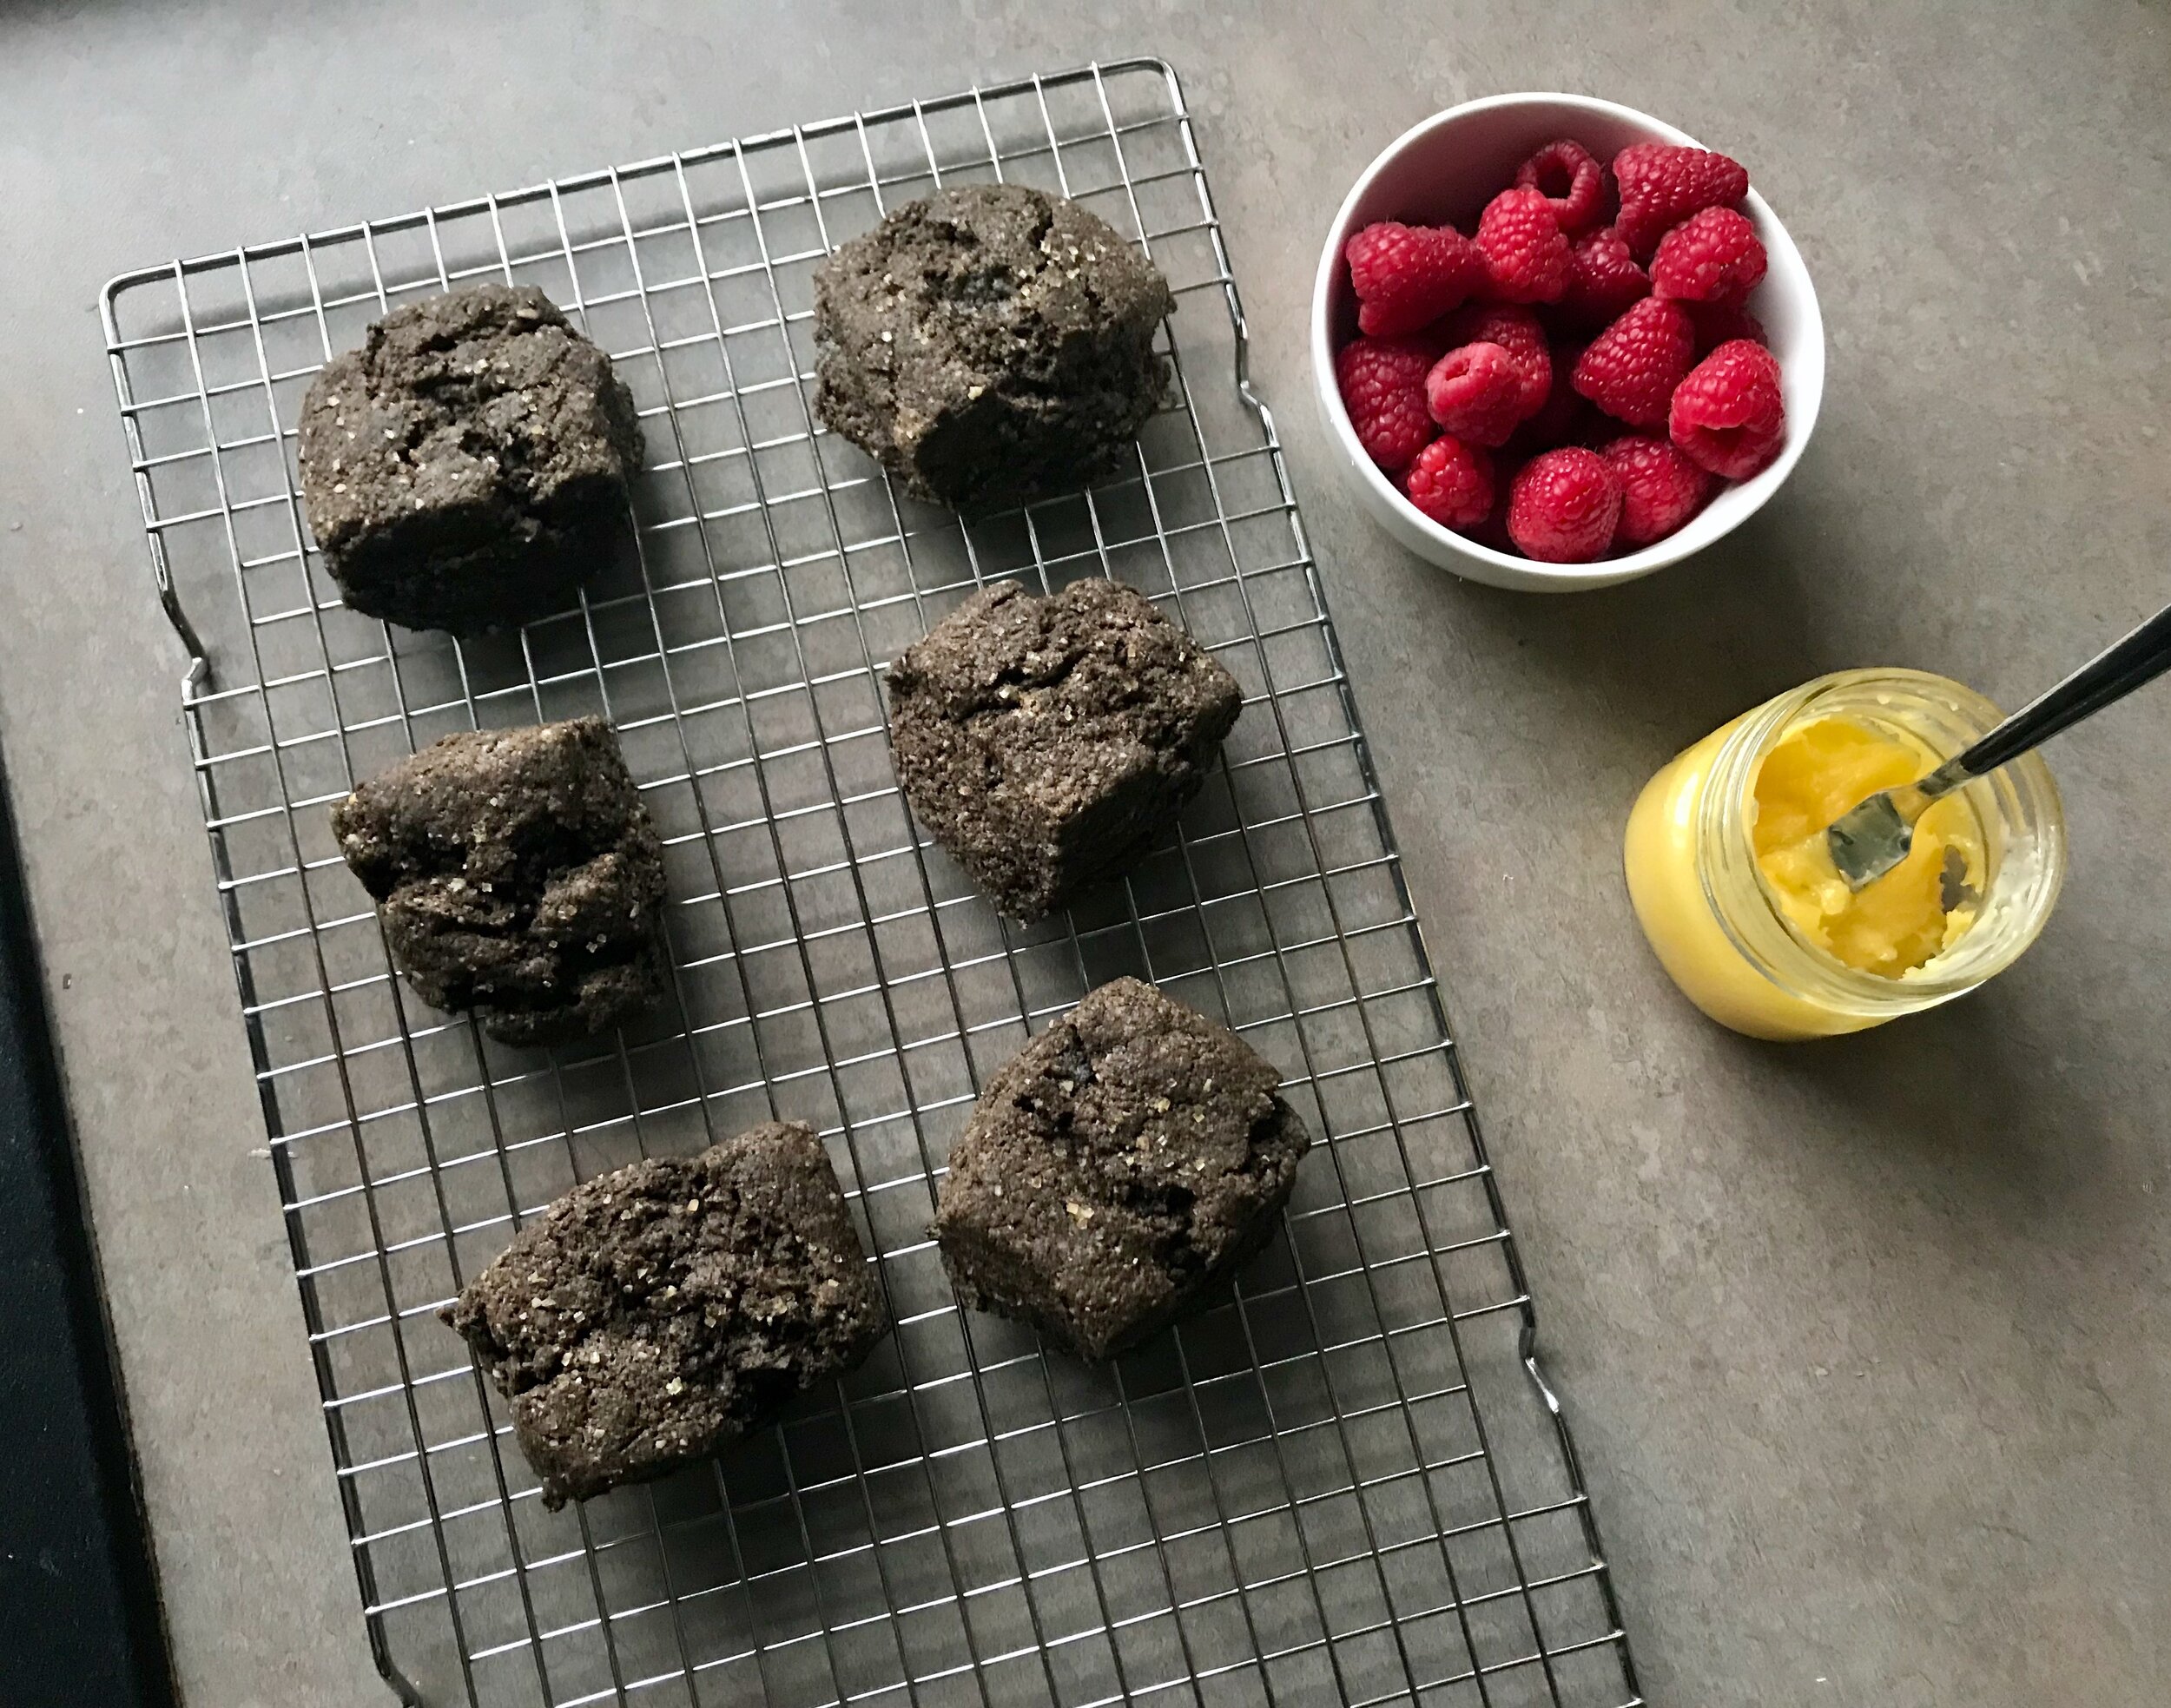
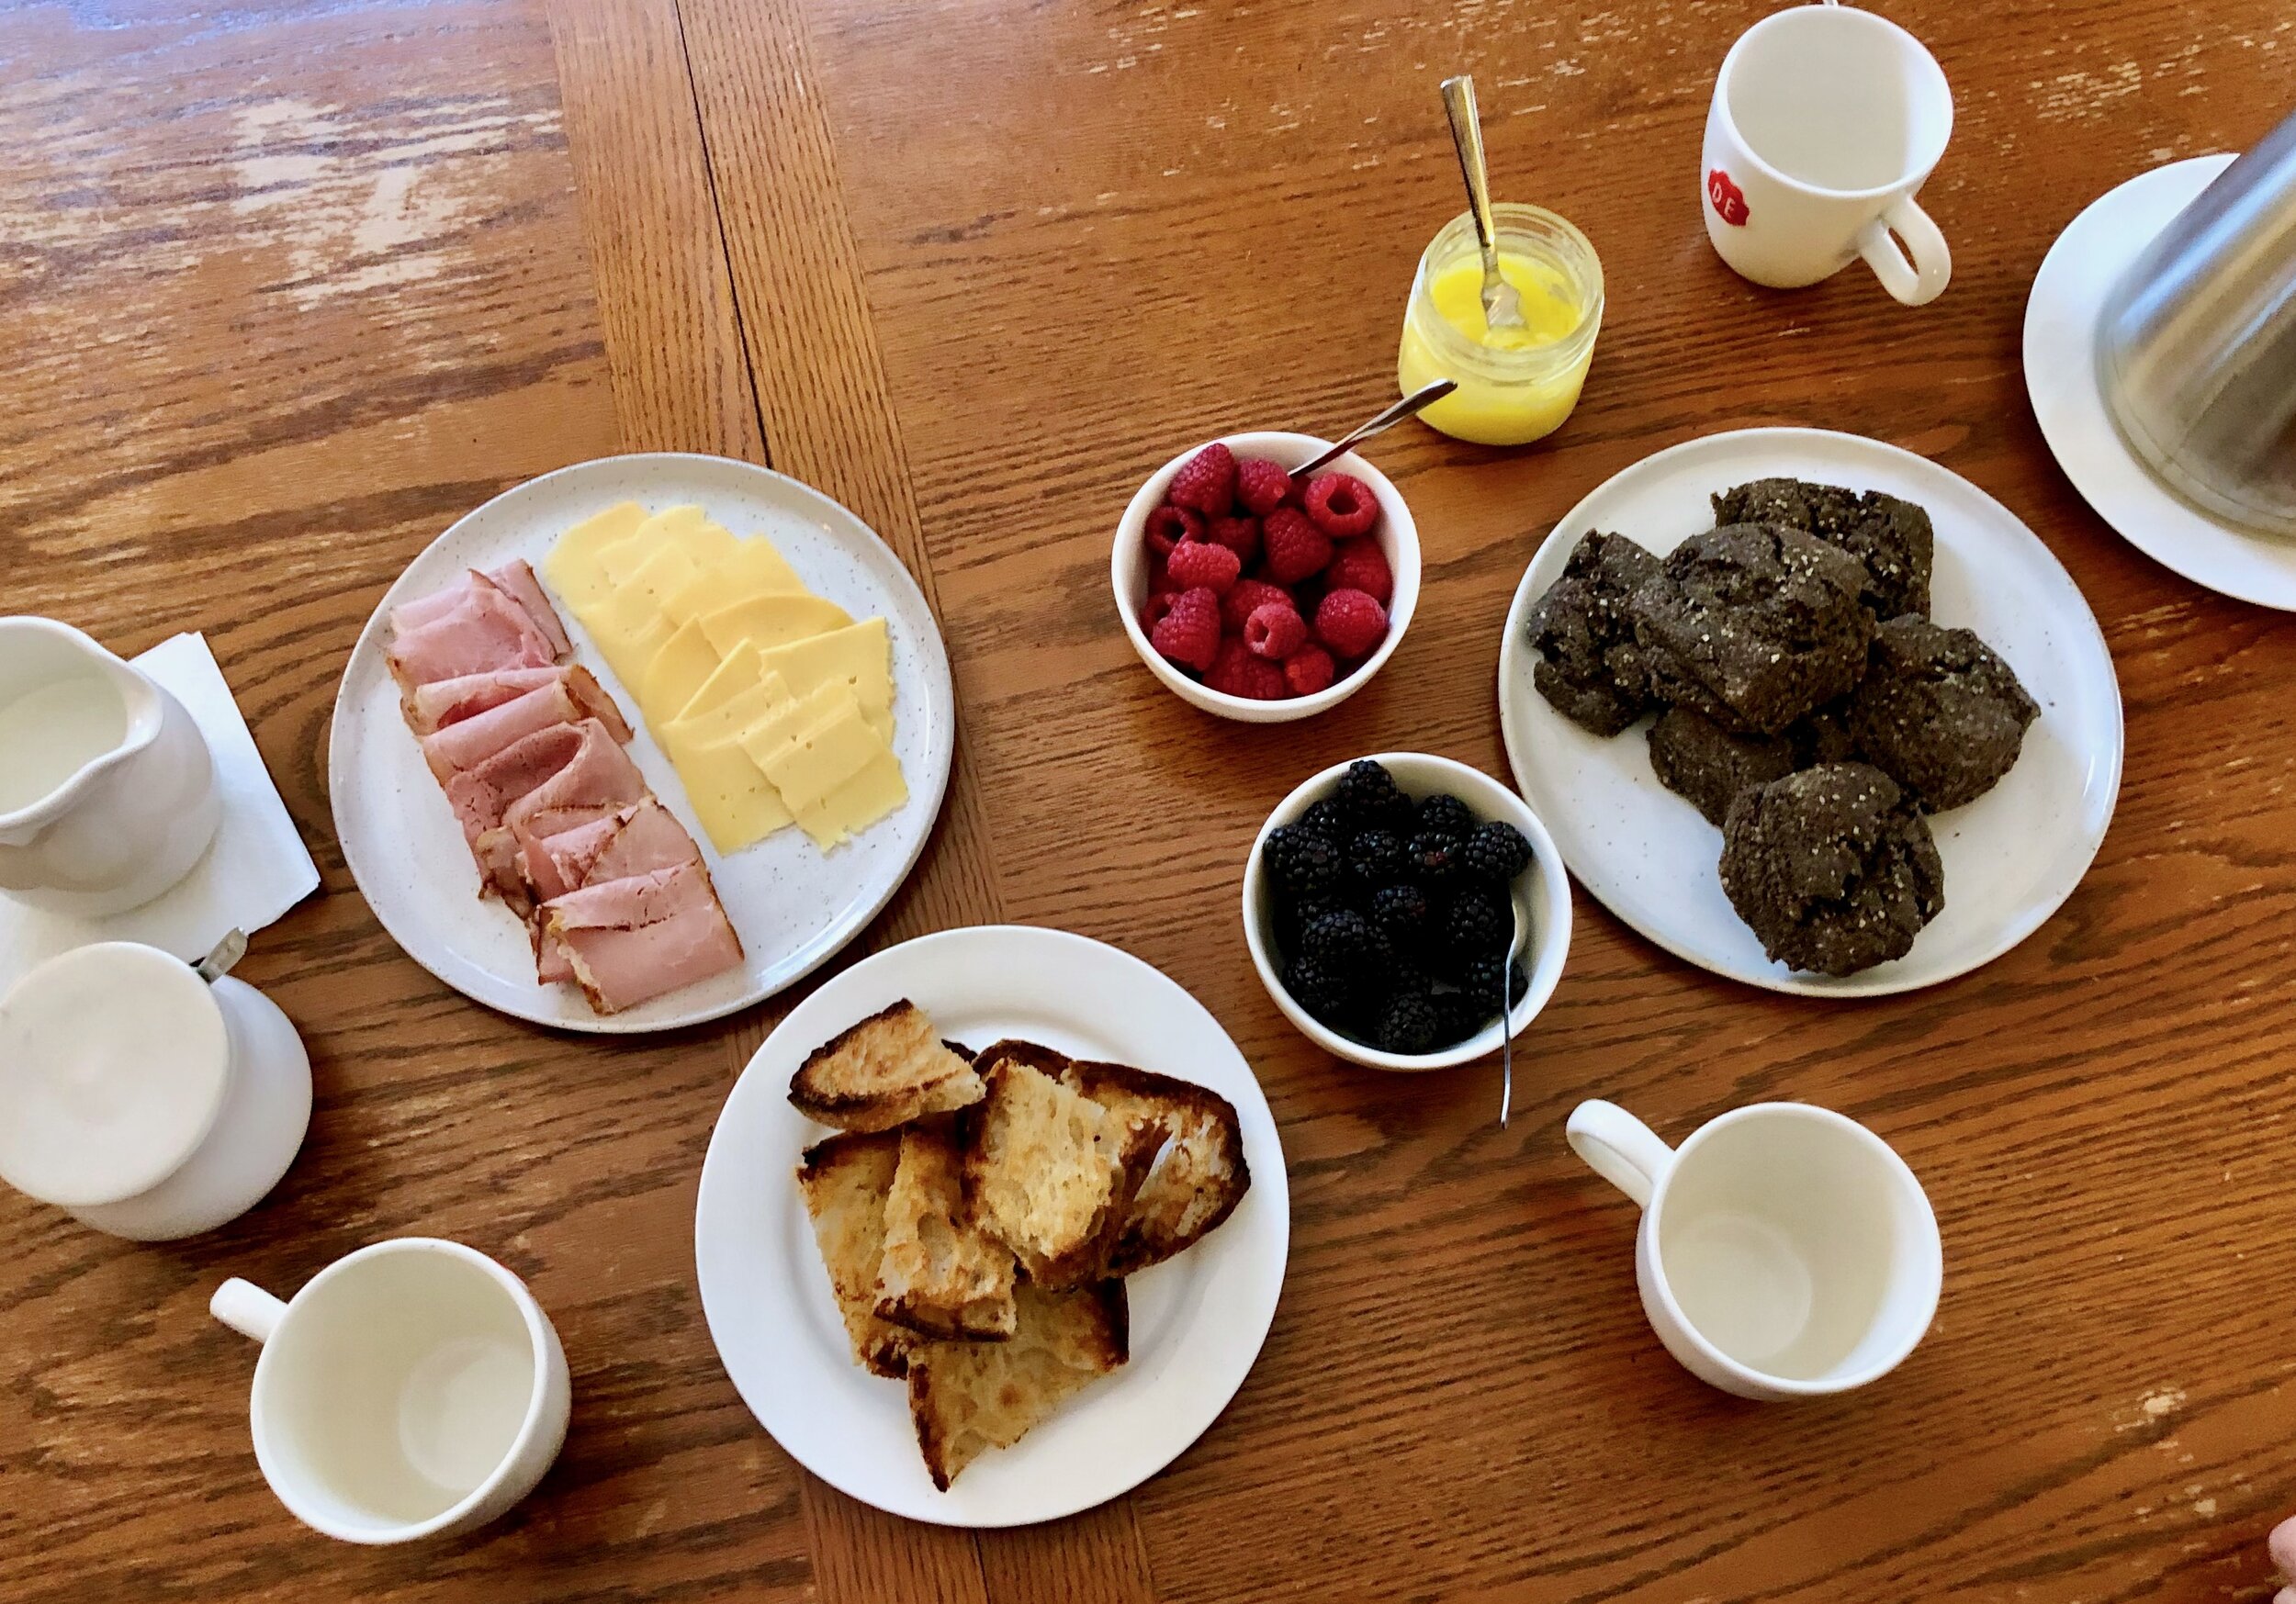
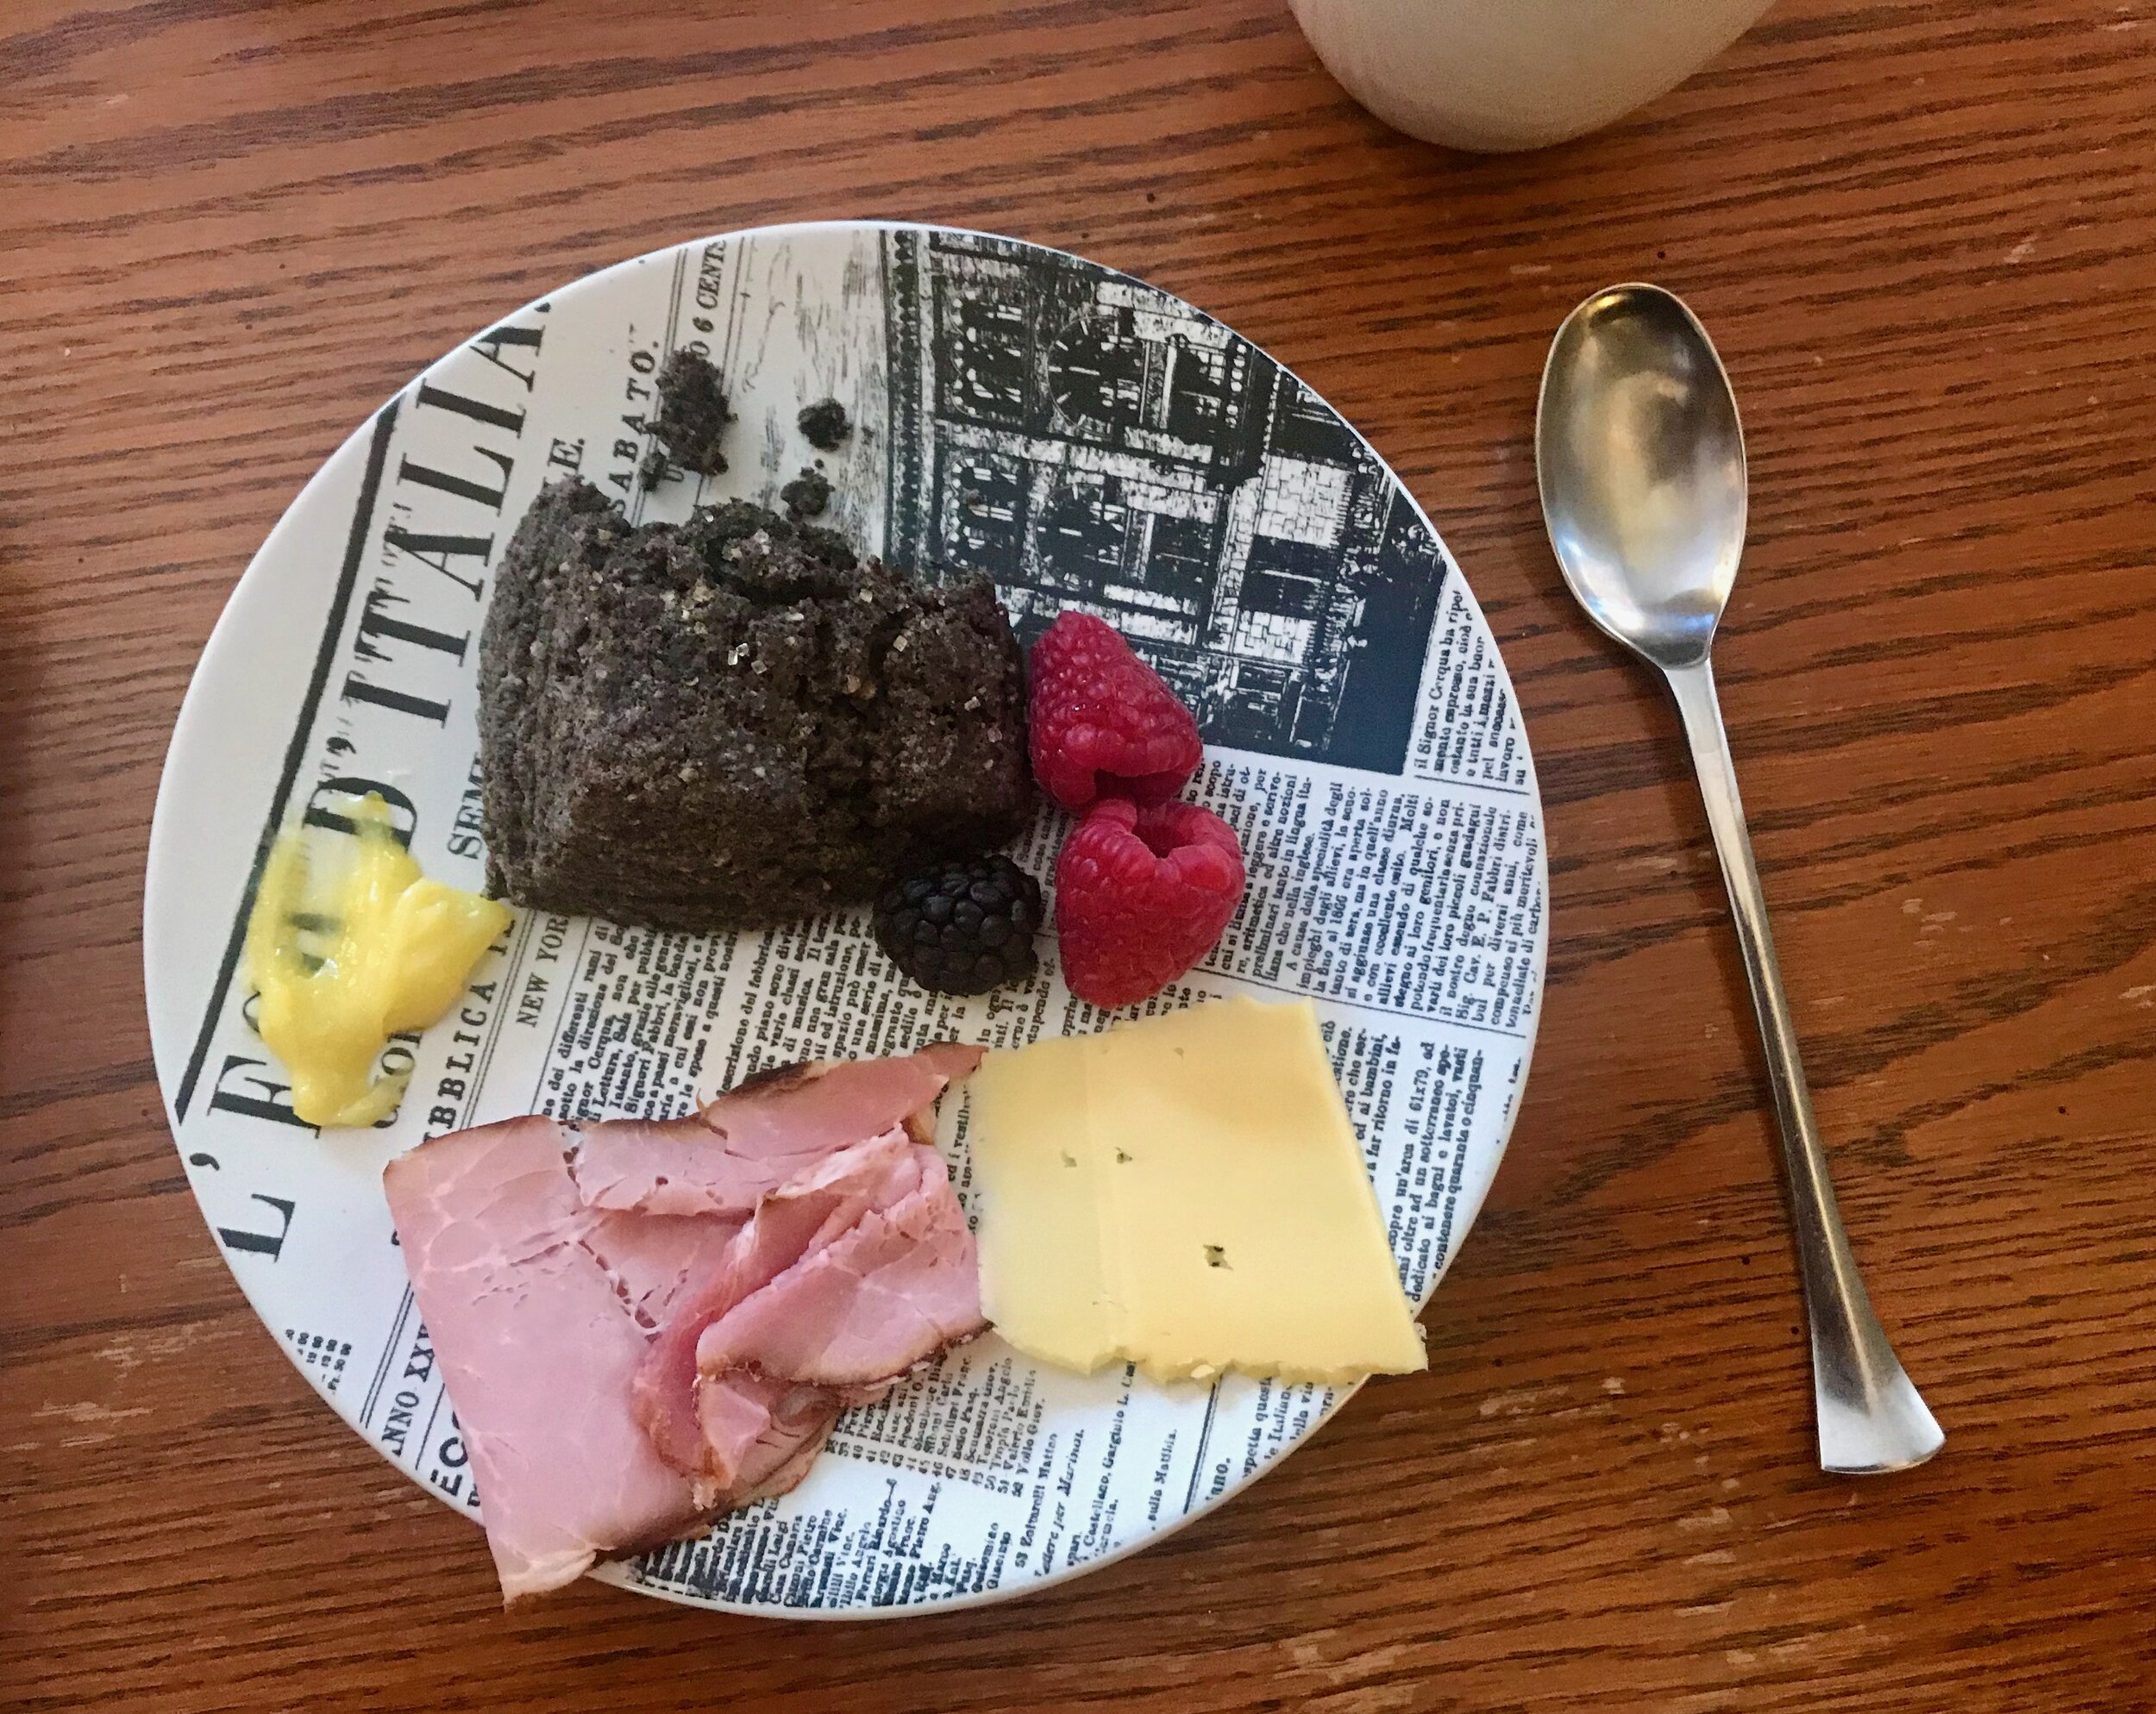
On Christmas morning Lara and I started the day with a Chirsmas Day run which is always so nice, and so quiet on the roads! We then had a friend over for a Christmas morning brunch. We served buckwheat scones with lemon curd, smoked ham with double cream gouda, and some fresh berries. It was perfect. Great conversation, great company!

IMG_0916.jpeg

I hadn’t made these scones in a while and now I don’t know why, they are so good! A little crumbly and sandy due to the buckwheat, slightly sweet and nutty. The lemon curd was the perfect accompaniment. I hadn’t tried the combo in the past, but it was wonderful! I may always need lemon curd with these scones.

IMG_9951.jpeg

Lara and I then headed to our parent’s home, with a stop at the dog park for a short hike, for a little relaxation by the fire. Just hanging out which is so nice.

Later that afternoon my brother and his family came over for our (now traditional) homemade pizza dinner followed by presents. I love homemade pizza so this has been a great tradition over the past several years. I hope everyone else likes it too!

IMG_9960.jpeg
IMG_9966.jpeg

The pizzas turned out really well this year! Last year for whatever reason, I wasn’t happy with how they turned out. I tried baking them on baking sheets, and I’m not sure I even preheated the baking sheets, all I know is they were a little anemic looking and didn’t rise much in the oven. More flatbread like than puffy pizza crust. This year was completely different! I heated two baking steels for over an hour in my mom’s new oven. The dough was nice and puffy, perfectly timed to go straight into the oven after topping. If I had my choice I would let the pizza dough rest a little longer after dividing, but it didn’t really seem to matter this time.

IMG_9983.jpeg
IMG_9975.jpeg

I had people shape their dough on a flour counter, and once shaped as desired they placed the dough/crust on a square piece of parchment paper. Then they could top as desired and the pizza, parchment and all, was transferred to the hot baking steel. I was able to fit two pizzas at a time onto each steel.

IMG_9981 2.jpeg

We only had one casualty (see left); as I was sliding the whole rack back into the oven after placing my nephew and my brother’s pizzas on the steel, I watched my nephew’s pizza (which was in the back corner of the steel) slowly waterfall off the back of the steel and onto the bottom of the oven. Talk about smoke and burning dough! I was actually able to pick up most of the dough with a large spatula and put it back on the steel in one big blob, but most of the cheese burned in the bottom of the oven. Very sad. Thankfully we had some extra dough for my nephew so he was still able to have a nice pizza. Lara and I enjoyed the blob of pizza. Almost like a calzone! Just without a lot of filling, but the inside of the dough was very soft and fluffy!

All the rest of the pizzas turned out great thankfully! I found out that my mom’s oven seems to be significantly hotter than mine. The pizzas only baked for maybe 5-8 minutes (I didn’t really time it) which is so much less time than I do at home. And the bottoms of the first pizzas were even a little charred and burned in spots (which I loved, but my nephew wasn’t a fan of). Even though I preheat mine to 550 degrees for over an hour sometimes, it has never been as hot as hers was (and I think hers only preheats to 500 degrees). Now I’m questioning my ovens accuracy, it’s ability to actually get up to 500 or 550 degrees, or perhaps my electricity… I know for a fact the electric in my house is NOT great. So I’m super excited for my kitchen renovation! New electrical, new oven - I can’t wait to see how much better everything will work (as I anticipate it will!)!

IMG_9987 2.jpeg

After pizza it was time for presents. Lots of presents! This seemed to be the year of the canvas bag! I got two (one farmers market bag, and a reusable grocery bag, both from Food52), and Lara got a canvas garden bag. They’re all beautiful and will be very useful I have no doubt. I also got some great running gear, a headband and scarf from Tracksmith to add to my winter running wardrobe which has greatly improved over the past month. I finally pulled the trigger and bought myself some new winter running tops and tights and it has been glorious! The stuff I had been wearing was SO old! I was wearing some of it in college it’s that old. I’m still waiting on a new running jacket (the NDO jacket from tracksmith) which I splurged on and bought myself on boxing day, the day it was available. Should be coming this weekend and I can’t wait to try it!

IMG_0015 2.jpeg

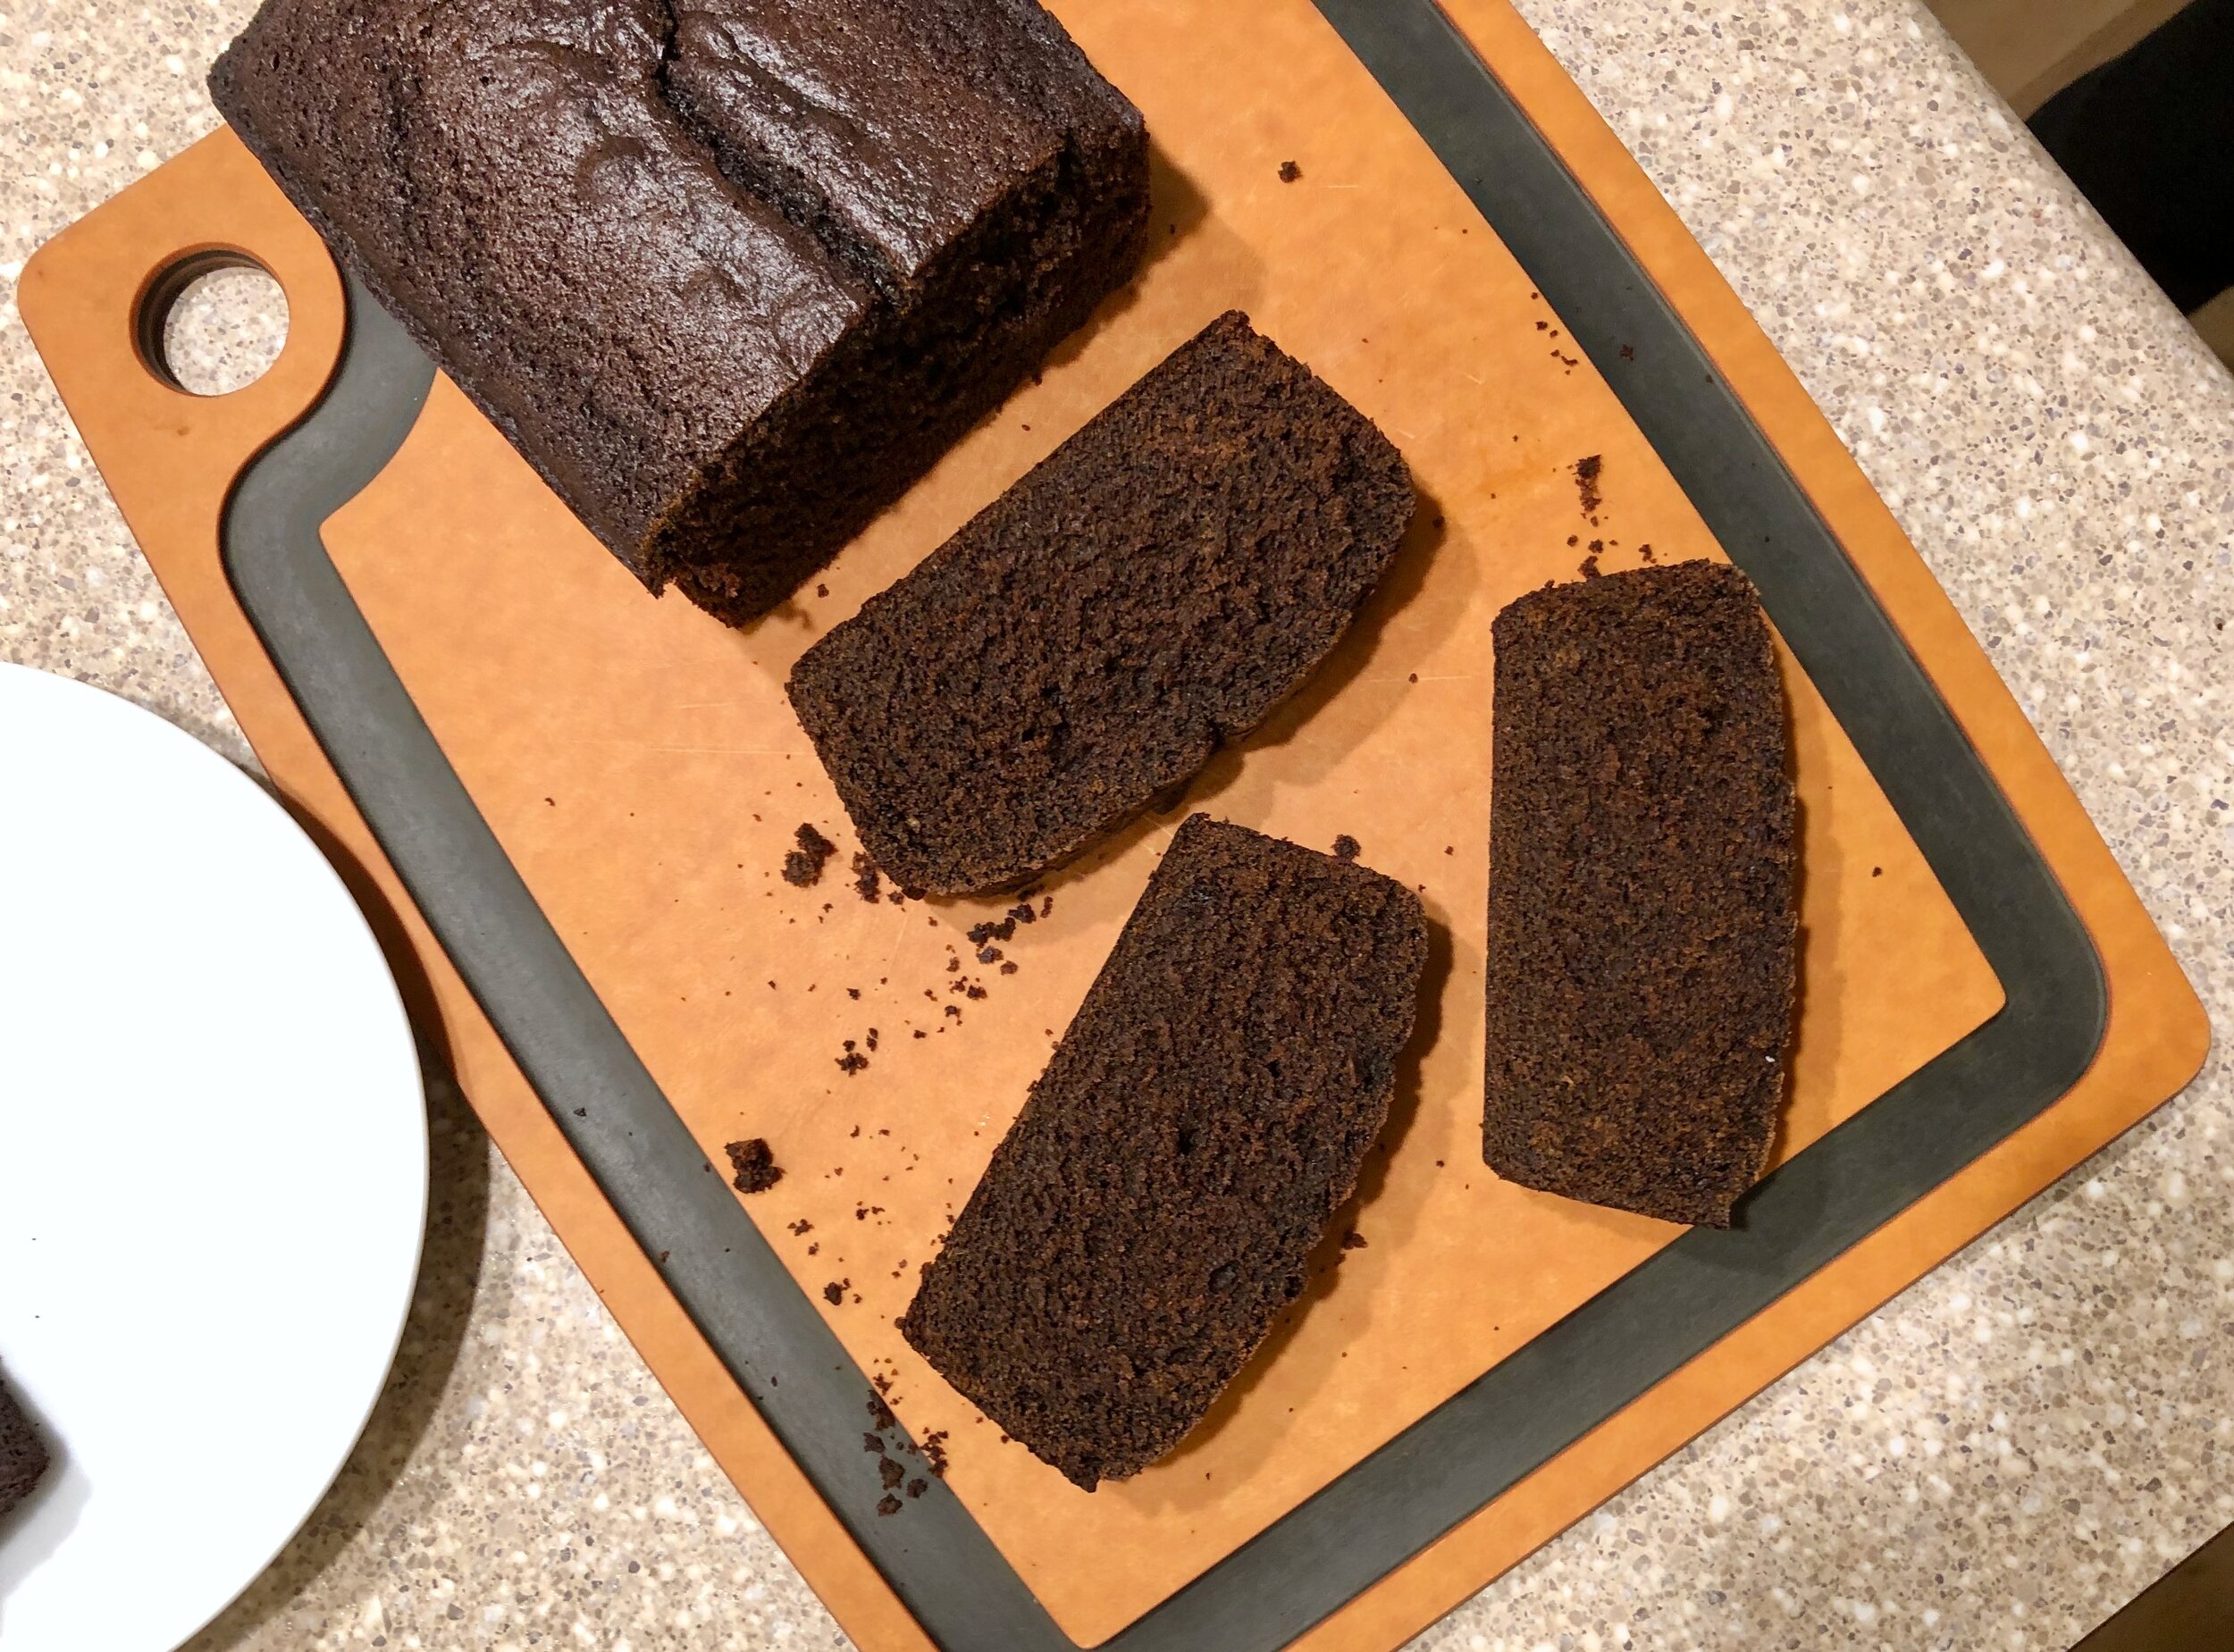
After presents we enjoyed a short dessert time before everyone headed home. Earlier in the afternoon I had felt like baking something, so Lara found a recipe for a gingerbread loaf cake that was quick and easy to throw together, and my mom had all the ingredients in the house. So we had baked that before pizza time. I loved it! I love gingerbread and this cake was perfect! We used a combo of dark, and blackstrap molasses which is what my mom had, and I thought it was great. I like using the darker molasses in baking. It just adds more flavor, and bitterness which I like. The cake was moist and rich. It would have been perfect with a little whipped cream or my personal favorite, cream cheese frosting. But it was wonderful on it’s own as well. I will definitely make this again.


Basic Pizza Crust
From Sally’s Baking Addiction
Ingredients

  • 3 and 1/2 cups (440g) all-purpose flour

  • 2 and 1/4 teaspoons instant yeast

  • 1 Tablespoon (13g) granulated sugar

  • 3/4 teaspoon salt

  • 2 Tablespoons (1 ounce) olive oil

  • 1 and 1/3 cups water

Directions
Prepare the dough: In the bowl of a stand mixer with the dough hook in place, whisk together the flour, yeast, sugar and salt. Add the olive oil and mix until the dry ingredients are slightly moistened and coated in the oil. Then add the water and knead for 5-6 minutes until a smooth shiny dough is formed. Form the dough into a ball and place in a lightly oiled bowl.

Cover with plastic wrap and allow the dough to rise 60-90 minutes at room temperature, or until about double in size.

Shape the dough: When the dough is ready turn it out onto a lightly floured work surface. Divide the dough into two pieces and shape each piece into a round. Let these rest on the counter for 5-10 minutes to help the dough relax.

Shape the dough: press each ball of dough into a disc and stretch and flatten the disc into a circle, approximately 12-inches in diameter. Cover dough lightly with plastic wrap or a clean kitchen towel and allow to rest for a few minutes as you prepare your pizza toppings. (You can also top immediately and bake if you don’t have the time, it will turn out either way if you’re in a pinch).

For this Christmas I made 2.5 batches of the dough above. From this I ended up making 7 pizzas initially, and then an 8th after my nephew’s initial pizza fell off the steel. After all that we still had a little dough left over. Probably a little more than one pizzas worth, but I didn't weigh it. Each pizza was 215 grams which I thought was a nice size. They were definitely not too small. More than I want to eat on my own for sure. But no one else had any trouble finishing theirs off! Everyone else ate their own whole pizza, Lara and I ate 1/3 each of ours.


Spiced Gingerbread Loaf
From Sally’s Baking Addiction
Ingredients
For the Cake:

  • 2 cups (250g) all-purpose flour

  • 1 teaspoon baking soda

  • 1 and 1/2 teaspoons ground ginger

  • 1 and 1/2 teaspoons ground cinnamon

  • 1/4 teaspoon ground cloves

  • 1/4 teaspoon salt

  • 1/8 teaspoon fresh ground pepper

  • 3/4 cup (225 grams) unsulphured or dark molasses

  • 3/4 cup (6 ounces) hot water (about 100°F (38°C))

  • 1/2 cup (115g; 1 stick) unsalted butter, softened to room temperature

  • 1/3 cup (67g) packed light or dark brown sugar

  • 1 large egg, at room temperature

  • 1 teaspoon pure vanilla extract

For the Orange Icing:

  • 1 cup (120g) confectioners’ sugar, sifted

  • 2–3 Tablespoons (30-45ml) orange juice

Directions
Adjust the oven rack to the lower third position and preheat oven to 350°F. Grease a 9×5-inch loaf pan. Set aside.

In a medium bowl, whisk the flour, baking soda, ginger, cinnamon, cloves, salt and pepper together until combined. Set aside. In a separate bowl or dish, whisk the molasses and hot water together.

In a large bowl using a handheld or stand mixer fitted with a paddle attachment, beat the butter on high speed until smooth and creamy – about 1 minute. Add the brown sugar and beat on high speed for 1 minute until creamed together fairly well. Scrape down the sides and up the bottom of the bowl with a rubber spatula as needed. On medium-high speed, beat in the egg and vanilla extract until combined. Scrape down the sides and up the bottom of the bowl as needed. With the mixer on low speed, add the dry ingredients in three additions alternating with the hot water/molasses and mixing each addition just until incorporated. Avoid overmixing. Batter will be thin.

Pour batter into prepared pan. Bake for around 50-60 minutes (mine went about 47 minutes , I had to restart the timer at one point so I may have lost a few minutes, but it was perfect, so I’d probably start checking at around 45 minutes) or until baked through. All ovens are different and your loaf could take a little more or less time. To test for doneness, insert a toothpick into the center of the gingerbread loaf. If it comes out clean with only a couple moist (not wet) crumbs, it is done. Allow to cool completely in the pan set on a wire rack before removing from pan.

Make the icing: Whisk the confectioners’ sugar and orange juice together. Drizzle over cooled loaf. Tasty I’m sure, but option. Very good without the glaze.

Stuffed Pork Loin with Chimichurri

IMG_0783.jpeg

Last Saturday Lara and I hosted a small Christmas gathering with our friend Lindsay and her husband Andrew. They both enjoy good food and trying new things so we were excited to try a new recipe, something fun we’ve never done before.

We thought that a stuffed pork loin sounded festive, fun, and celebratory. Something we won’t typically cook for ourselves, and sadly something our family just won’t enjoy that much so not something to make for them. I’m very thankful for friends who are excited about trying new things, because my family (however much I love them) isn’t.

We did some recipe hunting and settled on this recipe for an Argentinian style pork roast stuffed with olives, roasted red peppers, Chimicurri and other tasty things - a combination of things I would never think about putting together which is why I was excited to try it.

IMG_0792.jpeg

This was good to get me out of my typical routine (which for the last few months has been FULL of fresh lemon, parmesan, and garlic… so good!).

IMG_0800.jpeg
IMG_0758.jpeg

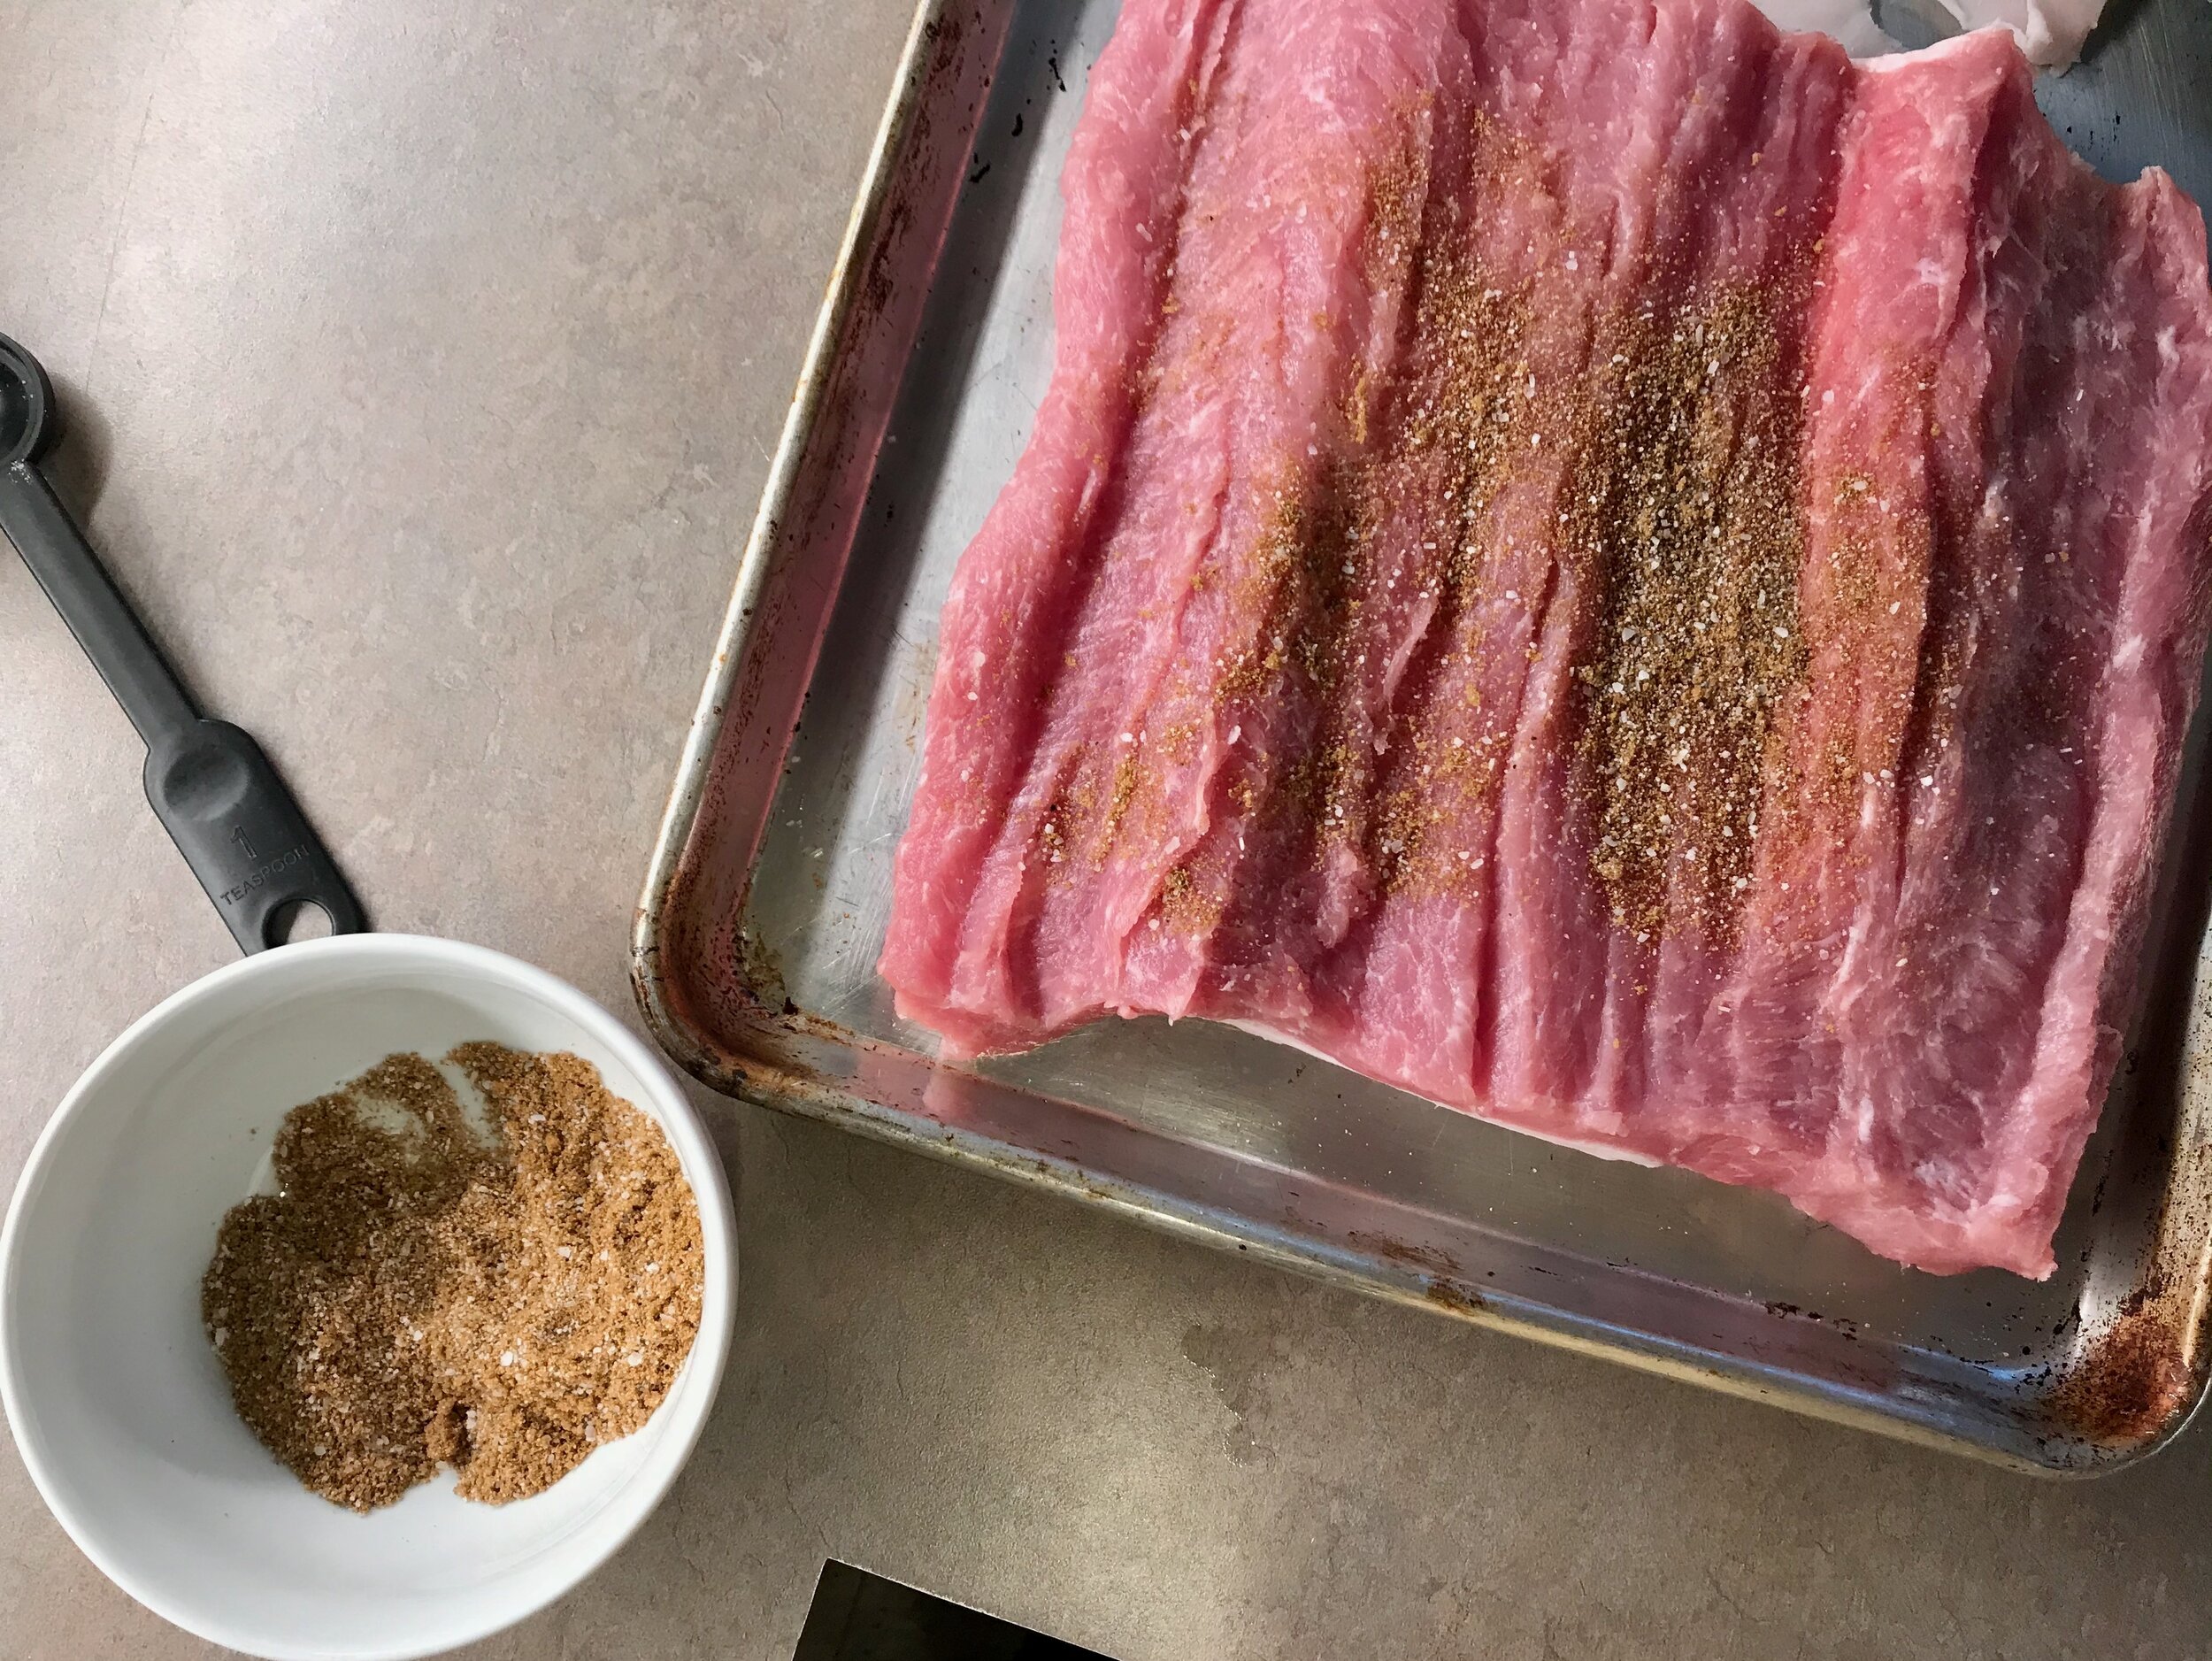
This recipe definitely had a lot of steps, but wasn’t difficult. Getting your mise en place done ahead of time is extremely helpful so I recommend prepping everything before starting to put the roast together. Make your chimichurri (or buy a good store bought version if that’s more your style, no shame in that if that’s what works for you). Get your spice mixture together, and then lay everything else out so it’s at hand and ready to go; your olives, peppers, capicola, breadcrumbs, and eggs (if using).

I made the chimichuri in the recipe below with a slight variation. I didn’t have any fresh oregano but could get fresh cilantro and parsley from the farmers market so I used that combination. I also made 2/3 of the recipe as printed and there was still plenty of it.

IMG_0723.jpeg

I do think a really good cut of pork is critical to the best final product. I bought a gorgeous 3.3 lb (I went slightly smaller than the recipe called for without any issues) center cut pork loin from my favorite butcher (Louise Earl Butcher for those in Grand Rapids, Matt is the best!). This roast was gorgeous! It had a beautifully thick cap of fat which roasted up so tasty. The recipe says to not trim this fat cap, but I did end up trimming a little from mine because it was so thick to start. It did not detract from the finished roast, there was still an ample amount of fat.

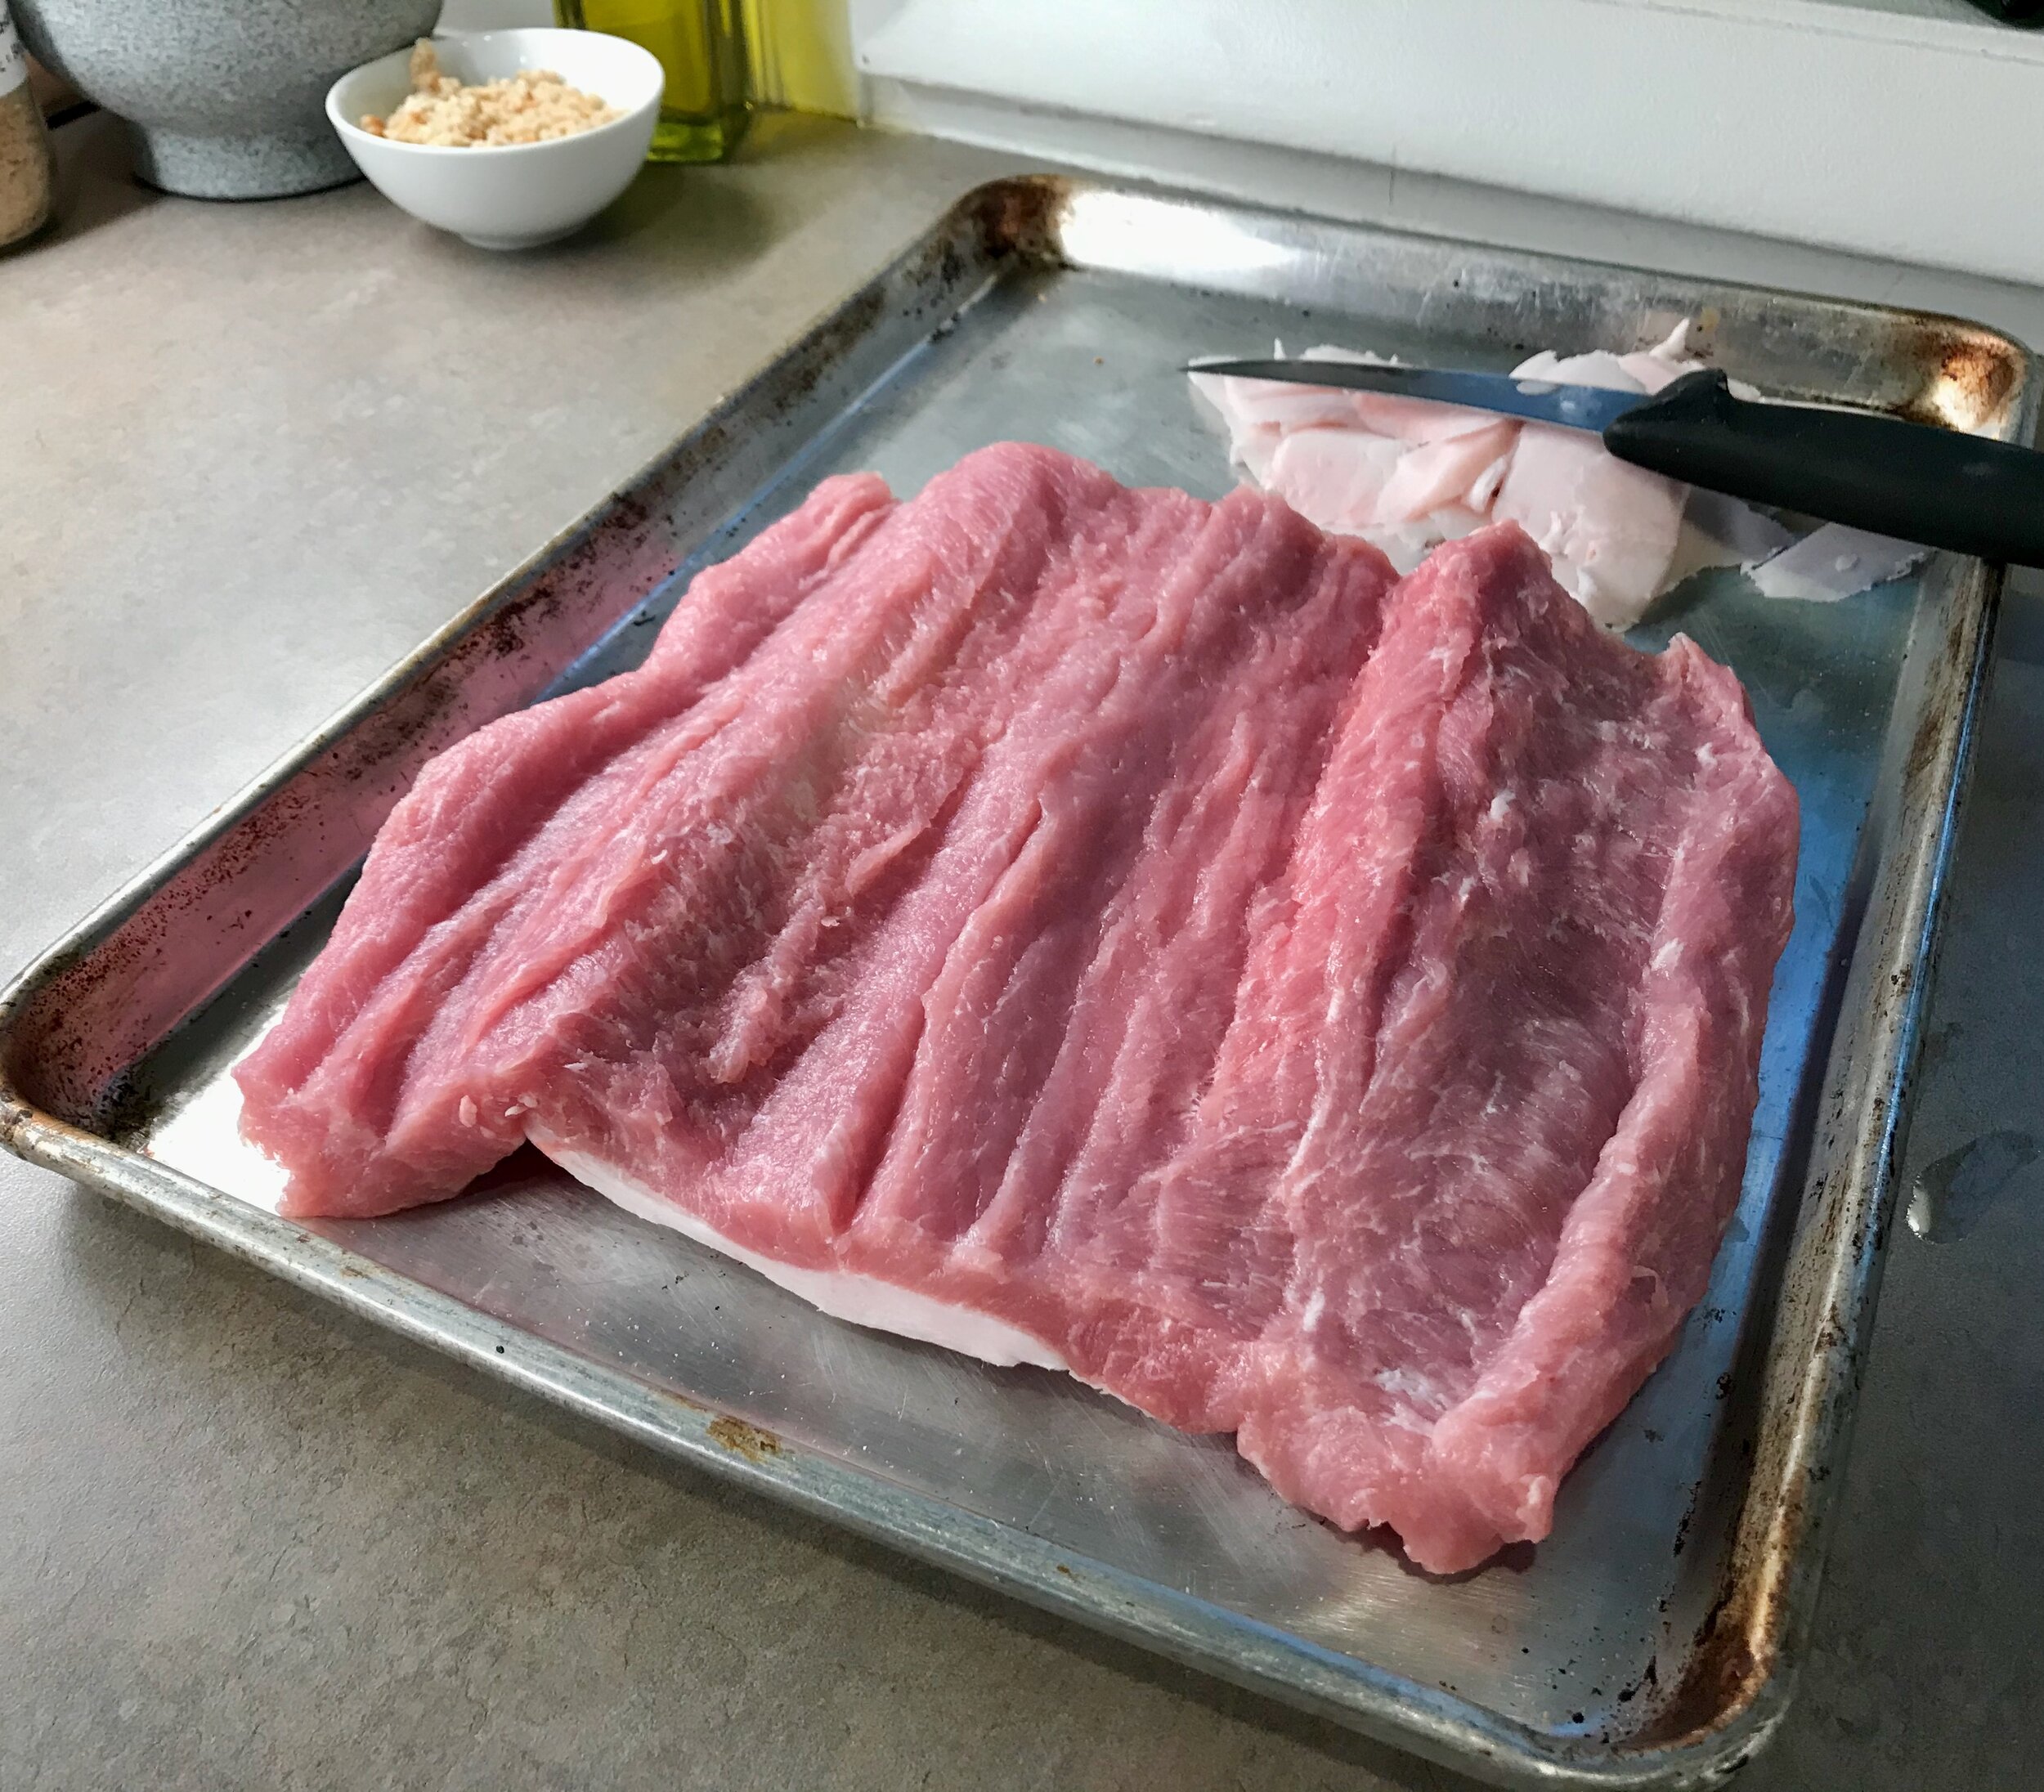
The most challenging/technical part of the recipe was cutting the roast open so that I could stuff it. I watched a video which helped. It’s important to have a good sharp knife, and to go slow. This was the first time I had done this and it turned out fine.

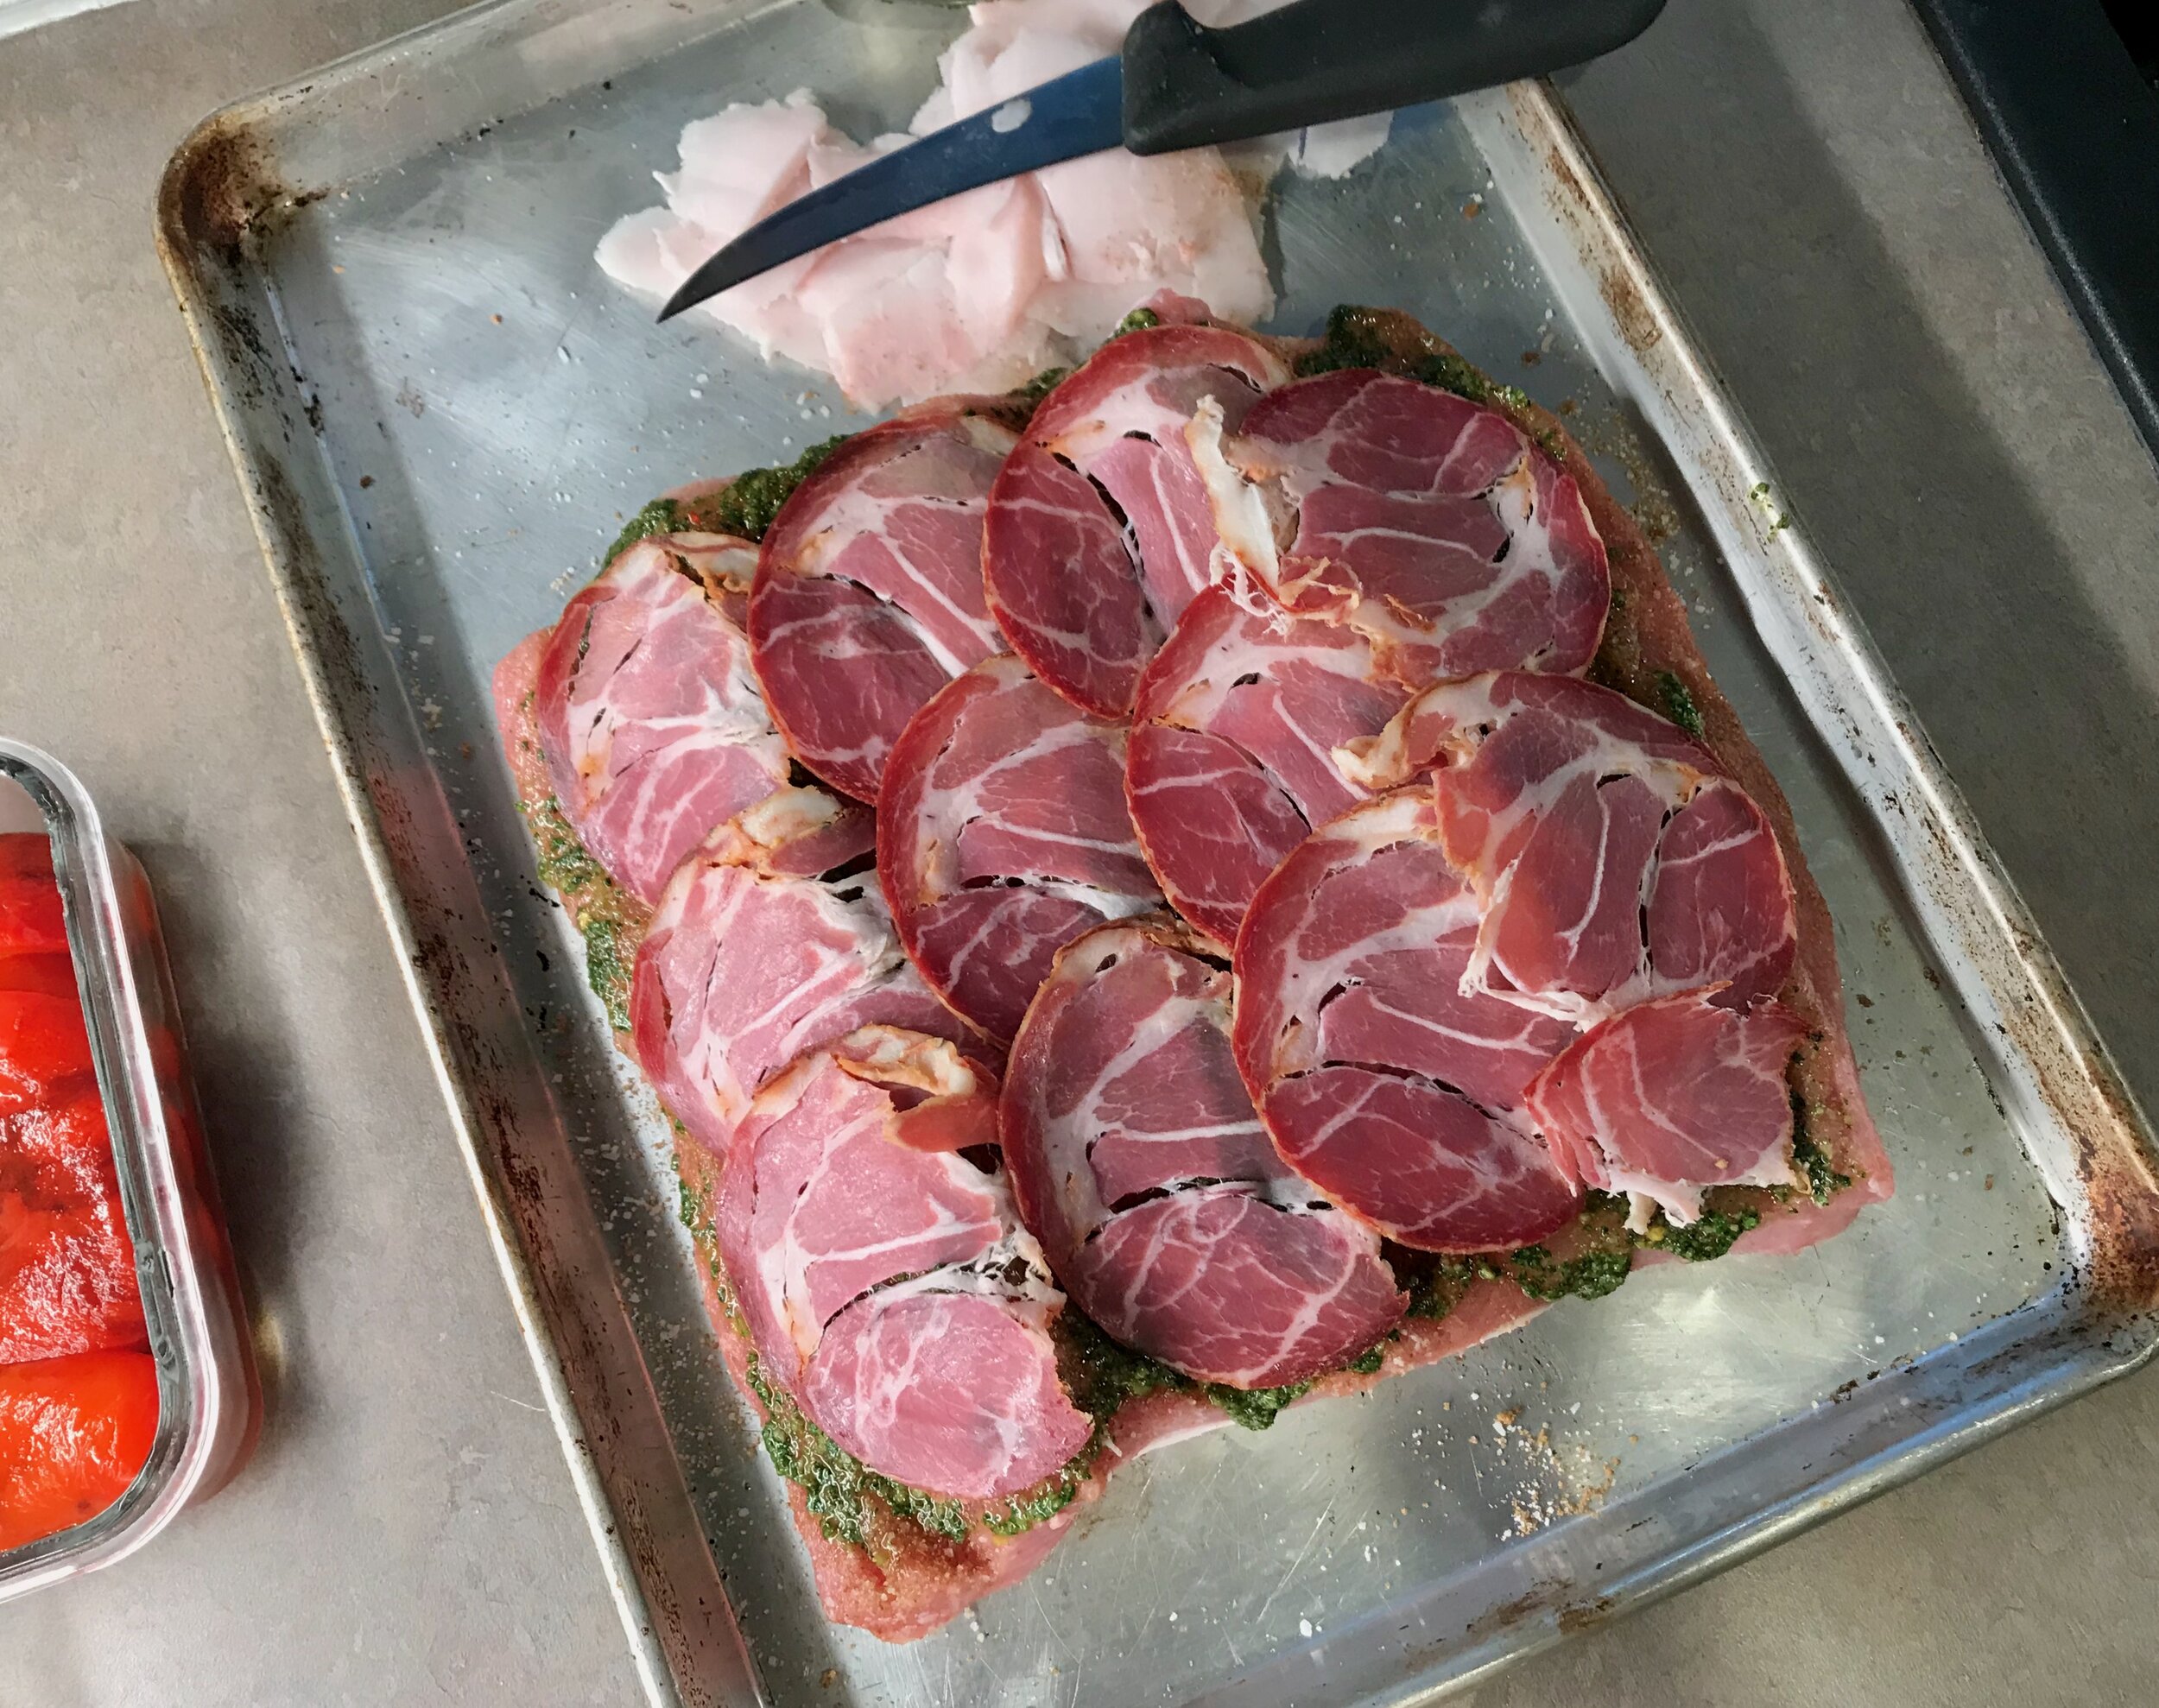
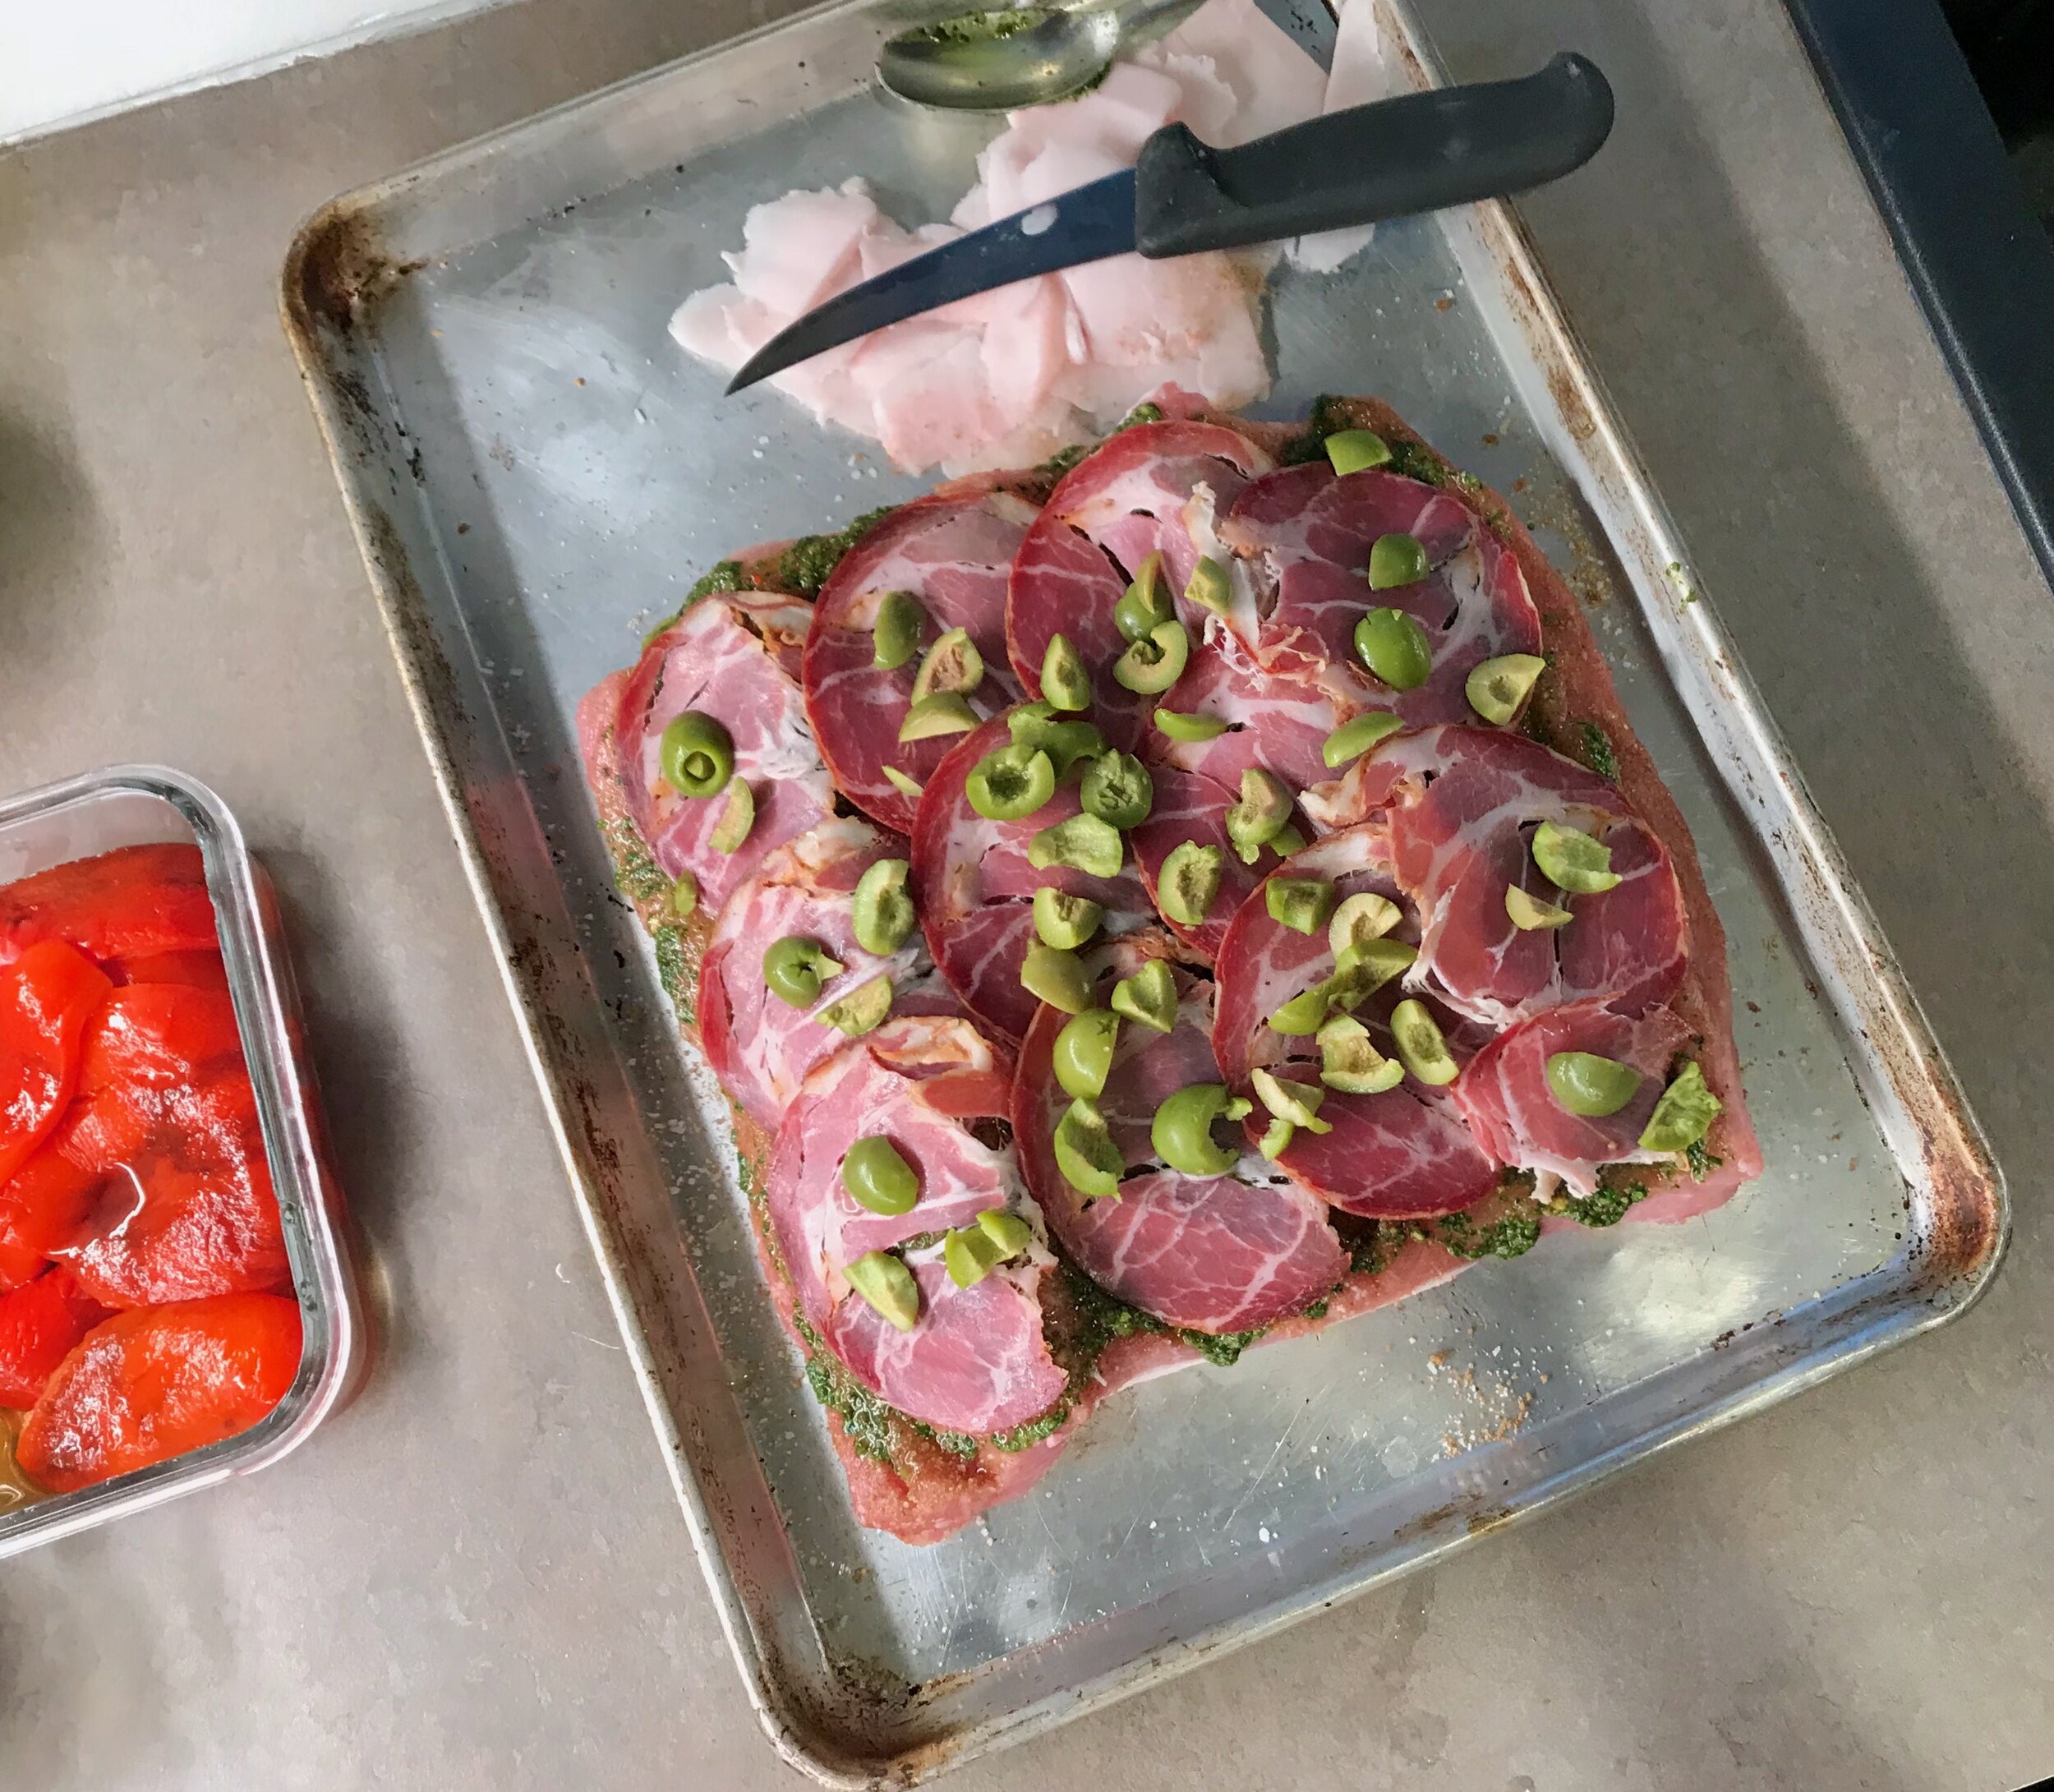
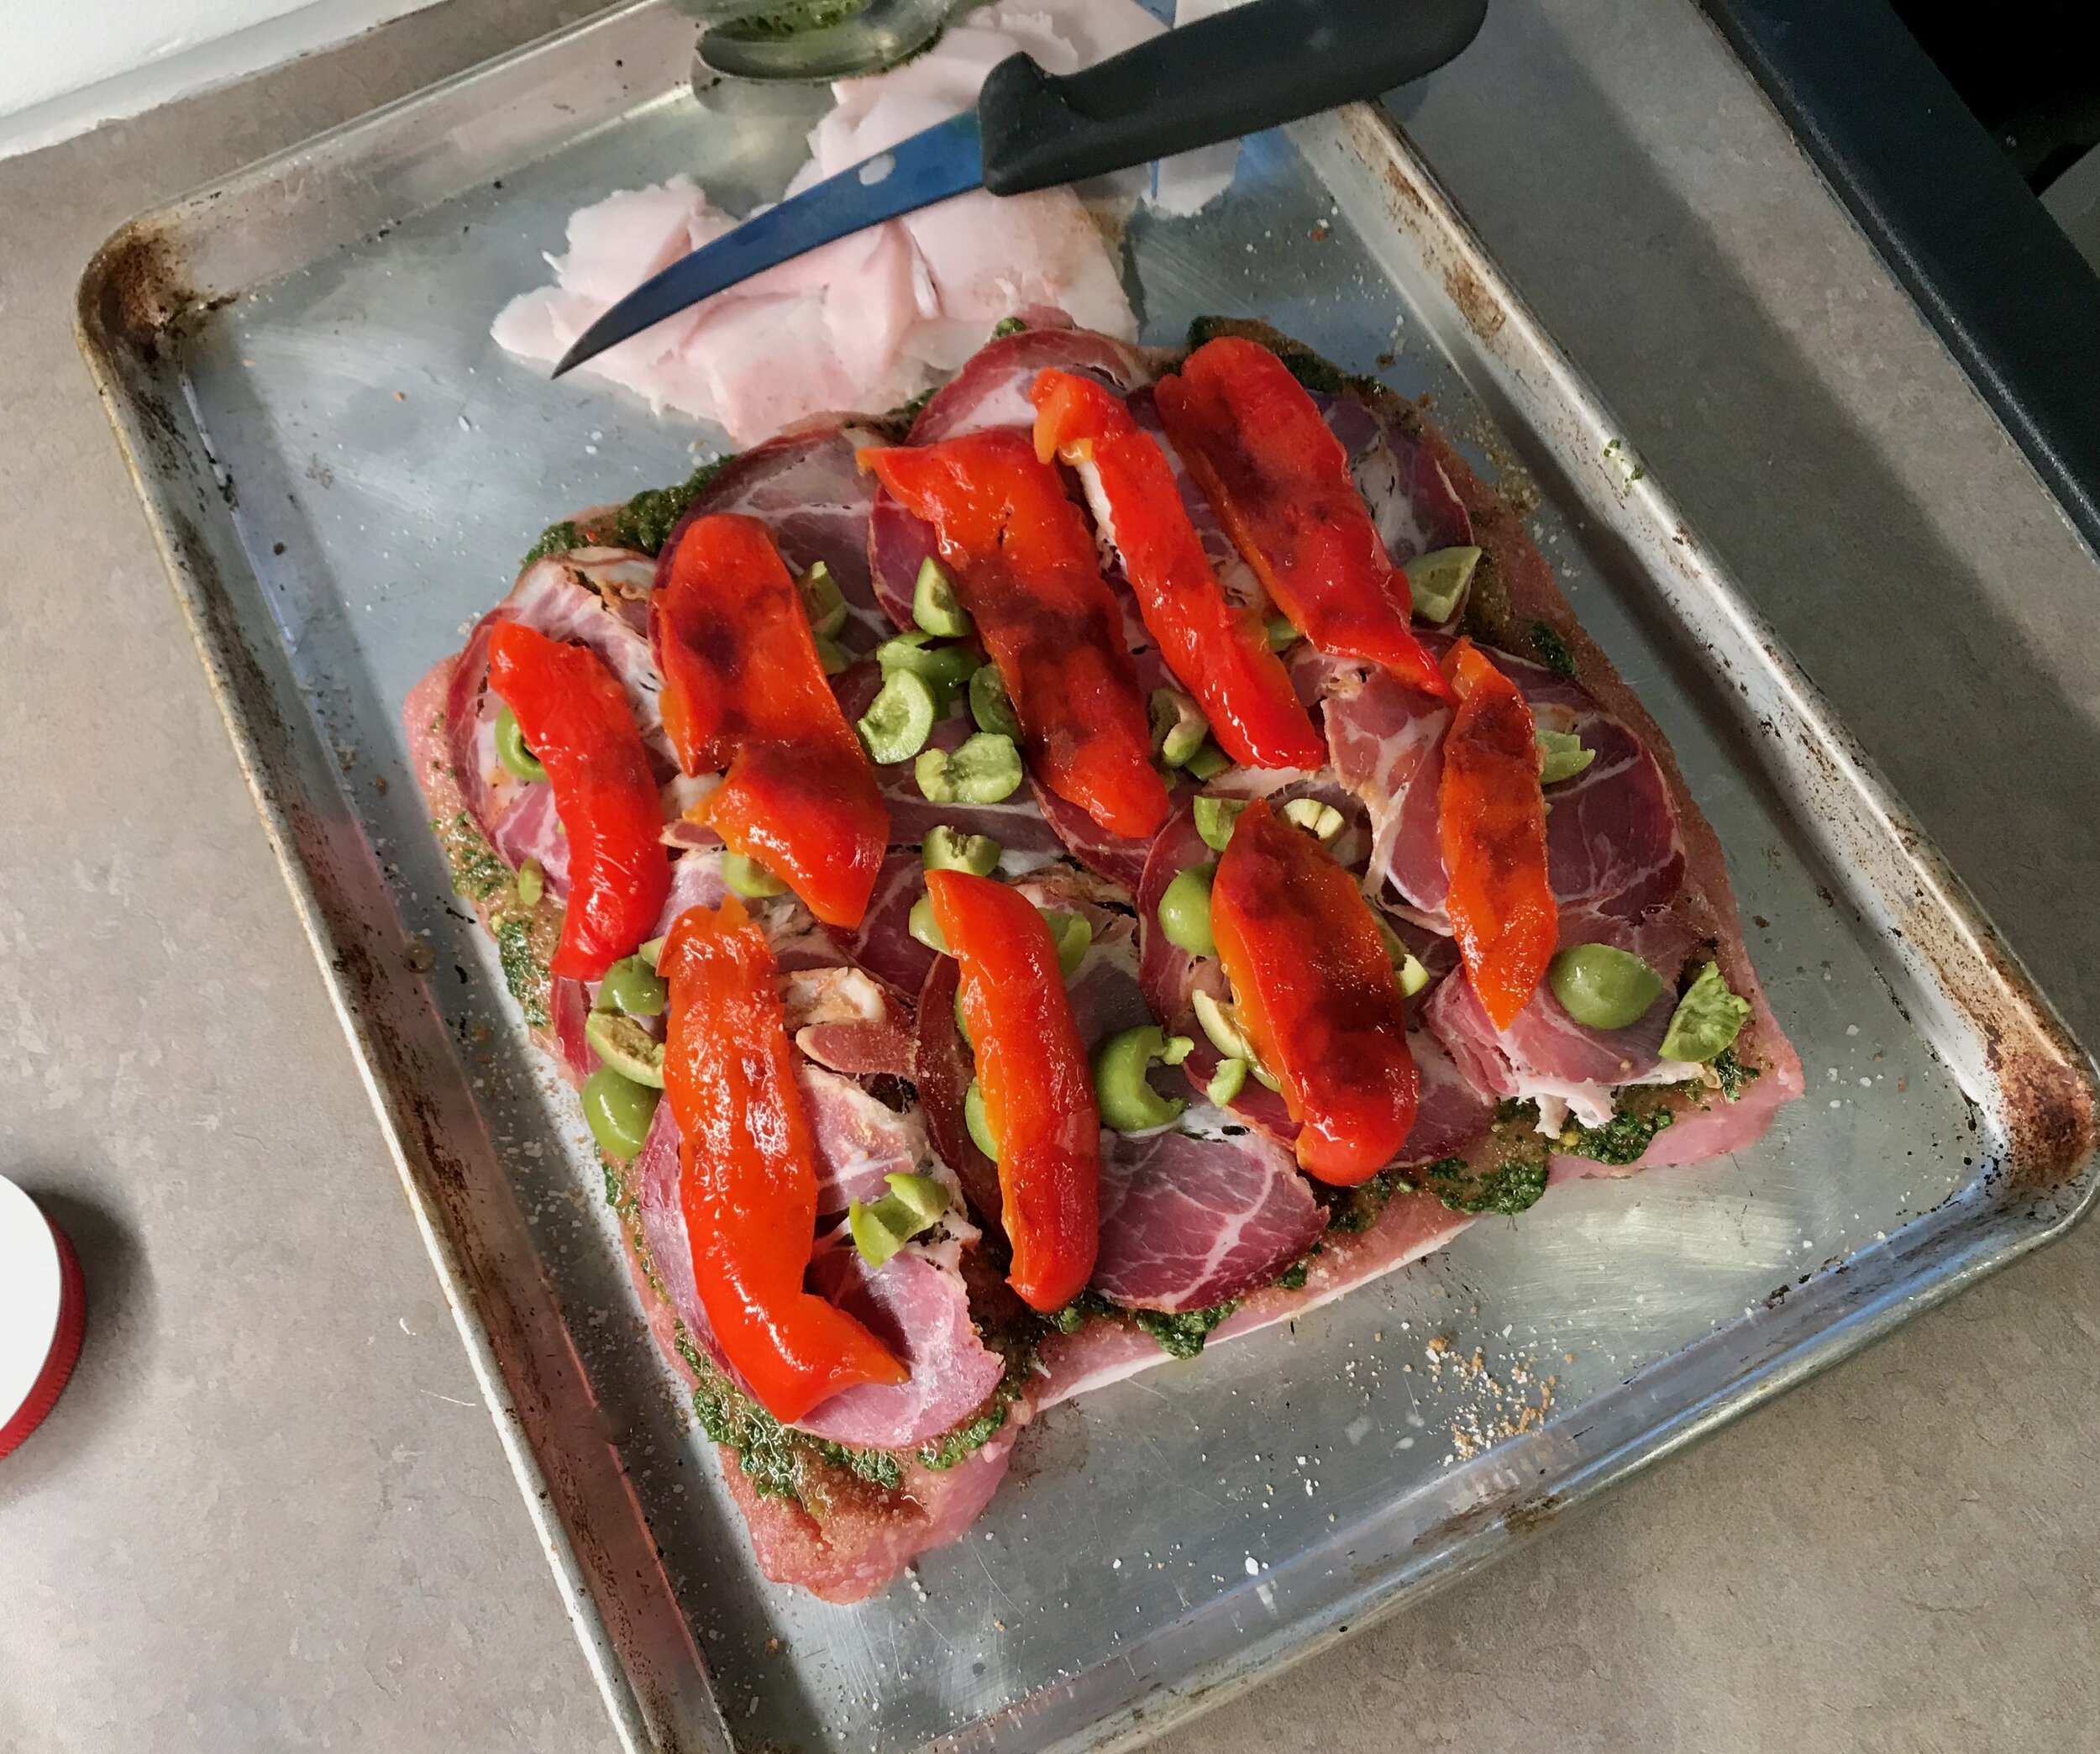
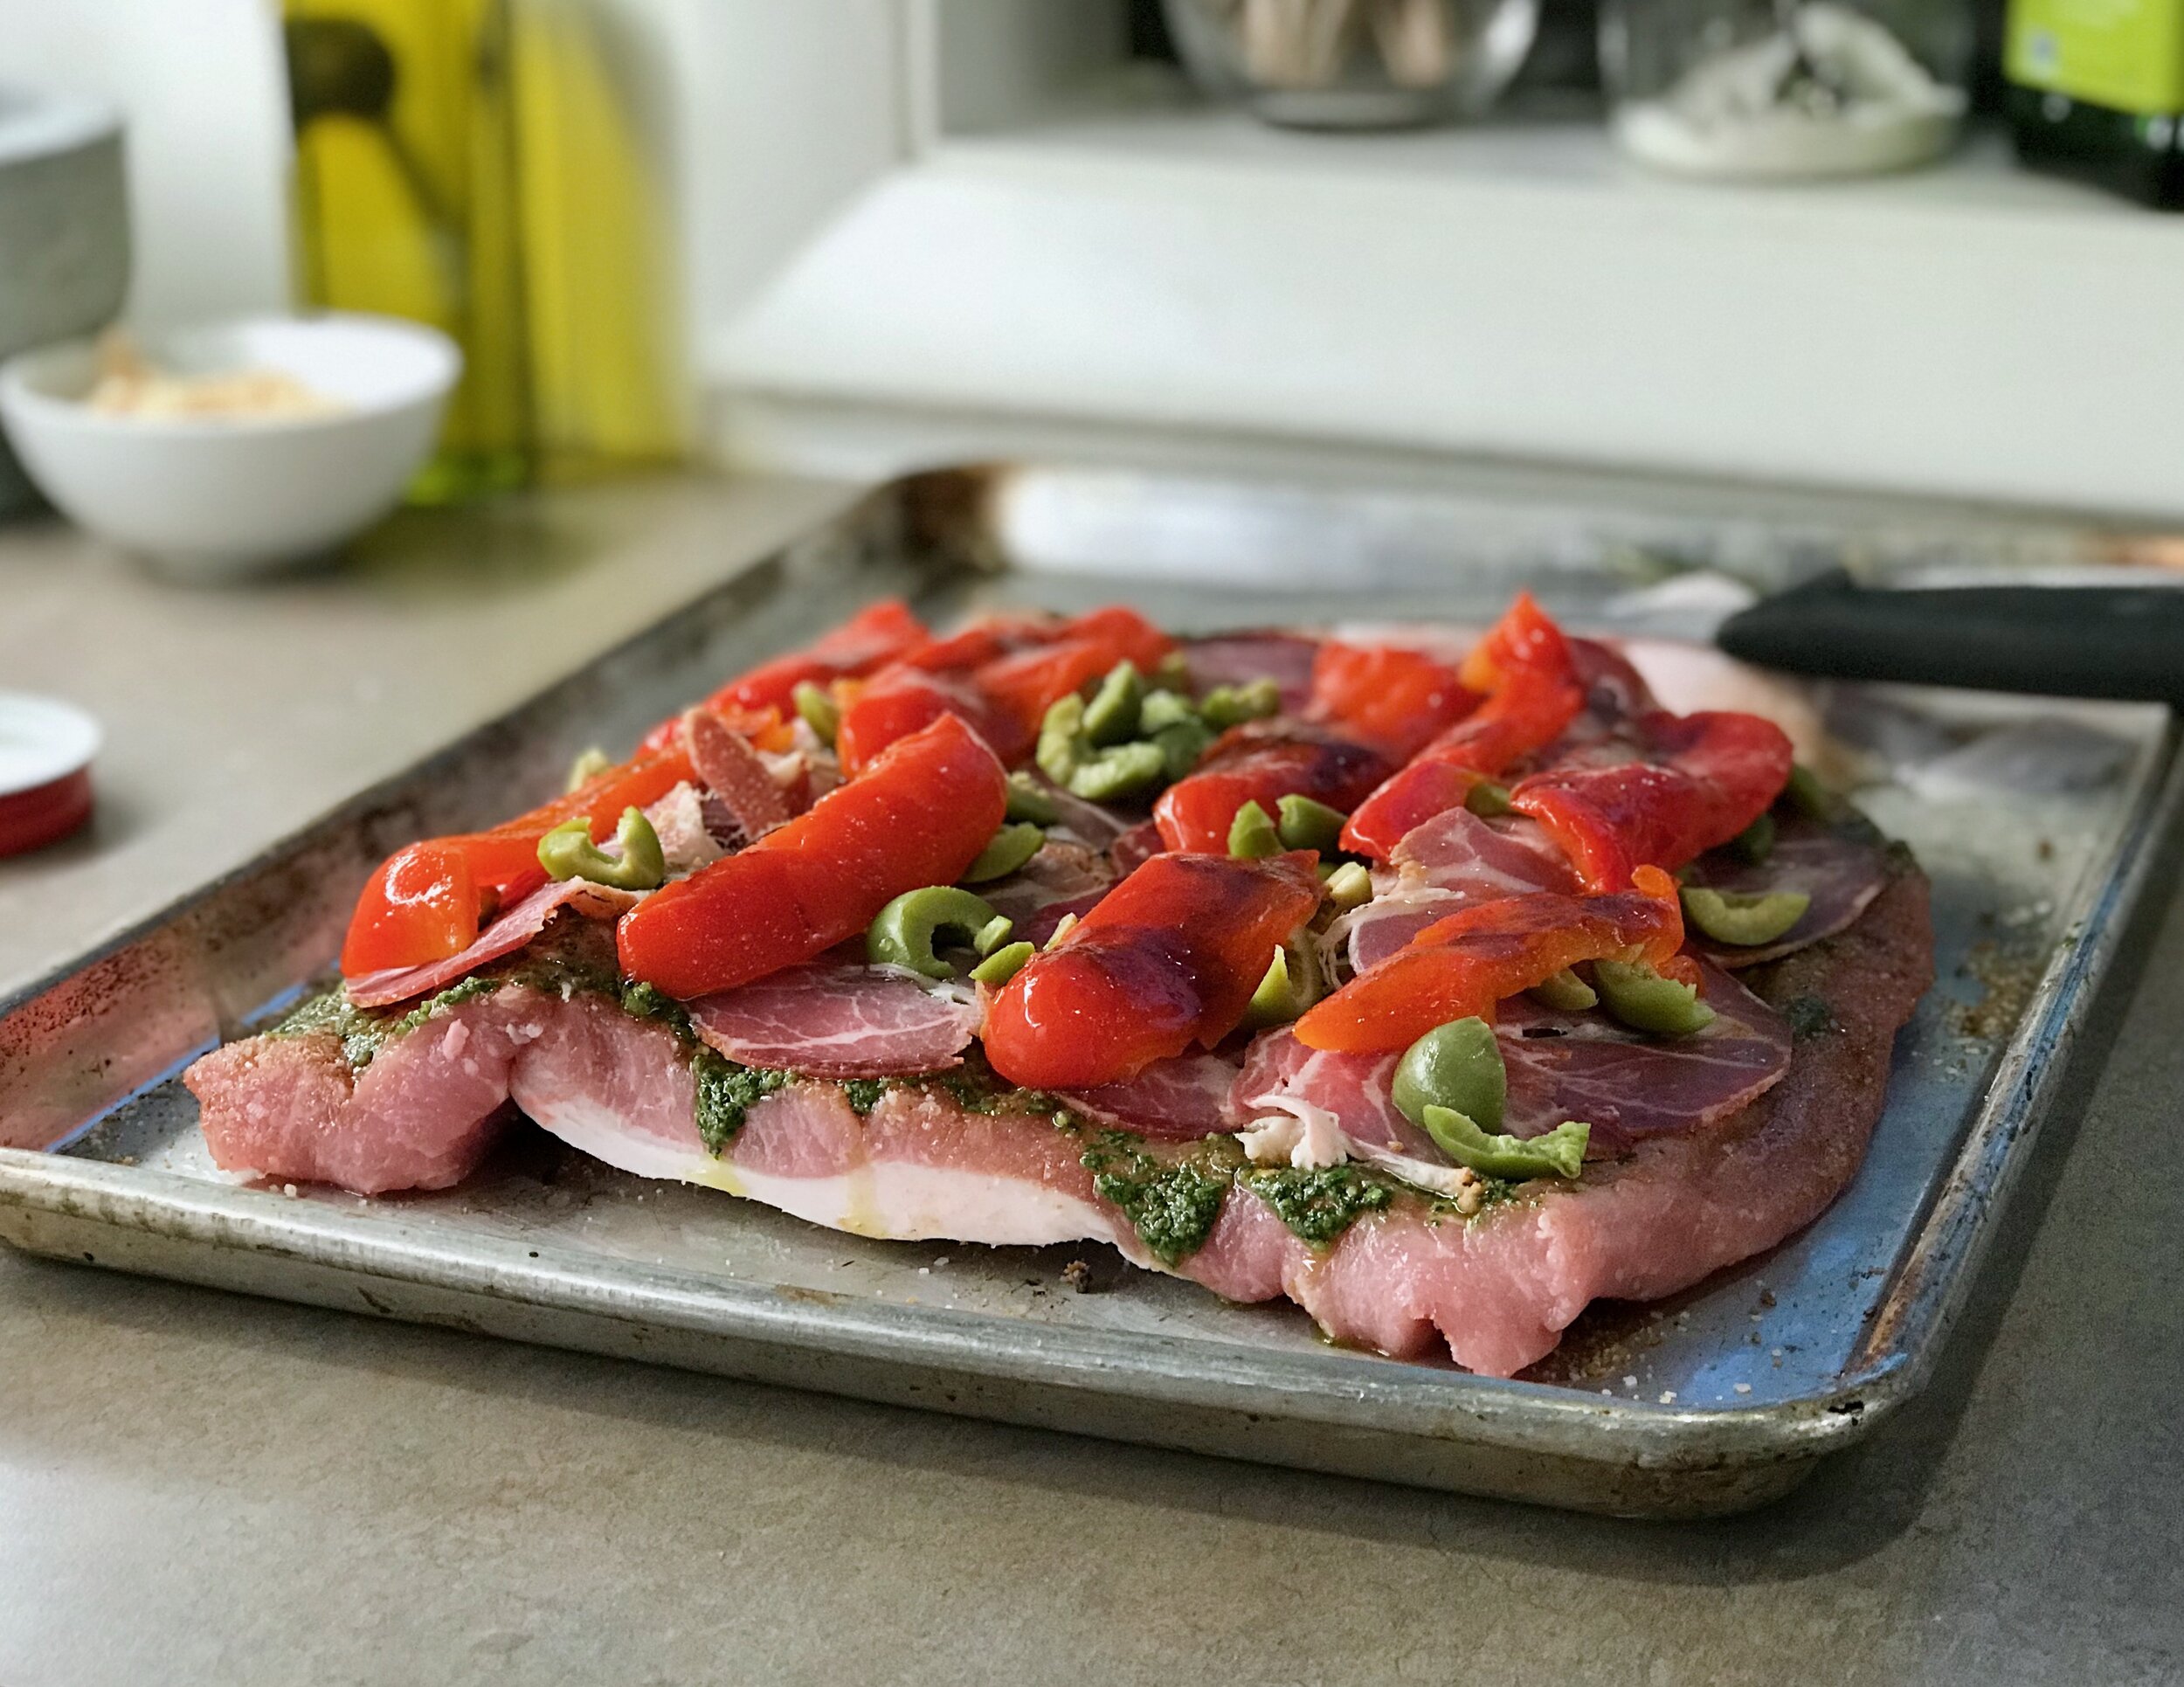
Once that step was done the rest was pretty easy. Just start layering everything, starting with the spice mixture and chimichuri, then the capicaola that you cover with the festive combination of green olives (I used castelvetrano olives) and roasted red peppers (I roasted my own, but jarred are easy and delicious. I ended up roasting two large red bell peppers and probably used just a little over half of this in the roast).

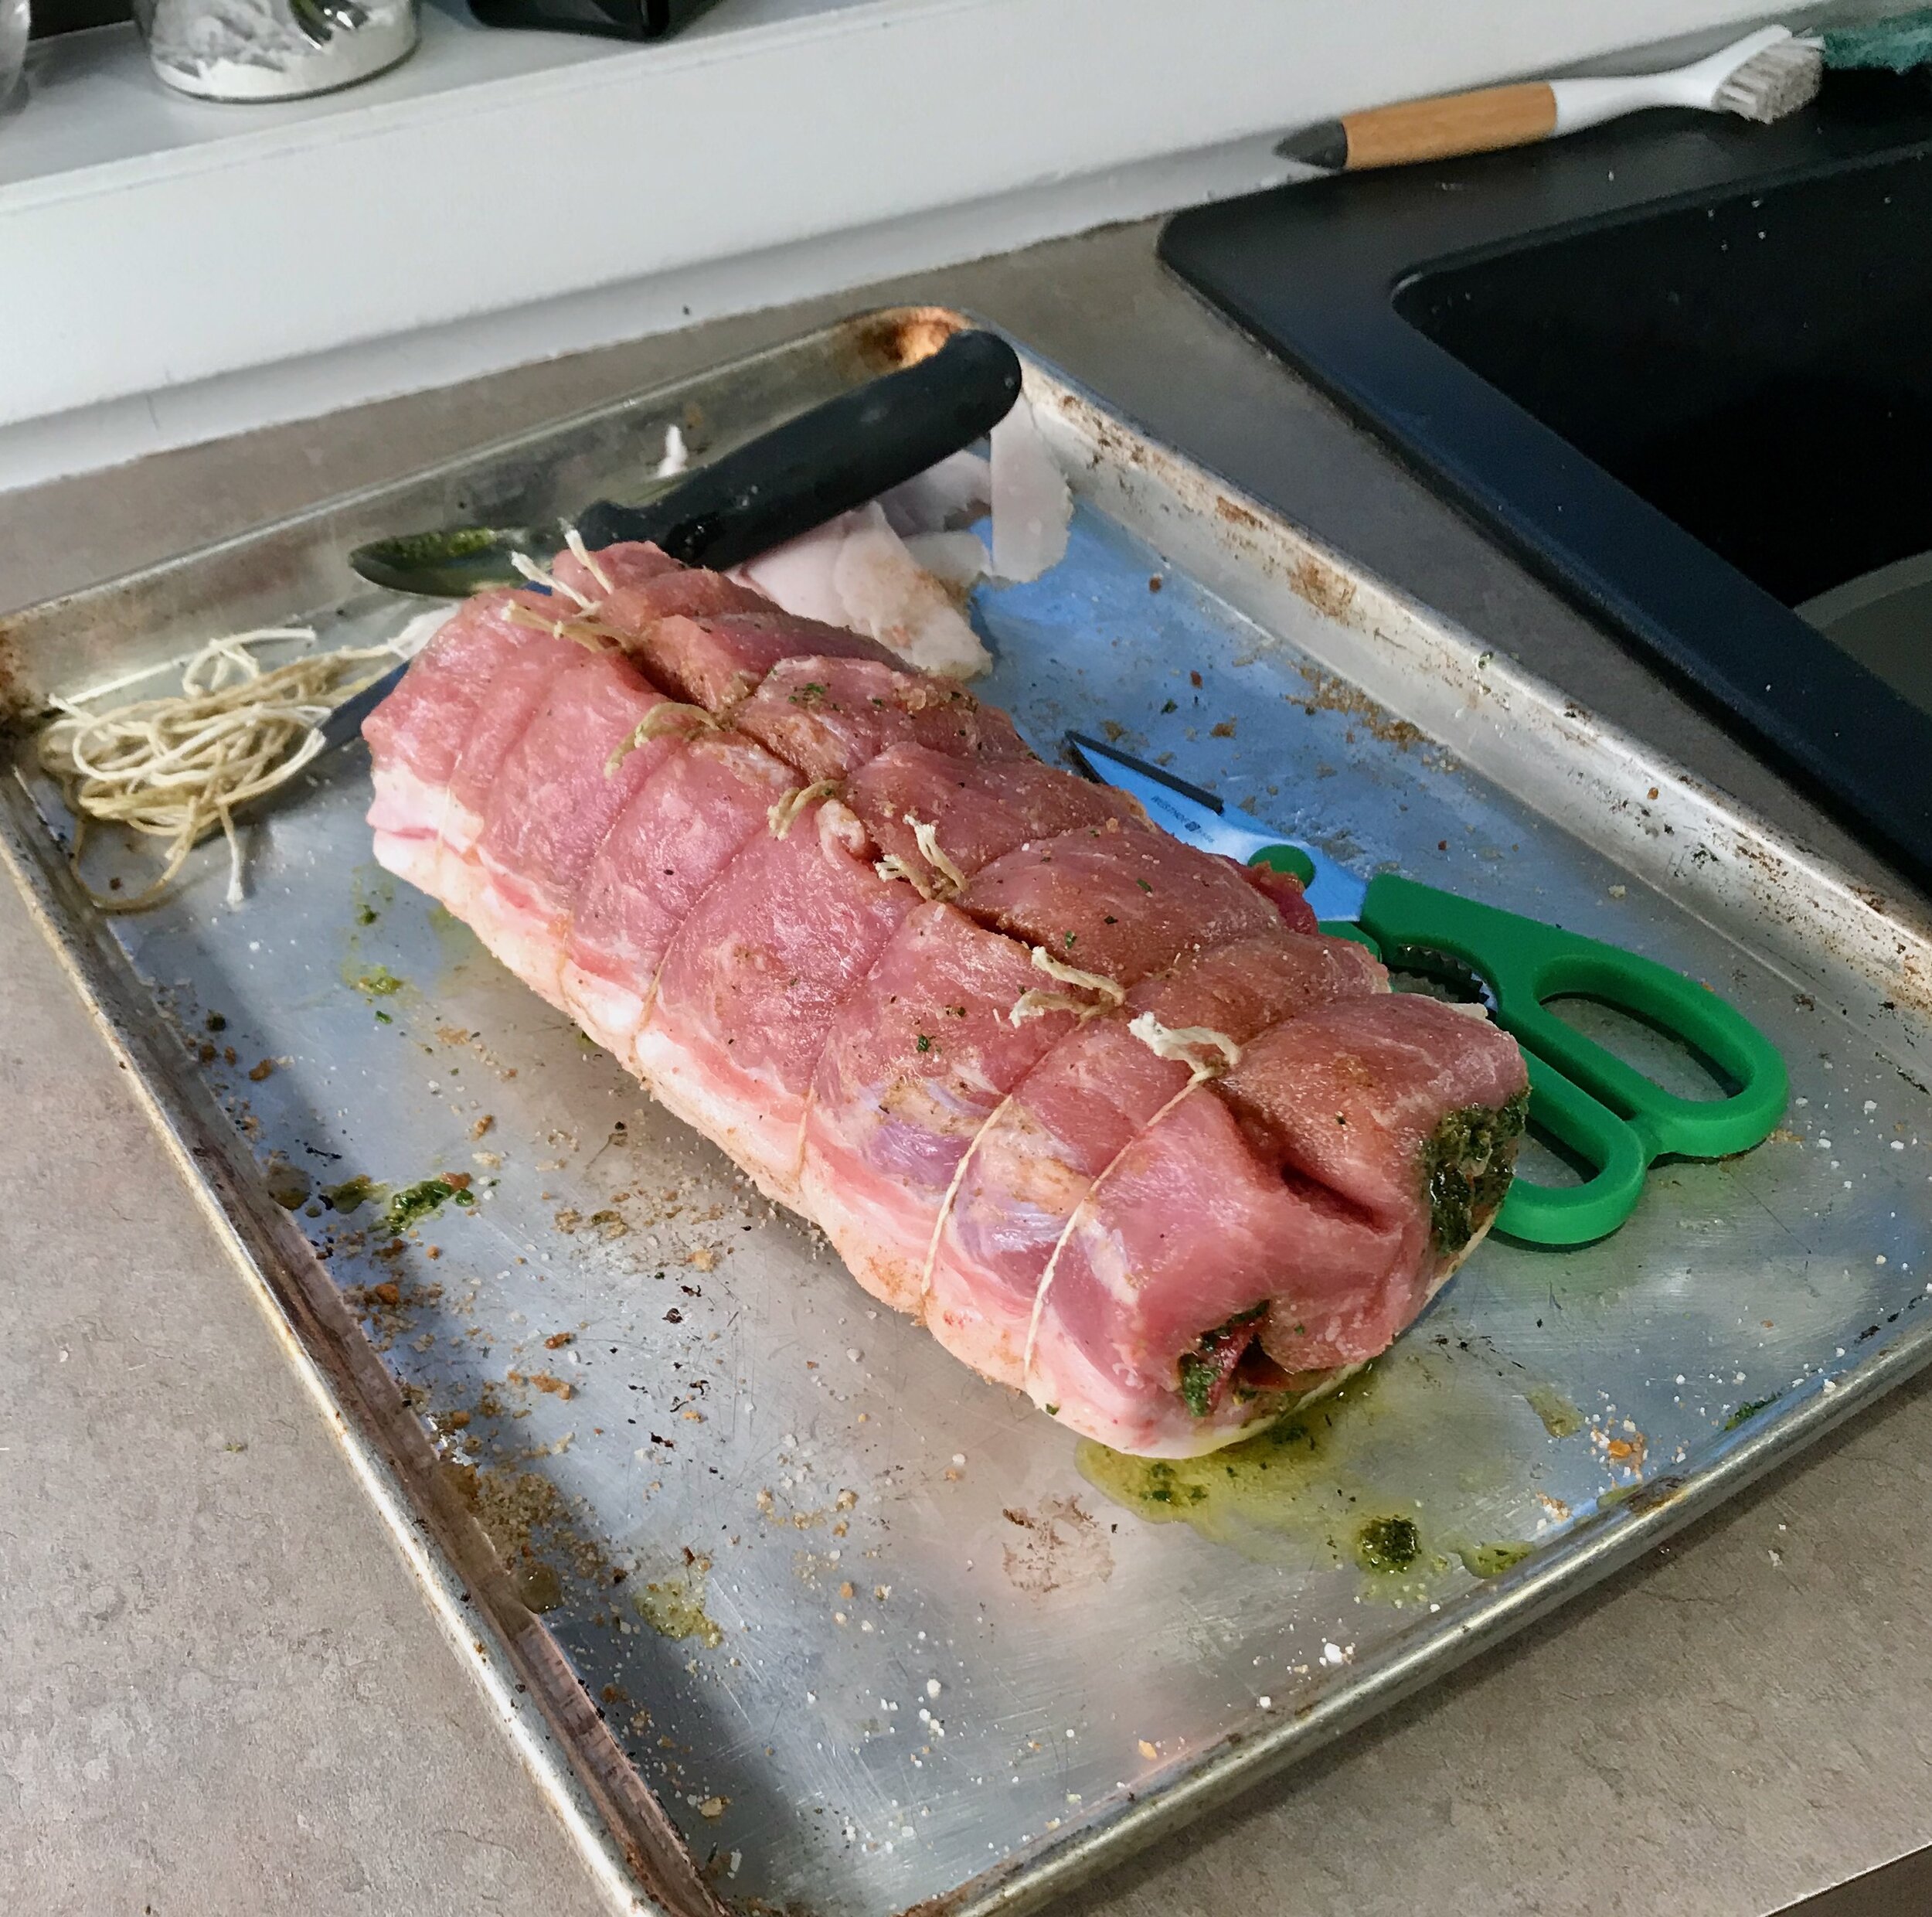
Roll it up and tie it tightly with butchers twine to keep everything in place. Place the finished product on a wire rack over a baking sheet and into the oven. I think this could all easily be done in advance, the day prior if desired. I don’t see why it would be a problem to refrigerate at this point if you want to make it easy on yourself the day you’ll be serving this.

IMG_0784.jpeg

I ended up baking the roast for a total of 1 hour and 28 minutes (not the 1.5-2 hours as stated in the recipe, but I did have a slightly smaller roast) - it came in at just over 135 degrees, a little over 140 degrees in a few spots, so probably could have come out a minute or two earlier, but I don’t think it was a big deal, it was not overcooked or dry at all. I let it rest about 15-20 minutes before slicing and it was perfect. The nice thing about something like this is that the timing isn’t so so crucial. It can sit and rest anywhere from 15 minutes to an hour, so you have a lot of flexibility.

IMG_9855 2.jpeg

I served the roast with a Celery Root salad with Brown Butter, Oranges, Dates, and Almonds from Joshua McFadden’s Six Seasons (one of my all time favorite cookbooks!), as well as some fresh sourdough bread that I baked earlier that morning. It was a perfect combination.

Final verdict? This was amazing. I couldn’t have picked a better recipe for our party. It was beautiful, smelled amazing while roasting, and was one of the best tasting things I have made all year. I will definitely be making it again. The fat cap was crispy and fatty and basted the entire roast. The filling was perfect, an amazing combination of flavors as well as some texture differences.

Highly recommended for your next party!


Stuffed Pork Loin with Chimichurri
From 177 Milk Street
Ingredients

For the Chimichurri:

  • 3 cups lightly packed fresh flat-leaf parsley

  • 1/3 to 1/2 cup lightly packed fresh oregano

  • 7 medium garlic cloves, smashed and peeled

  • 1 1/2 teaspoons ground cumin

  • 1 1/2 teaspoons ground coriander

  • 3/4 teaspoon red pepper flakes

  • Kosher salt and ground black pepper

  • 1/4 cup red wine vinegar

  • 3/4 cup (6 ounces) extra-virgin olive oil

For the Roast:

  • 1 tablespoon ground cumin

  • 1 tablespoon ground coriander

  • 2 teaspoons packed light brown sugar

  • Kosher salt and ground black pepper

  • 4 -pound boneless center-cut pork loin

  • 6 ounces thinly sliced capicola or mortadella

  • 1/2 cup pitted green olives, roughly chopped

  • 1 1/2 cups drained roasted red peppers, patted dry and torn into large pieces

  • 1/3 cup panko breadcrumbs

  • 3 hard-cooked large eggs, peeled and halved crosswise (optional in my opinion, I did without and it was just fine)

  • 1 1/2 tablespoons extra-virgin olive oil

  • Flaky sea salt, to serve (optional)

Directions
To prepare the Chimichurri: in a food processor, combine the parsley, oregano, garlic, cumin, coriander, pepper flakes, 1 teaspoon salt and ½ teaspoon black pepper. Process until finely chopped, 30 to 45 seconds. Scrape the bowl, add the vinegar and oil, then process until as smooth as possible, 45 to 60 seconds. Measure ¼ cup of the chimichurri into a small bowl and set aside; transfer the remainder to a serving bowl; cover and refrigerate until ready to serve.

Heat the oven to 350°F with a rack in the lower-middle position. Line a rimmed baking sheet with extra-wide foil and a fit with a wire rack.

To prepare the roast: in a small bowl, stir together the cumin, coriander, brown sugar, 3½ teaspoons salt and 1½ teaspoons pepper. Set aside. Heat the oven to 350°F with a rack in the lower-middle position. Line a rimmed baking sheet with extra-wide foil and a fit with a wire rack. To prepare the roast, in a small bowl, stir together the cumin, coriander, brown sugar, 3½ teaspoons salt and 1½ teaspoons pepper. Set aside.

Cut eight 24-inch lengths of kitchen twine. Place the roast fat side down on a cutting board, perpendicular to the counter's edge. With a sharp boning or carving knife, cut along the length of the roast, down its center, stopping about ½ inch from the bottom. Starting at the base of the cut and with the knife blade held as parallel as possible to the cutting board, slice along the length of the roast, unrolling the meat with your free hand as you go. Continue cutting and unrolling the meat until the half is a flat, fairly even surface ½ to ¾ inch thick. Rotate the roast 180° and repeat with the second side. If there are areas that are slightly too thick, use a meat mallet to pound those areas to the same thickness.

Season the pork on both sides with the spice mixture. Place the meat fat side down and with a short side nearest you. Spread the reserved ¼ cup chimichurri evenly on the meat. Shingle on the capicola slices, covering the entire surface, then sprinkle evenly with the olives. Lay the red peppers on top, tearing as needed to cover the entire surface. Sprinkle evenly with the panko. Place the egg halves cut sides down in a row about 3 inches from the bottom edge. Lift the bottom edge over the eggs and continue rolling the meat into a tight cylinder. Position the cylinder seam side down and tie at even intervals with the twine, then snip off excess twine. If any bits of filling fall out, simply tuck them back in. Brush the roast on all sides with the oil.

Transfer the roast fat side up to the prepared baking sheet. Bake until the top is nicely browned and center of the roast reaches 135°F, 1½ to 2 hours. Let rest on the wire rack for 30 to 60 minutes. Remove the chimichurri from the refrigerator about 30 minutes before serving. Cut the roast into ½-inch-thick slices, removing the twine as you go. Arrange the slices on a platter, sprinkle with flaky salt (if using) and serve with chimichurri.

Tip: Don't trim the fat off the pork loin. The fat cap lends richness to an otherwise lean cut and gives the roast an appealing burnished-brown appearance. Don't rush when butterflying the pork loin. Short, small cuts allow for the best control so you can maintain an even slice and adjust as you go. Don't worry if the surface of the butterflied meat is not perfectly flat or even; it won't matter in the finished dish.

Christmas Cookies - 2015

Almost a week later, but here it is, the last of my Christmas cookie posts, and probably the most anticipated! Every year my sister Lara pulls out the meringue powder and whips up a batch of sugar cookies beautifully decorated with royal icing. This year was no exception. And even though she had to whip these together pretty quickly this year, they still turned out just as gorgeous as ever. Enjoy!

Check out previous year's decorated Christmas cookies for ideas and recipes

2011

2012

2013

Chocolate Peppermint Cookies

I have to quick share these cookies while the sweet memories of Christmas are still not too far from everyone's minds. They were one of the cookies on the Christmas cookie platter this year, and were included in the bags I delivered to the neighbors. I do have to say that they were absolutely fantastic! A great double chocolate cookie is difficult to find. I've shared several on the blog, and while I adore my Death by Chocolate Chip Cookies, they have so much melted chocolate in them that they can be a little more expensive to make, not to mentioned incredibly rich (not that I'm complaining!). Finding a recipe with just cocoa powder has left me disappointed in the past, but these cookies are not included in that disappointment. 

These cookies are thick, soft, and super chocolatey. The addition of peppermint extract around the holidays is a wonderful touch, but they can be made without the mint flavor at any time of year. Throw in some espresso powder instead if you have it, another great combo. Dipping in some white chocolate sprinkled with candy canes was the perfect touch for Christmas, it really ups the festiveness of these already amazing cookies.

The only thing you want to make sure of when making these cookies is that you have at least a couple of hours to let the dough chill in the fridge before you shape into balls and bake. The dough is just too soft when it is first made. As long as you have the extra time these cookies are quick and easy to make. They really are a favorite of mine, a new go-to recipe when all I need is chocolate!

Chocolate Peppermint Cookies
Adapted from Sally's Baking Addiction
Ingredients

  • 1/2 cup (115g) unsalted butter, softened to room temperature
  • 1/2 cup (100g) granulated sugar
  • 1/2 cup (100g) packed light or dark brown sugar
  • 1 large egg, at room temperature
  • 1 teaspoon pure vanilla extract
  • 1 teaspoon peppermint extract
  • 1 cup (125g) all-purpose flour 
  • 1/2 cup + 2 Tablespoons (53g) unsweetened cocoa powder
  • 1 teaspoon baking soda
  • 1/8 teaspoon salt
  • 1 cup (180g) semi-sweet chocolate chips
  • 4 ounces white chocolate, coarsely chopped
  • 1-2 large candy canes, crushed

Directions
In a large bowl using a hand-held mixer or stand mixer fitted with a paddle attachment, beat the butter for 1 minute on medium speed until completely smooth and creamy. Add the granulated sugar and brown sugar and beat on medium high speed until fluffy and light in color. Beat in egg, vanilla and peppermint extracts on high speed. Scrape down the sides and bottom of the bowl as needed.

In a separate bowl, whisk the flour, cocoa powder, baking soda, and salt together until combined. On low speed, slowly mix into the wet ingredients until combined. The cookie dough will be quite thick. Switch to high speed and beat in the chocolate chips. The cookie dough will be sticky. Cover dough tightly with aluminum foil or plastic wrap and chill for at least 3 hours and up to 3 days. Chilling is mandatory for this cookie dough.

Remove cookie dough from the refrigerator and allow to sit at room temperature for 20 minutes - if the cookie dough chilled longer than 3 hours, let it sit at room temperature for about 30 minutes. This makes the cookie dough easier to scoop and roll.

Preheat oven to 350°F (177°C). Line baking sheet with parchment paper. Set aside.

Scoop dough (I liked about 25 grams of dough each, if you have a scale, I made a few larger one first at 50 grams and I actually liked the look of the smaller cookies better) and roll into balls and place on the baking sheet.

Bake the cookies for 10-12 minutes rotating once during bake time. The baked cookies will look extremely soft in the centers when you remove them from the oven. Allow to cool for 5 minutes on the cookie sheet. They will slightly deflate as you let them cool. Transfer to cooling rack to cool completely.

Melt the chopped white chocolate in a microwave: placing the chocolate in a medium heat-proof bowl. Melt in 15 second increments, stirring after each increment until completely melted and smooth. Dip each completely cooled cookie halfway into the white chocolate and place onto a parchment or silicone baking mat-lined baking sheet. Sprinkle crushed candy canes on top of the chocolate. Repeat with the rest of the cooled cookies. Place the baking sheet into the refrigerator to help the chocolate set. Once set, enjoy!

Cardamom Walnut Snowballs

It's Christmas week and I'm on break! I've been taking advantage of my free time by doing one of my favorite things - baking Christmas cookies! Since I have so much to share and only a few more days to do that yet, I'm going to post a couple additional recipes this week. Today I'm sharing these festive cardamom walnut snowballs. They are really quick and easy to make, and they are absolutely delicious, plus, they're just so darn cute! And since there's not even a hint of snow on the ground (it's going to be 60 today!! What??) these cookies are the only way we're going to have a white Christmas this year! 

These little butter cookies are melt-in-your-mouth tender, buttery and nutty, and not overly sweet. It's a perfect combination. I love the mild walnut flavor combined with the somewhat citrusy, herbal character of the cardamom. If you don't have any cardamom you can skip it, but I highly recommend getting some and giving it a try if you haven't tried it before. All-in-all, a wonderful addition to your Christmas cookie platter!

Other than grinding up some walnuts, this is a super basic recipe. Cream some butter and sugar, add in the dry ingredients, mix it up and you're good to go. There's not even any eggs. Once the cookies are cool you just roll them in some powdered sugar and you're done. You can roll them a second time in the sugar to get an extra heavy dusting, or just leave them after the first time. They're cute and delicious either way!

Cardamom Walnut Snowballs
Adapted from American Heritage Cooking
Ingredients

  • 1 cups all-purpose flour
  • 1 cups finely chopped walnuts, divided
  • 1 teaspoons ground cardamom
  • 3/8 teaspoon salt
  • 1 stick butter
  • 1/4 cup granulated sugar
  • 3/4 teaspoons vanilla extract
  • 3/4 cups powdered sugar, for coating

Directions
Preheat oven to 325°. Line two baking sheets with parchment paper. 

In a food processor pulse half of the walnuts until they are finely chopped; remove and set aside. Add the remaining nuts to the food processor and pulse until medium grind (no big chunks remain).

In a medium bowl combine the flour, walnuts, cardamom and salt; whisk to combine. Set aside. 

In a stand mixer, cream the butter and sugar together until light and fluffy, scraping the sides of the bowl as needed. Beat in the vanilla until well combined. Add all the flour mixture and mix on low speed until the dough just comes together.

Use a tablespoon cookie scoop to scoop the dough and then roll into balls.

Bake until the bottoms are golden and the tops are beginning to brown, 15-18 minutes. Be careful not to over-bake them or they will be dry and crumbly.

Cool the cookies 2 minutes on the baking sheet before transferring to wire racks to cool completely. Place powdered sugar in a large plastic bag. Working with two cookies at a time. Toss gently to coat and place back on the wire rack.

Allow the cookies to sit at least an hour, up to overnight, and then repeat the tossing in powdered sugar.

Yields: 24 cookies

Cranberry Pistachio Biscotti

School is out! And that means one thing - it's Christmas cookie time! I love holiday baking and now that I am free for 2 weeks it is time to fire up the oven and get the cookie party started! This year is bittersweet to me because it is my last official "Christmas break". I think I may cry a small tear. I know, most people don't get a Christmas break until they're 28 but when you're in school for forever you have to find small victories once in a while! So I'm going to revel in this last official break and enjoy every minute of it. 

I've made a few batches of cookies this weekend and the first one I want to share is this cranberry pistachio biscotti. If you take a look around my blog you might notice that I have quite a few biscotti recipes, I just love the stuff. It's so easy and delicious, and something a little different from the norm. The instant I saw this festive biscotti pop up I knew it was on the list for 2015. I wasn't disappointed, and I don't think you will be either. So grab you own mixer and start baking!

This was a new recipe for me, which always makes me just a little bit nervous. You never quite know how much biscotti is going to spread. But there was no need to worry here, the cookies baked up beautifully. My only disappointment was not having quite enough pistachios to fold in. I threw in what I had and just made the best of it, but if you can, try to get the entire 3/4 cup mixed in. It just adds even more to the festiveness of this deliciously crunchy cookie. 

Cranberry Pistachio Biscotti
Adapted from Sally's Baking Addiction
Ingredients

  • 2 and 1/4 cups (280g) all-purpose flour 
  • 1 cup (200g) packed brown sugar 
  • 1 teaspoon baking powder
  • 1/2 teaspoon ground cinnamon
  • 1/2 teaspoon salt
  • 1/4 cup (60g) unsalted butter, cold and cubed
  • 3 large eggs
  • 1 Tablespoon vegetable or olive oil 
  • 1 teaspoon vanilla extract
  • 3/4 cup (75g) pistachios
  • 3/4 cup (120g) dried cranberries
  • Egg wash: 1 large egg beaten with 1 Tablespoon milk

Directions
Preheat oven to 350°F (177°C). Line two large baking sheets with parchment paper. Set aside.

Whisk the flour, brown sugar, baking powder, cinnamon, and salt together in a large bowl until combined. Add in the cold butter and mix until mixture is crumbly. Set aside. In a medium bowl, whisk the eggs, oil, and vanilla together. Pour into the flour/butter mixture and mix until everything is just barely moistened. Fold in the pistachios and dried cranberries.

Turn dough out onto a lightly floured surface, and with floured hands, knead lightly until the dough is soft and slightly sticky, about 8-10 times. If it's uncontrollably sticky, knead 1-2 more Tablespoon(s) of flour into the dough. With floured hands, divide the dough in two and place each half onto a baking sheet. Shape each half into an 8-9 inch long roll, patting down until each is about 1/2 inch thick. 

Using a pastry brush, lightly brush the top and sides of each biscotti slab with egg wash.

Bake in batches (or together) for 25-26 minutes, or until the top and sides of the biscotti slabs are lightly browned. Remove from the oven, but do not turn off the heat. Allow to cool for 10 minutes. 

Once the slabs are cool enough to handle, cut each into 1 inch thick slices. Set slices cut sides upright, ¼ inch apart, on the baking sheets. Return to the oven to continue baking for about 20 minutes, rotating the pan once while baking. The cookies may be slightly soft in the centers with harder edges. Remove from the oven and allow to cool for 5 minutes on the baking sheet. Then transfer to a wire rack to cool completely. As the biscotti cools, it becomes crunchy. 

Cranberry Dark Chocolate Gingerbread Muffins

It may be January, but I have one last Christmas-y recipe to share. I am a big gingerbread fan (as you could probably already tell from the  Gingerbread Bundt Cake I made for my big family Christmas party) but it seems to be something that is only eaten at Christmas, so I have to try and fit in as many different recipes during December as I can. Since I'm such a huge muffin fan I couldn't resist a gingerbread muffin of course. I decided to fill it with dark chocolate and fresh cranberries, one of my favorite combinations. Along with some molasses, spices and a little butter, this blend of flavors packs the perfect punch of flavor that can be enjoyed all winter long. 

Nothing fancy in this recipe, just a lot of nice add in's and spices that can be customized to your tastes. Don't have any fresh cranberries, how about dried cranberries? Or dried cherries for that matter. Try switching out the dark chocolate with some white chocolate, or skip the chocolate + fruit combination and throw in some cinnamon chips. Whatever you like and have on hand. That's what I love so much about muffins, they are so easy to adapt. So go ahead, have some fun!

Cranberry Dark Chocolate Gingerbread Muffins

Adapted from 

Sweet Phi

Ingredients

  • ½ stick (4 tablespoons) butter, melted (I've also replaced 2 tablespoons of butter with 2 tablespoons Greek yogurt and they still turn out great!)
  • ½ cup milk
  • 2 tablespoons molasses
  • 1 egg
  • 1 teaspoon vanilla extract
  • 1¾ cups flour
  • ¼ cup brown sugar
  • ¼ cup granulated sugar
  • 1 teaspoon baking soda
  • 1 teaspoon cinnamon
  • ½ teaspoon ginger
  • ½ teaspoon salt
  • ¼ teaspoon all spice
  • 1 cup fresh cranberries, finely chopped
  • 1/4 cup dark chocolate, finely chopped

Directions

Preheat oven to 350 degrees. Line a muffin pan with liners. 

In a microwave safe bowl microwave butter for 30 seconds, then remove from microwave and add milk, molasses, egg and vanilla. Whisk until combined, it's ok if there are a few lumps.

In another bowl add all dry ingredients except the cranberries and chocolate. Add wet ingredients to dry and stir a few times, then add the cranberries and chocolate, mixing until everything is just combined, don't over-mix. Spoon batter into muffin liners. Bake for 15-18 minutes, remove from oven and allow to cool.

Yields: I got 10 medium sized muffins

Christmas Morning Breakfast Wreath

Today I'm excited to share one of the most beautiful and delicious recipes I've ever made. Last week I went to one of my favorite bakeries because I had to get a loaf of their stollen before Christmas was over. I'd never actually tried stollen, but I knew I would love this dense, heavy fruitcake filled with boozy dried fruit and almond paste, covered in butter and sugar. I was right, it is one of the most delicious breads I have ever eaten. Inspired by this bread, I decided to make something along the same lines for my Christmas morning breakfast. This recipe that I found from The Kitchn was the reminiscent of a traditional stollen, but with a twist, perfect for a festive breakfast to celebrate Christmas morning.

The ingredient list may look long for this recipe, but it really isn't any more difficult than most yeasted breads. The whole concept is similar to making cinnamon rolls, but with a filling of dried fruit and almonds instead of cinnamon sugar. 

I actually halved the original recipe since there was only two of us to eat this cake and we certainly didn't need the whole recipe. There were no problems halving the recipe, the only thing that changed was that the wreath wasn't as big as the original, there wasn't much of a hole in the middle, but this this didn't affect the finished product in any way other than looks. 

The recipe called for the wreath to be baked for 25 minutes, but when I checked mine at this point it wasn't anywhere near being done. I ended up baking it for about 50 minutes total. I don't know where this discrepancy came from, but I thought my wreath was baked perfectly at 50 minutes, I don't know why it took double the time called for in the original recipe. The only thing I can think of is that since I halved the recipe and my wreath was much more compact, it took longer for it to cook through, but who knows. Regardless, this recipe turned out so absolutely delicious, the perfect way to start off my Christmas morning!

Christmas Morning Breakfast Wreath
Adapted from The Kitchn
Ingredients
For the bread:

  • 1 1/2-1 3/4 cups unbleached all-purpose flour
  • 1 1/2 tablespoons sugar
  • 3/4 teaspoons salt
  • 1/2 teaspoon cardamom powder
  • 1 teaspoon instant yeast
  • 1/2 teaspoons grated lemon peel
  • 1/2 teaspoon grated orange peel
  • 2 tablespoons butter, softened to room temperature
  • 2 tablespoons warm water 
  • 1/4 cup warm milk
  • 1 large egg, lightly beaten 

For the fruit-almond filling:

  • 1/3 cup dried cranberries, cherries, and/or raisins soaked in 1/2 cup brandy or other liqueur
  • 2-3 tablespoons butter, softened to room temperature
  • 2 1/2 tablespoons unbleached all-purpose flour 
  • 1/3 cup finely chopped almonds
  • 1 1/2 tablespoons sugar
  • 4 oz almond paste, crumbled
  • 1/2 teaspoon freshly grated lemon peel
  • 1/2 teaspoon freshly grated orange peel
  • 1/2 teaspoon almond extract

For the sugar glaze:

  • 1/2 cup powdered sugar
  • 1 tablespoons water
  • 1 teaspoon lemon juice
  • 1 teaspoon orange juice
  • 1/8 teaspoon cardamom powder

Directions
Prepare the dough: In the bowl of a stand mixer fitted with the dough hook, mix together the flour, sugar, salt, cardamom powder, yeast, lemon and orange peel. Add the butter, water, milk and egg and mix until starting to form a shaggy mass. Then turn on the mixer and knead until it forms a smooth and supple dough (add more water if it is too dry and more flour if it is too wet as needed).

Place dough in a lightly oiled mixing bowl large enough to accommodate dough when doubled in size. Cover with plastic wrap and let it rise in a warm place until doubled in bulk, about 1 1/2 hours.

Prepare the cranberry-almond filling: Drain the dried fruit from the liqueur and reserve the liqueur for another use. In a small bowl, combine the drained fruit with remaining filling ingredients. Cover and refrigerate.

Shape the dough: When dough has doubled in size, punch it down and turn it out onto a lightly floured board, kneading just enough to release any air bubbles. Roll the dough into a long rectangle. Crumble the filling over the dough to within 1 inch of the edges. Starting along a long side, tightly roll up the dough, pinching edge against loaf to seal. With a sharp knife, cut roll in half lengthwise. Carefully turn the halves so the cut sides are facing up, and then loosely twist the halves around each other, keeping cut sides up. (Check out the photos from The Kitchn if you're having a difficult time visualizing this.)

Line a baking sheet with parchment or non-stick baking mat. Carefully transfer the rope to the baking sheet and shape into a wreath, pinching the ends together to seal. Let it rise, uncovered, in a warm place until puffy, about 45 minutes. (Alternatively, place wreath immediately into the fridge and let it rise overnight. In the morning, remove from fridge and allow to come to room temperature, 1/2-1 hour before proceeding with baking.)

Preheat the oven to 350°F. Bake the wreath until lightly browned, 45-50 minutes. While the wreath is baking, stir together the ingredients for the glaze and set aside.

When wreath is done, transfer to a cooling rack by picking up the sides of the parchment and then sliding the parchment out from underneath. Cool for a few minutes then drizzle the glaze over the warm wreath. Serve with extra butter if you're feeling decadent.