Chocolate Coconut Crunch

ALERT: Highly Addictive Recipe!!! Be forewarned, you may end up eating the whole batch at once! If you're looking for something new and delicious to snack on, this is the recipe for you. Puffed kamut or rice (or other puffed grains) combined with coconut, cocoa and chocolate along with a little butter (mmmm!!) and maple syrup for sweetness and then baked turn out this addictive and delicious snack that you may not be able to stop eating! Don't say I didn't warn you!

This recipe has just the right amount of coconut to add richness and a hint of coconut flavoring without overwhelming the whole batch. Next time I make this I plan sprinkle some flake salt over the whole thing right before it goes in the oven for that wonderful salty/sweet combo. I used butter instead of coconut oil which is what the original recipe called for, and cut back just a little on the amount. I also decreased the maple syrup from 1/2 to 1/3 cup maple syrup and thought it was still plenty sweet. With the chocolate in there too I don't feel the need for as much maple syrup, but to eat their own! 1/4 cup? 1/2 cup? It really doesn't matter. What matters is how do you like it? I guess you'll have to try it and find out!


Chocolate Coconut Crunch
Adapted from Alexandra Cooks
Ingredients

  • 1 1/2 cup (120 grams) oats
  • 2 cups (30 grams) puffed kamut, alternatively you can use brown rice cereal or Rice Krispies
  • 1/2 cup (35 grams) shredded coconut
  • 3 tablespoons (15 grams) cocoa powder
  • 1/2 teaspoon salt
  • 3 tablespoons (42 grams) butter or coconut oil
  • 1 1/2 ounces chocolate
  • 1/3 cup (110 grams) maple syrup

Direction
Preheat oven to 275ºF. In a large bowl, combine oats, puffed kamut or rice cereal, coconut, cocoa powder, and salt. Toss to combine.

Place the butter or coconut oil and dark chocolate together in a small bowl and microwave until completely melted. Stir to blend; then add to dry ingredients along with the maple syrup. Stir until well combined.

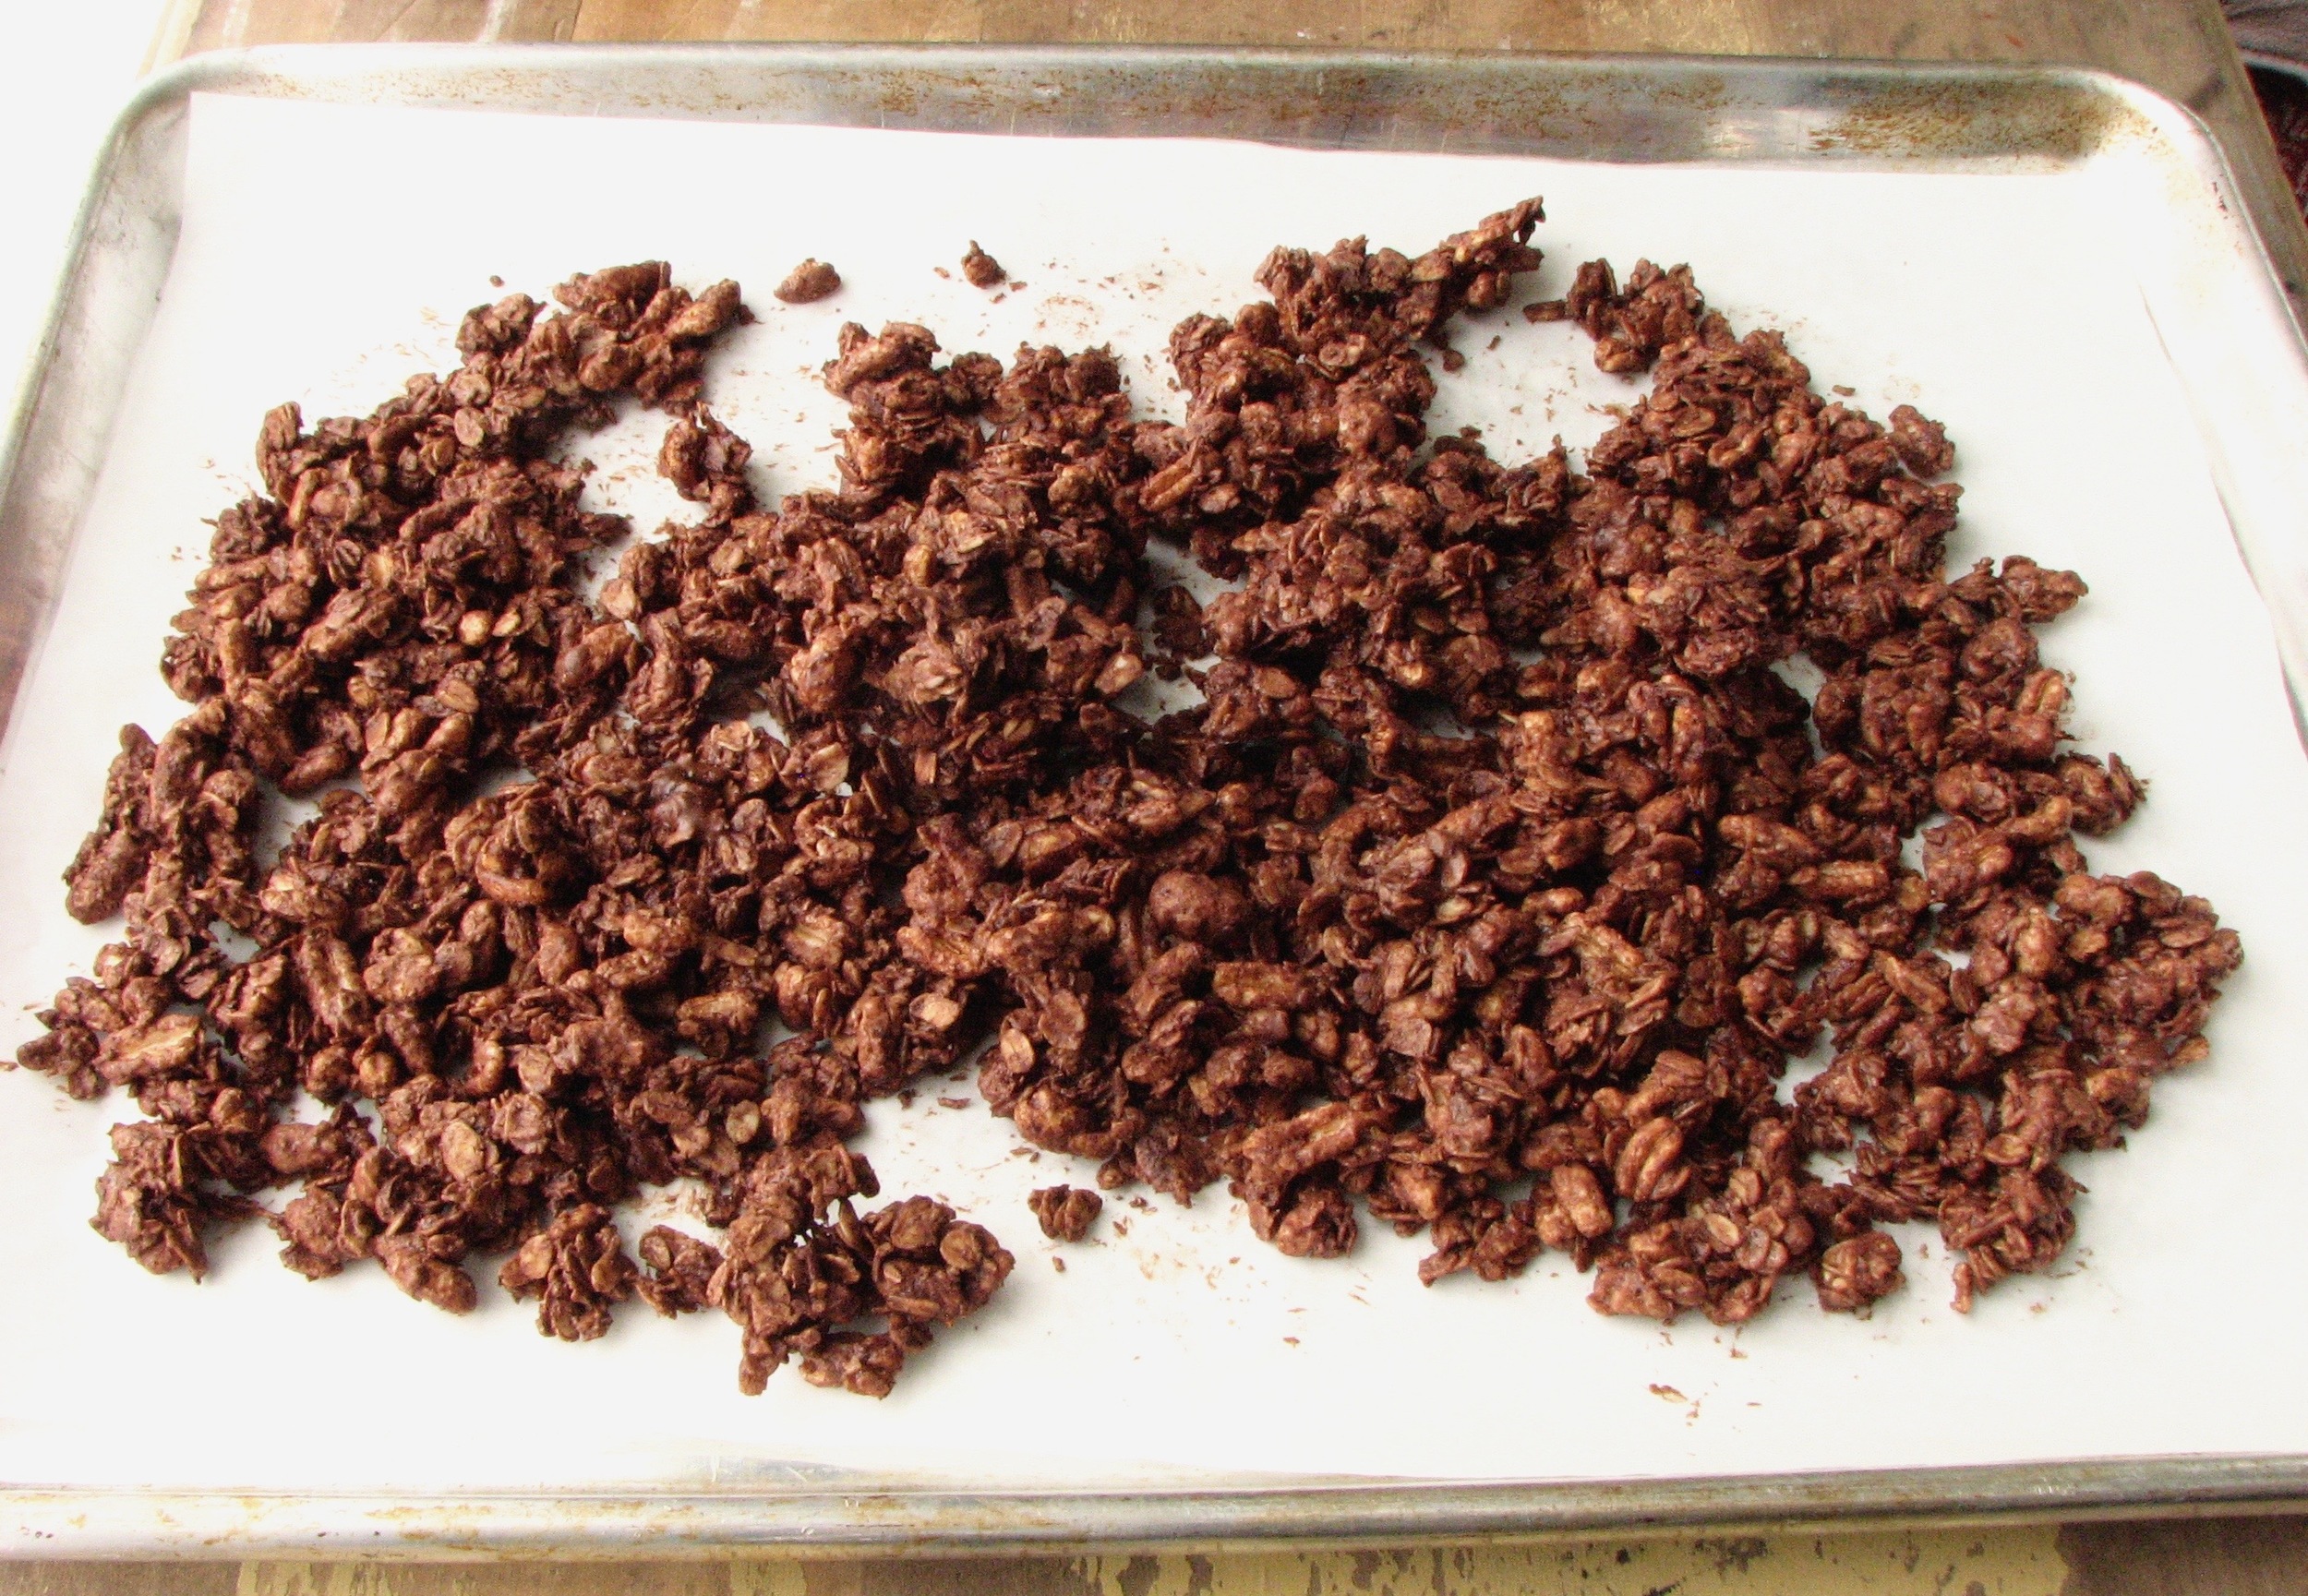
Turn mixture out onto a parchment-lined baking sheet. Spread into an even layer. Cook 35-40 minutes, rotating baking sheet halfway through. To maintain large chunks, do not stir the mixture. Remove from oven and let cool. Break into shards or into small pieces.

Gratin of Zucchini, Rice and Corn with Cheese

I was browsing through my Instagram feed earlier last week when I came across a photo for a zucchini rice casserole that for whatever reason just called to me. I went online to find the recipe and was happy to see that it was a very simple and a very healthy recipe. So when I went to the farmer's market on Saturday I picked up two large zucchini so I could whip this dish up over the weekend. I am a huge zucchini fan and usually end up just slicing it up into rounds or spears and grilling it. I liked that this dish gave me something else that I could do with zucchini if I am feeling ambitious. Not that it's a difficult dish by any means, but it's slightly more involved than slicing and grilling!

Of course, I couldn't leave the recipe alone so I decided to add my own twist and add in some freshly picked sweet corn that I also picked up at the farmer's market. I think zucchini + corn is one of the best late summer combos so I couldn't pass it up. I think it was a brilliant addition to the gratin! The tender zucchini mixed with the juicy and sweet corn is fantastic along with some salty parmesan and a couple little pats of butter. Fresh, healthy and delicious, this is a great late-summer winner!

On the blog where I got the recipe she used brown rice in this gratin as opposed to the white rice which is what the original recipe that she used called for. I went with the brown rice as well and parboiled it for 8 minutes as she said. I found that in the finished dish the rice was not quite tender so I would recommend upping the length of the parboil to 10-12 minutes, or alternatively, baking the casserole longer overall. I ended up baking it for 35 minutes and there was still quite a bit of liquid left over when I dug in. This extra liquid did not detract from the delicious flavors, but if you are looking for a finished product with less moisture I would bake it longer and/or add less liquid prior to baking.


Gratin of Zucchini, Rice and Corn with Cheese
Adapted from Sprouted Kitchen
Ingredients

  • 2 1/2 pounds zucchini or other summer squash
  • 2 ears corn
  • 1/2 cup short grain brown rice 
  • 1/2 onion, sliced thin
  • 2 tablespoons butter, divided
  • 2 tablespoons olive oil
  • 2 large garlic cloves, minced
  • 2 tablespoons whole wheat flour
  • about 2 1/2 cups warm zucchini juices
  • 3/4 cup grated parmesan cheese 
  • salt and pepper to taste

Directions
Shred the zucchini in a food processor or with a box grater, toss with a heaping teaspoon of salt and drain in a colander. Reserving the juices. Meanwhile drop the rice into boiling salted water, bring rapidly back to a boil for 10-12 minutes; drain and set aside. Preheat the oven to 400'.

Cut the kernels off of the ears of corn. In a large oven-proof frying pan melt 1 tablespoon of the butter. Add the corn, salt and pepper and cook over medium high heat until starting to brown. Remove corn from pan and set aside. 

Return the frying pan to heat. Add the 2 tablespoon olive oil and cook the onions with a little salt for 15-20 minutes, or longer, until tender and translucent and starting to brown. Stir in the grated and dried zucchini and the garlic. Let sit without stirring for a few minutes to start browning some of the zucchini. Then, toss for about 5 minutes until the zucchini is almost tender. Add the corn back to the pan. Sprinkle in the flour, stir over moderate heat for a minute and remove from the heat. 

Gradually stir in the 2-2 1/2 cups warm liquid (zucchini juices). Put the pan over moderately high heat and bring to a simmer, stirring. Remove from the heat again, stir in the blanched rice, 1/2 cup of the grated parmesan and 1 tablespoon butter. Taste carefully for seasoning and add more salt and pepper if needed. 

Transfer frying pan to oven. Bake until the gratin is bubbling, top is browned and appears most of the liquid has absorbed, approximately 35-40 minutes, sprinkling with additional parmesan in the last 5 minutes if desired.

Warm Brown Rice, Sweet Potato and Roasted Cabbage Salad with Tahini Yogurt Dressing

This is one of those meals that I wasn't really planning on being anything extra special or turning out as well as it did. That is one of the things I love so much about cooking, coming up with new combinations that surprise me with how good they are. Taking a couple of ingredients that I have never really put together and creating a whole new dish out of them that just works, at least for me anyways!

The other night I just happened to have a few leftovers and random ingredients hanging out in my fridge and thought I better use them up or freeze them before they went bad. I had a general idea about what I was going to do with them, but it sort of evolved as I went along and turned into this wonderfully warm and filling salad, perfect on a rainy and chilly spring night. Sweet and creamy baked sweet potato combined with chewy brown rice, and roasted cabbage, topped with pecans for nuttiness and some dried cranberries for sweetness. A quick dressing of tahini and yogurt finishes the whole thing off and brings it all together. 

I decided to use zaatar for flavoring this salad. I've really been liking zaatar recently. If you don't know what zaatar is, it is a really nice mixture of dried herbs (dried thyme mostly I think), sesame seeds and sumac that is used in the Middle East. If you haven't tried it before I highly recommend it. But this is not a recipe that is set in stone so if you don't have any zaatar go ahead and use something else, you're favorite herbs or spices, whatever you have on hand. I also thought this would be good with a Mexican twist, using chili powder and cumin and throwing in some fresh cilantro, yum! Switching out different dried fruits and different nuts would also be be fun to play with. Cooking is just a great way to let your imagination go wild, so go ahead and have some fun!

Warm Brown Rice, Sweet Potato and Roasted Cabbage Salad with Tahini Yogurt Dressing

Ingredients 

  • 1 medium sweet potato
  • 1/4 head cabbage, sliced thin
  • 1/2 medium onion, sliced thin
  • 1-2 cloves garlic, minced
  • 1/2 cup brown rice (or 1-1 1/2 cups cooked brown rice)
  • 2 tablespoons Zaatar spice mix
  • Cayenne pepper, to taste
  • Plain yogurt
  • Tahini

Directions

Heat oven to 375 degrees. Place sweet potato on a baking sheet and baked until tender, 1 hour to 1 hour 15 minutes, depending on the size of the sweet potato. Set aside until cool enough to handle. 

Thinly slice the cabbage. toss with a little olive oil and some salt. Place on a baking sheet and broil until starting to wilt and char, stirring occasionally to evenly cook. This can take anywhere from 10-30 minutes depending on how charred you like your cabbage, and how hot your oven gets. 

While cooking the potato and cabbage, sauté sliced onions in a pan over medium to low heat until very soft and tender. When onions are caramelized to your liking, add the garlic and cook until fragrant. 

Cook the brown rice according to package instructions. Or even better, if you have some leftover rice use that in instead. Add the cabbage and brown rice to the onions and garlic mixture. 

Cut the cooled sweet potato into bite sized chunks. Add to the sauté pan along with the zaatar and cayenne. Give the whole thing a nice stir, adding some water to the pan if needed. Drizzle tahini over the whole mixture to taste and add a couple spoonfuls of yogurt. Stir again to combine well. Taste and season with salt if needed. 

Spoon salad into bowls and top with pecans and dried cranberries. 

Foolproof Oven-Baked Brown Rice

This may not look like a very exciting recipe to some people, but honestly it's one of my favorites. Over the last couple of years I have grown to absolutely love brown rice. It is extremely healthy, it's super versatile and I think it's absolutely delicious. If you've ever looked up directions on how to make brown rice, you may have noticed that there are so many different methods. Each with it's own ratio of water to rice. Now I'm sure most of them will turn out a fine batch of brown rice, I personally am not too picky as long as it's cooked through. However, once I found this recipe I never turned back. Not only does it turn out a perfect pan of brown rice every time, it also makes a really nice big batch so I can have it on hand all week long. This is the only recipe I ever use so I wanted to share it in case anyone else is looking for a foolproof method of cooking brown rice. Well look no further, this is it. 

My favorite part of this recipe is the fact that it's baked in the oven, not cooked on the stovetop. This means I throw it in the oven and can completely forget about it for the next hour. It does take the whole hour to cook, so if you need something at the last minute, this isn't going to work. But you only need to think ahead a little bit and you can have fresh, perfectly cooked brown rice on the table for dinner. 

The actual hands on time in this recipe is so minimal making it super easy and quick to throw together. You can get the rest of your meal ready while it cooks, or get a couple of chores done, whatever. I also make this rice ahead a lot so that it will be ready for me when I need it. Sprinkled with a little water for moisture and zapped in the microwave for a couple of seconds and it's pretty much as good as new! If you couldn't already tell, I highly recommend adding this simple recipe to your repertoire. I can guarantee that you'll use it over and over again.  

Foolproof Oven-Baked Brown Rice

Adapted from 

A Veggie Venture

, originally from Cook's Illustrated

Ingredients

  • 1 1/2 cups long-, medium- or short-grain brown rice
  • 2 1/3 cups water
  • 2 teaspoons unsalted butter or vegetable oil (optional)
  • 1/2 teaspoon salt

Directions

Preheat oven to 375 degrees. Spread rice in 8-inch square baking dish or similar size casserole dish with lid. Add salt and give it a quick mix. 

Bring water and butter or oil to boil; once boiling, immediately pour water over rice. Alternatively, bring a kettle to boil. Once boiling, measure out 2 1/3 cup and pour over rice. Cover baking dish tightly with a layer of aluminum foil or place lid on top of casserole dish and place in oven. Bake rice 1 hour, until tender.

Remove baking dish from oven and uncover. Fluff rice with dinner fork, then recover dish and let rice stand 5 minutes. Uncover and let rice stand 5 minutes longer; serve. 

Thanksgiving 2014

I truly do love all holidays, but there is something special about Thanksgiving. Everyone gets together on the same day every year and stuffs themselves with turkey and all the trimmings. The camaraderie makes me smile, and the fact that the main focus of a lot of people (myself included) is the food makes me love the day even more. For one day I am not the only one doing all of the food talk. 

My sister Lara and I made the Thanksgiving meal for our family again this year. We have such a fun time doing it and have been thinking about it and preparing for weeks. Instead of going full out and roasting an entire turkey we decided to do something a little different this year. One of my biggest pet peeves about Thanksgiving is that the turkey hogs the oven for the entire morning and I can't use it for anything else. (I am jealous of everyone who has more than one oven in their house.) We decided to utilize the grill instead. And for a different spin on the traditional we skipped the whole turkey and decided to grill up a whole bunch of turkey kabobs. 

It turned out great! I loved not cooking an entire turkey, and it was fun to use the grill while standing in a bit of snow. An experience for sure. We tried to keep the sides simple and light as well because that's how we like to eat. Everything went off without a hitch, we were so happy with how it all turned out. I would definitely do it again next year!

As for the rest of the meal, it started off with some butternut squash soup with leeks and carrots, finished with a little yogurt for creaminess. Next, the salad was a spin on the Fuji apple chicken salad from Panera; we sliced up a few apples and dried them out for apple chips, toasted some pecans with a hint of cinnamon sugar, thinly sliced red onion, dried cranberries and some feta cheese rounded out the toppings. The mixed greens were dressed with a simple white balsamic, apple cider vinaigrette with honey and dijon. It was a fantastic salad, Panera sure knew what they were doing when they created it!

We also served some homemade bread and my favorite Clementine Brown Rice Salad. A few extras finished the meal off, a simple cranberry sauce as well as a yummy lemony sage yogurt sauce, both for dipping the turkey into if desired (which I did!). 

While we were finishing up the cooking we served our guests a simple platter of cheese and crackers with some grapes and carrots. Just a little something to whet the appetite. I made a simple sangria and had some apple cider for some festive drinks to go along with the meal. And finally, a pumpkin bundt cake added the finishing touch to a fantastic Thanksgiving. I was so glad to be able to share my love of cooking with my family on this festive day. I am so thankful for all my family members who were able to come and celebrate the holiday together, as well as for all the delicious food we were so privileged to eat. I am so blessed, and for that I am extremely grateful, all year long! God is good is an understatement.

 Simple, yet scrumptious appetizer

 A little cold weather grilling never hurt anyone

 Plenty of drink options

 Dried fruit, pecan and feta salad

 Squash soup

And don't forget the turkey!

Turkey kabobs, my take on the traditional 

 This is what I like to see on Thanksgiving

And never, ever forget about dessert

Clementine Brown Rice Salad with Edamame and Cranberries

In the winter I can sometimes find it difficult to come up with a good, fresh salad that incorporates seasonal ingredients. It's not like summer when all it takes are a few garden fresh tomatoes and a handful of basal to call it good. But, although it takes a little more thought in the winter, beautiful salads made with in season produce can be done. Take this salad for instance, it uses a lot of things that you may just have stored in your cupboard or freezer; dried cranberries, edamame, brown rice, and slivered almonds. Add to this some fresh, sweet and juicy clementines, a few thinly sliced green onions and some feta cheese and you have the perfect combination for a hearty winter salad, great as a flavorful side or a light main coarse, whichever you prefer. Either way you won't be disappointed.

The combination of all the different ingredients in this salad are just perfect. Sweetness from the clementines, tartness from the cranberries, crunch from the almonds and creaminess from the edamame. It is also a beautiful salad, full of all the different colors. The clementine juice and honey in the dressing give it just the right amount of sweetness mixed with the acidity from the lemon juice and vinegar. I really do love this salad. The perfect way to add freshness to those gloomy winter days. 

Clementine Brown Rice Salad with Edamame and Cranberries

Ingredients

For the Salad

  • 1 cup brown rice*
  • 1 cup frozen, shelled edamame beans
  • 4 clementines
  • 3 green onions
  • 1 cup of sliced or slivered almonds, toasted
  • 3/4 cup dried cranberries
  • 1/2 cup feta cheese

For the Dressing

  • 2 tablespoons white wine vinegar
  • 2 tablespoons honey
  • 2 tablespoons olive oil
  • 2 teaspoons fresh lemon juice
  • 2 tablespoons fresh squeezed clementine juice
  • Salt & pepper to taste

Directions

Cook rice according to package directions*. Set aside to cool while you prepare the rest of the salad. (Brown rice can also be prepared a day ahead and stored in the fridge until needed.) 

Fill a small pot with two inches of water. Bring to a boil, add edamame and cook for about 3 minutes or until tender. Drain and set aside. 

Peal clementines, tear into segments and place in a large bowl. Thinly slice the green onion and add to the bowl. Add in the brown rice, edamame, toasted almonds and cranberries. Mix all together. 

In a small bowl, whisk together all of the dressing ingredients and pour over the salad. Mix it until everything is well incorporated. Add in the feta cheese and give it another  mix.

*Check out 

this

 post for my all time favorite, super easy method for making brown rice that turns out perfectly every time!