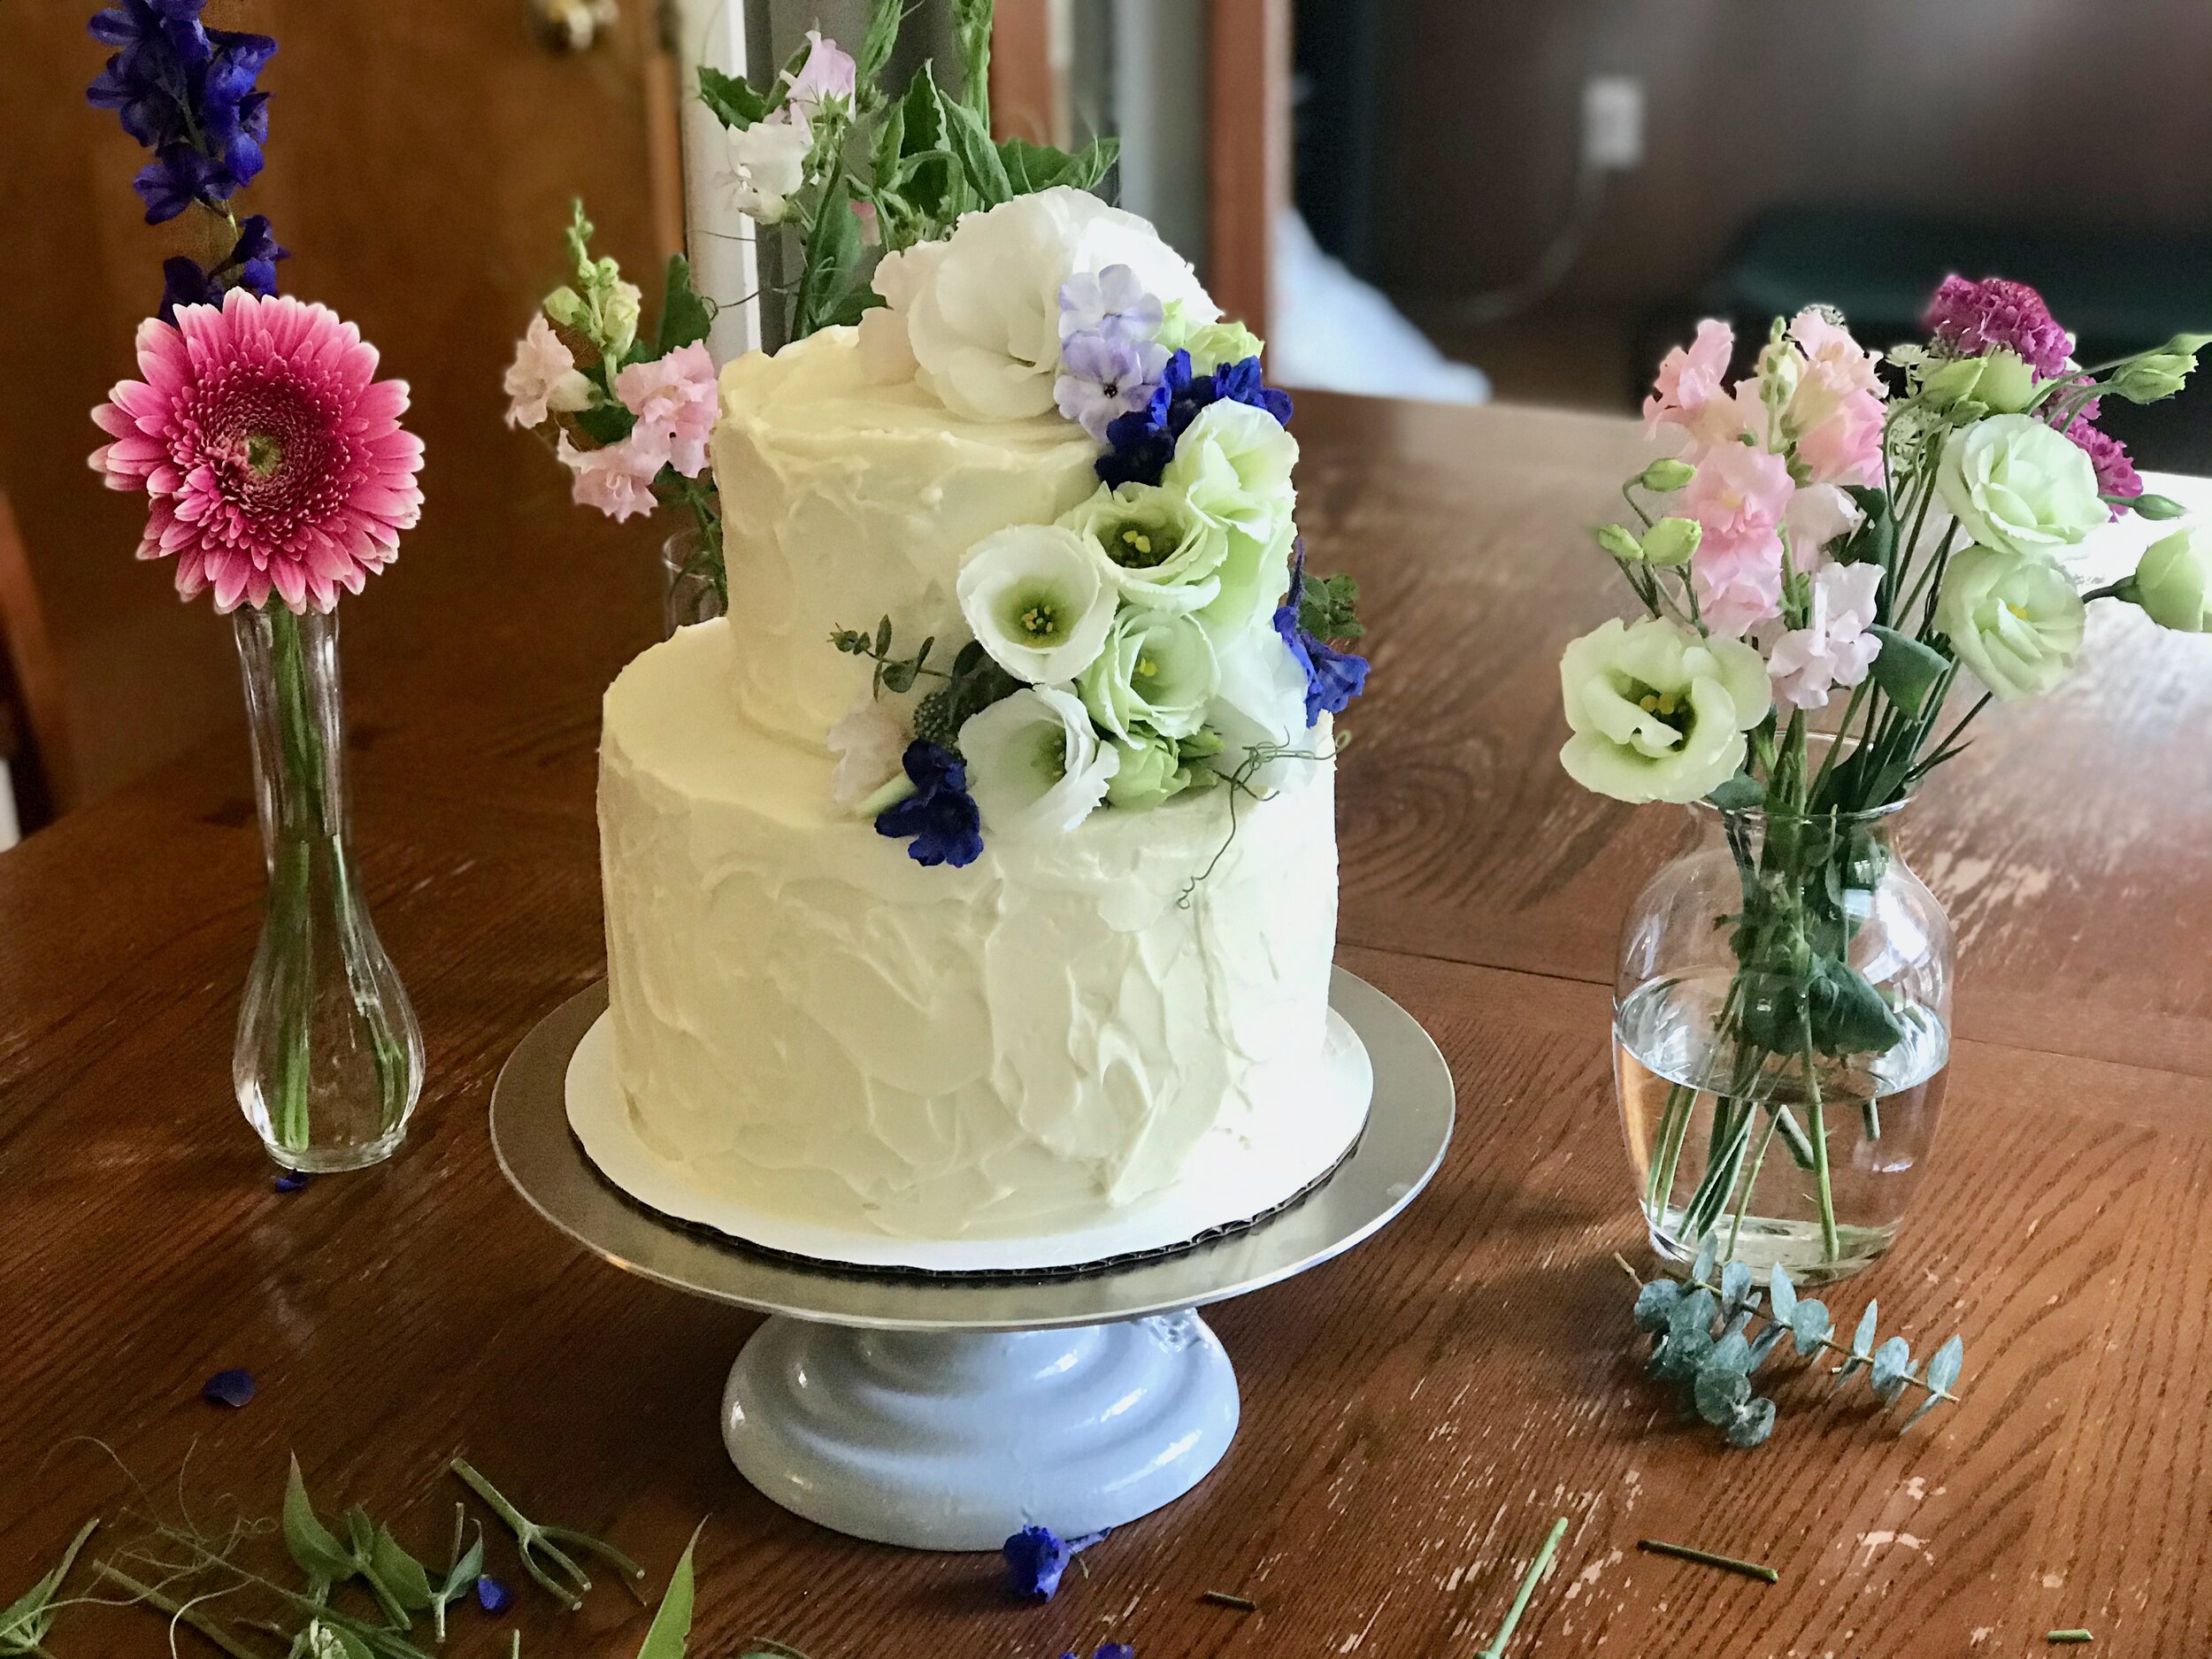
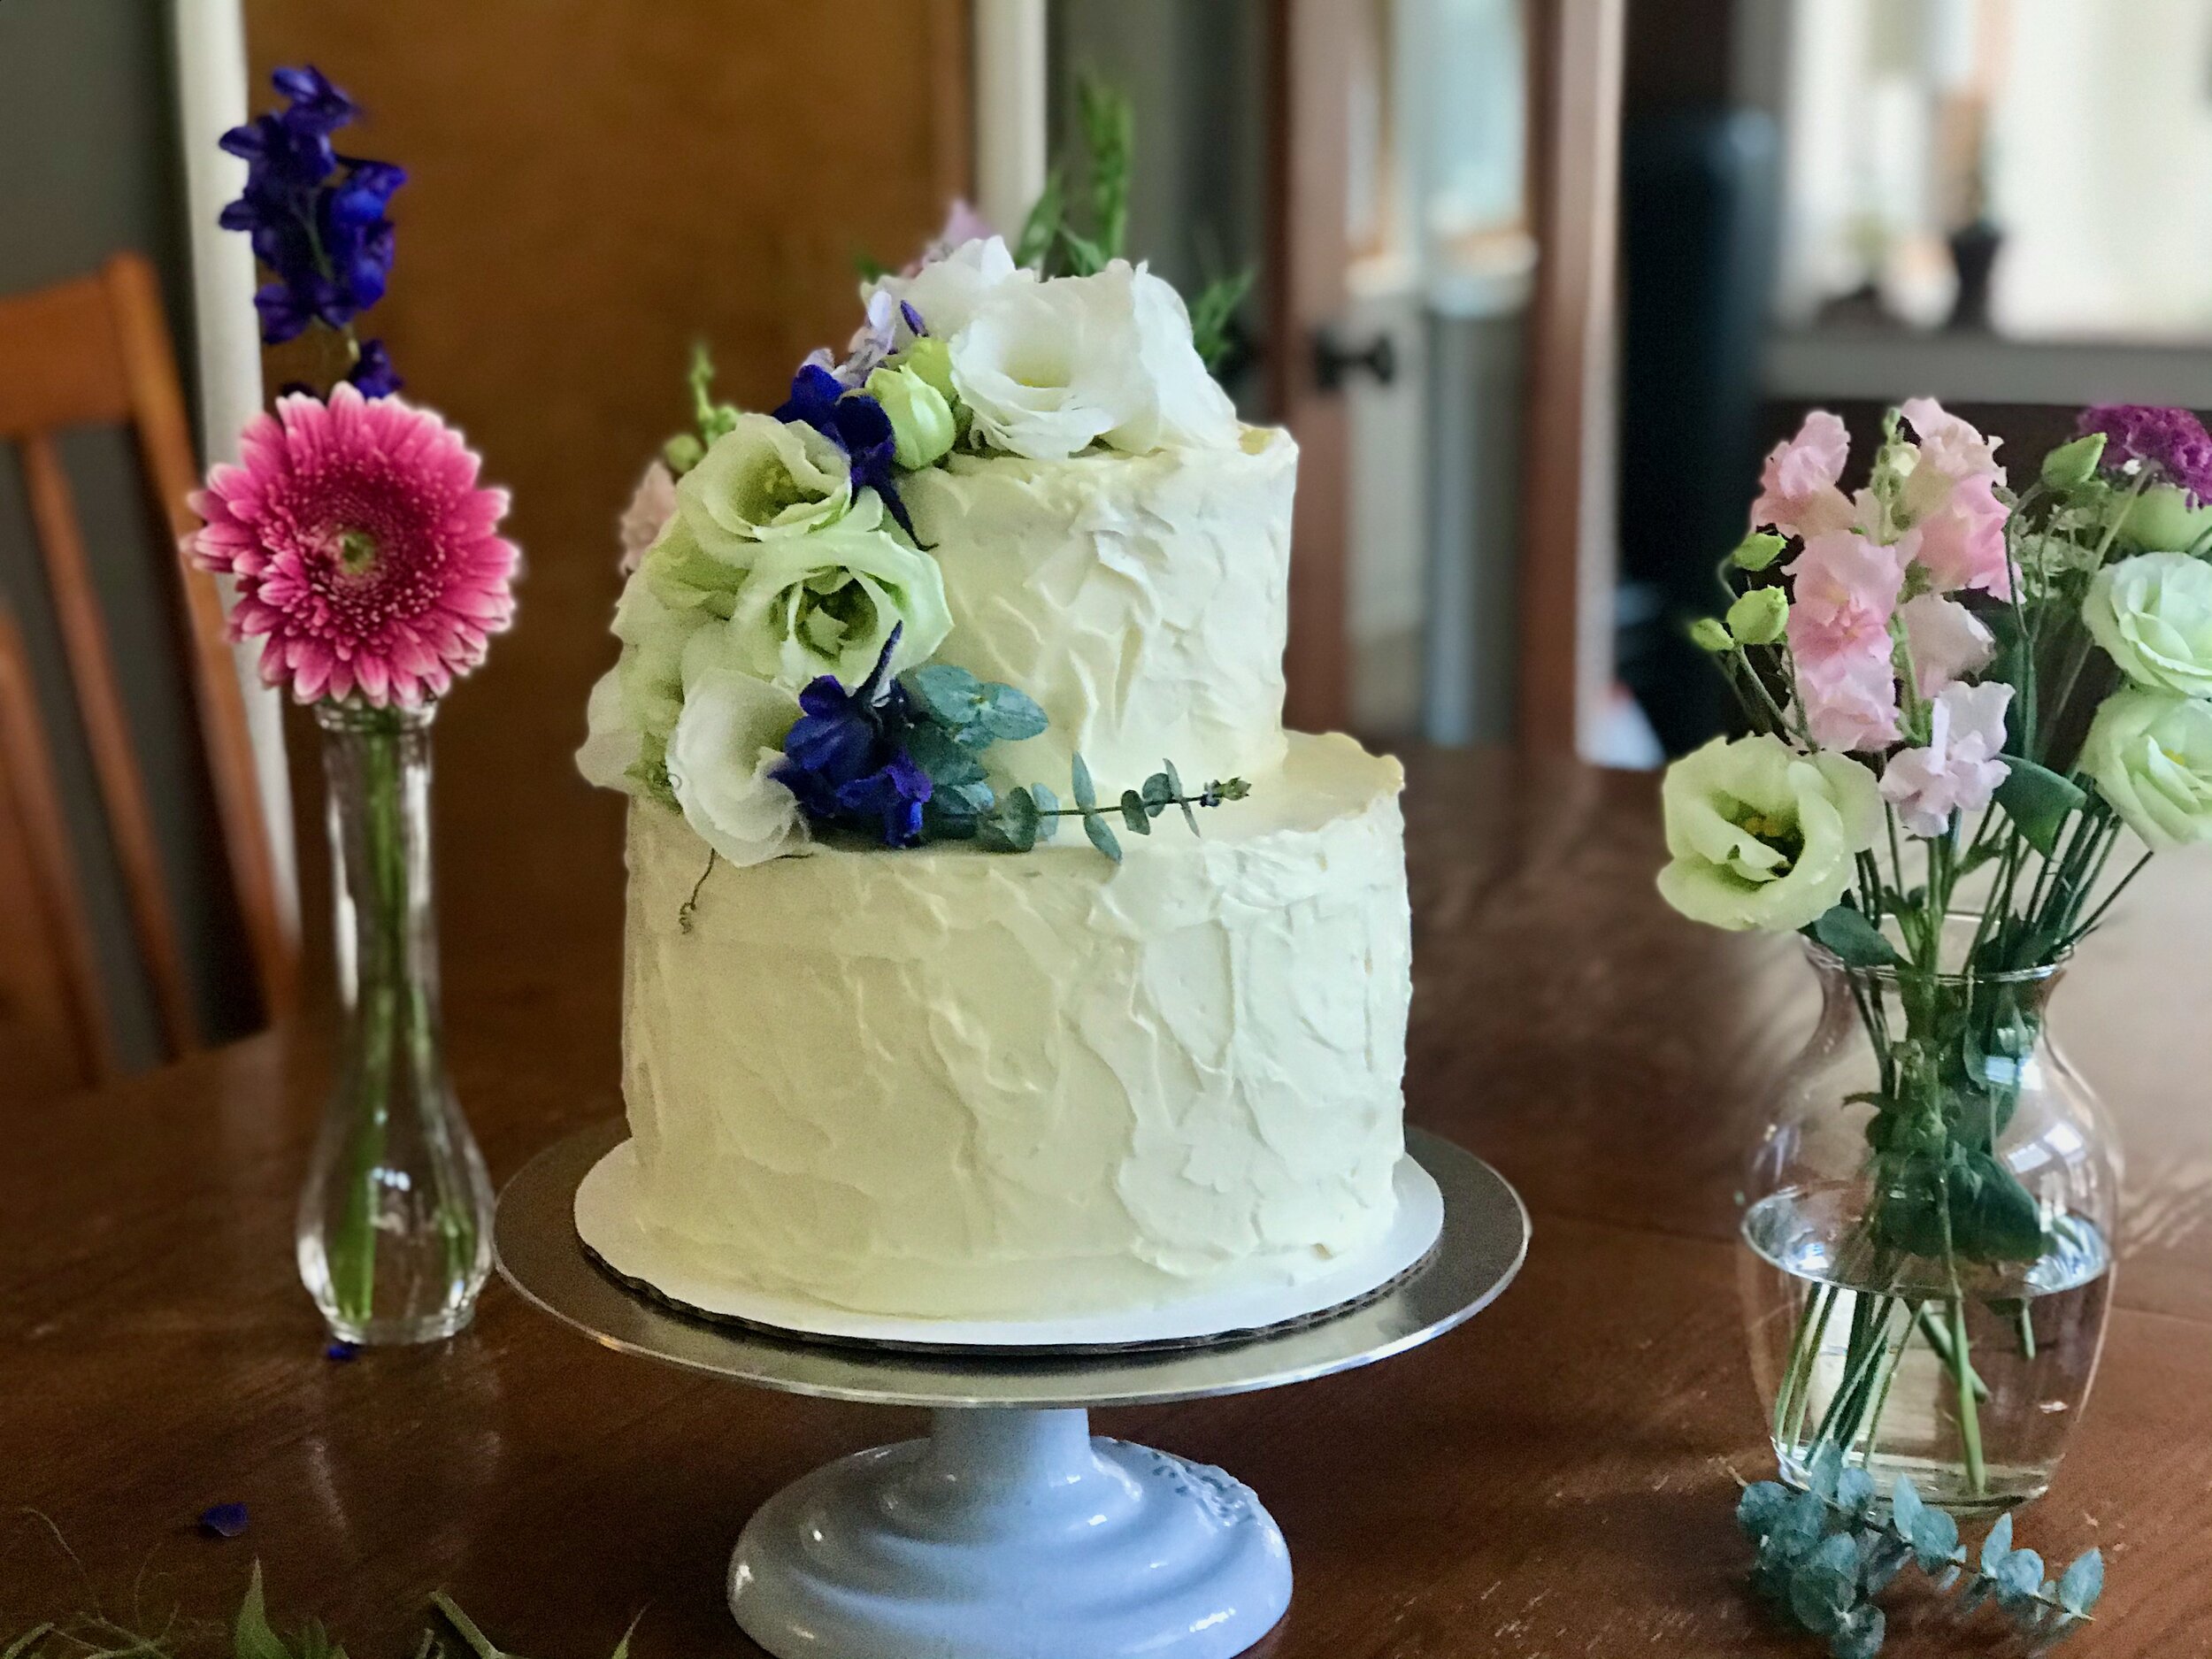
Almond Raspberry Wedding Cake with Swiss Meringue Buttercream

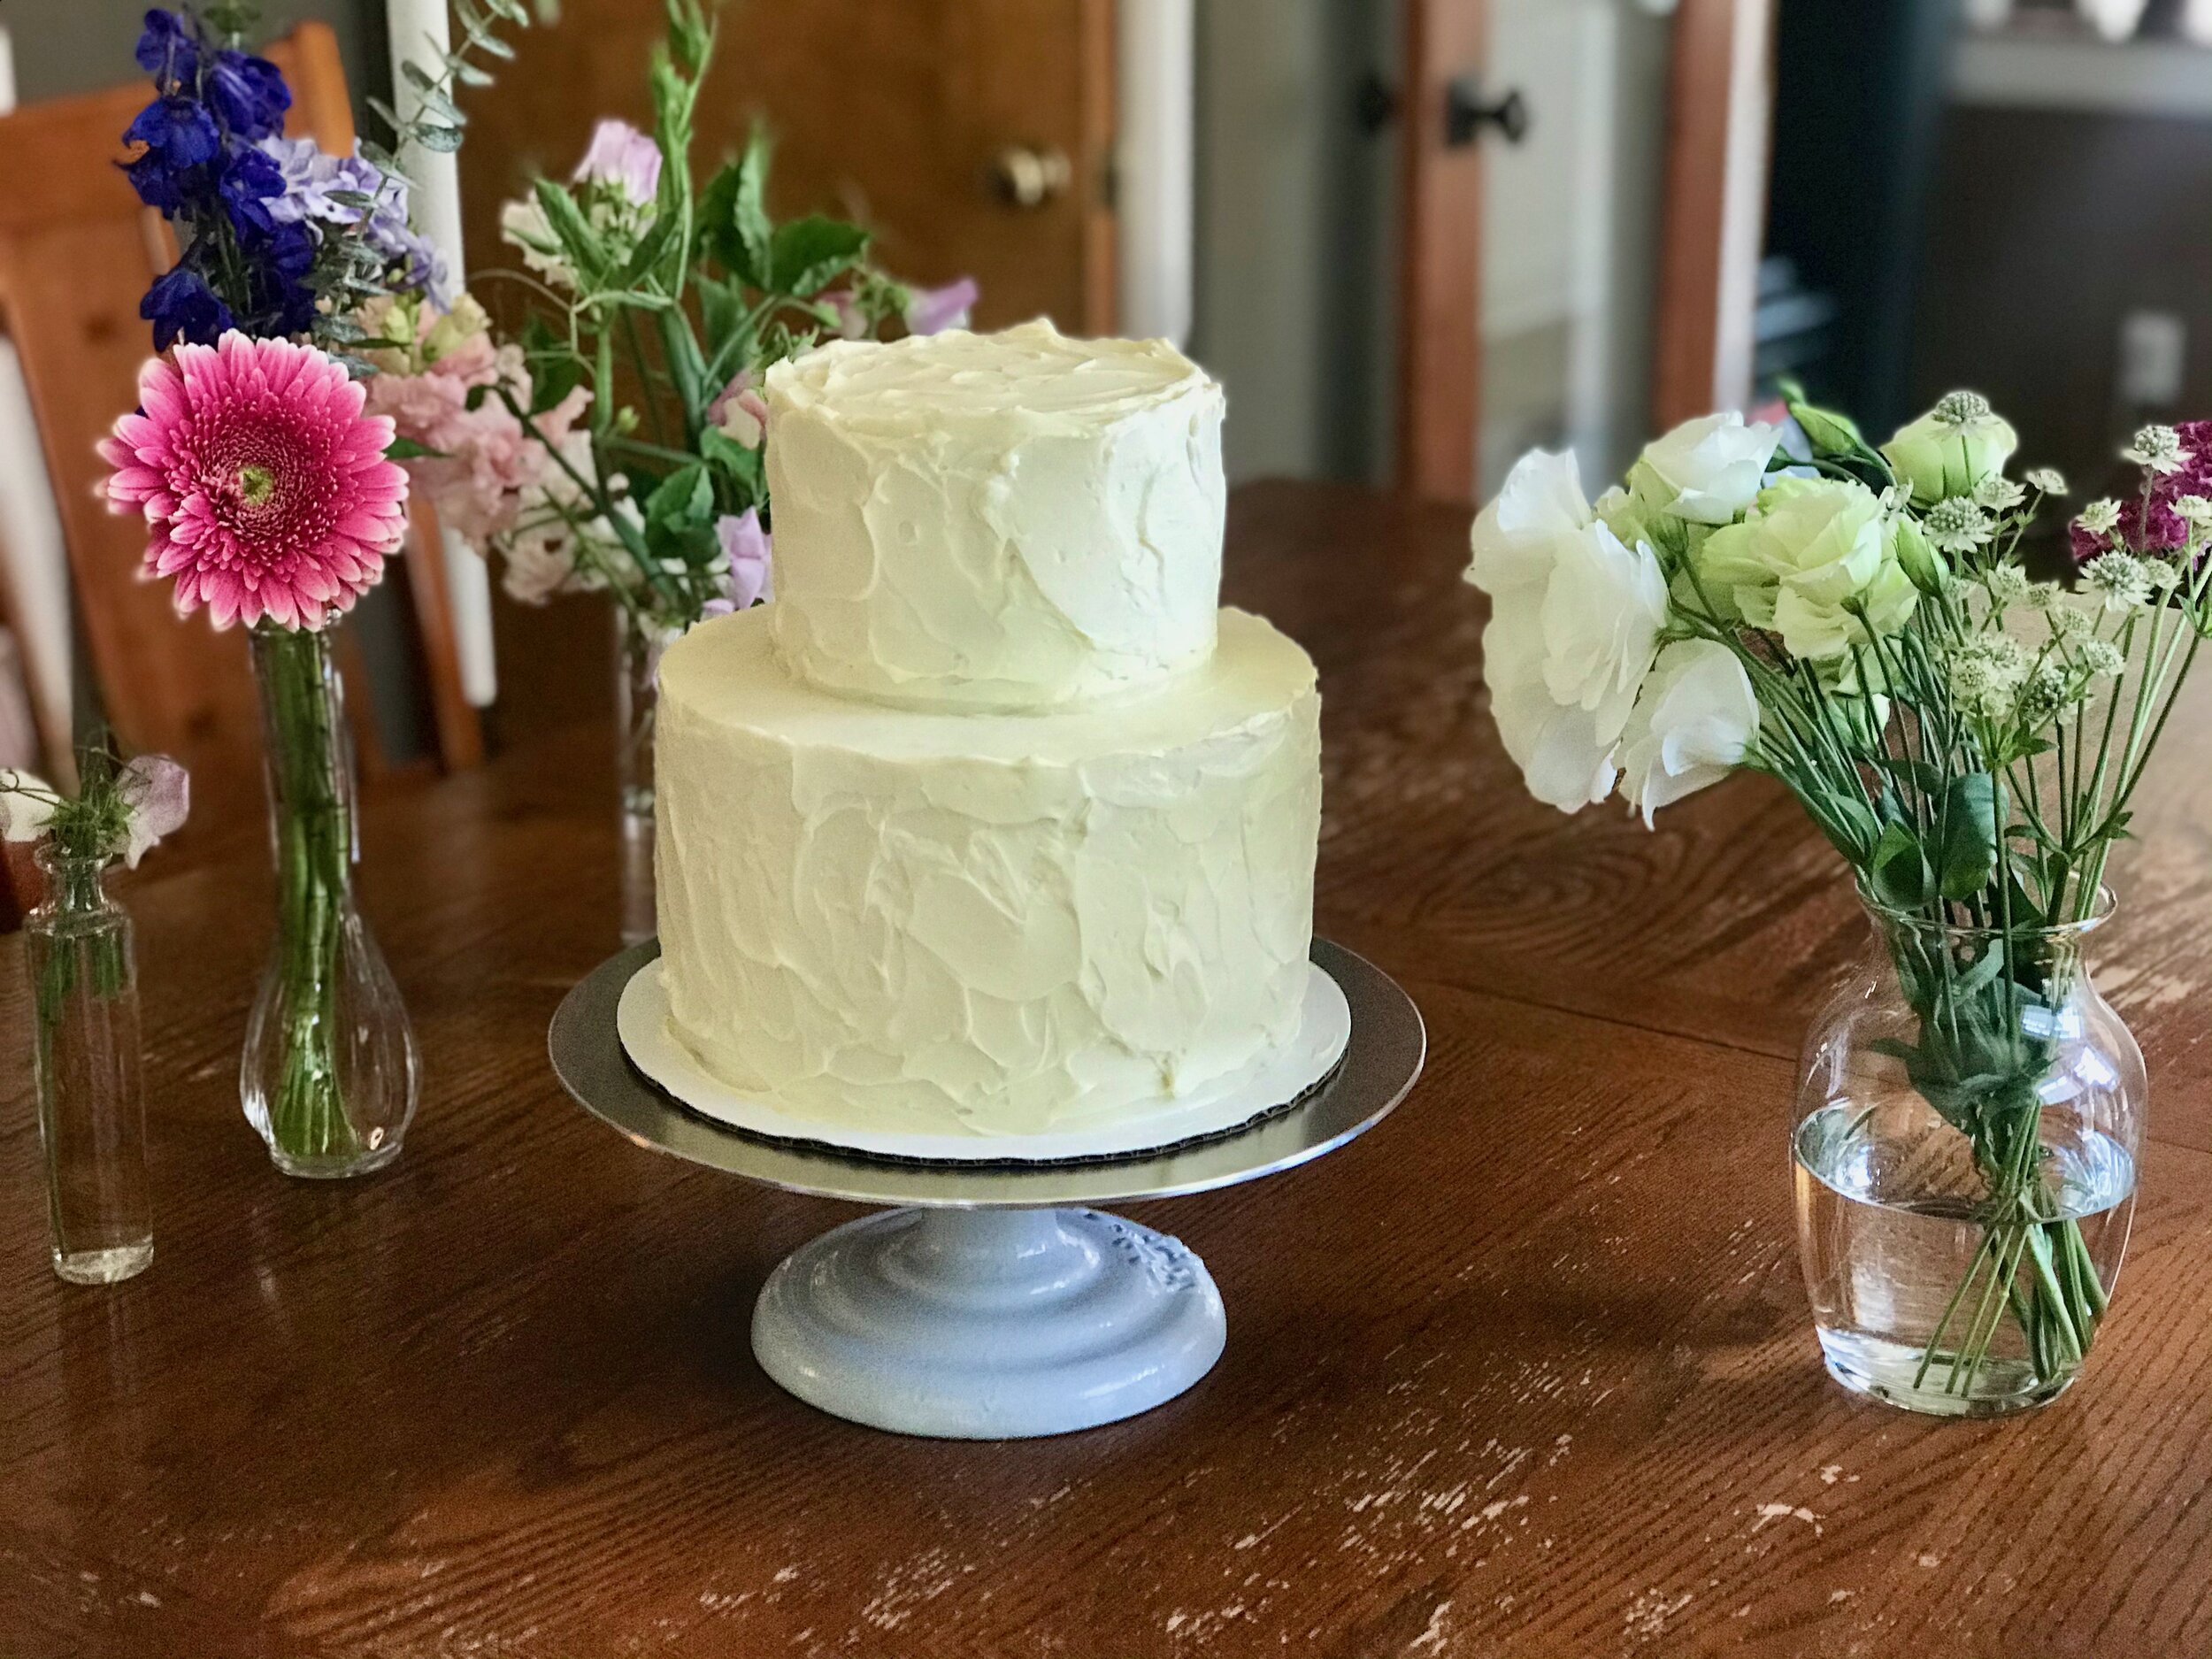
One of my best friends, Lindsay, got married last weekend. Thankfully, despite everything going on with COVID, she managed to plan a beautiful wedding. Lara and I were honored to be able to make her a wedding cake. It was my first tiered cake which was so much fun to plan and execute. Thankfully, we had a couple of days off prior to the wedding to make the cake. This made the whole process stress-free and run smoothly.

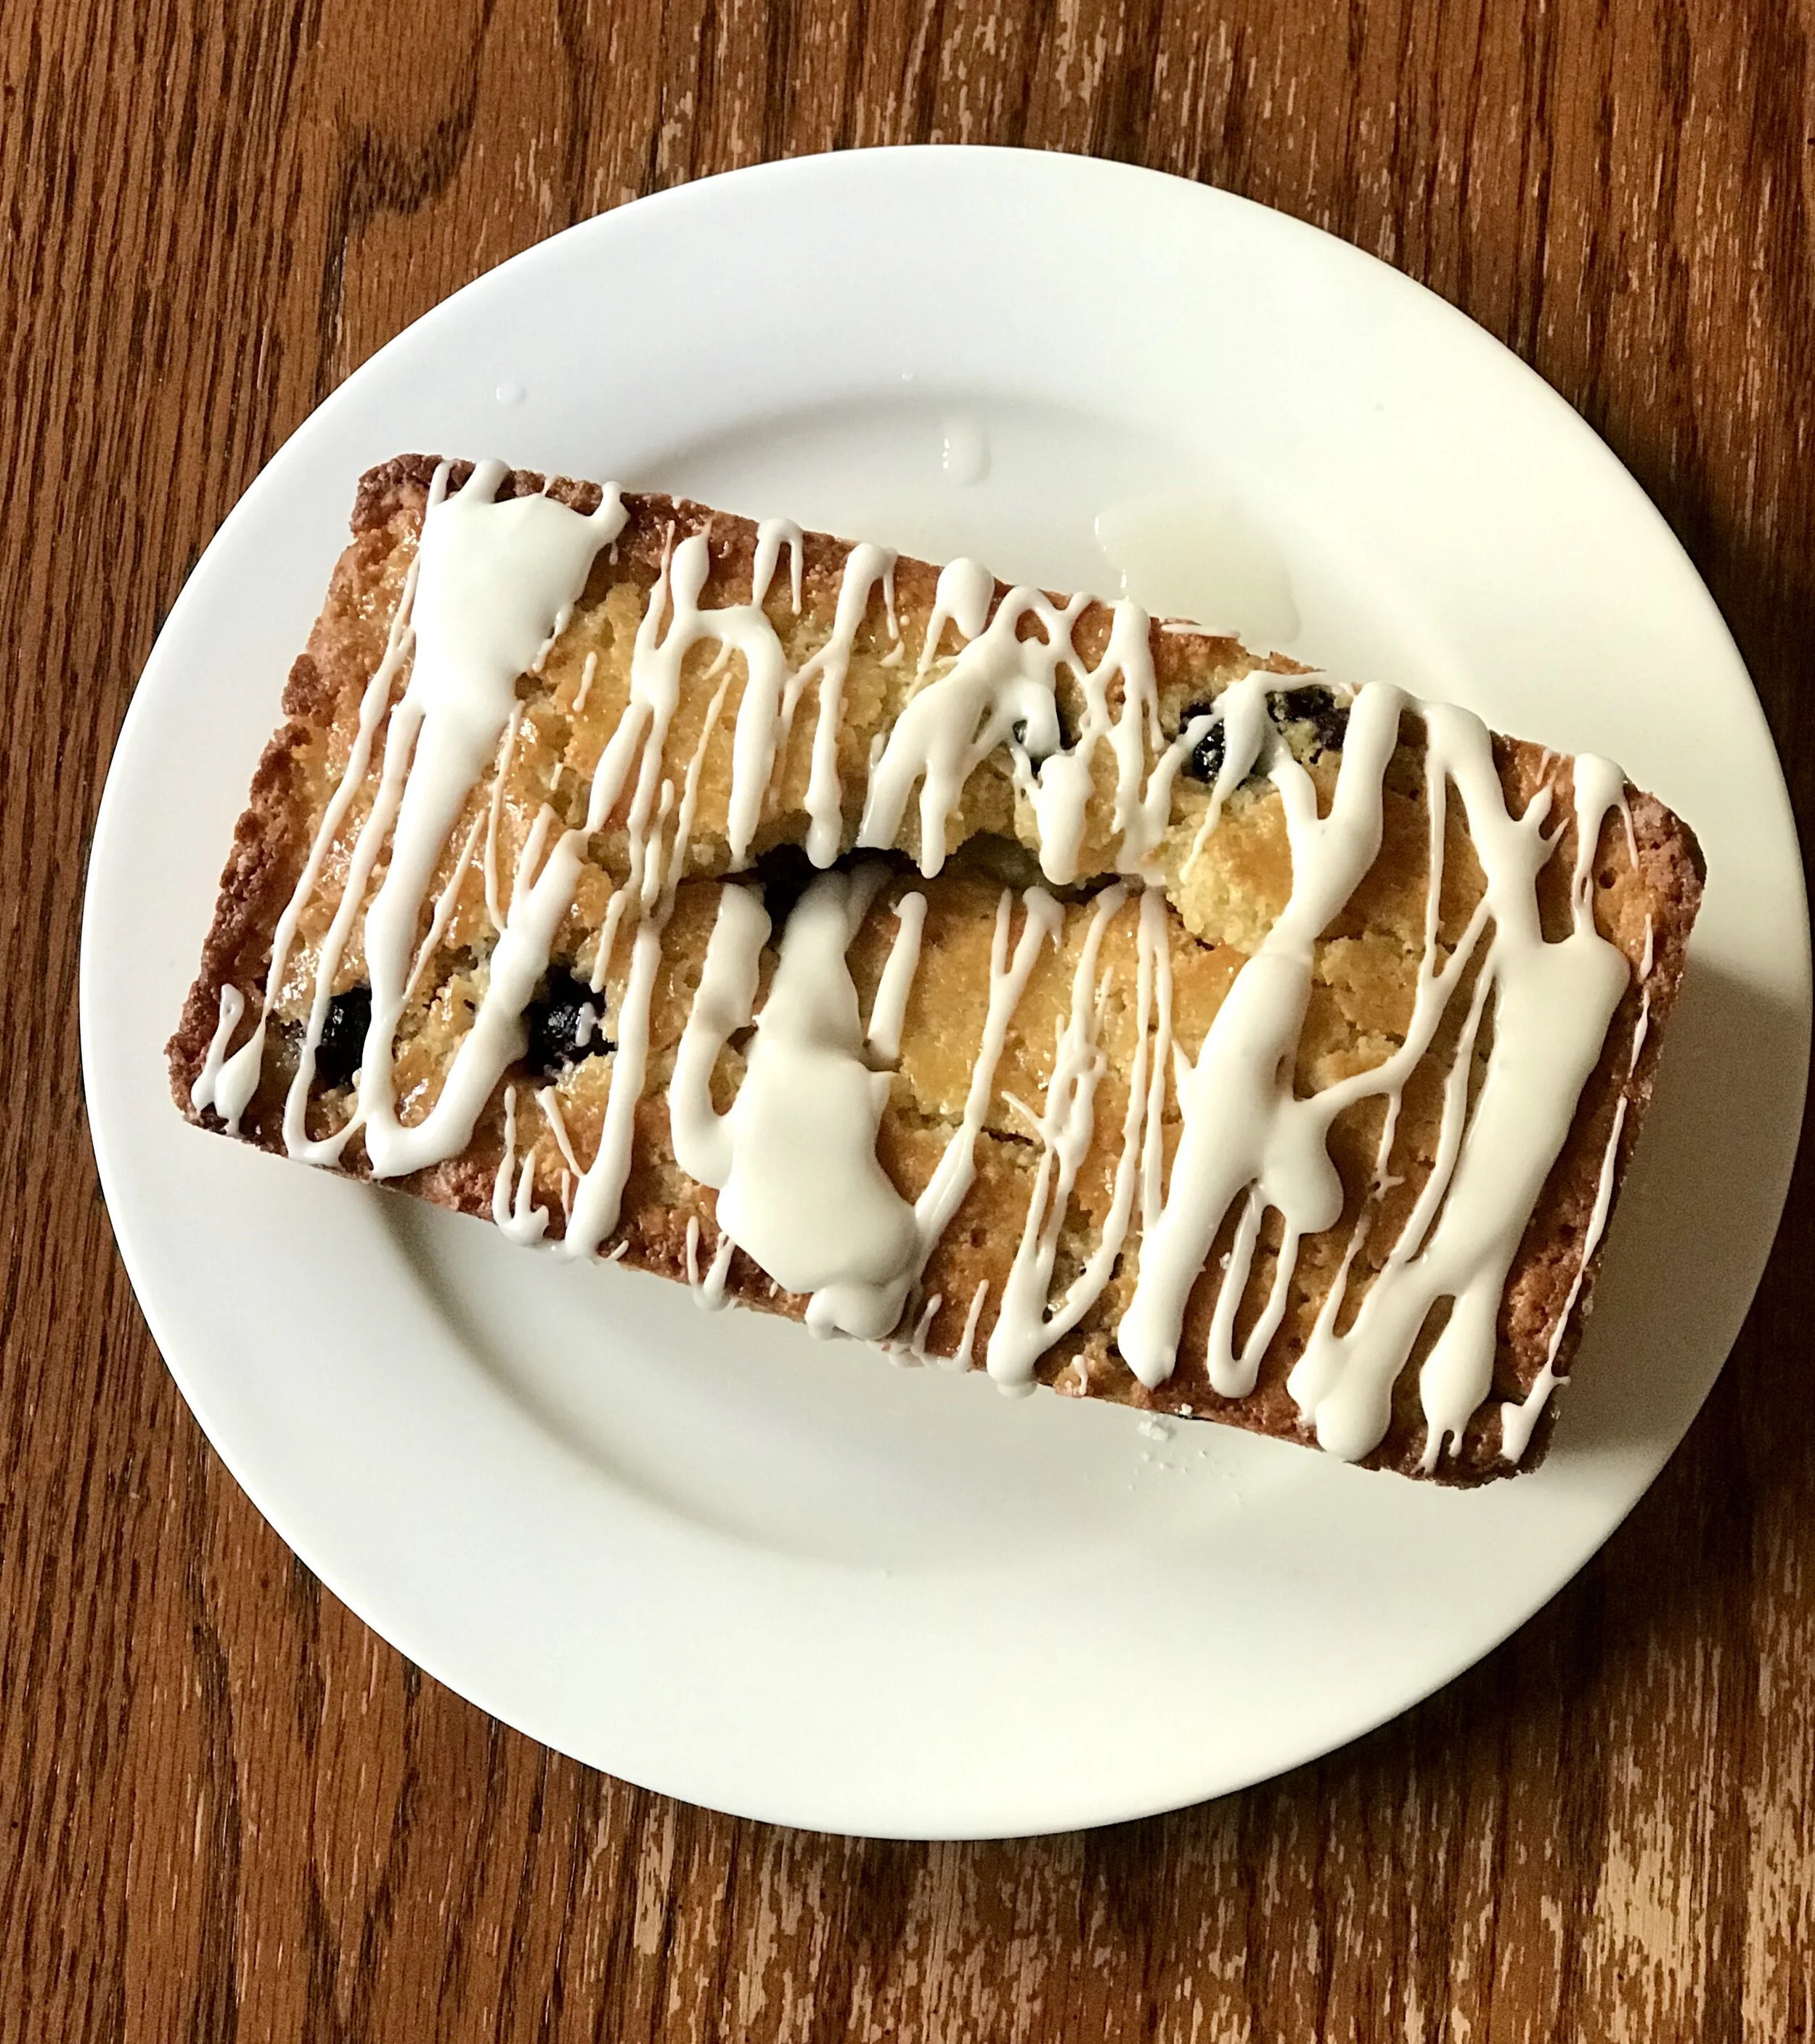
We also made about 5 dozen cupcakes to supplement the cake. We used the same cake recipe for both the wedding cake and the cupcakes. The same recipe I made for my cousin’s wedding about 10 years ago. It’s still the best for a wedding cake, whatever form that might take (layered cake, sheet cake, cupcake)!

I would estimate that everything, cake and cupcakes, took about 2 full days to make and put together. This is with two of us working together on it. We had a lot of fun planning everything out, prepping, baking, and decorating. It was definitely something I would do again if asked!

IMG_8824.jpeg
IMG_8740.jpeg
IMG_8809.jpeg
IMG_8751.jpeg
IMG_8832.jpeg
IMG_8836.jpeg
IMG_8810.jpeg

Martha Stewart’s Wedding Cake
Slightly adapted from Martha Stewart’s Baking Handbook
Ingredients

  • 3 cups cake flour (I did 360 grams, then took out 3 tablespoons and replaced with 3 tablespoons of corn starch)

  • 2 teaspoons baking powder

  • 1 teaspoon salt

  • 3 sticks butter, at room temperature

  • 2 cups (400 grams) sugar, plus another 1/4 cup sugar (50 grams)

  • 1/2 teaspoon vanilla extract (I used 1 teaspoon vanilla and 1 teaspoon almond extract, optional)

  • 1 cup (226 grams) 2% or whole milk

  • 8 large egg whites

Directions
Preheat the oven to 350 degrees. Butter two 9-by-2 inch round cake pans and line the bottoms with parchment paper. Dust with flour, tapping out the excess. Set aside.

In the bowl of an electric mixer fitted with the paddle attachment, beat the butter and 2 cups (400 grams) of sugar until light and fluffy, 3 to 4 minutes, scraping down the sides of the bowl as needed. Beat in the vanilla extract (and almond extract, if using). With mixer on low speed, add flour mixture in three parts, alternating with the milk and beginning and ending with the flour; beat until just combined. Transfer mixture to a large bowl; set aside.

In the clean bowl of an electric mixer fitted with the whisk attachment, beat egg whites on low speed until foamy. With mixer running, gradually add remaining 1/4 cup (50 grams) sugar; beat on high until stiff, flossy peaks form, about 4 minutes. Do not overbeat. Gently fold a third of the egg-white mixture into the butter-flour mixture until combined. Gently fold in the remaining whites.

Divide batter evenly between prepared pans and smooth with an offset spatula. Bake, rotating pans halfway through, until cakes are golden brown and a cake tester inserted in the centers comes out with just a few moist crumbs. 30 to 35 minutes. Transfer pans to a wire rack to cool 20 minutes. Invert cakes onto rack; peel off parchment. Reinvert cakes and let them cool completely, top sides up.

Notes:

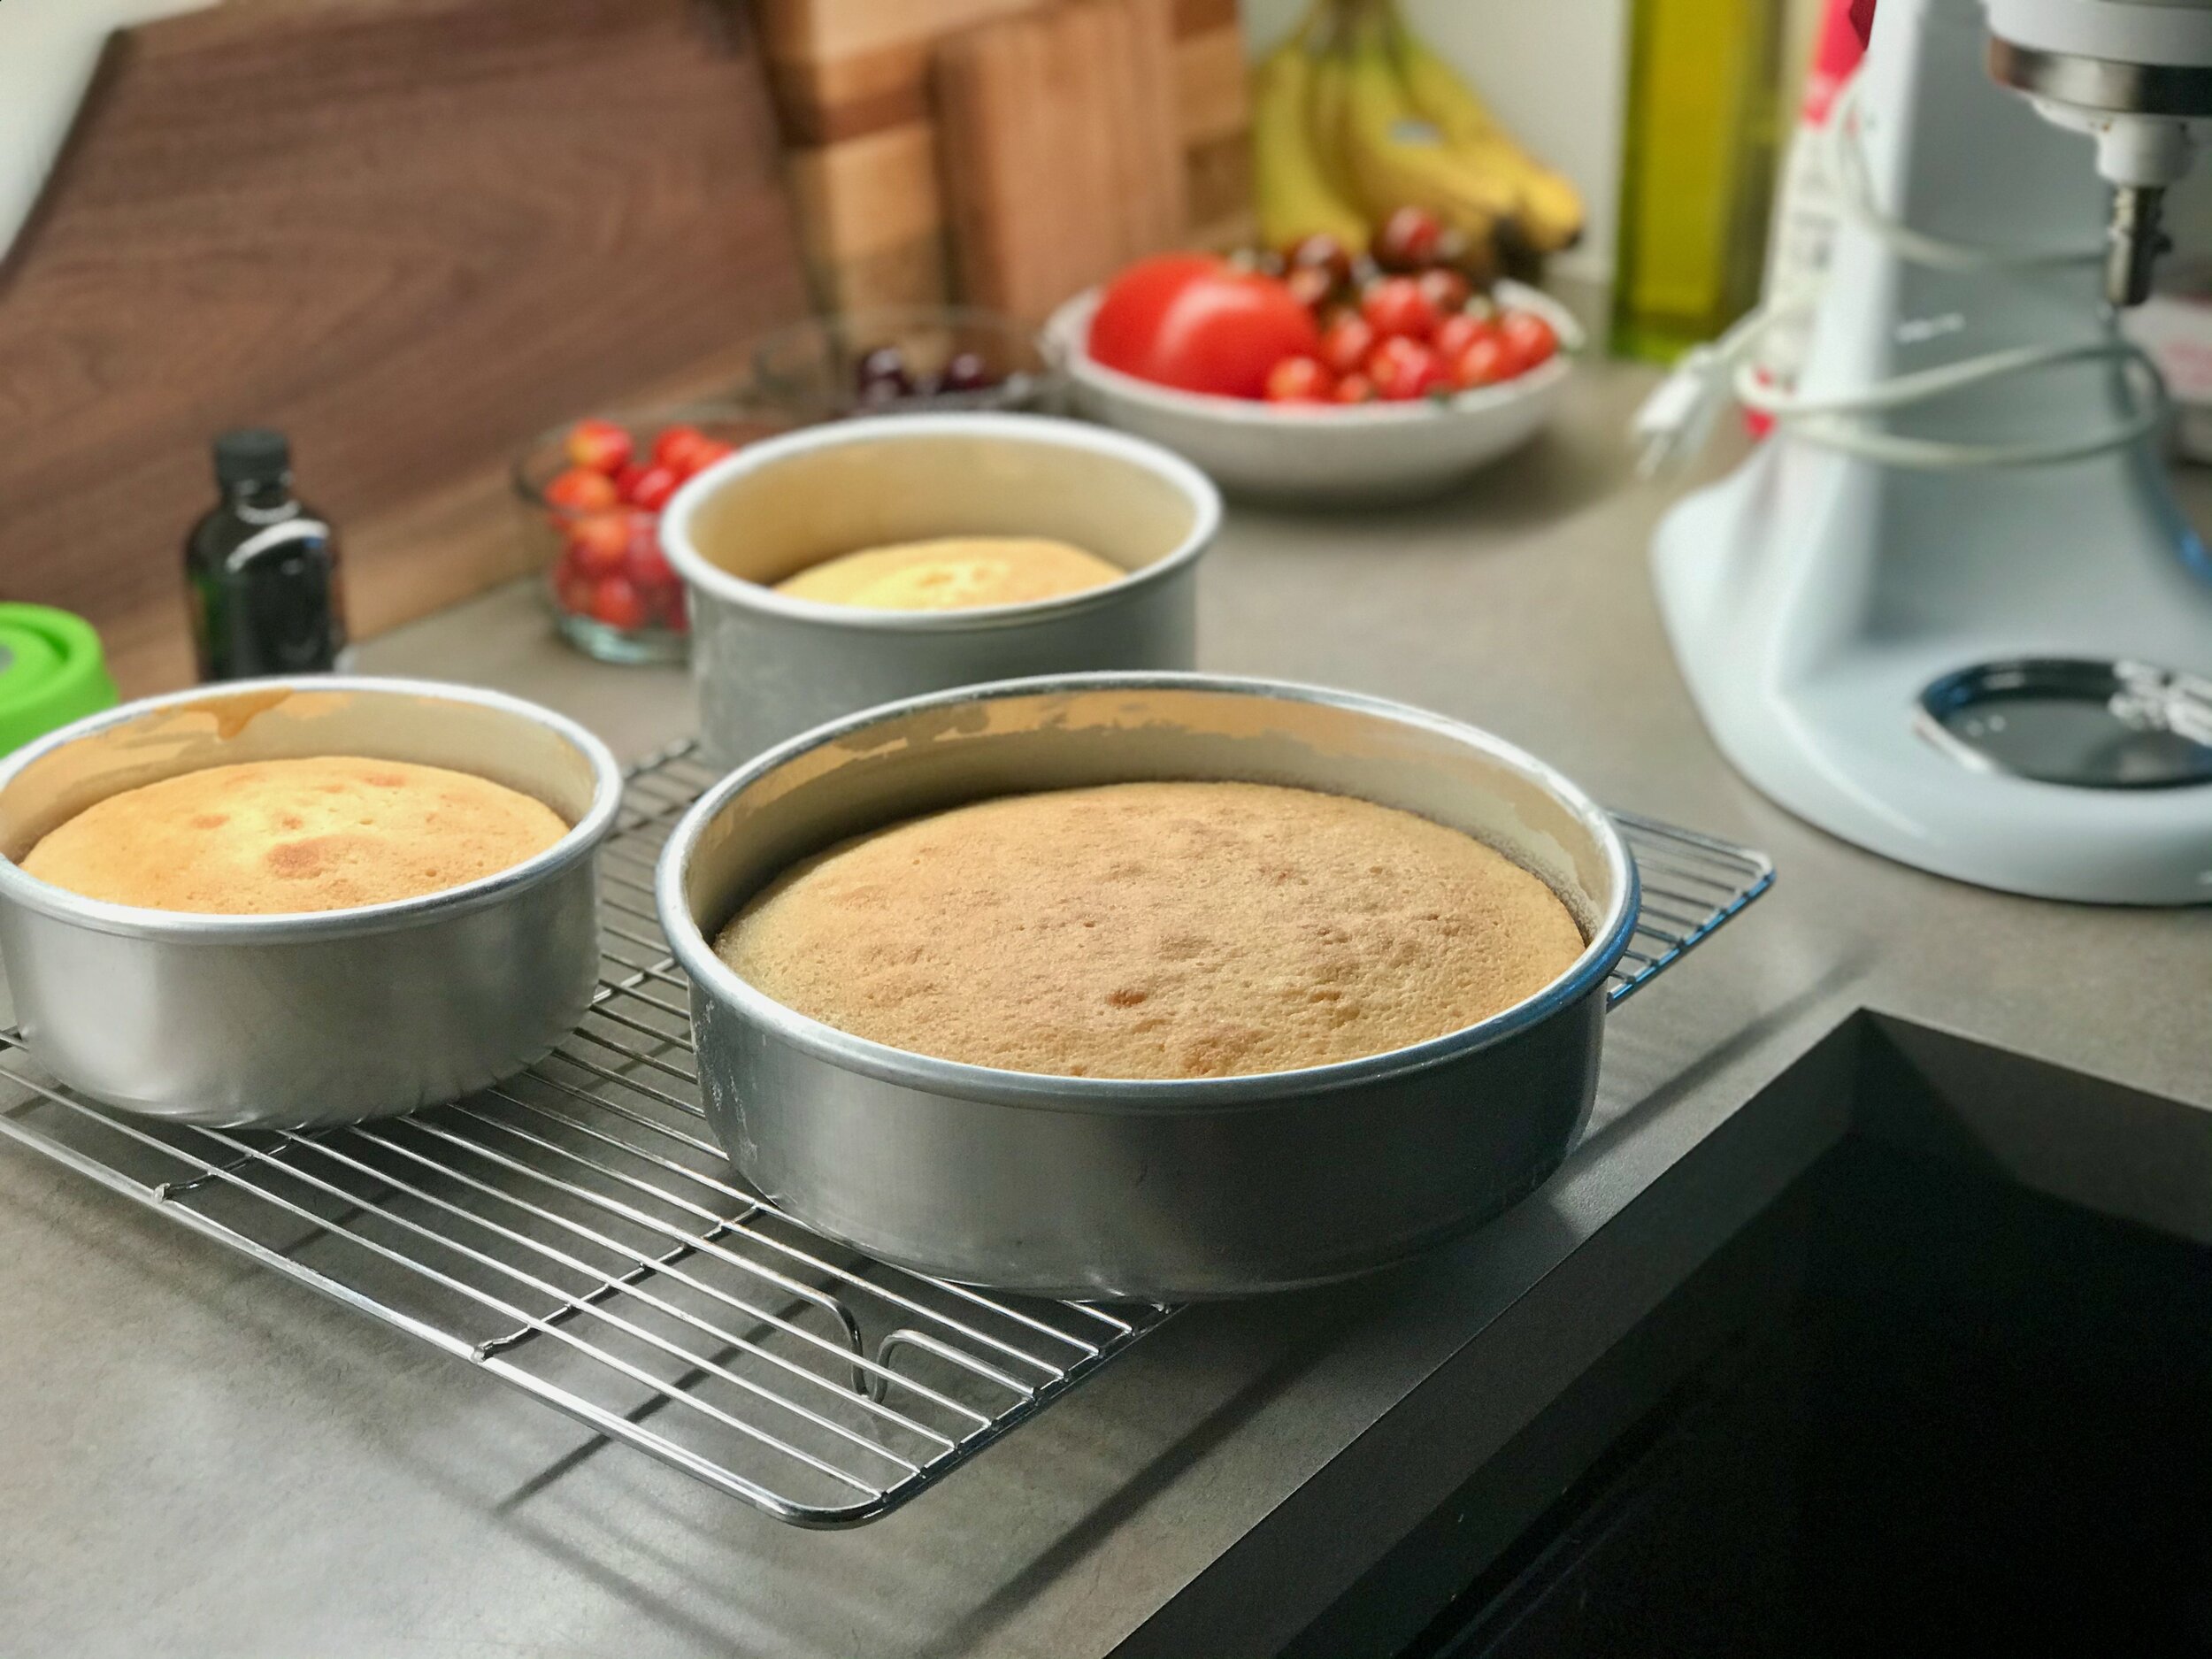
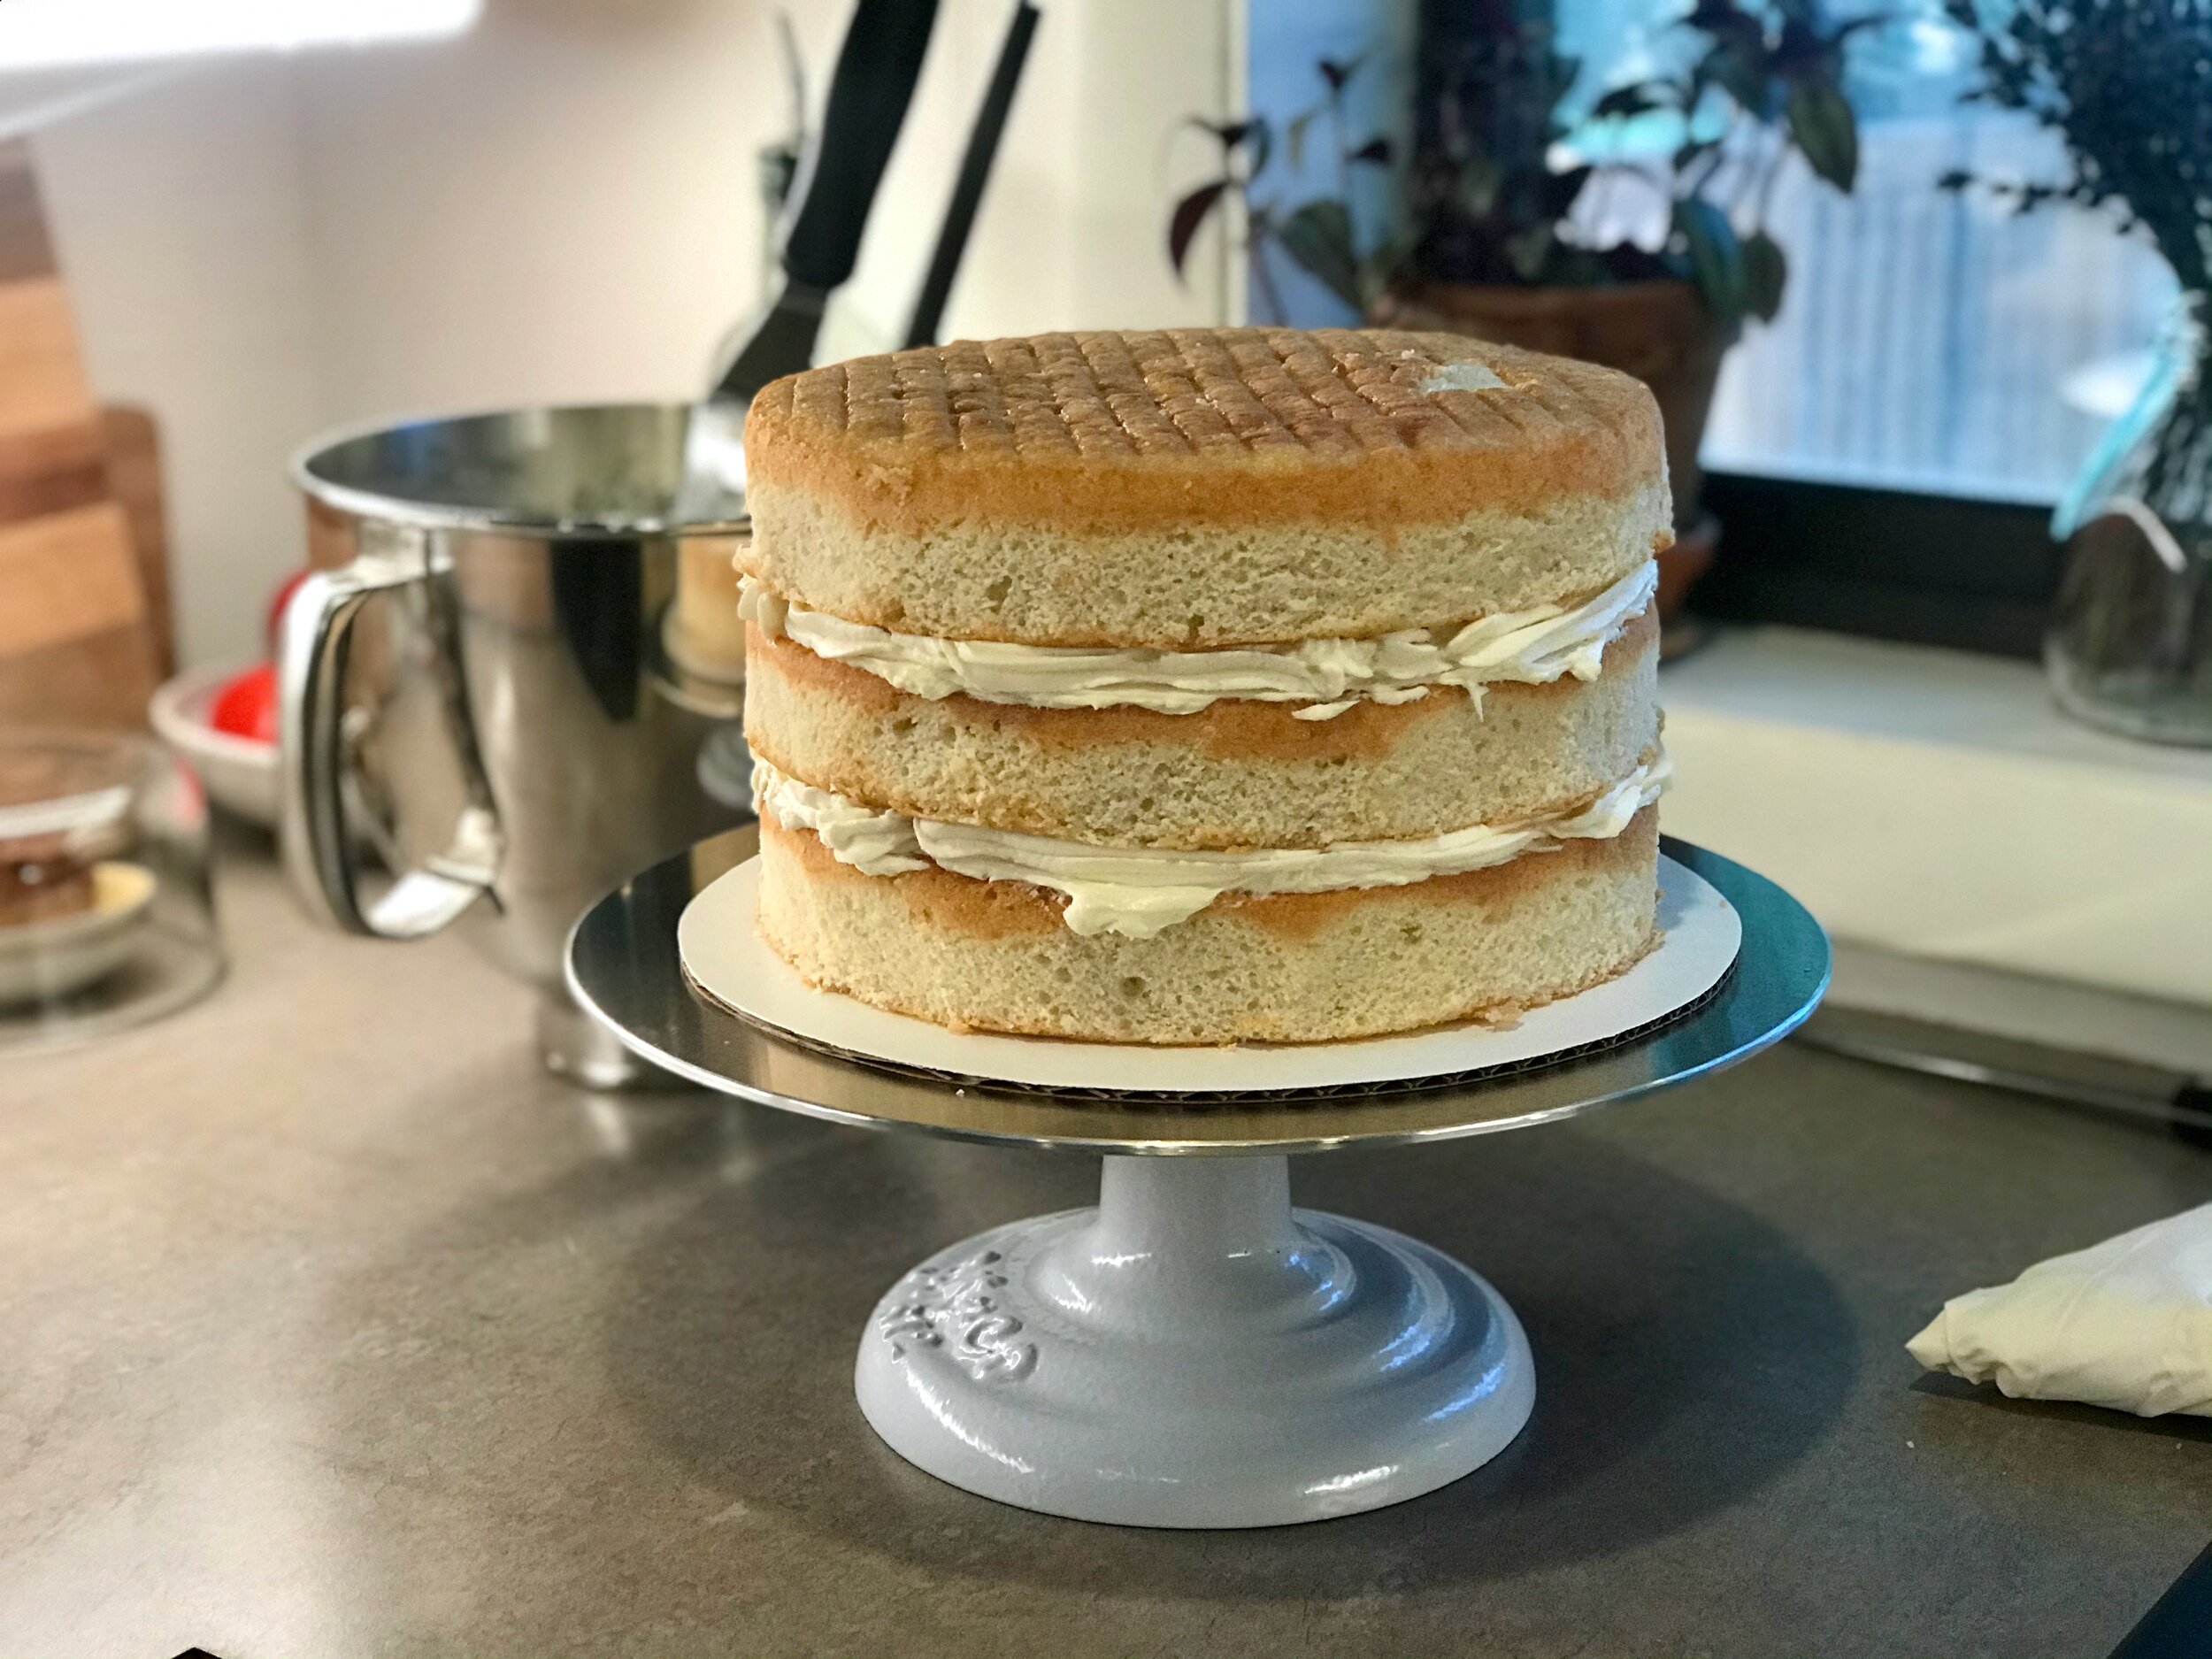
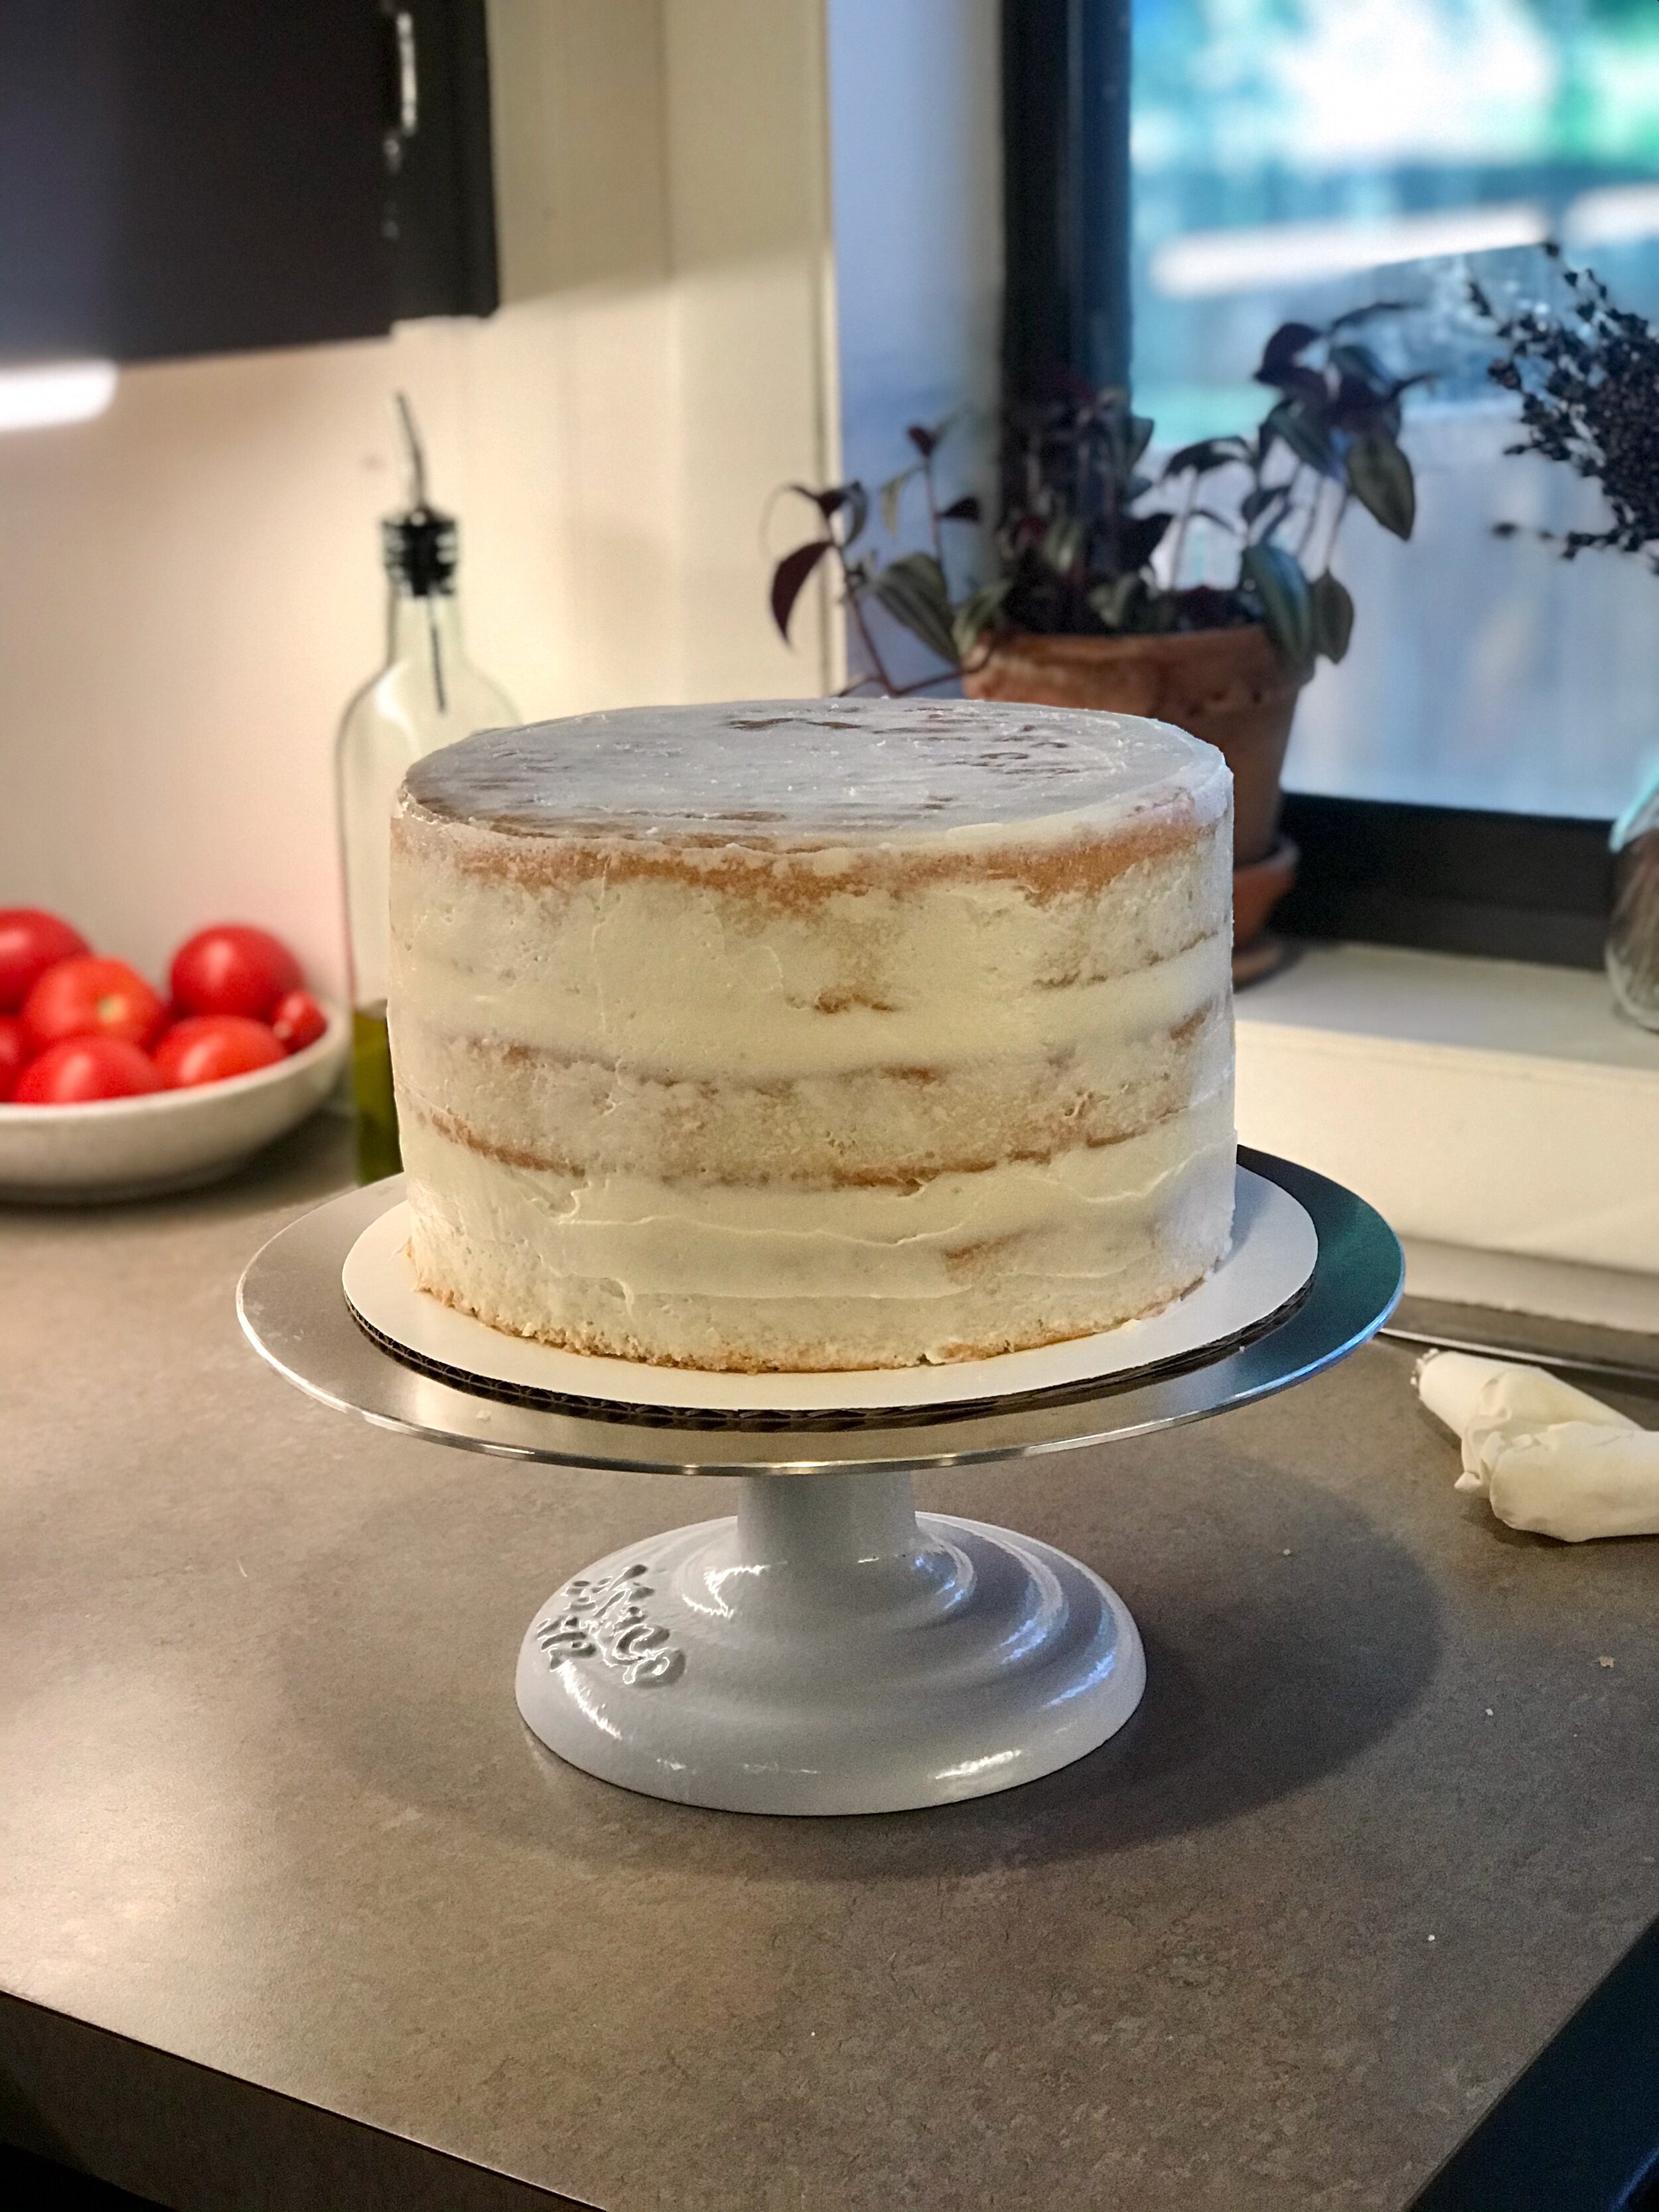
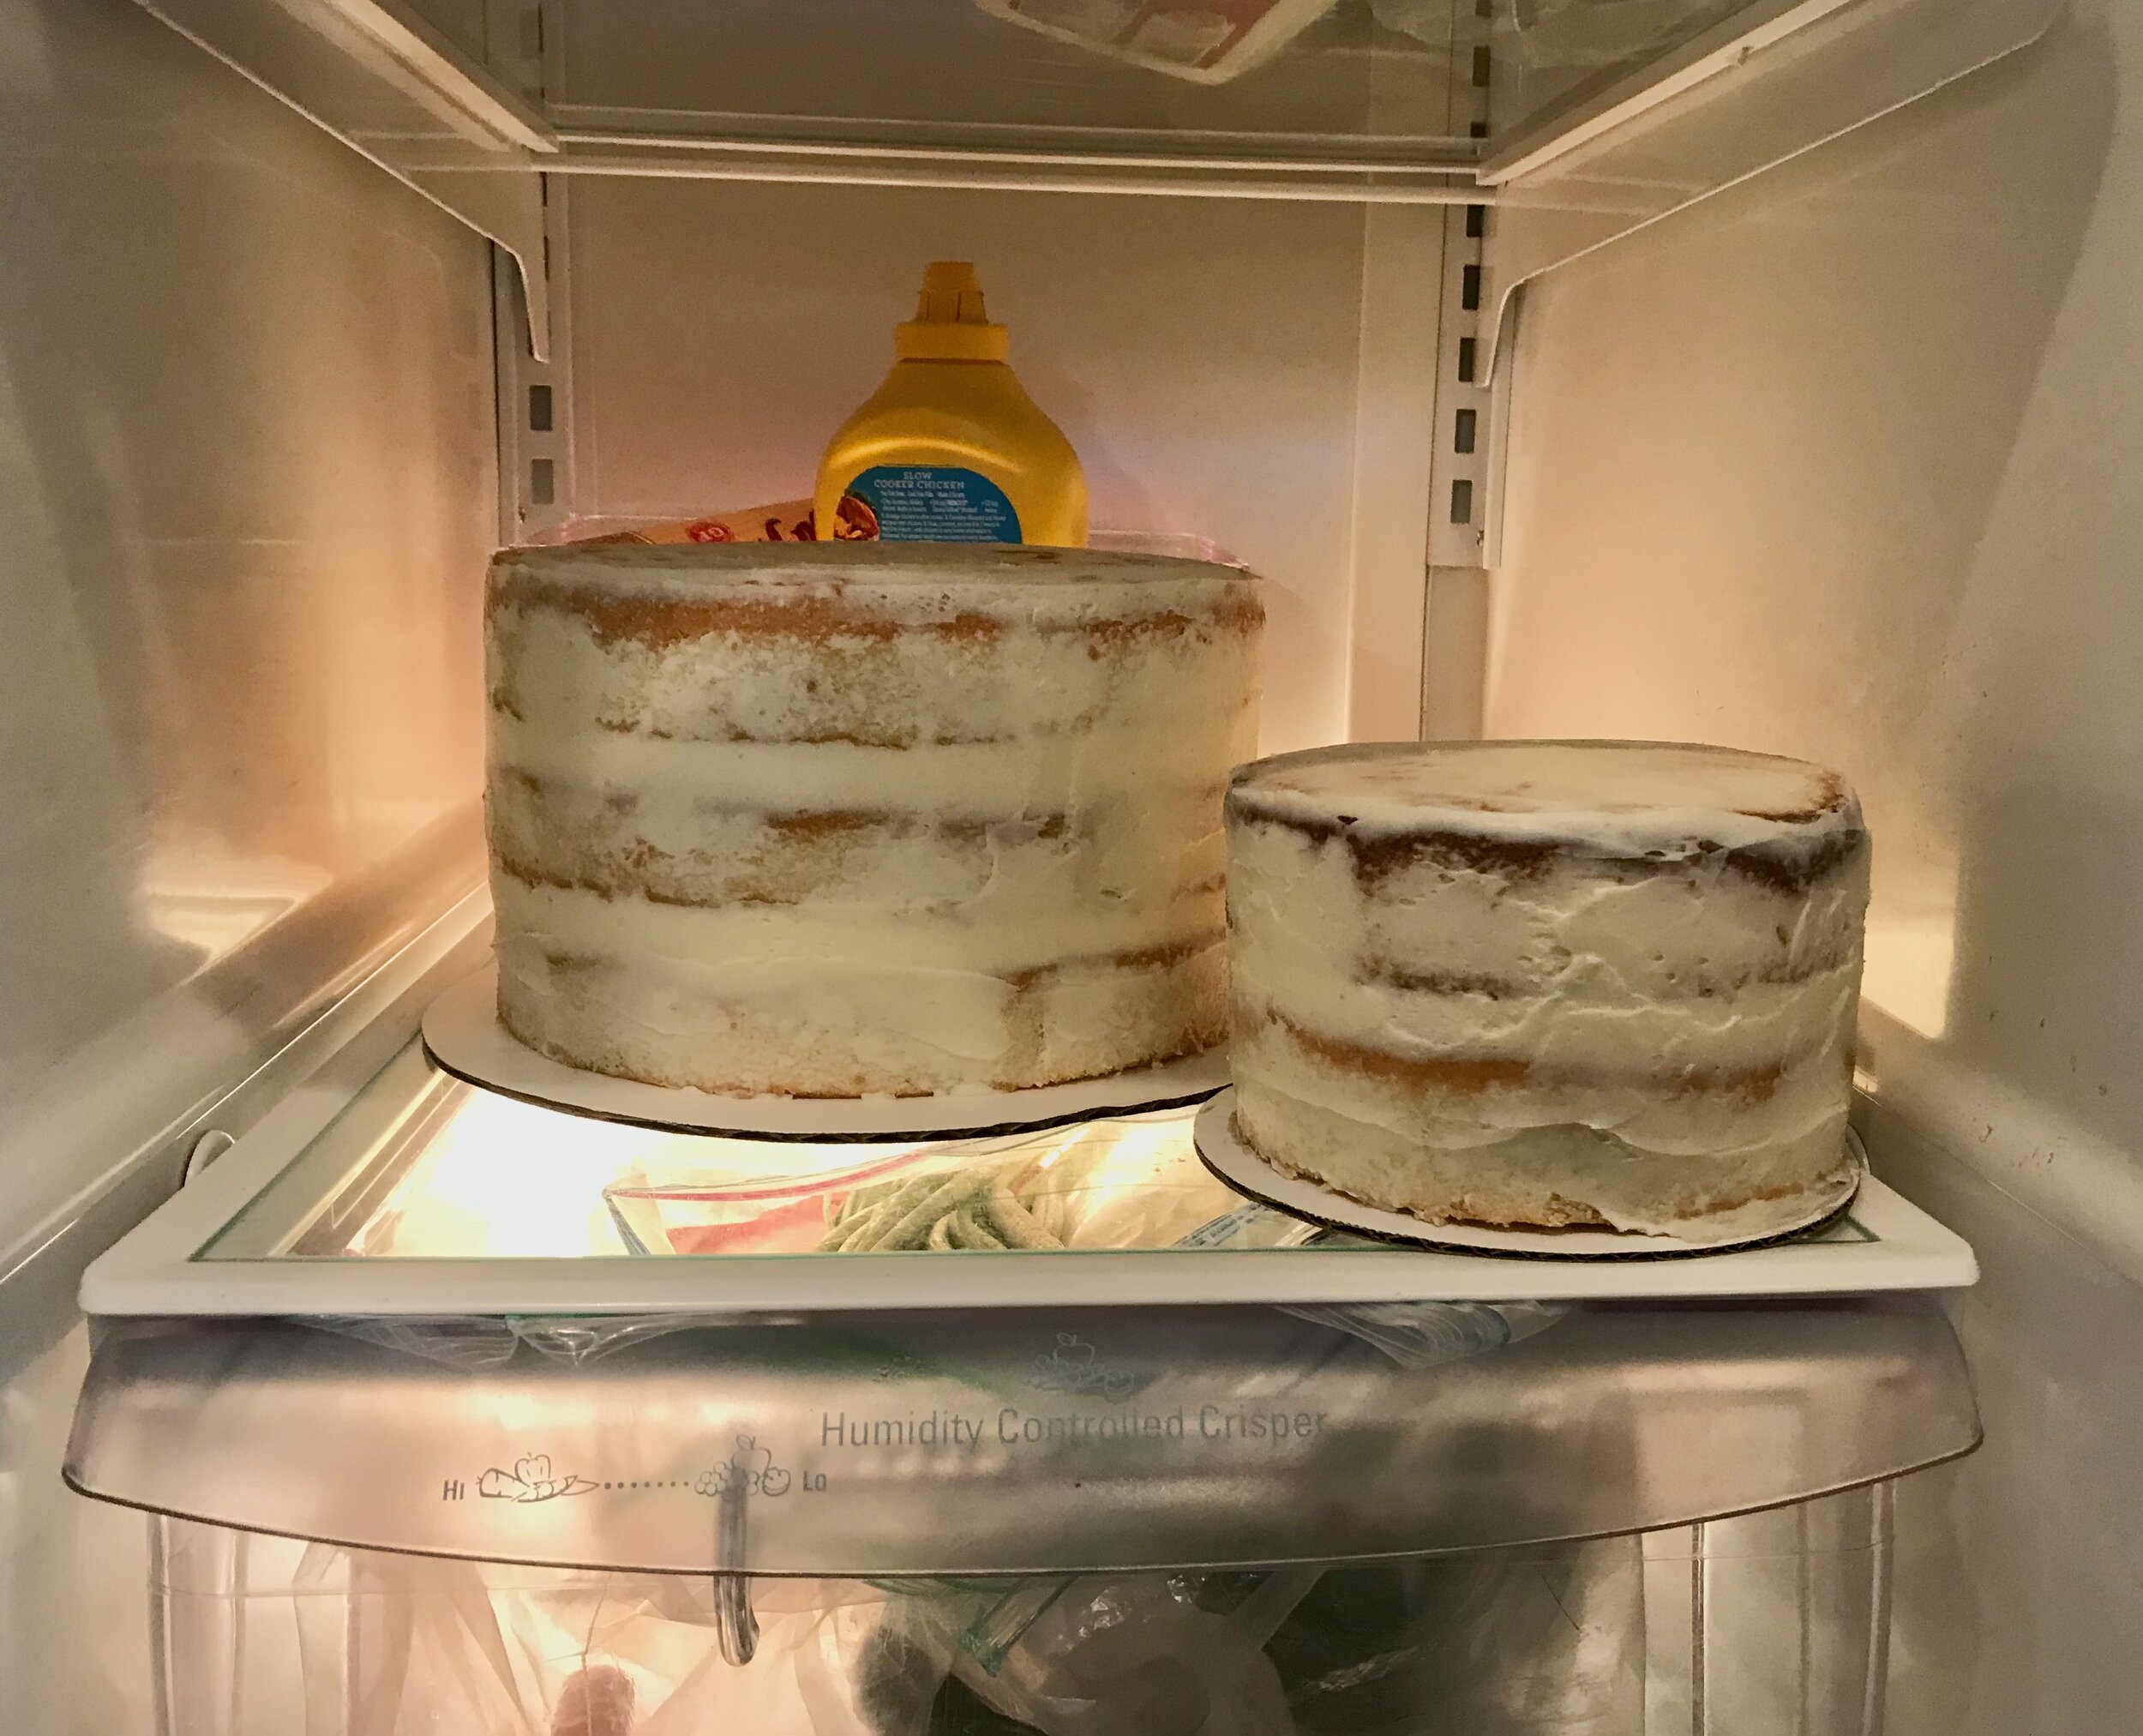
  • I made 2 full recipes of the cake for the tiered cake. Three 9-inch layers, and two 6-inch layers.

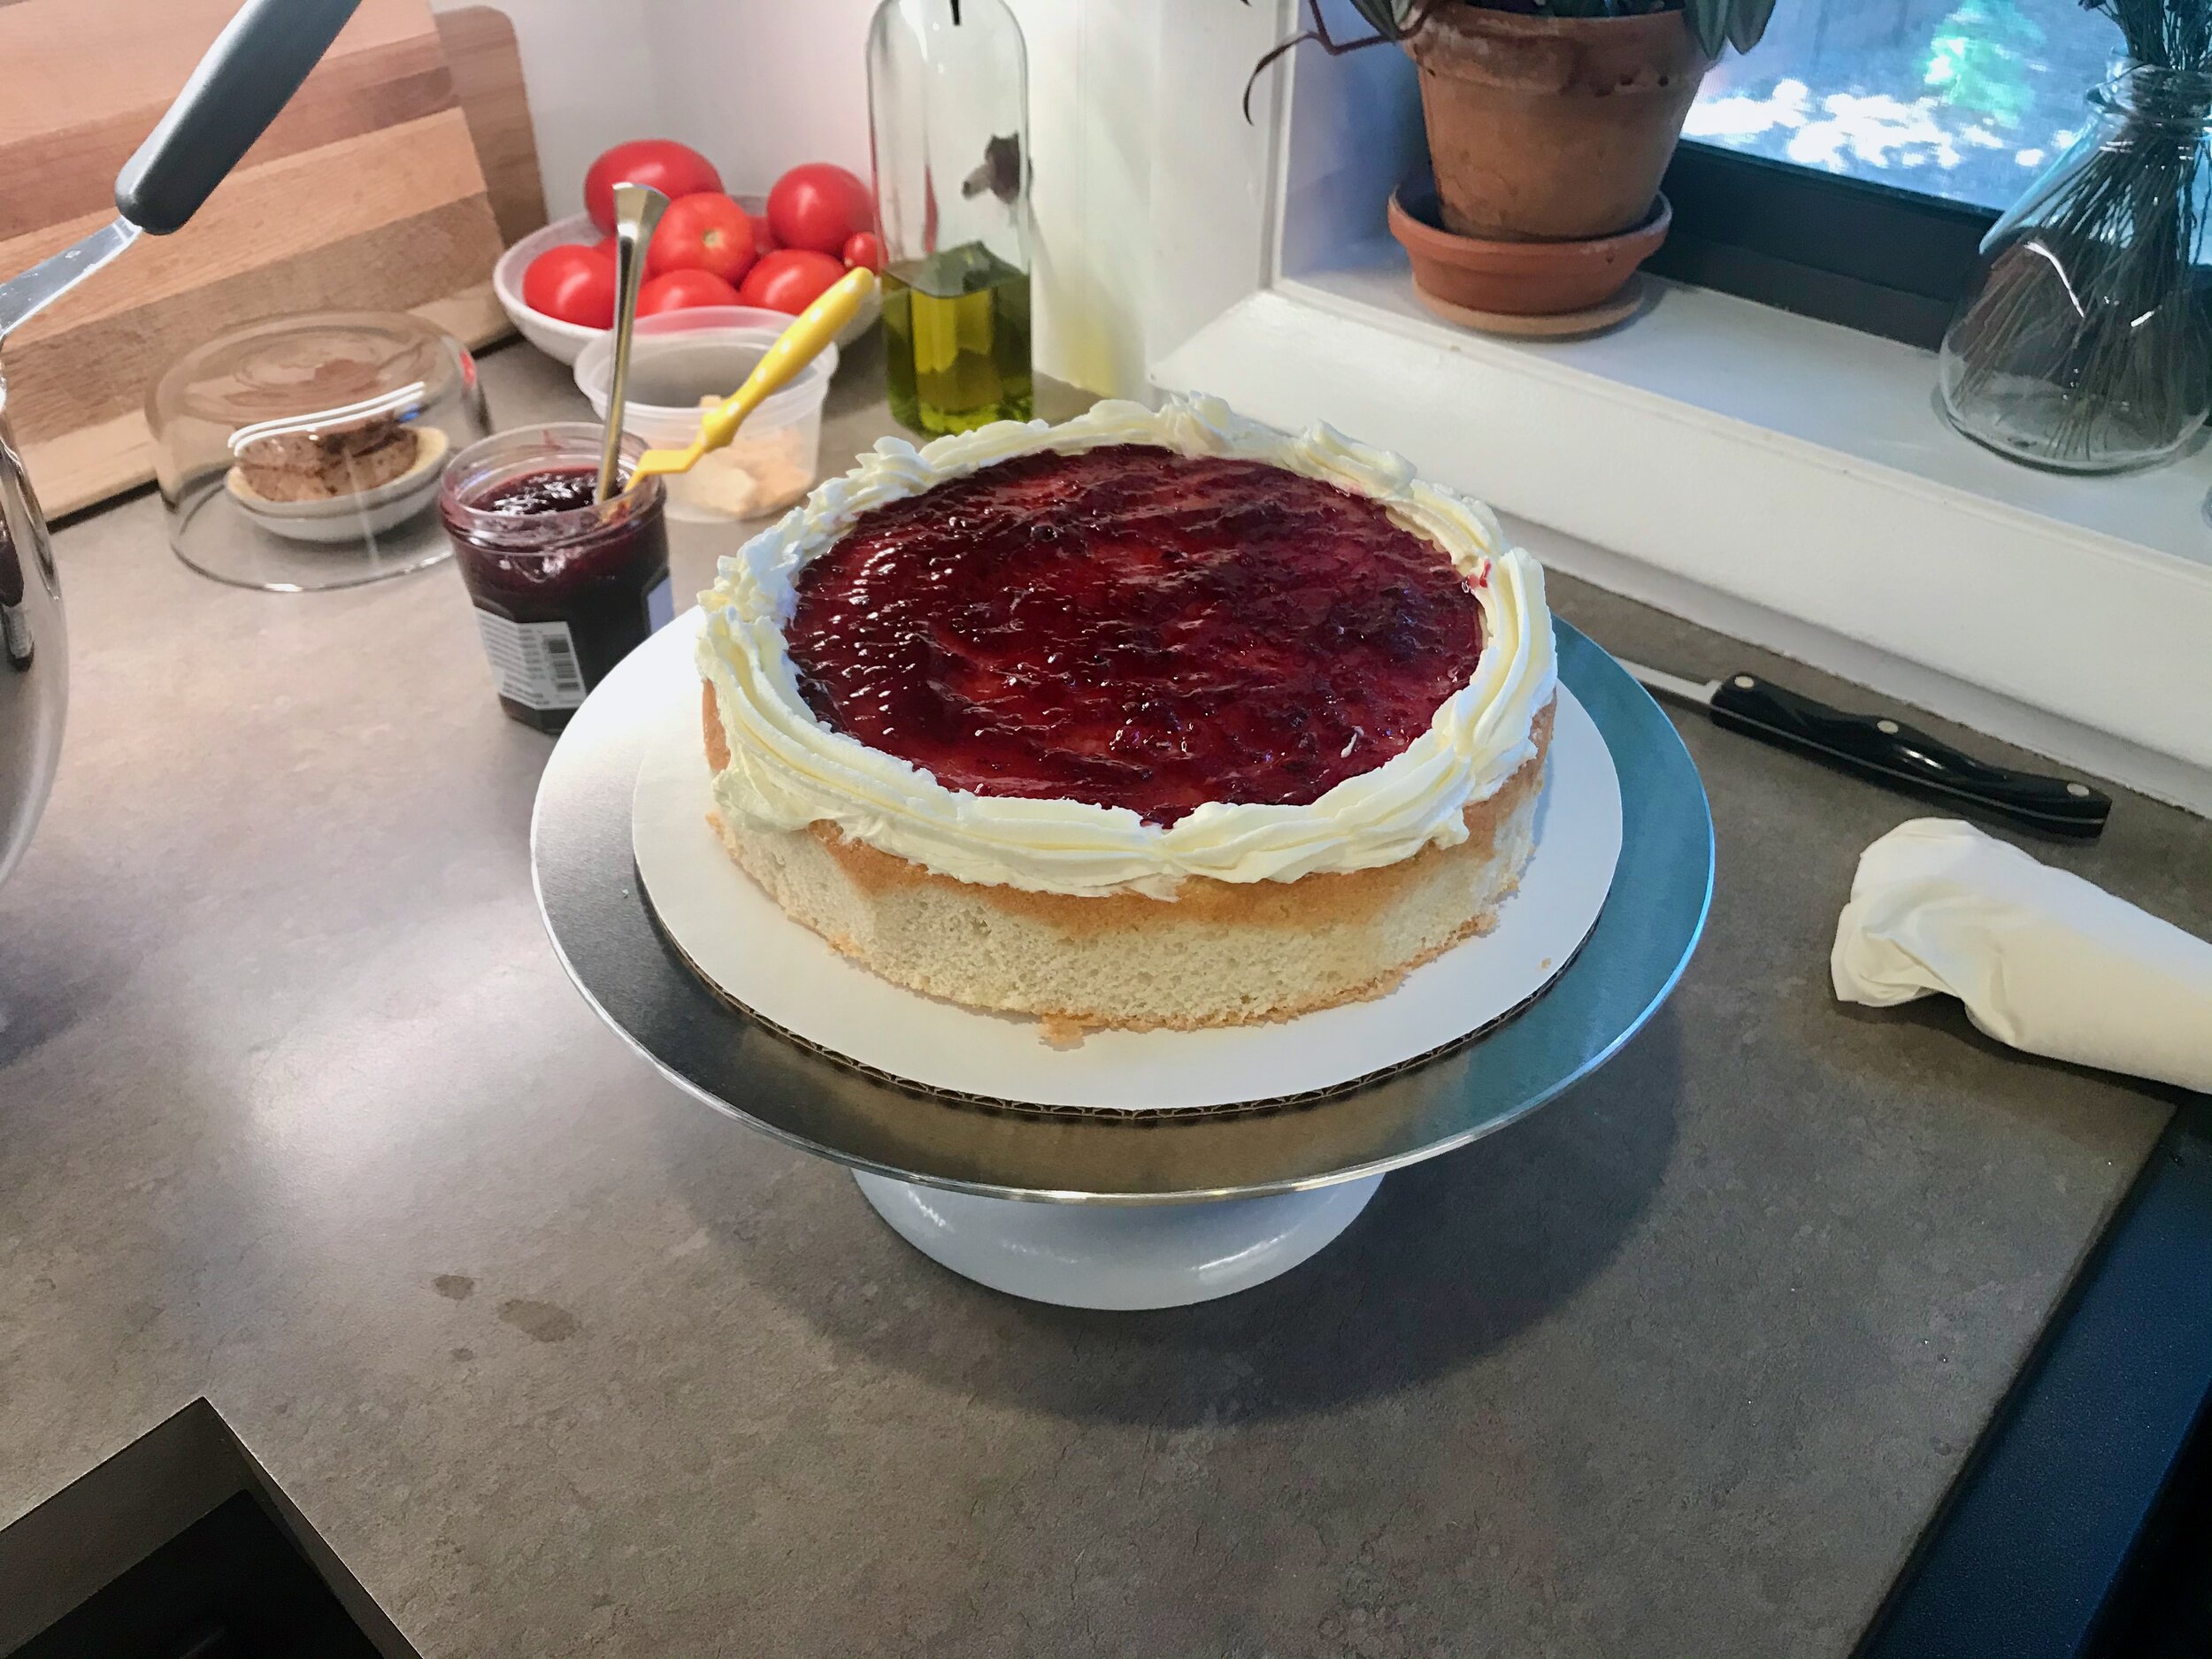
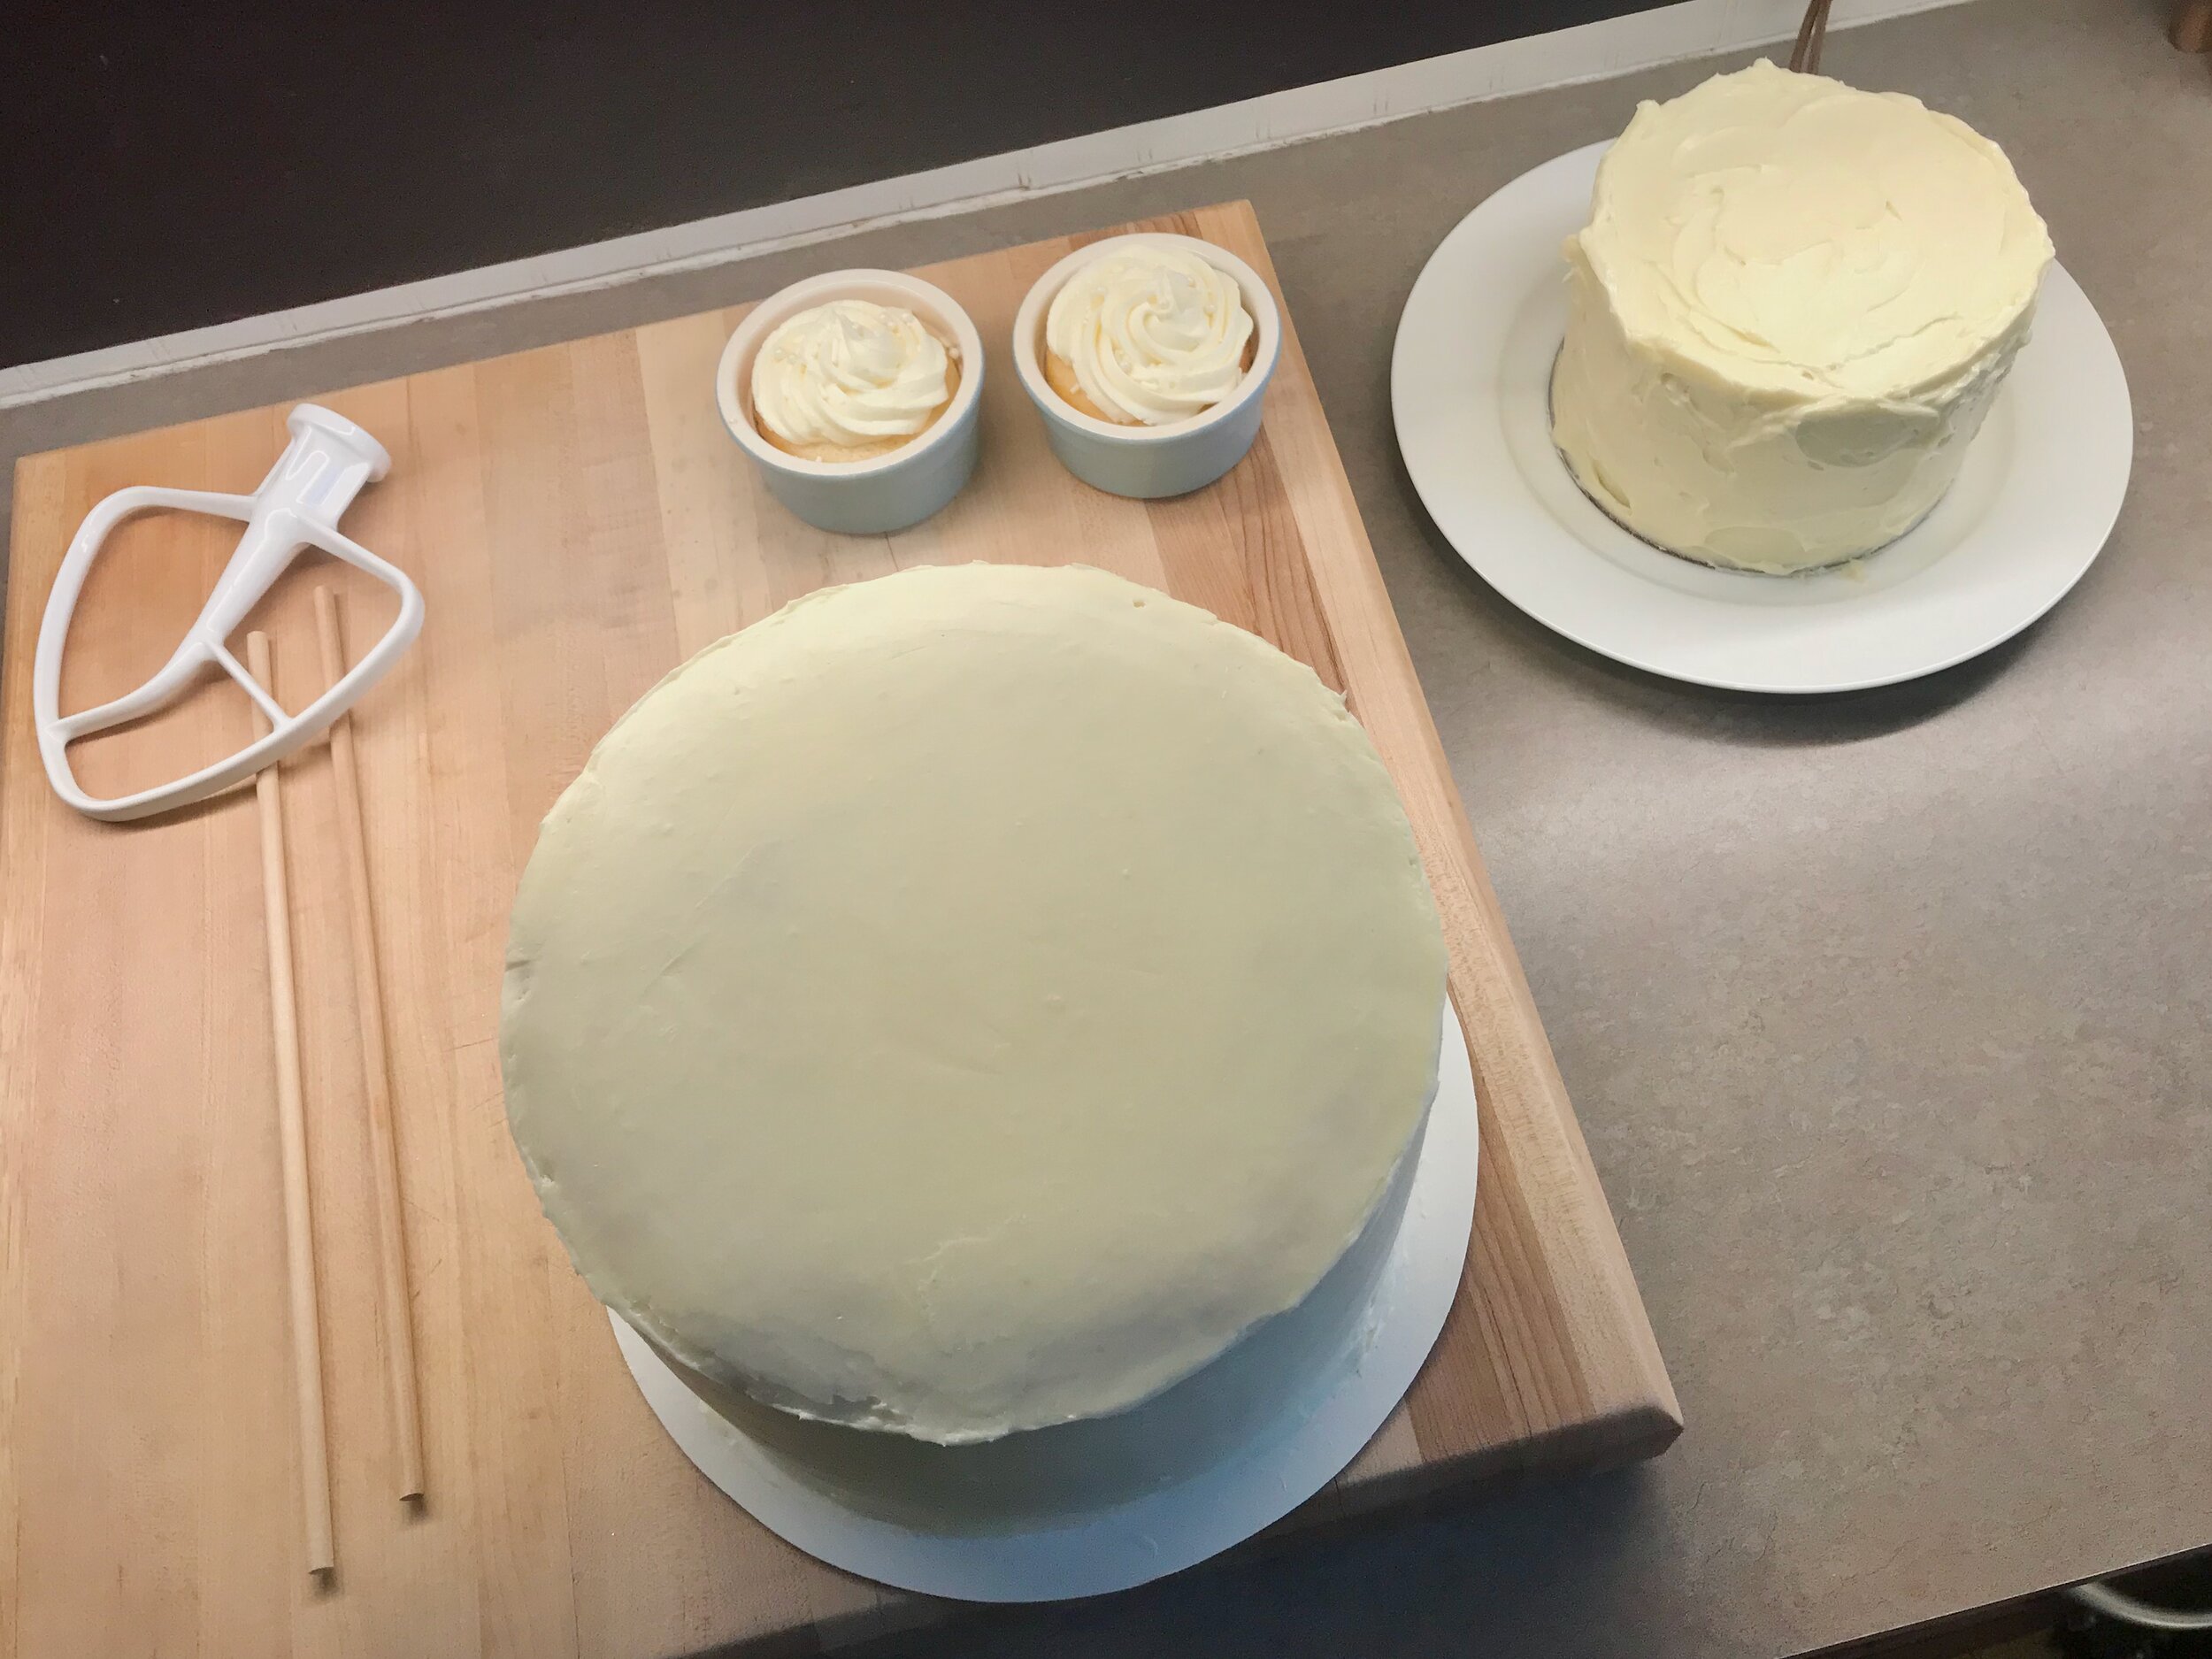
  • I made 2 full recipes of the Swiss meringue buttercream which was the perfect amount for this cake. However, I ended up using very little between the layers of cake. Just a very thin layer of the buttercream underneath the raspberry preserves to make sure the jam didn’t soak into the cake and make it soggy. Then I ended up using some leftover American buttercream as the frosting “dam”. If I had had to use some of the Swiss meringue as the dam instead there still probably would have been enough to frost the whole tiered cake, but it would have been tight. So if I were to do this again and needed to use the Swiss meringue in between the layers I would probably up the frosting recipe just a tad - add in 1-2 more egg whites and the corresponding amounts of sugar and butter.

  • If I had wanted to do any decorating with frosting then I definitely would have needed to make more.

  • I added 1 teaspoon of almond extract to each batch of cake and it was definitely noticeable. I really loved it, but if you want a more subtle flavor then I would only use 1/2 teaspoon.

  • I used a 6 inch cake round lightly pressed into the top of the frosted 9-inch cake to mark out where the second tier would go. I then inserted four cake dowels (cut to the height of the 9-inch cake) about an inch and a half in from the edge of the marked edge. Finally, I used a skewer the was 1-2 inches taller than the 9-inch cake as the center support to hold both tiers together. Note to self, put a hole in the center of the 6 inch cake round before frosting the top tier. I forgot to do this and had to use a new cake round, transferring the frosted tier to the new round before placing on the bottom tier.

  • Cut the 6-inch cake round slightly smaller so that it doesn’t stick out from under the later. After placing this tier onto the bottom tier, use a piping bag with pain circle tip to fill in a small line of icing between the two layers.

Sourdough Focaccia (Fourth of July, 2020)

IMG_5960.jpeg

Happy Fourth of July Weekend! It’s a HOT one here in West Michigan. This combo of events definitely = Beach! I went twice this weekend! First on Friday, the third, Lara and I went to Grand Haven city beach early when dogs are allowed (before 11), so we could walk the beach with Pinda and try to get him used to the water. We also wanted to avoid all the holiday weekend beach crowd. It was a glorious day. The lake was calm, the water was warm, and the sun was shining. Pinda is still not very sure about the water. He’ll allow us to drag him in, but then he turns right around and swims as fast as he can back to shore! It’s cute, but we want him to want to go in the water. Baby steps I guess!

IMG_2044.jpeg

Before doing anything else, we ate a chocolate muffin and drank coffee in the sand. Breakfast of champions! Then we headed down the beach for a walk and swim. Then we sat in our beach chairs and just watched the water and all the people for a bit. Relaxing and enjoyable! When we had to get the dog off the beach we headed into town to get some iced lattes at Aldea. Perfect! It was a hot walk along the boardwalk, but such a beautiful day. Mid-80s and sunny. Perfect holiday weekend!

Then, on the evening of the Fourth, my Aunt and Uncle invited me and my family out to their house on Lake Macatawa for some food and a boat ride on their new boat. She asked if we would bring some kind of appetizer. For the last few weeks/months I’ve really been liking the pizza dough I’ve been making and I’d been wanting to try making it into focaccia. I adapted a basic pizza dough recipe in order to use up my leftover sourdough starter from bread baking and it seemed like it could make a good focaccia as well. I decided this was the time and place to try it out.

IMG_2114.jpeg

I replaced some of the water and flour in the recipe with my discarded starter (I used 150 grams this time, in the past when I’ve made this as pizza dough I’ve done 120 grams and both seemed to work just fine in their respective settings so the recipe is pretty forgiving). I also increased the salt slightly from the original, I thought it needed a little more. I really like the addition of a small amount of oil and sugar to this dough. I think it adds the perfect balance of sweetness to the dough, as well as tenderizing it.

I let the dough rise for an hour before popping it in the fridge overnight. It ended up exploding out of the bowl I was using which is always kind of crazy! The next day I took it out and added in my mix-ins. I did cubes of sharp Irish Cheddar, some raw garlic, and a bunch of chopped fresh herbs (parsley, chives, thyme, and basil). I dumped all this into a parchment lined 9x13 inch glass pan in which I drizzled a nice amount of olive oil first (I have tried and tried to make focaccia without parchment and I have never succeeded. It ALWAYS sticks to the pan no matter what I do or how much oil I put in it. So I’ve just given in and now use parchment. It works great!). I let it rise for another 50-60 minutes until super puffy before baking. I looked at a few recipes and it seemed like most did 425, although I did see 450. I baked it for 30 minutes at 425. I would have liked it a little more brown on both the top and bottom, but the interior was soft and well baked so I wasn’t too upset about the browning.

IMG_9395.jpeg

Right before putting in the oven, I drizzled with a little more olive oil. Then, while the bread was baking I made a little garlic and herb infused oil that I brushed on top as soon as it came out of the oven. I heated olive oil, butter, and slivered garlic in a cold pan until it was just started to bubble but the garlic hadn’t browned yet. I took off heat and added herbs (thyme, basil and chopped parsley). Once the oil was brushed on I grated a some Piave Vecchio cheese over the hot bread and oil. So good!

IMG_1526.jpeg
IMG_3322.jpeg
IMG_2415.jpeg

I thought it turned out great! I think this is the best focaccia I’ve made yet. It was tall which I always want my focaccia to be. It seems like so many recipes make a thin focaccia, but I want my thick, thick, thick! The interior was super soft and delicious! I love adding garlic oil/butter to the top as soon as it’s out of the oven. It adds such great fresh flavor that you don’t get if you only add oil before baking.

Some things I’d like to try - while the interior was fantastic, I would like it a little more open crumb, hole-ier if you will. I would like to try adding more water to the dough at the start, making a more pourable dough. I could also try replacing some/all of the flour with bread flour to help with structure and chew. But if I never end up changing anything I would be very happy eating this focaccia from here on out!


Sourdough Focaccia
Adapted from Sally’s Baking Addiction
Ingredients

  • 150 grams leftover/discarded sourdough starter

  • 365 grams all purpose flour

  • 2 teaspoons instant yeast

  • 1 tablespoon sugar

  • 1 teaspoon salt

  • 2 tablespoons (25 grams) olive oil

  • 302 grams water

Directions
Add all of the ingredients to the bowl of a stand mixer with the dough hook and knead for 5-6 minutes, until nice and soft and smooth. Transfer to a oiled bowl and cover for an hour. Then place in the fridge until ready to use.

Once ready to bake, line a 9x13 inch pan with parchment paper and generously drizzle olive oil onto the parchment and spread all around the bottom of the pan. Transfer the dough to the prepared pan and use your fingers to spread it out until it evenly lays in the pan, touching all corners and sides as best you can. (If you want to add anything to the dough, add it before you transfer to the pan. Alternatively you can add these ingredients to the dough right away when it is first made, before the initial rise). You may need to let it rest for 5-10 minutes a couple of times to help the dough relax and be easier to spread. Once it is spread out, cover with plastic and let rise another 45-60 minutes until super poofy and tall.

Once ready to bake, drizzle with more olive oil and sprinkle with plenty of flaky salt. The more the better in my opinion… Bake in a 425 degree preheated oven for 30 minutes. If desired, poke some holes in the bread as soon as it comes out of the oven, brush the hot bread with a mixture of melted butter and olive oil (and garlic if you’d like, I do) and sprinkle with more flaky salt if desired (I do). Let cool completely before cutting.

You can cut into thin strips as I did this time, or you can cut into squares. I know this would make some delicious focaccia sandwiches!

IMG_4405.jpeg

Charred Onion Fritatta

IMG_5421.jpeg

Lara created this lovely fritatta a few weeks back to highlight some beautiful onions we got in our CSA. We had requested salad turnips but the farm had some bug issues and had to replace the turnips with sweet onions. I love onions so this wasn’t a big deal other than the fact that we still had a LOT of alliums in the fridge from the past couple of weeks. We were working through them but these onions added just that many more so we had to find something to do with them!

This recipe was all Lara, and she did a great job! The onions were the star, and it made some delicious lunches throughout the week!

IMG_5527.jpeg
IMG_1413.jpeg

Charred Onion Fritatta

Put about 1/2 TBS butter and 1 tsp of Olive Oil in a 10 in nonstick skillet at medium heat. Once butter if frothing, add 5-6 small onions, halved lengthwise, cut side down in butter. Let cook for 8-10 min until nice and brown, flip for another 2-3 min. Drizzle with about 1 tsp good balsamic vinegar. Put in a 400 degree oven for about 10 minutes. Top with chopped chives or the green ends of the onions if you have them. Lower over temp to 350 degrees. Let cool a few min. Then place back over med low heat. Whisk together 6 eggs and a splash of milk. Add a 1/2 tsp or so of red pepper flakes. Add 1 tsp of chopped rosemary and 1 tsp chopped parsley. Grate about 1/2 cup rosemary asiago cheese. Pour egg mixture over onions and let cook, scrapping the sides every min or so and tilting the pan to allow uncooked eggs to run under cooked eggs. Make sure to not disrupt the onions. Once the eggs mixture is starting to set around the sides, sprinkle cheese over top and place in the 350 degree over for about 8 min or until middle has just set. Will puff around the edges. Let cool a few min in pan, slip out the whole frittata onto a cutting board and slice into desired pieces.

Sesame-Walnut Manoushe with Zucchini And Yufka Flatbread

My friend Ilana recently let me borrow a cookbook of hers that she thought I would like. Soframiz by Ana Sortun and Maura Kilpatrick. They run a restaurant called Sofra Bakery and Cafe in Cambridge, Massachusetts which Ilana has been to and highly recommends.

The cookbook has a lot of good breakfast and lunch options, as well as a great dessert section. There is a whole section of sandwiches/flatbreads which is definitely what I am drawn too. Most of these are made on a homemade flatbread called Yufka which from what I can tell is very similar to a tortilla (and similar to other homemade tortillas I’ve made). It’s a simple dough of flour, salt, water and olive oil. You do have to let the dough sit for about 4 hours before rolling out but it’s so quick and easy to put together this isn’t a big deal. Mix it all up and let it sit!

IMG_3858.jpeg
IMG_0366.jpeg

Rolling out the dough: with all flatbreads the question is always, how well/easily will the dough roll out? This one wasn’t too bad. It’s 100% white flour which helps, and it’s enriched with olive oil which also helps. After it sat for about 4 hours it was fairly easy to roll out. I shaped the dough into 6 balls. I then went through and did an initial rolling out of the six pieces during which they didn’t roll out very thin, they definitely wanted to spring back as I went. However, I just went through all six pieces and gave them this initial roll, and then I went back around to roll them out again. After this initial roll and short rest they then rolled out very nicely without much problem at all. I cooked them up in a 12 inch cast iron skillet which worked great. I really like how this recipe calls for you to only cook one side of the flatbreads. I’ve never tried that before but I feel like it really helped keep them from drying out which sometimes happens with thin flatbreads. I’ll probably do this with other recipes in the future.

IMG_8222.jpeg

I did not follow the filing recipe exactly as it is written below from the cookbook, but I used it as a loose guide using what I had on hand, not measuring everything. I started with grating about 1/2 an onion and a fairly large zucchini which I squeezed to get rid of excess water before adding to the pan. Towards the end of cooking I added a minced clove of garlic, and two bunches of Tatsoi from my CSA that I needed to use followed by a couple tablespoons of ricotta once it was off the heat. I mixed this all together and then add nice chunks of deliciously creamy French feta and folded in gently to maintain the large pieces. I didn’t have any haloumi so I skipped this, and instead of pomegranate molasses I used balsamic vinegar. I didn’t have any Maras pepper or sesame seeds. As for herbs, I threw in what was on the counter; a little basil, mint and Italian parsley.

The filling turned out wonderfully! It was a fun mix of different things that I eat, but maybe wouldn’t typically put together this way! It was delicious and perfect to fill the flatbreads with. I put down a nice layer of my favorite red pepper sauce to start, and then topped with the filling. I finished with extra feta. Then fold in the dough on both sides and press to hold in place. I then grilled these up on the grill. This was a tiny bit tricky to make sure the filling didn’t all out when I flipped them over (I probably over filled them a bit too) but in the end I was very successful, just had to be careful. You could definitely just bake in the oven for a few minutes, or fry up in a pan as the recipe stated. Just get them heated up and warmed through.

I had the leftovers for lunch the next few days and it was delicious! Definitely not as crispy as day-of, but still wonderful, and easy for a nice lunch! If I was at home would have reheated in either a skillet or the oven and I imagine it would have been just as good as the day they were made!

Sesame-Walnut Manoushe with Zucchini
Ingredients

  • Yufka Dough (recipe below)

  • 2 cups grated zucchini or cousa squash

  • 1/2 teaspoon kosher salt

  • 1 Spanish onion

  • 2 tablespoons plus 2 teaspoons extra-virgin olive oil

  • 1/4 cup cup walnuts, lightly toasted and finely ground in a food processor

  • 1/2 cup grated haloumi cheese

  • 3 to 4 ounces crumbled feta, or 4 ounces buffalo milk mozzarella, broken up into small pices

  • 1 tablespoon pomegranate molasses

  • 3/4 teaspoon Maras pepper

  • 2 tablespoons toasted sesame seeds

  • 2 tablespoons chopped fresh flat-leaf parsley

  • 1/4 cup sliced fresh basil leaves

Directions
Follow the directions to make the yufka dough, transfer to a plastic bag and store at room temperatures. Sprinkle the zucchini with the salt and let stand in a colander or a bowl for 5 minutes to draw out water.

Using the large holes of a box grater, grate the onion over a plate with sides. Place in a strainer and rinse with cold water. Squeeze dry by placing it in the palm of your hand, making a ball and then flattening it as hard as you can to get the water out. Repeat the squeezing with the zucchini. Sweat the zucchini with 2 teaspoons olive oil in a spall saute pan over medium heat until it is barely tender, about 3 minutes.

In a large mixing bowl, combine the onion, zucchini, walnuts, haloumi, feta, pomegranate molasses, Maras pepper, sesame seeds, remaining 2 tablespoons olive oil, parsley and basil. Mix until the filling is spreadable.

When you are ready to assemble, put about 1/3 cup filling on each yufka and smooth it to the edges in a very thin layer. Fold the left side in towards the middles and then the right sides towards the middle, overlapping by about 1/2 inch, to form a rectangle shape with an open top and bottom.

When the manoushe are assembled, heat an 11-to-12 inch cast iron or nonstick pan over medium-low heat. Place two manoushe at a time, seam side down, in the pan. Cook until the filling is hot and the bread is lightly toasted on one side but still soft on the other, 3 to 4 minutes. Flip to the other side and cook 1 minute more to heat through. Place on a tray and cover with aluminum foil to keep warm while you cook the remaining four manoushe. Cut into halves or strips and serve immediately.


Yufka Dough
Ingredients

  • 1 2/3 cup (200 grams) all purpose flour

  • 1 teaspoon kosher salt

  • 2/3 cup (150 grams) warm water

  • 2 tablespoons extra virgin olive oil

Directions
In a medium bowl, whisk together the flour and salt. Make a well in the center and pour in the water and olive oil. Using your fingers, draw the flour in from all sides, working the mixture until it’s sticky and forms into a ball. Turn the dough onto a floured surface and knead until smooth and elastic, about 3 minutes. Transfer back to the bowl, drizzle with a little bit of oil and turn to coat. Cover with plastic wrap and let rest at room temperature for at least 4 hours, or up to overnight.

Divide the dough in half, then divide each half into three equal pieces; you should have six equal pieces, each weighting about 2 ounces of 60 grams.

Roll out each yufka ball into a very thin 8-to-9-inch round, using plenty of flour to keep the dough from sticking to the rolling pin.

Heat an 11-to-12 inch cast-iron or nonstick pan over medium heat and cook the yufka on one side until it starts to bubble up and lightly brown on the bottom, about 2 minutes. You only need to partially cook each flatbread at this stage; don’t get them too crispy or they will be dry and hard to work with. Stack them on top of each other as you cook each one so that they lightly steam and keep each other soft and pliable.

Transfer the warm yufka to a large zip-top plastic bag and store at room temperature up to overnight, or freeze for later use.

Memorial Weekend 2020 (and Chili-Red Pepper Chicken Kebabs [Tavuk Şiş])

IMG_8210.jpeg

It was a bit different of a Memorial Weekend this year. No annual Memorial Day parade. No Monday morning waffle tradition with friends. No big cookout in the afternoon. It was a much quieter and more low key weekend. I really had no plans going into the weekend, but as each day passed they filled up with small gatherings and outings with a few friends and family members. It turned into one of the most lovely and relaxing holiday weekends! And tasty, very tasty…

IMG_8209.jpeg

Friday night I had a friend over to grill out and relax in the back yard. She provided the burgers and wine, while Lara and I provided the grill and the remainder of the food. We grilled up some juicy burgers, topped them with sharp and crumbly Irish Cheddar (one of my favorites!) and garlicky red pepper sauce that is to die for. The sauce was actually made to use on chicken skewers that were on the menu later in the weekend (see below) but it is so good that I doubled the recipe and ate it on pretty much everything this week including these burgers. The juicy meat, sharp cheese, and sweet and garlicky sauce were a perfect combination that I will definitely do again!

We grilled up some asparagus to have on the side which I tossed with a super garlicky Parmesan vinaigrette. My basic go-to of lemon juice and zest, whole grain mustard, salt, garlic and olive oil. This time I added a lot of extra raw garlic, 2 full cloves (if you’re a little nervous about raw garlic then this would not have been for you… but I LOVED it!) as well as a couple of handfuls of grated Parmigiano-Reggiano. The resulting dressing was almost more of a paste at this point. I tossed it together with the hot asparagus straight off the grill and it was so good.

IMG_7989.jpeg

The next day started with a lovely scone and coffee breakfast on the porch. It was the perfect weather for lounging outside for as long as I wanted. Hot coffee, buttery scone, and great company!

Later that afternoon my parents came over for a cook out. We grilled up a new chicken skewer recipe with red pepper paste with homemade Greek yogurt pita, and a fresh green salad. This red pepper paste is the sauce that I was talking about above that we also served with the burgers. Super versatile! It’s apparently a take on a Turkish red pepper paste called biber salçası. This was the first time I’ve heard of this recipe so I know nothing
about it other than that it was delicious!

IMG_8020.jpeg
IMG_8025.jpeg
IMG_8023.jpeg

We ate outside again, enjoying each others company (it had been a long while since I’d seen my dad!), and finally getting the dead branches out of the trees in the backyard. Thanks dad! :)

IMG_8026.jpeg

Finally, on Memorial Day, after another fantastic front porch scones breakfast —> (it was so lovely the day before we had to do it again!) we headed out to a nearby state park that I had never heard of to go kayaking and paddle boarding with friends.

I had never paddle boarded before so I was excited. The lake was lovely, the weather was perfect and the company was great. Since our friends provided the entertainment, Lara and I provided the food.

IMG_8032.jpeg
IMG_8038.jpeg

We thought long and hard (as always!) about what would be best for a picnic after kayaking. We ended up making chicken pesto salad wraps. We grilled up a few boneless skinless chicken breast, cubed it up, and tossed it with plenty of pesto sauce, chunks of fresh mozzarella (similar size to the chicken), and halved cherry tomatoes. It was soooooo good! I’ve made similar things, but never this exact recipe. I loved the soft fresh mozzarella that had marinated in the pesto by the time we ate it. We ate this on more of the homemade Greek yogurt pita. Served with more grilled asparagus, some cold drinks and fruit, it was a perfect picnic!

That was about it for the weekend. Other than one more simple treat, my first iced latte of the summer! What better way to end the weekend!

——————————————————————————————

Chili-Red Pepper Chicken Kebabs (Tavuk Şiş)
Recipe from 177 Milk St
Ingredients

  • 1/2 cup drained roasted red bell peppers, patted dry (I roasted my own and used one full roasted pepper)

  • 6 medium garlic cloves, smashed and peeled

  • 2 fresno chilies, stemmed, seeded and roughly chopped (I wasn’t able to find any fresno chilies so I omitted this and the recipe was still delicious but I would love to make again with the fresnos to see what they add to the mix)

  • 1/4 cup (50 grams) extra virgin olive oil

  • 2 tablespoons dried mint

  • 2 tablespoons aleppo pepper (or 1 tablespoon sweet paprika plus 1/4 teaspoon cayenne pepper) (I used the paprika + cayenne)

  • 1 tablespoon (21 grams) honey

  • 1 tablespoon tomato paste

  • Kosher salt

  • 1 1/2 tablespoons fresh lemon juice

  • 2 lbs boneless, skinless chicken thighs, trimmed and cut crosswise into 1-inch strips (I bought 6 bone-in thighs and boned them myself, this was around 2 lbs)

  • 3 tablespoons chopped fresh mint (I didn’t use, my mint plant isn’t big enough yet!)

Directions
In a food processor (or high-speed blender, I used my Vitamix), combine the roasted red peppers, garlic, chilies, oil, dried mint, Aleppo pepper, honey, tomato paste and 2 teaspoons salt. Process until almost smooth, 45 to 60 seconds, scraping the sides as needed. Measure 3 tablespoons of the puree into a small bowl, then stir in the lemon juice; cover and refrigerate. Transfer the remaining puree to a medium bowl, add the chicken and toss to coat. Cover and refrigerate for at least 1 hour or up to 12 hours.

Prepare a charcoal or gas grill for direct, medium-high heat. For a charcoal grill, ignite a large chimney three-quarters full of coals, let burn until lightly ashed over, then distribute evenly over one side of the grill bed; open the bottom grill vents and the lid vent. For a gas grill, turn all burners to high. Heat the grill, covered, for 5 to 10 minutes; clean and oil the grate. Remove the reserved puree from the refrigerator.

While the grill heats, thread the chicken onto eight 10- to 12-inch metal skewers (I only got 6 skewers out of this, not 8), evenly dividing the pieces and scraping off excess marinade. If using a gas grill, turn all burners to medium-high. Place the skewers on the grill, on the hot side if using charcoal, and cook, uncovered, turning every 2 to 3 minutes, until evenly charred on all sides and the thickest piece is opaque when cut into, 10 to 12 minutes. Transfer to a serving platter. Stir the fresh mint into the reserved puree and serve with the kebabs.

Blubarb Snack Cake

IMG_7883.jpeg

I seem to have a theme going. Loaf cakes with lemon. Probably because I love them so much, and they seem perfect in the spring. I’d eyed this particular recipe before and decided to make it yesterday, a dreary and rainy Sunday. It literally rained all day with hardly any breaks. That rarely happens. I think my newly planted garden loved it, but I hope it doesn’t just keep going and flood out the plants!

I got the recipe off of Food52, but it’s originally from Yotam Ottolenghi’s cookbook, Sweet: Desserts from London's Ottolenghi. My neighbor had dropped off a few stalks of rhubarb that I wanted to do something with so I cooked it down into a quick tart rhubarb and. blueberry (aka “blubarb”) jam and swirled it into the cake. (my “jam” was 4-5 stalks of rhubarb, 4 handfuls of frozen blueberries, and 1/4 cup of sugar. Not super sweet at all. I wanted it just sweet enough to be tasty but still nice and tart and not overwhelmingly sweet. This worked out well,) This jam replaced the poppyseeds and a lot of the lemon zest, although I still used zest from probably 1/2 a lemon or so.

Other little tweaks: It called for sour cream which I don’t usually have so I substituted with my homemade Greek yogurt which is nice and thick and rich. I cut back slightly on the sugar and used 200 grams (1 cup) instead of the 225 called for. Also, my lemon wasn’t super juicy so I made 3/4 of the glaze which worked out fine.

IMG_7898.jpeg

As I transferred the cake to the pan I dropped in spoonfuls of the blubarb jam and swirled it in with a toothpick. Into the oven it went. The recipe specifically states to not open the door of the oven for the first 45 minutes which is killer for me but I did it! Mine ended up baking for exactly 55 minutes which seemed just right.

Overall I think it’s a pretty cake, but I was hoping it would baked up taller and more domed. The crumb of my cake also looked nothing like the picture on the website. It was much spongier and wet looking, not fluffy and cake-like. Now, I know sometimes cakes made with yogurt can look like this so that may be my problem since I basically replaced cream with milk (sour cream vs yogurt) which are very different things. I may have to attempt this recipe again the next time I happen to have some sour cream just to see how big of a different it makes. I do love the lemon glaze on top and will do that for other cakes too.

The flavor is very nice. A good amount of lemon, obvious but not overwhelming. I like the swirl of jam but would do more next time. I like to eat mine with a dollop of plain yogurt on top. The combination of sweet cake with tart and creamy yogurt is the best!

———————————————————————————————————————————————————————————————

Blubarb Jam Snack Cake
Adapted from Food52
Ingredients

  • 3 large eggs

  • 1 cup plus 2 tablespoons (225 grams) granulated sugar [I only used 1 cup/200 grams]

  • 1/2 cup (120 grams) sour cream [I substituted with Greek yogurt, same weight]

  • 5 tablespoons (70 grams) unsalted butter, cubed, plus extra for greasing

  • 1 tablespoon poppy seeds Finely grated zest of 3 lemons (1 tablespoon) [I omitted the poppy seeds and used less lemon zest]

  • 1 1/3 cups (170 grams) all-purpose flour

  • 1 1/4 teaspoons baking powder

  • 1/4 teaspoon salt 3/4 cup (90 grams) confectioners' sugar, sifted

  • 2 tablespoons lemon juice

Directions
Heat the oven to 325° F. Grease a 8 1/2 x 4 1/2-inch loaf pan and line with parchment paper, then set aside.

In a small saucepan over low heat melt the butter. Stir in the poppy seeds and lemon zest and set aside to cool. Sift the flour, baking powder, and salt together into a bowl, set aside.

Place the eggs and granulated sugar in the bowl of an electric mixer with the whisk attachment in place and whisk on medium-high speed for about 2 minutes, until pale and frothy. Add the sour cream and continue to beat for about 2 minutes, until the mixture has combined.

Use a rubber spatula to fold the flour mixture into the egg mixture until mostly combined. Then fold in the butter mixture until everything is just combined, don’t overmix. Spoon the mixture into the loaf pan. Bake for 55 to 65 minutes, or until a skewer inserted into the center comes out clean [Mine took 55 minutes and seemed perfectly cooked]. Do not open the oven door to check the cake during the first 45 minutes of baking.

While the cake bakes make the glaze: Whisk the confectioners' sugar with the lemon juice in a bowl. Pour the glaze over the top of the cake as soon as it comes out of the oven, spreading it over the top so that it sinks in and creates a nice coating. Set aside to cool for 30 minutes before removing from the pan. Leave to come to room temperature before serving.

Greek Yogurt Pita Bread

IMG_7726.jpeg

I love soft, tender flatbreads, still warm from cooking. There’s almost nothing better! I’ve made pita and tortillas occasionally over the years, but I’ve been wanting to try Molly Yeh’s Greek yogurt pita bread for a while now. I just hadn’t gotten around to it until this weekend.

IMG_7721.jpeg

I love baking with yogurt, it tenderizes and adds a slight tangy flavor to whatever it is you bake and this recipe was no exception. I’ve posted the original recipe (with a few tweaks to the instructions) below, and I also posted my adaptation which used my leftover sourdough starter. Since I’ve been making a lot of sourdough bread recently I’m always on the lookout for ways to use up my discarded starter. This pita was a great option!

IMG_7717.jpeg

The dough was soft, tender, and easy to roll out. I made half a batch of the sourdough version and ended up making 8 pita (the original recipe called for you to make 12 for the full recipe, so this would be 6 for a half batch) and I thought they were a nice size. Not too big and not too small.

IMG_7727.jpeg
IMG_7729.jpeg

The original recipe calls for you to bake these in the oven. I decided to grill them instead which I find fun to do. They only took 1.5-2 minutes on the grill at around medium heat. I’m sure baking them as instructed turns out a good pita as well but at this point I can’t say for sure.

I served these with some lamb meatballs that I also grilled. No recipe for those, I kind of just threw them together. I added a nice amount of allspice, some cumin, coriander, and smoked paprika to the ground lamb as well as minced green onion, ramps, garlic and a few breadcrumbs for good measure.

Finally, I whipped up a delicious yogurt sauce that also had some of the garlic, ramps and green onion as well as olive oil and a lot of sumac. Fantastic!

——————————————————————————————

Greek Yogurt Pita Bread
Recipe from Molly Yeh via Joy the Baker
Ingredients

  • 2 1/4 teaspoons instant yeast

  • 1 teaspoon plus 1 tablespoon granulated sugar

  • 3 3/4 cups bread flour, plus more for dusting

  • 1 1/2 teaspoons kosher salt

  • 3 tablespoons olive oil, plus more for the bowl

  • 3/4 cup warm water (105 to 110 degrees F)

  • 3/4 cup whole-milk Greek yogurt

Directions
In a stand mixer with a dough hook attachment combine the flour, salt, sugar, yeast. Add the oil, water and yogurt and mix to combine. Stir the mixture with a spatula to lightly bring it together then knead with the dough hood on medium speed into a slightly sticky and soft ball. Add more flour or water as needed.

Remove the dough from the bowl. Add a splash of olive oil and return the dough to the greased bowl. Cover with plastic wrap and allow to rest in a warm place until doubled in size - about 1 1/2 hours.

Preheat the oven to 500 degrees. Line two baking sheets with parchment paper and set aside. While the oven preheats, turn the dough out onto a clean work surface and divide into 12 equal balls. Roll the balls out into circles that are 1/4-inch to 1/2-inch thick. Cover loosely with plastic wrap or a clean kitchen towel and let rest for 15 minutes. Place the pita on the prepared baking sheets an inch apart. Bake until they're puffy and lightly browned on top. Check their doneness after 5 minutes. They cook fast. Somewhere between 5 and 7 minutes should do the trick. Remove from the oven and clean kitchen towel, cover and let cool.

IMG_7722.jpeg

Sourdough Variation

Sourdough Greek Yogurt Pita Bread
Ingredients

  • 140 grams bread flour

  • 3/4 teaspoon kosher salt

  • 1 teaspoon instant yeast

  • 1 1/2 teaspoons honey

  • 1 1/2 tablespoons olive oil

  • 3/8 cup (90 grams) Greek yogurt

  • 170 grams discarded sourdough starter

Directions
In a stand mixer with a dough hook attachment combine the flour, salt and yeast. Add the honey, oil, water, yogurt and starter. Mix to combine. Follow the remainder of instructions as above.

Lemon-Blueberry Drizzle Cake

IMG_7553.jpg

I’ve gotten into the habit of having some kind of cake on hand at all times. While I try to eat very healthy the vast majority of the time, I like a little piece of cake at night before bed. It’s generally not huge, and I try to pick things that aren’t over-the-top decadent and rich (although from time to time this is okay!). This is one of my recent recipes. A fairly standard loaf cake. Some flour, a stick of butter, some sugar, eggs and milk, etc. The lemon blueberry combination is always a winner so this recipe sounded nice.

IMG_7559.jpg
IMG_7569.jpg

So, Lara actually made this twice within a week because the first round did not turn out well. It was under baked even though it went longer than the stated time and looked like it was done when it came out of the oven. It sunk shortly after coming out of the oven which is always sad. Also, she used an older loaf pan the first time and it just didn’t seem to bake up well in this pan. The resulting cake was somewhat disappointing visually, but don’t worry, it didn’t go to waste!

IMG_7570.jpg

We decided to try it again because I hate failing at something, especially something that should be delicious! The second round went much better! A better pan, and more close monitoring of the “done-ness”. It ended up taking an additional 11 minutes or so, a total of 61 minutes which was perfect. This second successful loaf was perfectly cooked. The edges were beautifully browned and crispy. I typically like the softer interior of cakes, but for this one the crispy outside edges are probably the best part!

Interestingly when I was looking back at this recipe to document it below I noticed something that likely explained why the original bread didn’t turn out. Lara had been looking at this recipe on William Sonoma’s Blog (found here) where it was labeled as “cake”. I found it on the Williams Sonoma’s website (found here) where it was labeled as bread. They are the same exact ingredients, BUT, on the blog it states to bake at 350 degrees for 50 minutes, and on the website it says to bake at 375 degrees for 55 minutes. A HUGE discrepancy! Lara had baked them both and did 350 degrees, and she started checking around 50 minutes. So if it’s actually supposed to be baked at 375 for 55 minutes, no wonder it was under baked the first time! Kind of an interesting accidental experiment. But thankfully baking it for 61 minutes at 350 degrees turned out to be perfect the second time around!

We like this cake, and many like it, with a dollop of plain Greek yogurt on the side. The combination of the cool tart yogurt pairs well with the creamy sweet cake.

Below are a few pictures of the original “failed cake”. As you can see, we didn’t end up getting to the final lemon glaze above, so at least you can see how it's supposed to look on this version, although without the sunken middle! :)

IMG_7383.jpg

——————————————————————————————————————————————————————————————-

Lemon Blueberry Drizzle Cake
From Williams Sonoma
Ingredients
For the cake:

  • 1 1/2 cups (7 1/2 oz./235 g) plus 1 tsp. all-purpose flour

  • 1 tsp. baking powder

  • 1/2 tsp. kosher salt

  • 8 Tbs. (1 stick) (4 oz./125 g) unsalted butter

  • 3/4 cup (6 oz./185 g) granulated sugar

  • 1 Tbs. finely grated lemon zest

  • 3 eggs

  • 1/2 cup (4 fl. oz./125 ml) whole milk

  • 1 tsp. vanilla extract 1 cup (4 oz./125 g) blueberries

For the syrup

  • 3 Tbs. fresh lemon juice

  • 3 Tbs. granulated sugar

For the glaze:

  • 1/2 cup (2 oz./60 g) confectioners’ sugar

  • 3 tsp. fresh lemon juice

Directions
Preheat an oven to 375°F (190°C). Butter and flour a 9-by-5-inch loaf pan. Sift the flour, the baking powder, and salt into a bowl. Set aside

In the bowl of a stand mixer, beat the butter, sugar, and lemon zest on medium-high speed until lightened. Add the eggs one at a time, beating well after each addition. Add the milk and vanilla and stir until blended. Add the dry ingredients and stir just until blended.

In a small bowl, toss the blueberries with the 1 tsp. flour. Gently fold into the batter. Scrape the batter into the prepared pan. Bake until the cake is golden brown and a toothpick inserted into the center comes out clean, about 55 minutes (mine took 61 minutes when baked at 350 degrees, see above). Let the cake cool in the pan on a wire rack for a few minutes, then turn out onto the rack to cool while you make the syrup.

To make the syrup, in a small saucepan over medium heat, simmer the lemon juice and granulated sugar until syrupy, about 2 minutes. Using a long wooden skewer, pierce the sides and bottom of the warm cake at least 1 inch (2.5 cm) deep all over. Brush the cake generously with the syrup.

To make the glaze, in a small bowl, stir together the confectioners’ sugar and lemon juice until smooth. When the cake is completely cool, turn it right side up and drizzle the glaze over the top.