Chicken and Orzo Soup with Garlic and Paprika

IMG_7437.jpeg
IMG_7429.jpeg

There’s a local butcher shop that’s been in Grand Rapids for several years now (EA Brady’s), but last fall they closed up shop to move to a new location. Where is their new space? Less than a quarter mile from my house! I could not be more pleased. It will be so convenient in the months and years to come! I had never actually been to their old location, it just wasn’t as convenient and I already have a great local butcher (I love Matt at Louise Earl), but they opened their doors in the new space today (a very soft opening in the midst of COVID quarantine) and I was there within a few hours of their opening. Had to welcome them to the new neighborhood!

I decided that on this cold and dreary day soup sounded like a good dinner plan. I had bookmarked this very simple soup so decided to try it tonight, all I needed were a few chicken thighs which the butcher fixed me up with right away.

This recipe looks very simple, and it was so quick and easy, but don’t let the short ingredient list fool you, this soup was full of flavor and super satisfying. It only took about 20-30 minuter to make and it was so good. The combination of garlic, plenty of tomato paste, and chicken thighs packs a lot of flavor into just a few ingredients. A little paprika and mint (I had to substitute a little basil in the form of homemade pesto which was quite a nice sub) along with some pasta finish it all off.

There are many ways you could adapt this, different spices, different protein, different starch, but I know this is something I will come back to in the future again and again! This would be a great option for a weeknight meal with friends if you need something quick, simple and delicious after work!

——————————————————————————————————————————————————————————————-

Chicken and Orzo Soup with Garlic and Paprika
From 177 Milk Street
Ingredients

  • 3 tablespoon extra virgin olive oil, plus more to serve

  • 1/3 cup tomato paste

  • 4 medium garlic cloves, finely chopped

  • 1 tablespoon sweet paprika

  • 2 teaspoons dried mint

  • Kosher salt and ground black pepper

  • 1 1/2 pounds boneless skinless chicken thighs

  • 1 cup orzo pasta

Directions
In a large saucepan, combine the oil, tomato paste and garlic. Cook, stirring, until several shades darker. Add the paprika and mint, then cook, stirring, just until fragrant. Add the chicken, 7 cups water and 2½ teaspoons salt. Simmer, uncovered, until a skewer inserted into the chicken meets no resistance. Transfer the chicken to a bowl. Add the orzo to the pot and cook until al dente. Shred the chicken. When the orzo is done, add the chicken and season with salt and pepper. Serve drizzled with additional oil.

Optional garnishes: A dollop of yogurt OR squeeze of lemon OR torn fresh mint OR a sprinkle of Aleppo pepper

White Cake Testing

IMG_0219.jpeg

A friend of mine recently got engaged and she has asked if Lara and I would make a cake for her wedding! We’ve done a few weddings together in the past (cupcakes, cake pops and a small cake for the bride and groom to cut) and are excited to get to do it again!

Although we don’t have the details finalized, it will most likely be a white cake base so I decided that I needed to test out a few white cakes prior to this since I don’t really have a go-to white cake.

After some online searching and research I decided to start by testing 3 separate recipes to see what my thoughts were, and go from there, either testing a few more recipes or making a decision based on the three initial tests.

The Competition:

The three cakes we ended up testing were:

  1. White Mountain Layer Cake from Bravetart by Stella Parks

  2. Classic White Cake from The Perfect Cake by America’s Test Kitchen

  3. Martha Stewart’s White Cake from Martha Stewart’s Baking Handbook

I first made the White Mountain Cake and the ATK white cake on the same day. About a week later I got around to making Martha Stewart’s. I scaled down all the recipes because I didn’t really need 3 full cakes in my house all at once! I know that scaling back can sometimes be tricky, and recipes don’t always do as well when you make them smaller but I went for it anyway. (They all baked up ok, but the ATK cake did end up being the smallest amount of batter volume-wise, and of the three it was my least favorite and it is possible that my alteration of the recipe had something to do with it.)

I wanted to try the White Mountain Cake because it sounded interesting because she calls for coconut oil and butter, and describes the cake as:


Rich and velvety to the point of creaminess, heady with vanilla, and almost as fluffy as angel food cake. The secret is virgin coconut oil, which amplifies the aroma of butter and vanilla while creaming up lighter (and whiter) than butter alone.


This description sounded amazing so I had to try it.

I went for the ATK cake because I’ve had good success with many of their recipes and this one seemed straightforward and a good standard white cake.

Finally Martha' Stewart. I had actually made the Martha Stewart recipe before, as cupcakes for my cousins wedding! But I had never made it into a layer cake, and it’s been years since I have made it so I couldn’t remember what it was like exactly, but I do remember thinking it made some lovely cupcakes. I didn’t really want to make this one because of the three, it’s the one recipe that calls for beating the egg whites separate and folding them into the batter. I try to avoid this step in any recipe if I can, but sometimes it can’t be helped.

The Results:

White Mountain Cake

America’s Test Kitchen

Martha Stewart

IMG_6743.jpeg

Here is the White Mountain Cake on the left with the ATK cake on the right

White Mountain Cake on the top, ATK on the bottom

IMG_6891.jpeg
IMG_6904.jpeg

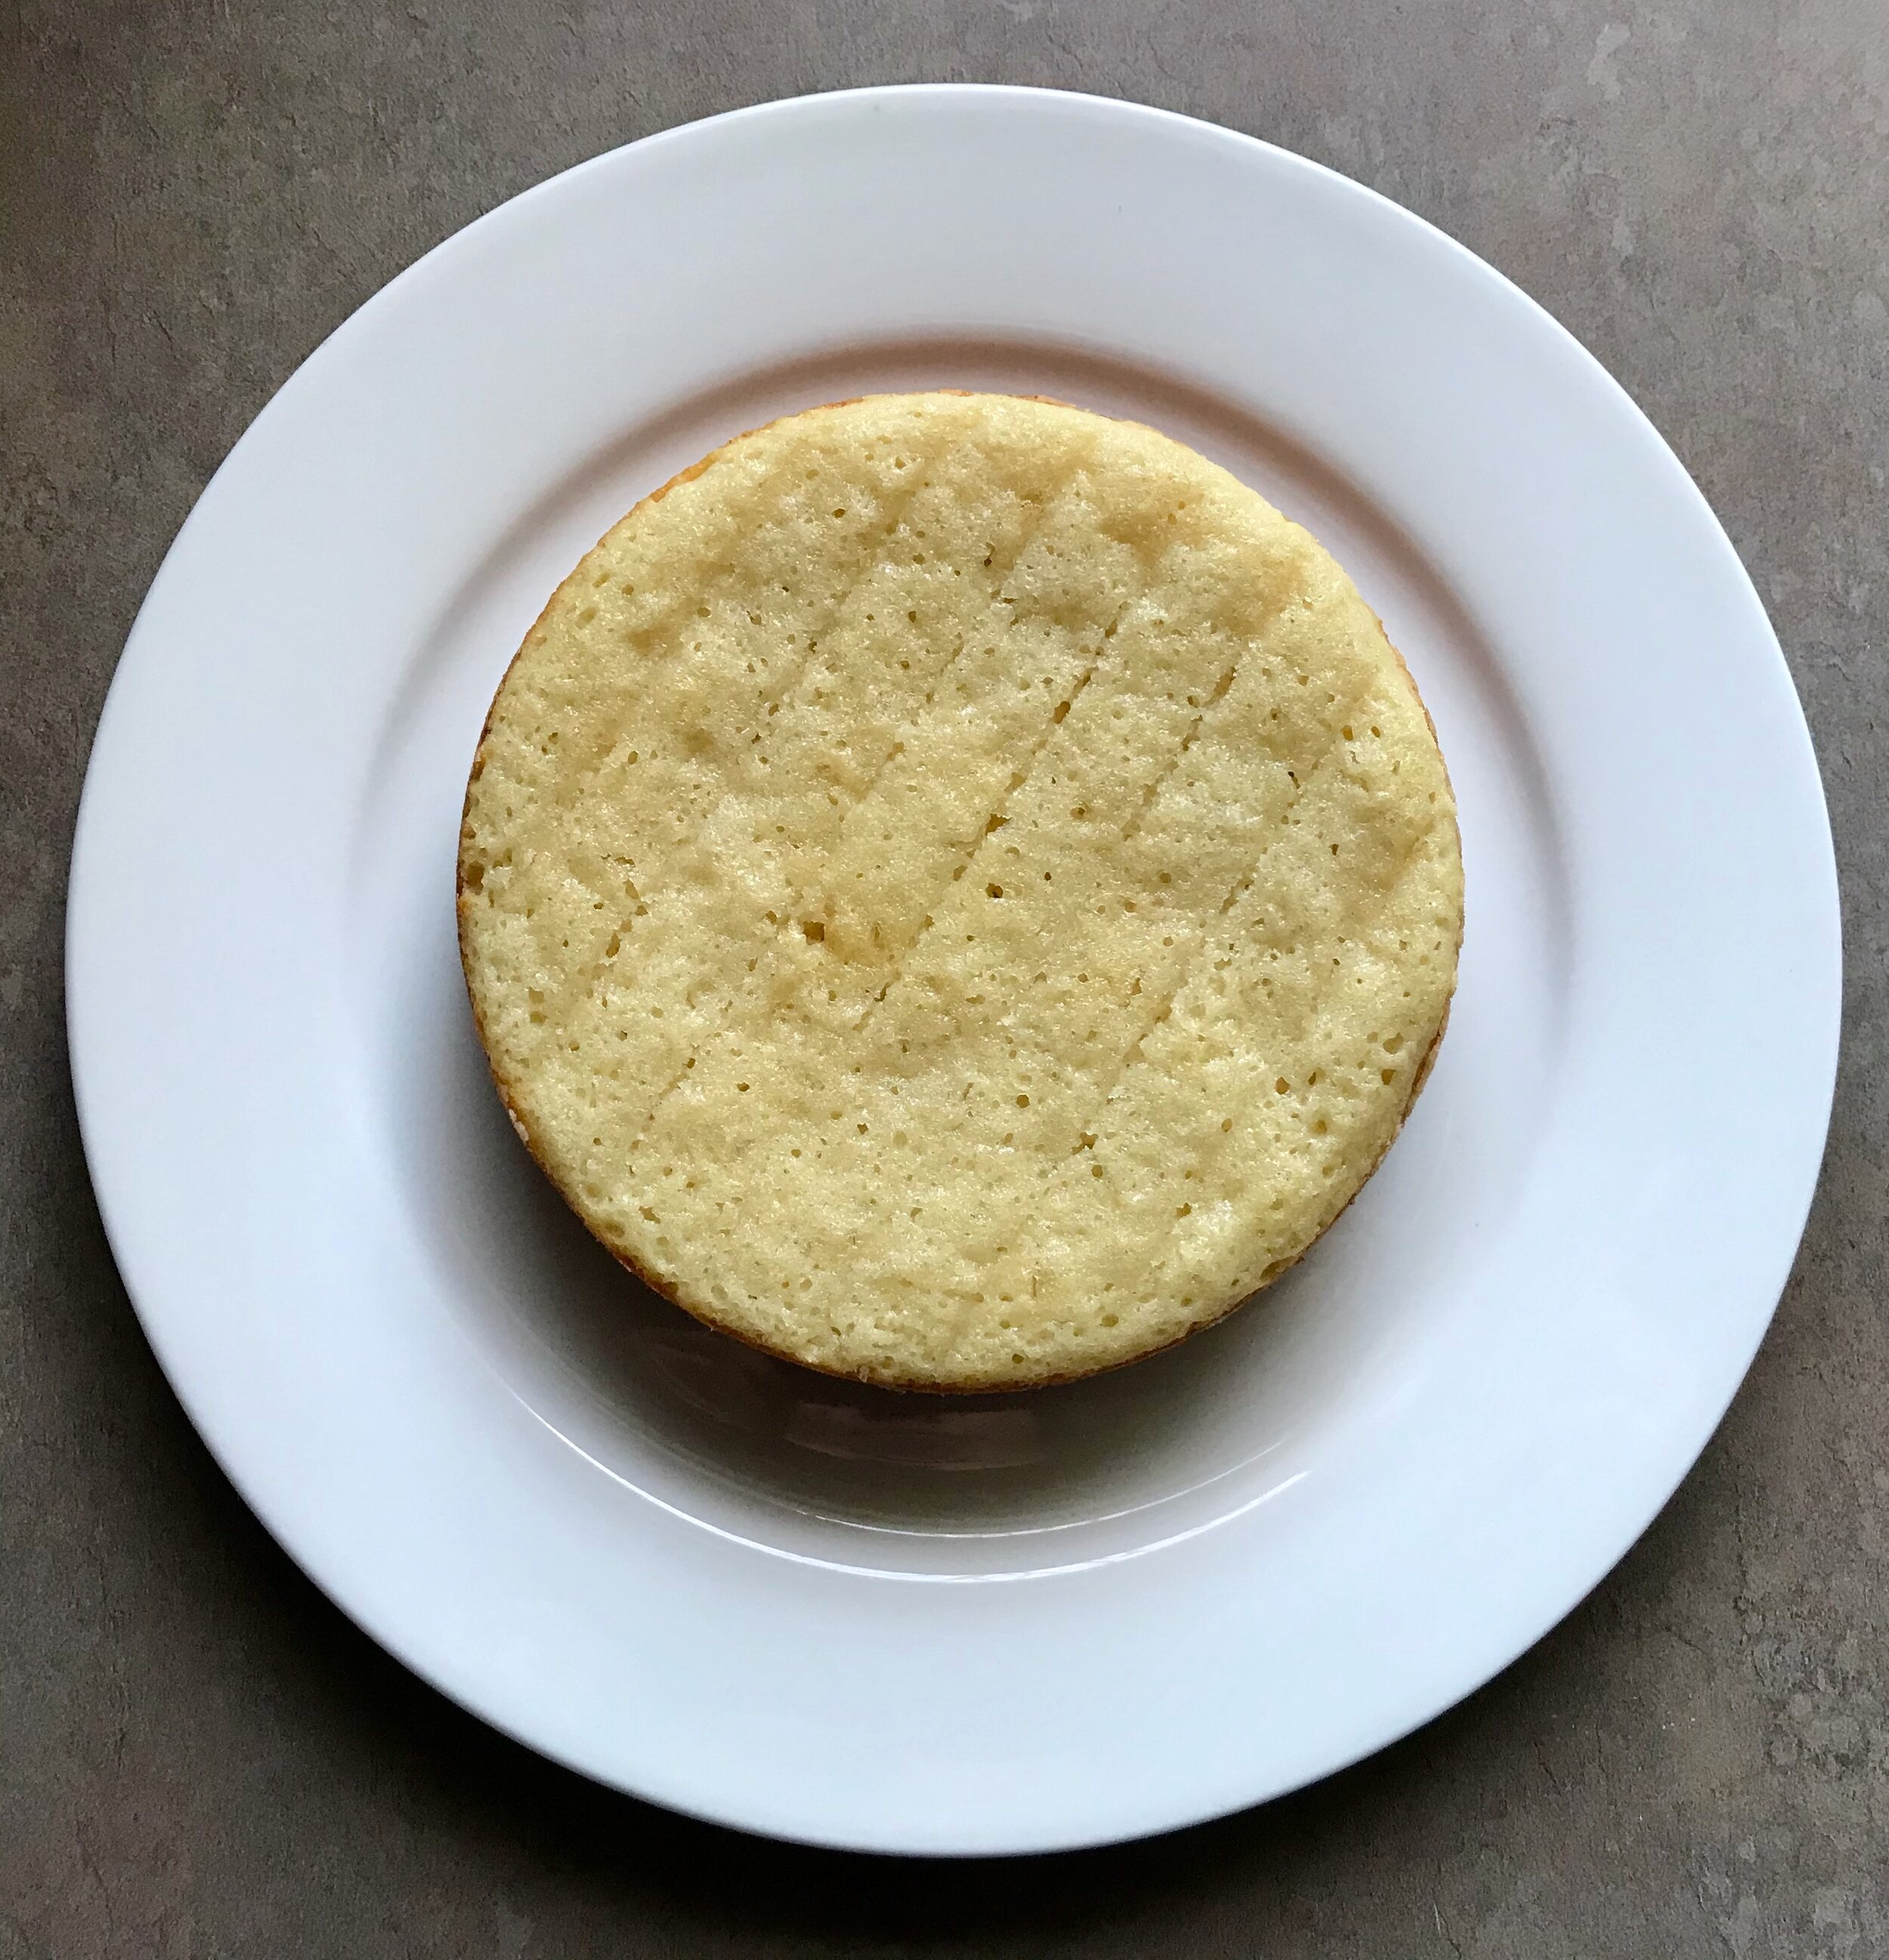
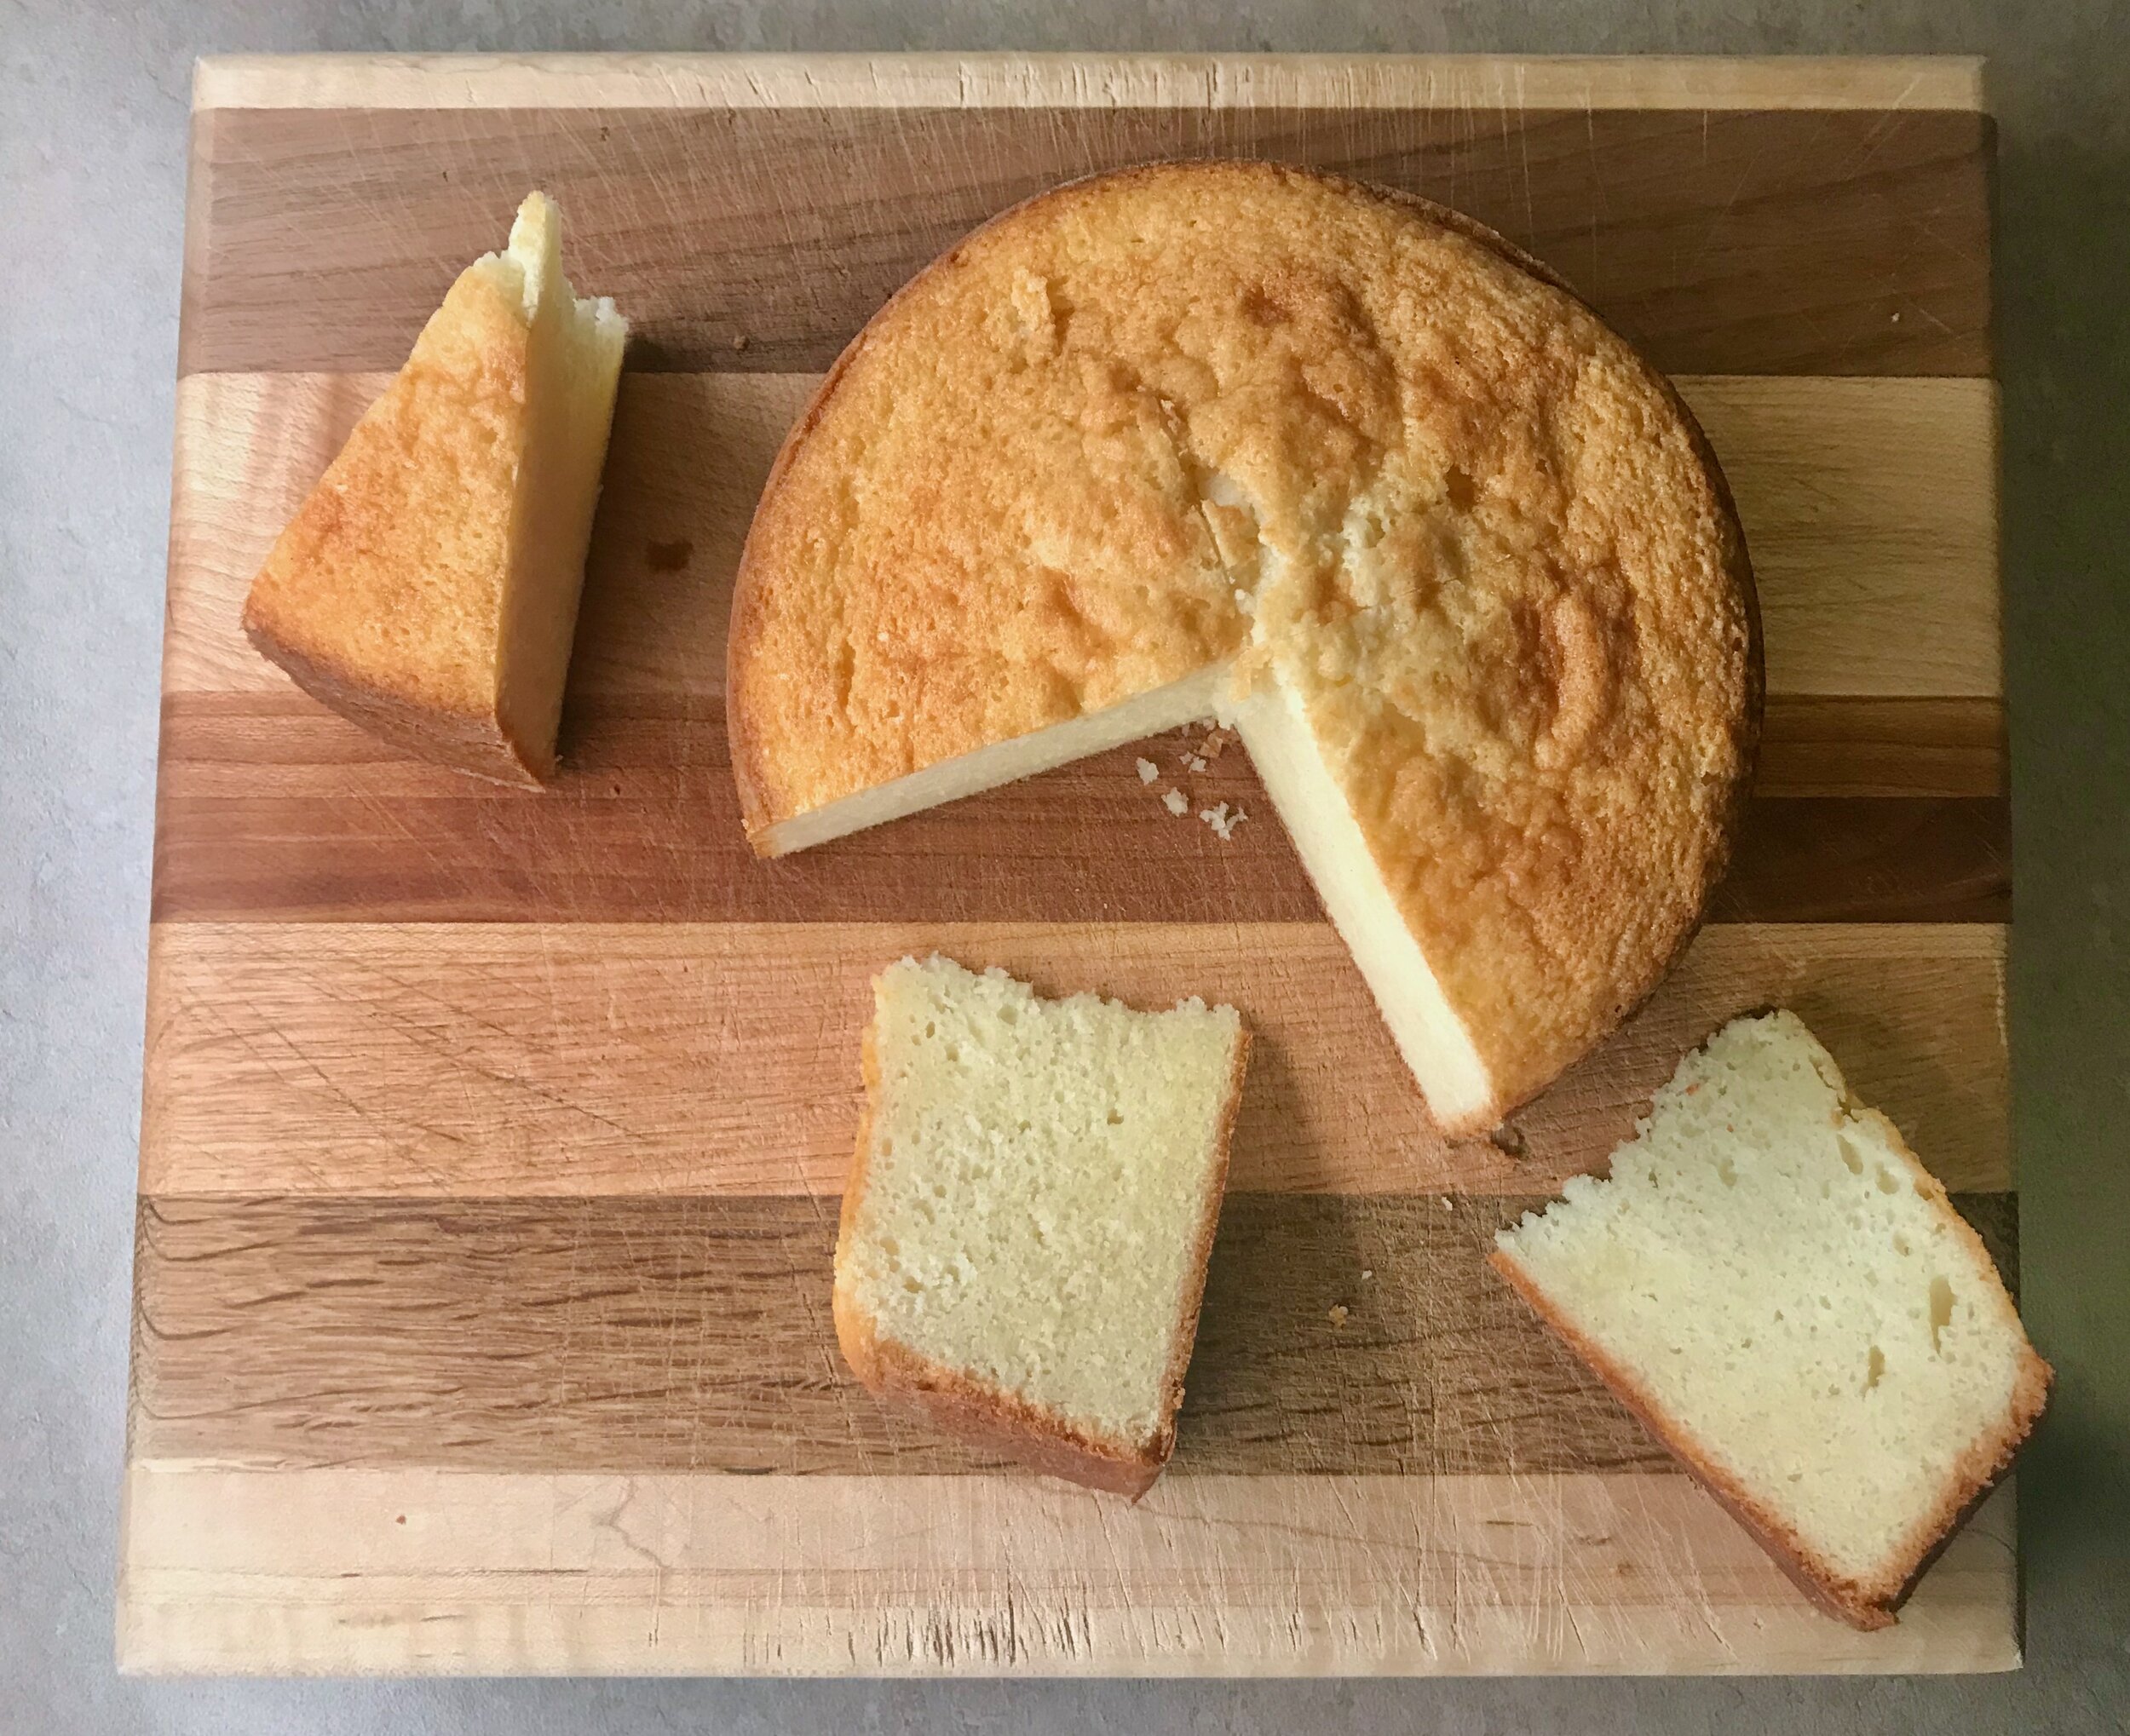
This is Martha Stewart’s White Cake

Conclusion:

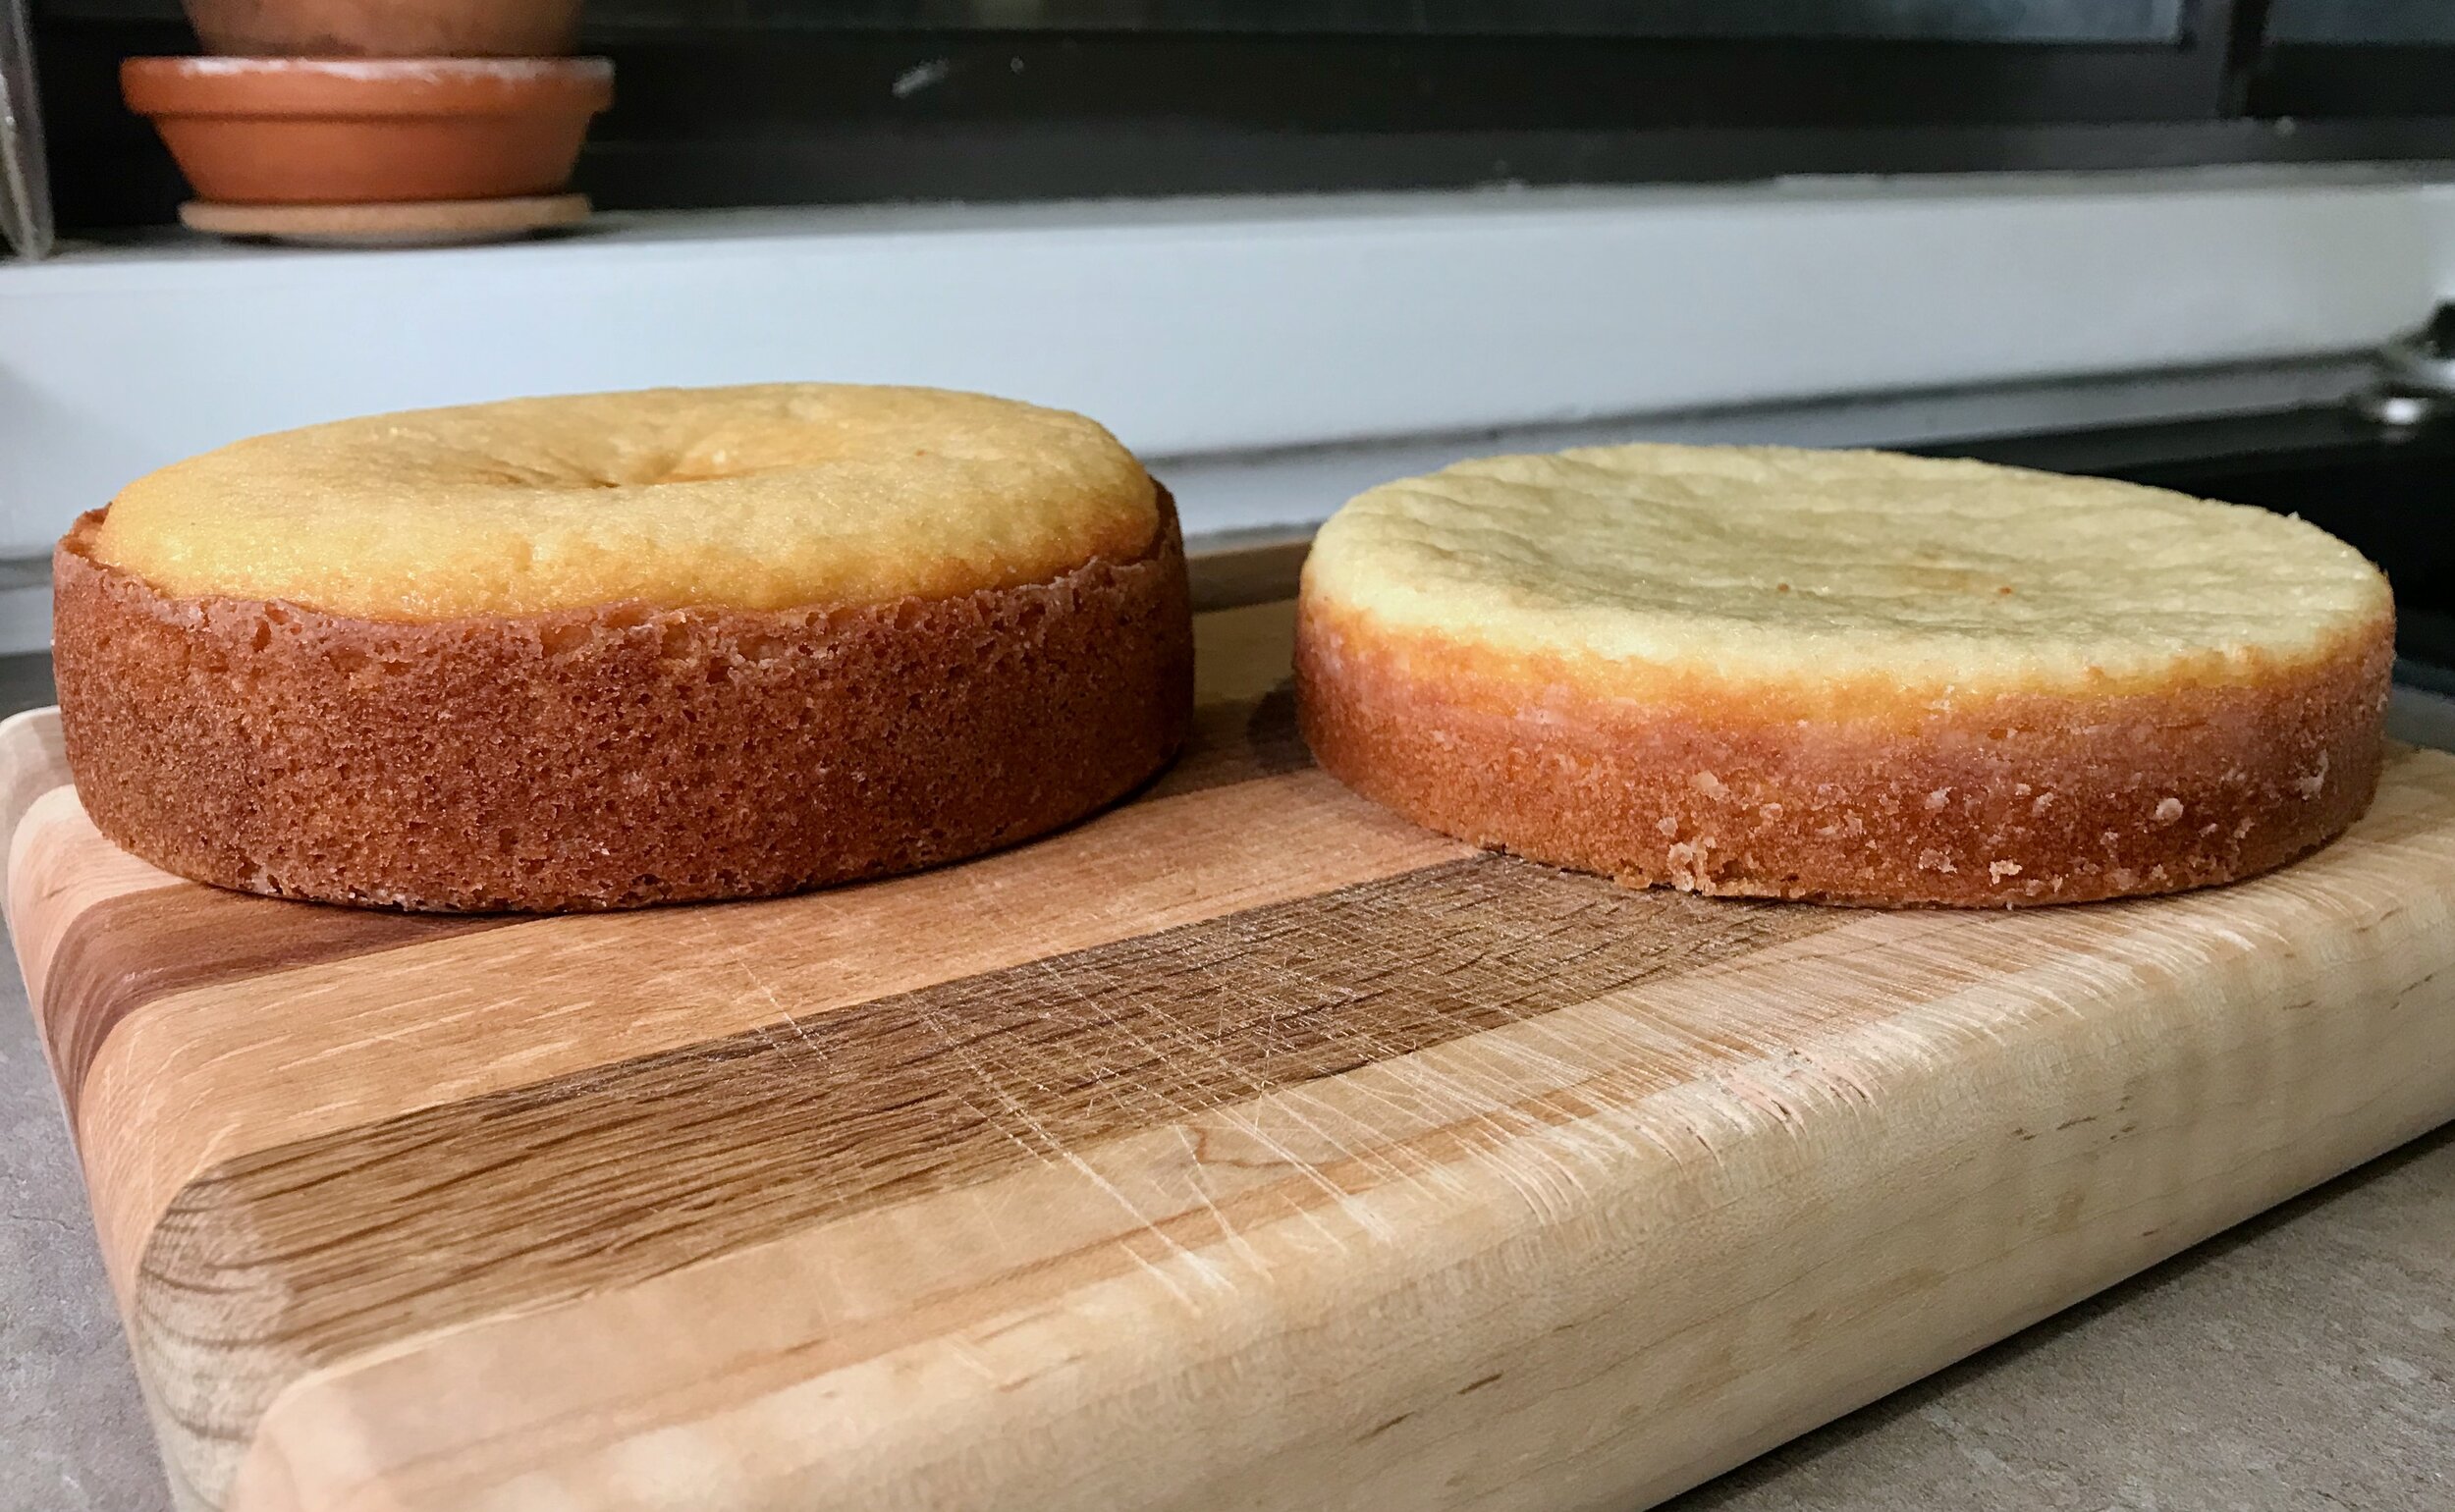
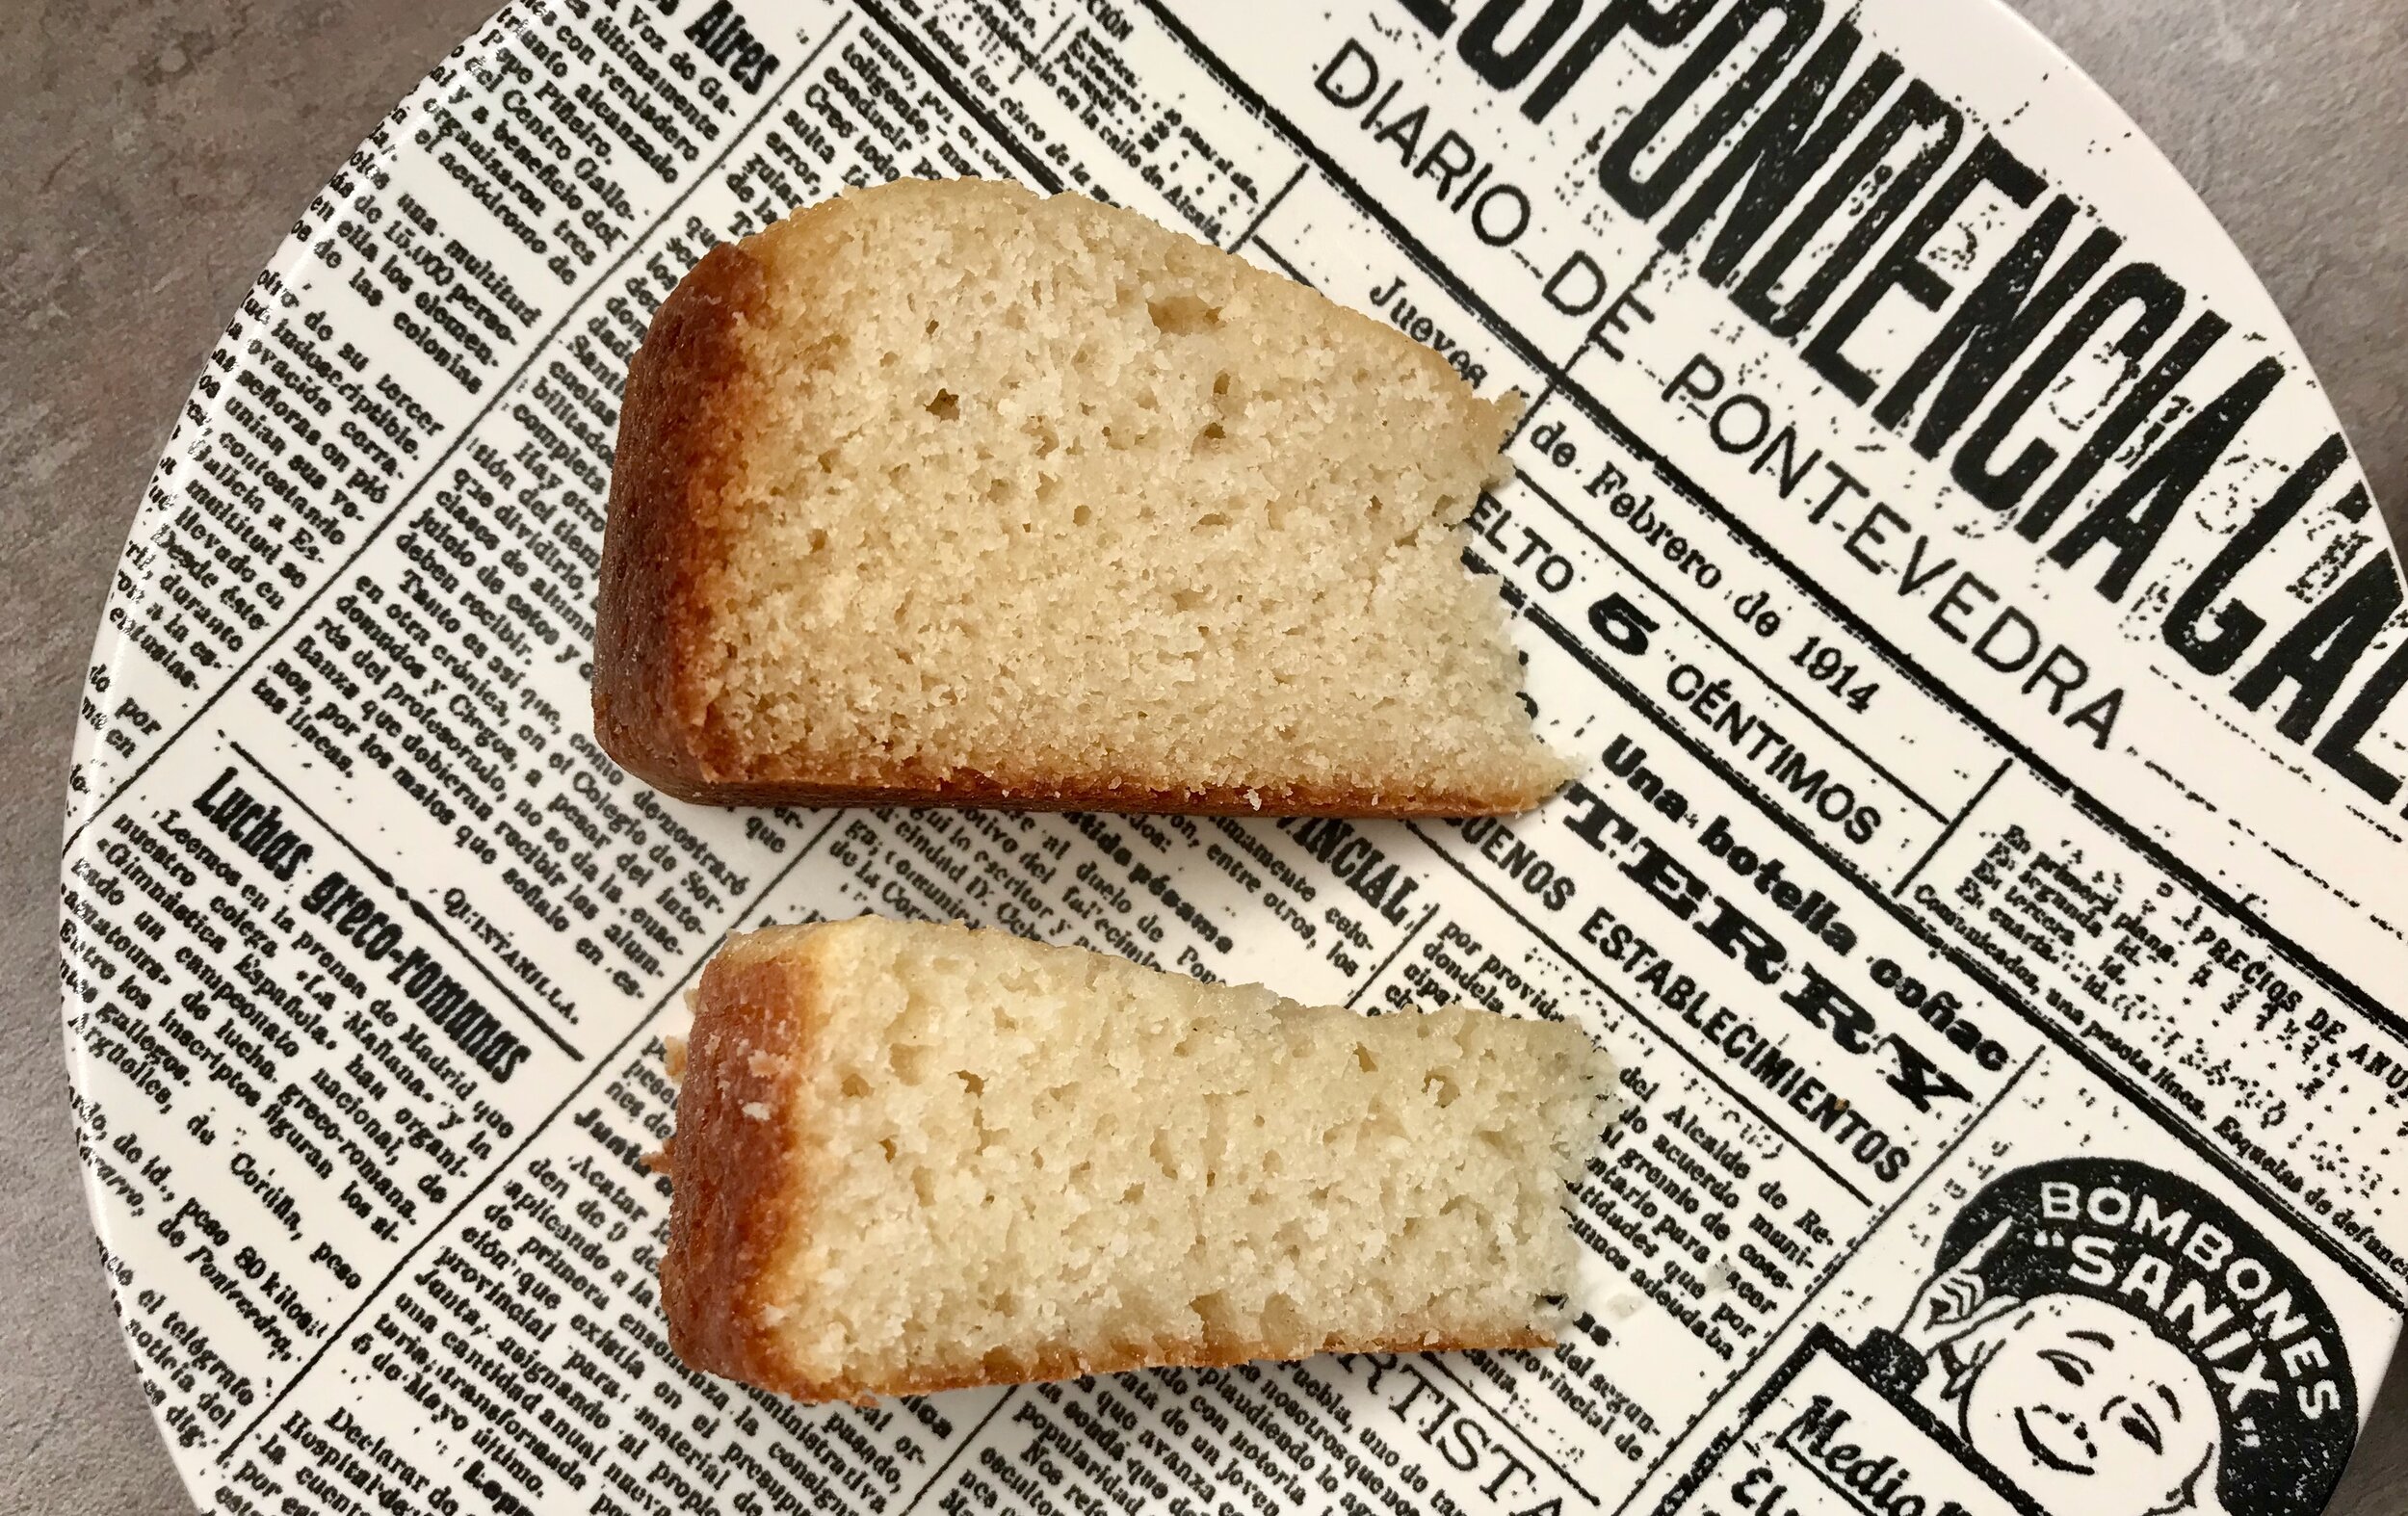
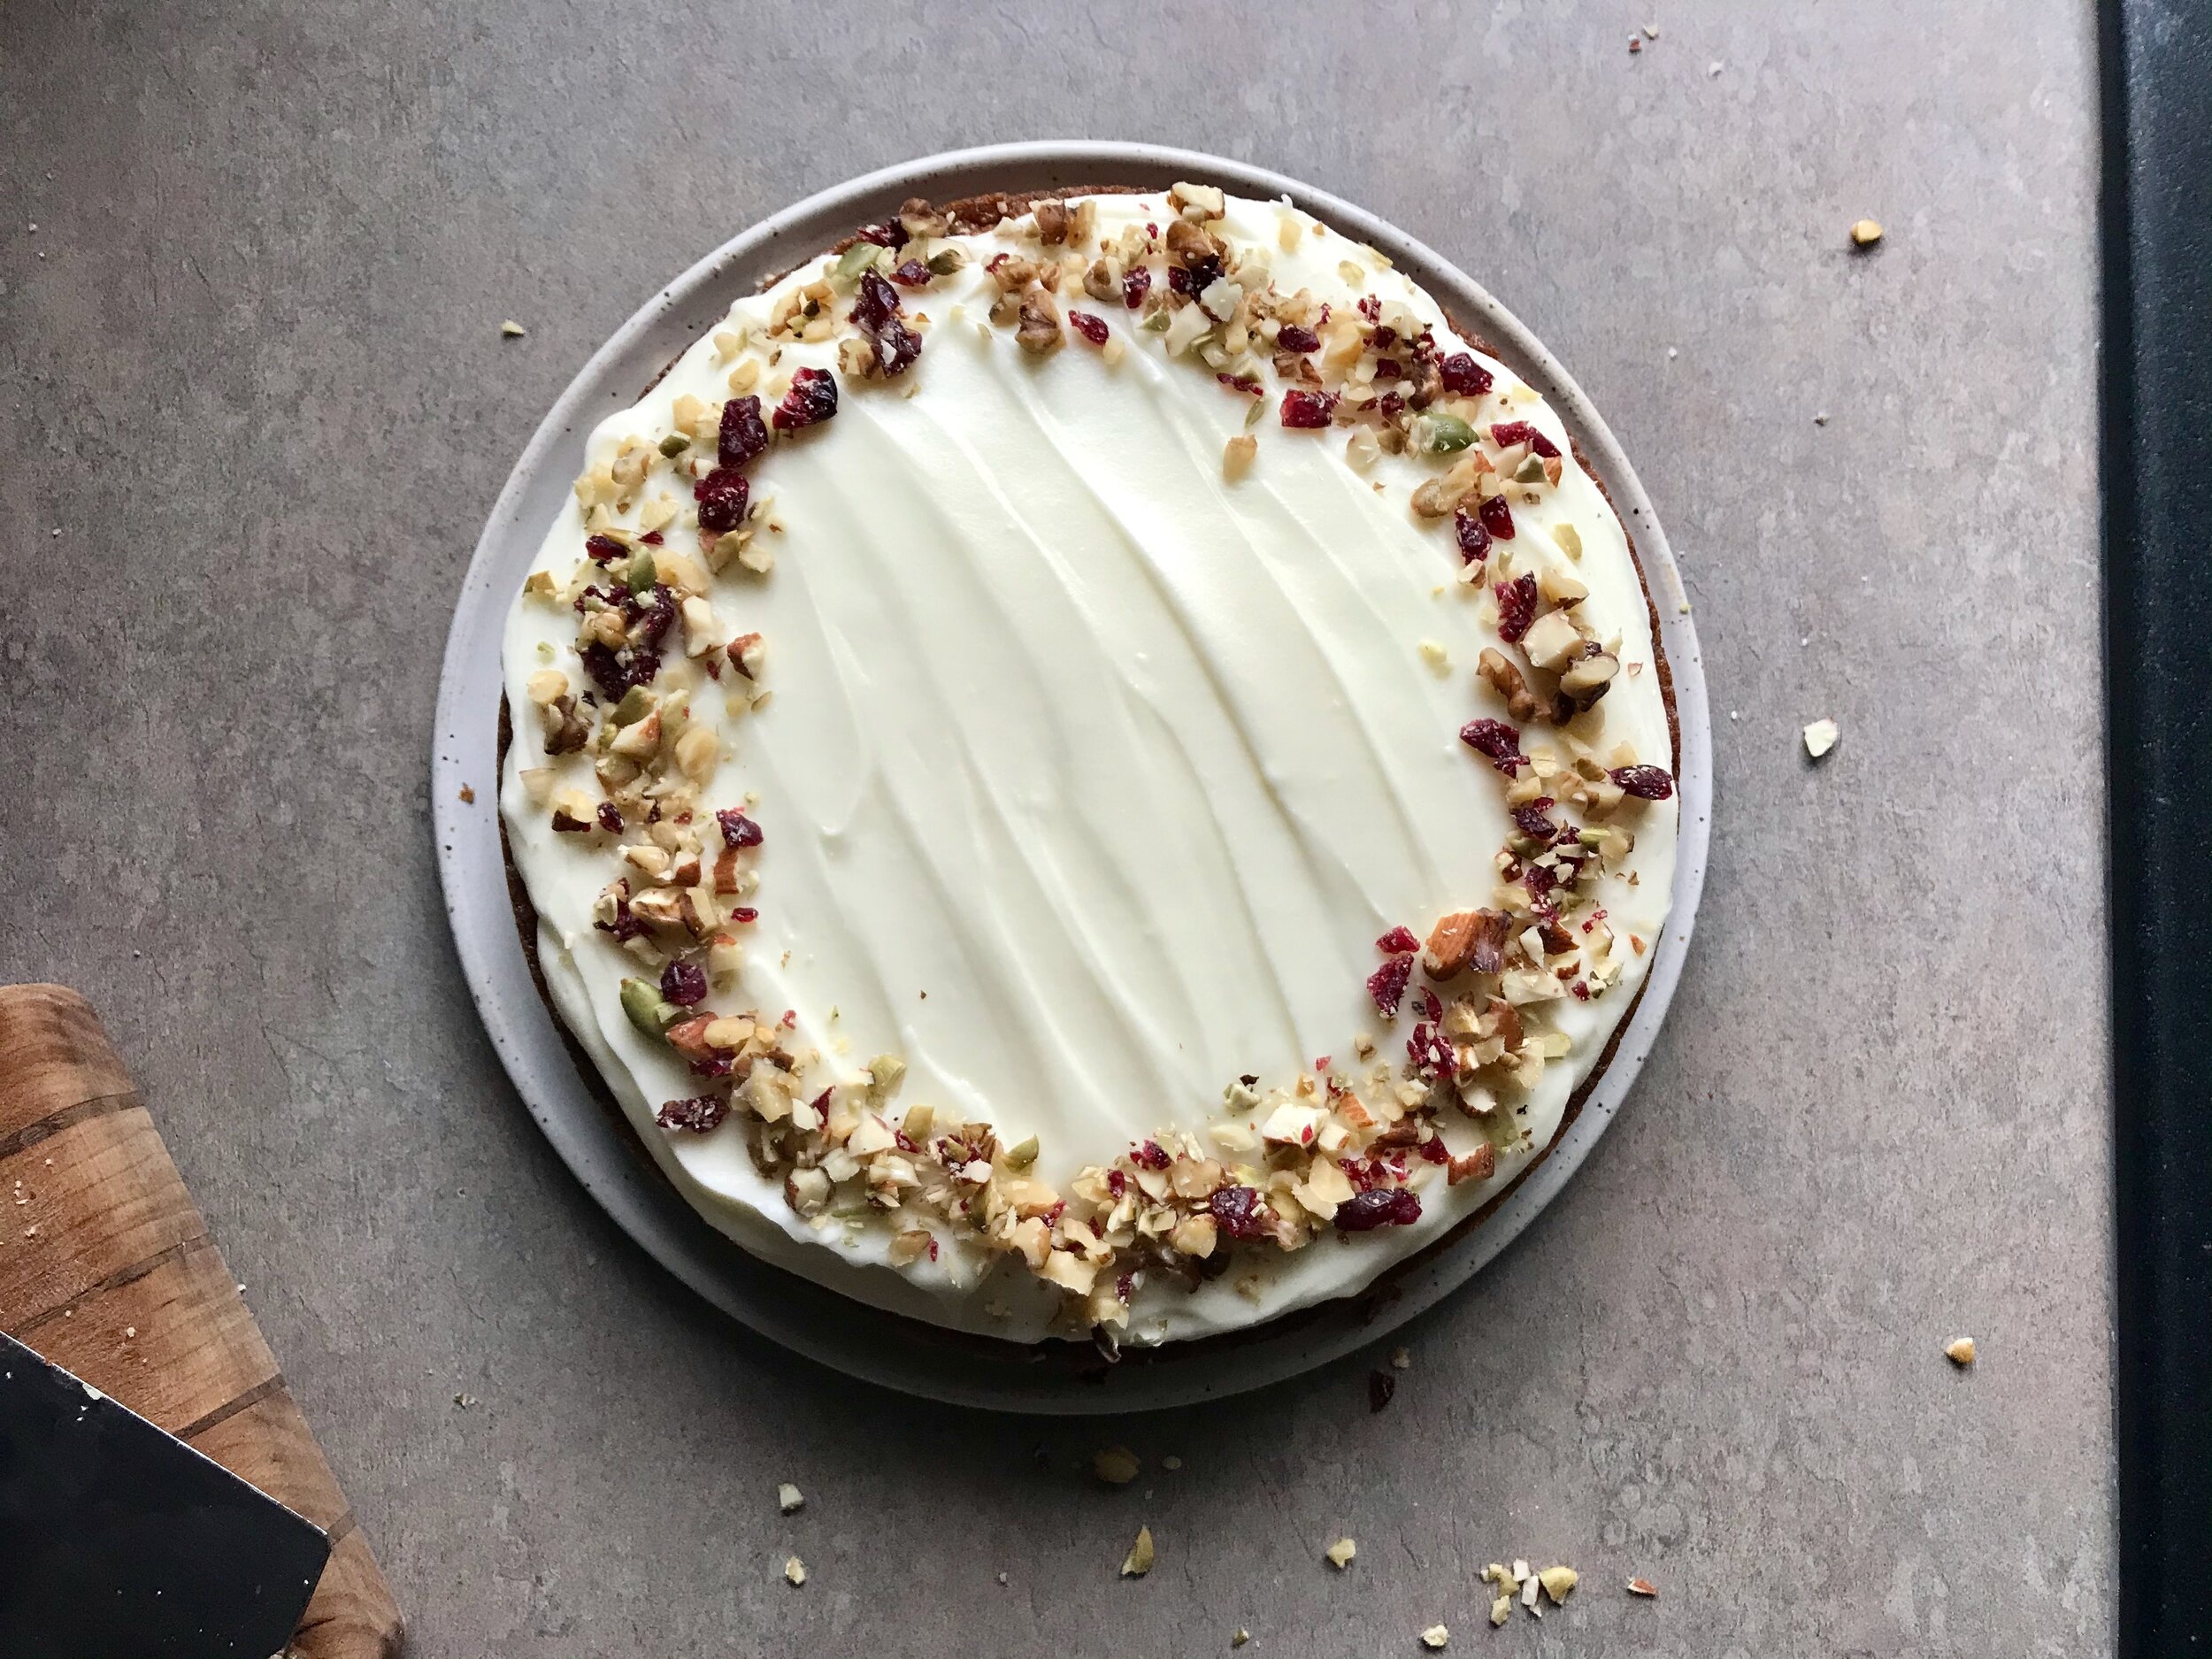
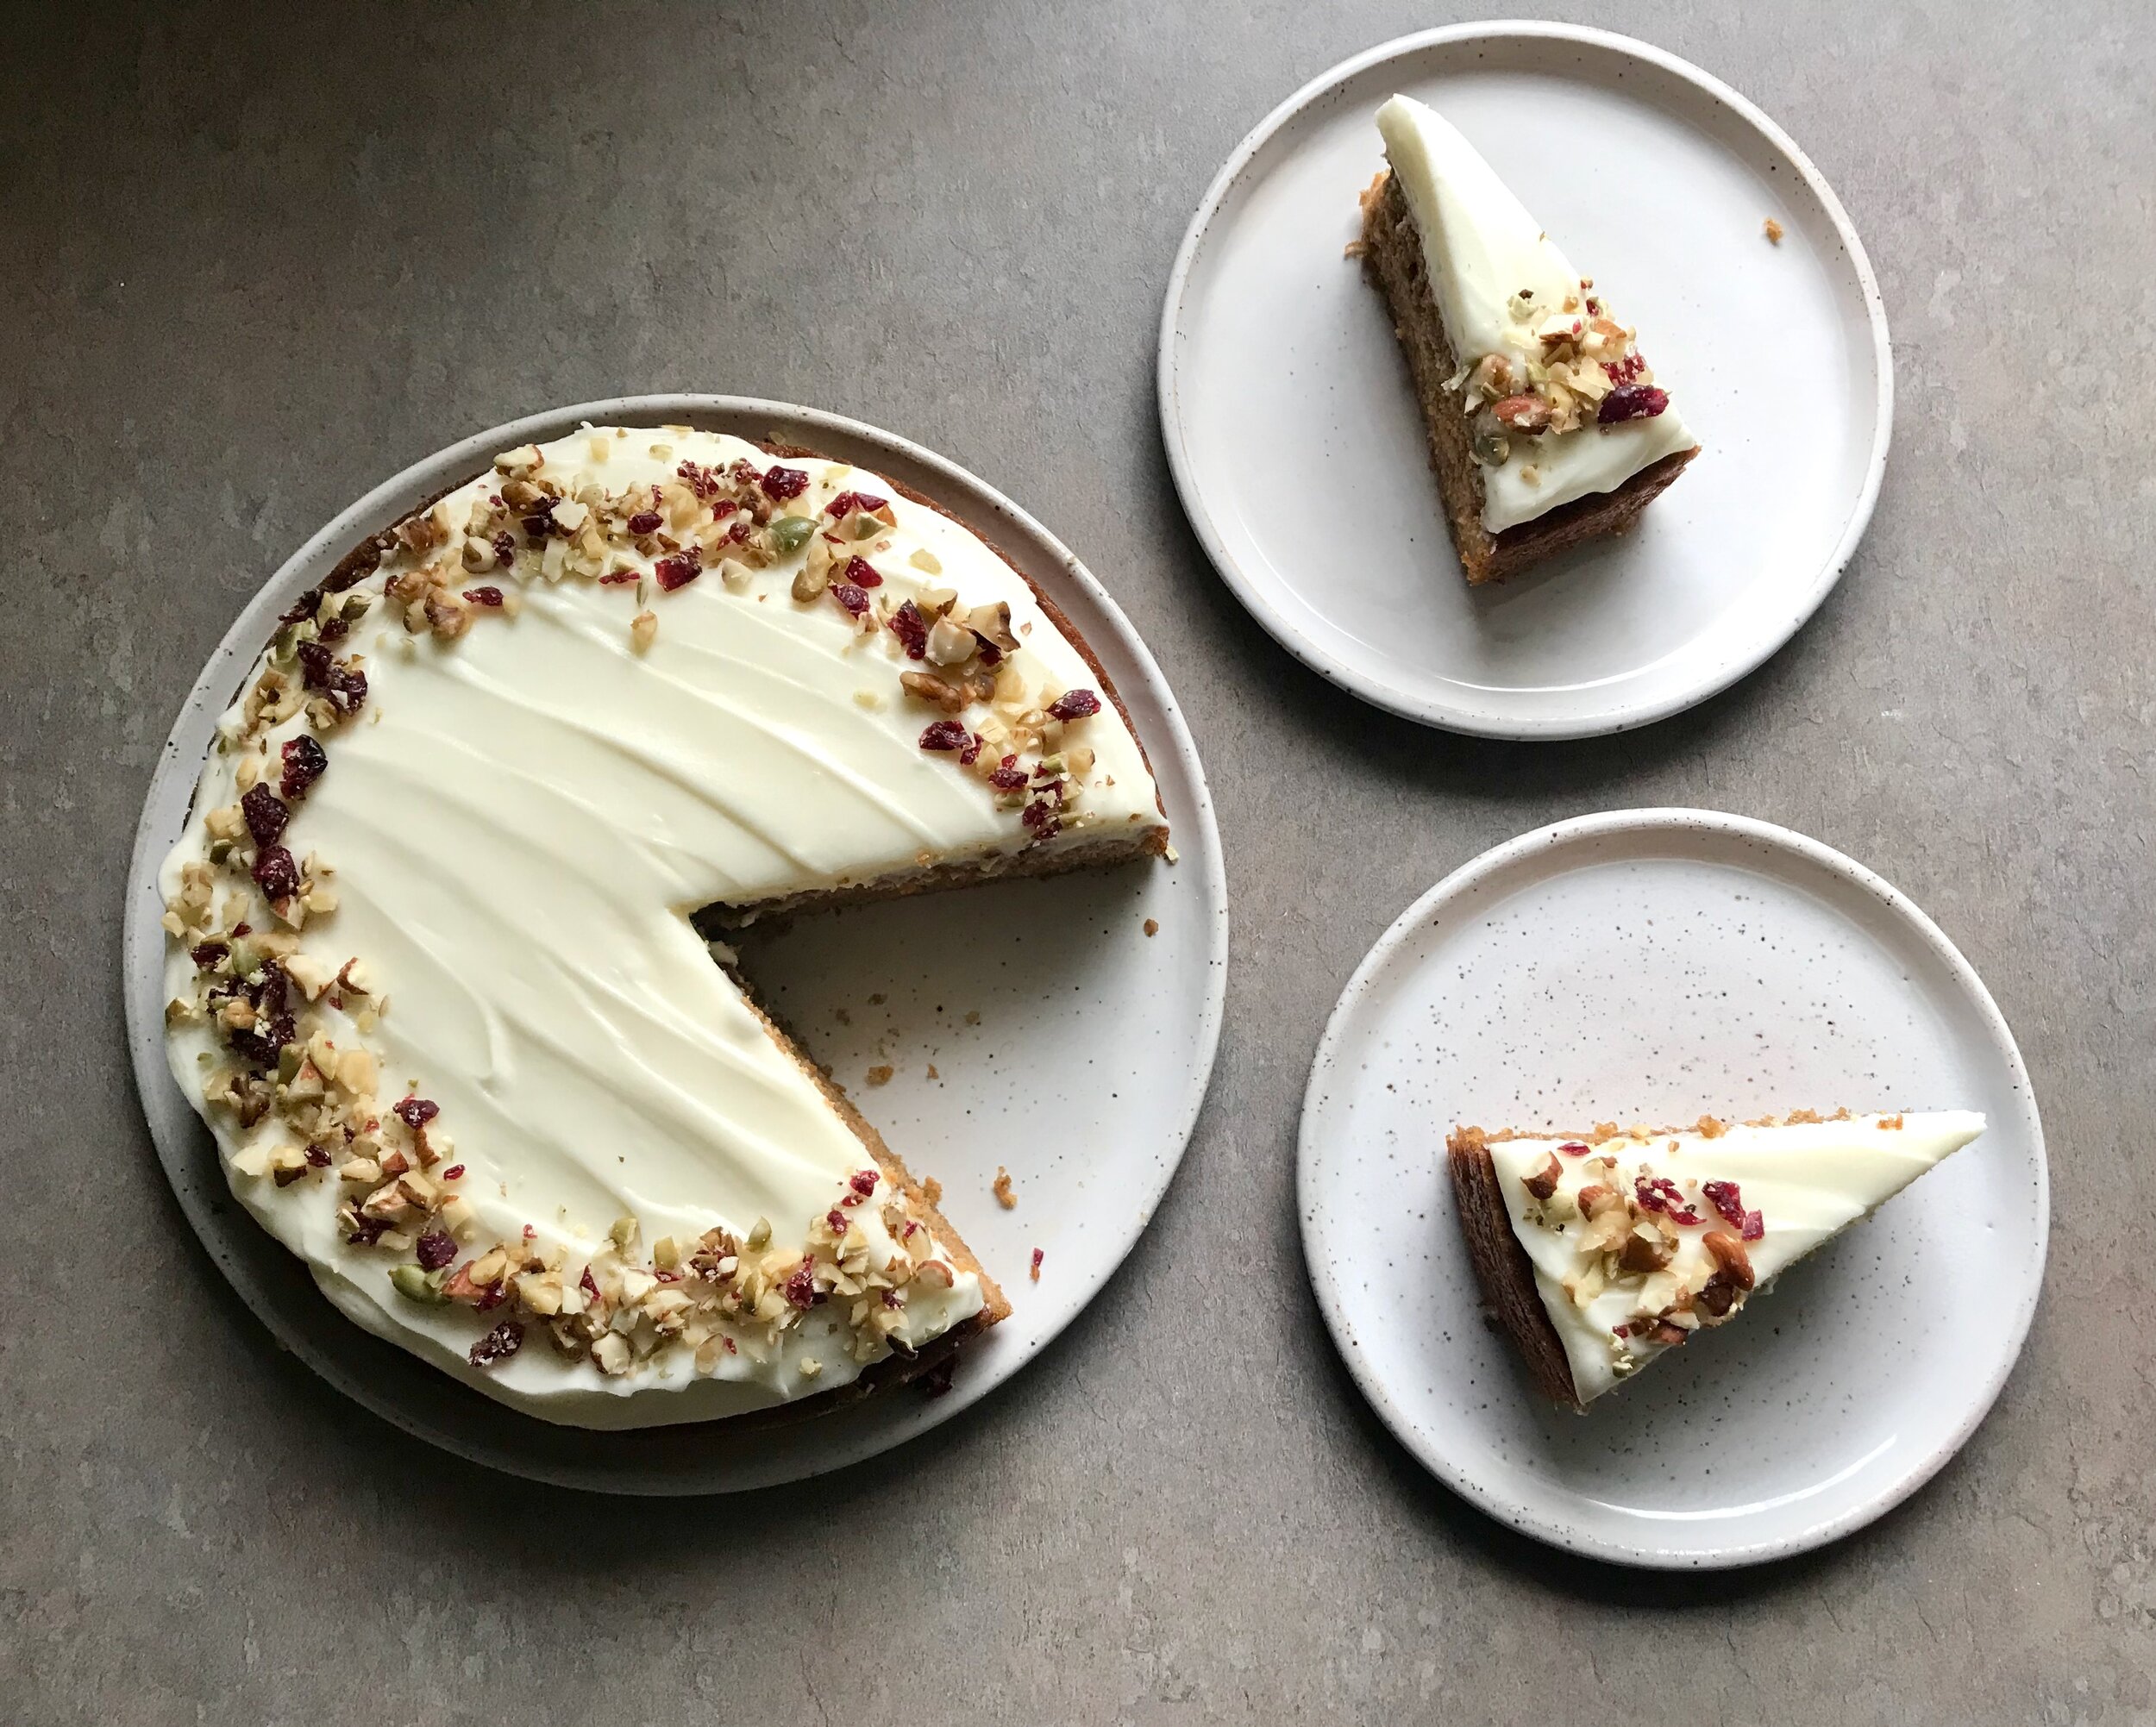
There was a clear winner and loser in this cake testing competition. Lara and I agreed right away. Martha Stewart was the clear favorite. The White Mountain Layer Cake was a very close second, but it was not quite as light as Martha’s cake, and not quite as rich. The Martha Stewart cake baked up beautifully with a nice tight crumb and was airy and super light, yet very rich and buttery tasting. In my opinion the perfect wedding cake base.

The White Mountain Layer Cake was fantastic, but just slightly denser in texture and mouthfeel. It is a great recipe that I am sure to make again, but it didn’t seem quite right for a wedding cake. I loved the little hint of almond from the almond extract. And while I couldn’t taste the coconut oil in this (so if you’re worried about that, don’t be), there was a slightly different flavor that was very nice.

The ATK cake was super not impressive and not really all that good to be honest. The flavor was the most uninteresting, just flat and boring, and the texture wasn’t very nice. It was kind of gummy and a bit courser than the other two cakes. All in all I didn’t care for it at all. I do have to say, as I already mentioned above, when I scaled this recipe down it did end up being the smallest volume of batter and it is possible that if I made the original recipe as written it would have turned out better. However, with two other wonderful options I don’t feel the need to test it again.

The Recipes:

Note: the original recipes are listed below with my scaled down ingredient lists in italics

Martha Stewart’s White Cake
From Martha Stewart’s Baking Handbook
Ingredients

  • 3 cups cake flour | 1 cup, 120 grams

  • 2 teaspoons baking powder | 2/3 teaspoon

  • 1 teaspoon salt | 1/3 teaspoon

  • 3 sticks butter, at room temperature | 1 stick, 8 tablespoons

  • 2 1/4 cups sugar, divided | 3/4 cup, 150 grams

  • 1/2 teaspoon vanilla extract | 1/4 teaspoon

  • 1 cup milk | 1/3 cup, 2 2/3 ounces

  • 8 large egg whites | 2 2/3 egg whites, 93 grams

Directions
Preheat the oven to 350 degrees. Butter two 9-by-2 inch round cake pans and line the bottoms with parchment paper. Dust with flour, tapping out the excess. Set aside.

In the bowl of an electric mixer fitted with the paddle attachment, beat the butter and 2 cups of sugar until light and fluffy, 3 to 4 minutes, scraping down the sides of the bowl as needed. Beat in the vanilla. With mixer on low speed, add flour mixture in three parts, alternating with the milk and beginning and ending with the flour; beat until just combined. Transfer mixture to a large bowl; set aside.

In the clean bowl of an electric mixer fitted with the whisk attachment, beat egg whites on low speed until foamy. With mixer running, gradually add remaining 1/4 cup sugar; beat on high until stiff, flossy peaks form, about 4 minutes. Do not overbeat. Gently fold a third of the egg-white mixture into the butter-flour mixture until combined. Gently fold in the remaining whites.

Divide batter evenly between prepared pans and smooth with an offset spatula. Bake, rotating pans halfway through, until cakes are golden brown and a cake tester inserted in the centers comes out with just a few moist crumbs. 30 to 35 minutes. Transfer pans to a wire rack to cool 20 minutes. Invert cakes onto rack; peel off parchment. Reinvert cakes and let them cool completely, top sides up.

———————————————————————————————————————————————————————————————

White Mountain Layer Cake
From Bravetart by Stella Parks
Ingredients

  • 4 cups (16 oz) bleached cake flour | 4 ounces

  • 2 sticks butter | 1/2 stick

  • 2/3 cup (4 oz) virgin coconut oil, solid but creamy | 1 ounce

  • 2 1/4 cups (16 oz) sugar | 4 ounces

  • 2 1/2 teaspoons baking powder | 5/8 teaspoon

  • 1 teaspoon baking soda | 1/4 teaspoon

  • 3/4 teaspoon Diamond Crystal kosher salt (half as much if iodized) | 3/16 teaspoon

  • 1 cup (8 1/2 oz) egg whites, from about 8 eggs | 2 1/8 ounces

  • 2 tablespoons vanilla extract | 1 1/2 teaspoons

  • 1 teaspoon almond extract | 1/4 teaspoon

  • 2 cups (16 oz) cultured low-fat buttermilk | 1/2 cup (4 ounces)

Directions
Preheat oven to 325 degrees F. Line three 8-by-3-inch aluminum cake pans with parchment and grease with pan spray.

Combine butter, coconut oil, sugar, baking powder, baking soda and salt in the bowl of a stand mixer fitted with the paddle attachment. Mix on low speed to moisten, then increase to medium and cream until fluffy and light, about 5 minutes, pausing to scrap the bowl and beater halfway through. With the mixer running, add the egg white one at a time, follow by vanilla and almond extracts.

Reduce speed to low and sprinkle in one-third of the flour, followed by one-third of the buttermilk. Alternate between the two, allowing each addition to be roughly incorporated before adding the next. Once smooth, fold with a flexible spatula to ensure it’s well mixed from the bottom up. Divide among the prepared caked pans, about 22 ounces each.

Bake until the cakes are firm but pale, browned only around the very edges, about 40 minutes (My small cake took about 35.5 minutes at 350 degrees —> I did accidentally bake at the incorrect temperature but it didn’t seem to do any harm!). A toothpick inserted into the center will emerge with a few crumbs still attached, and your fingertip will leave a slight indentation in the puffy crust.

Cool until no trace of warmth remains, about 90 minutes. Loosen the cakes from their pans with a knife. Invert onto a wire rack, peel off the parchment, and re-invert.

———————————————————————————————————————————————————————————————

Classic White Layer Cake
From The Perfect Cake by America’s Test Kitchen
Ingredients

  • 1 cup whole milk | 1/4 cup

  • 6 large egg whites | 1.5 egg whites

  • 1 teaspoon vanilla extract | 1/4 teaspoon

  • 2 1/4 cups (9 ounces) cake flour | 2.25 ounces

  • 1 3/4 cups (12 1/4 ounces) sugar | 3 ounces

  • 4 teaspoons baking powder | 1 teaspoon

  • 1 teaspoon salt | 1/4 teaspoon

  • 12 tablespoons butter, cut into 12 pieces and softened | 3 tablespoons

Directions
Adjust oven rack to middle position and heat oven to 350 degrees. Grease two 9-inch round cake pans, line with parchment paper, grease parchment, and flour pans. Whisk milk, egg whites, and vanilla together in a bowl.

Using stand mixer fitted with paddle, mix flour, sugar, baking powder, and salt on low speed until combined. Add butter, 1 piece at a time, and mix until only pea-size pieces remain, about 1 minute. Add all but 1/2 cup milk mixture, increase speed to medium-high, and beat until light and fluffy, about 1 minute. Reduce speed to medium-low, add remaining 1/2 cup milk mixture, and beat until incorporated, about 30 seconds. Give batter a final stir by hand.

Divide batter evenly between prepared pans and smooth tops with a rubber spatula. Gently tap pans on counter to settle batter. Bake until toothpick inserted in center comes out with few crumbs attached, 23 to 25 minutes, switching and rotating pans halfway through baking. Let cakes cool in pans on wire rack for 10 minutes. Remove cakes from pans, discarding parchment, and let cool completely on rack, about 2 hours.

Chocolate Chunk Buttermilk Scones (with variations)

IMG_7336.jpeg

I absolutely love scones. Most scone recipes out there can be put into a few general categories; they can be made with just cream, with just butter, with cream AND butter, with butter and buttermilk, with an egg or without an egg. I personally don’t think something should be considered a true scone unless it has butter, cream, or both. But within this group I don’t discriminate, they’re all good if made well!

I had tried this recipe a few months back and wasn’t blown away, but thought that with a few tweaks they could be really good so I decided to try them again this week. I’m glad I did as they turned out really well. The instructions in the original recipe was a little finicky in my opinion, calling for you cut the butter into only half of the dry ingredients, and then transferring to a new bowl and adding the remaining dry ingredients followed by the buttermilk. I didn’t find that this seemed to help at all, and I prefer to dump everything into the food processor at the beginning, cut in the butter, and then add the buttermilk before transferring to the counter to finish up the mixing and shaping.

I also made some changes to the recipe itself. I did only make half a batch of the original recipe so that is reflected below. I increased the sugar by about 50% because I like a sweeter scone, and also decreased the salt. The original recipe called for 2.5 teaspoons of kosher salt which is way to much my opinion. I ended up only using 1/2 teaspoon for the half batch (so 1 teaspoon in the full batch) which is significantly less than called for but I much preferred this amount of salt. I want to state that I am NOT afraid of salt, I love salt, I typically like a little more salt than is called for in a lot of recipes but not in this one. I think the decreased amount of salt is much better, but do as you will.

The original recipe is for a triple ginger scone with chocolate chunks and included ginger (ground, fresh grated, and crystalized), nutmeg, orange zest and black pepper along with the chocolate. I decided to skip the ginger and spices and just included chocolate chunks and a little cinnamon. In the end it doesn’t really matter what put in the scones. When you start with a good base you can customize however you would like and it should turn out just fine!

———————————————————————————————————————————————————————————————

Chocolate Chunk Buttermilk Scones
Adapted from 177 Milk Street
Ingredients
Scone Base:

  • 227 grams/8 ounces (1.75 cups plus 2 tablespoons) all-purpose flour

  • 50-67 grams (1/4 -1/3 cup) sugar

  • 2 teaspoons baking powder

  • 1/4 teaspoon baking soda

  • 1/2 teaspoon kosher salt (I used Mortin)

  • 128 grams/4.5 ounces (9 tablespoons) butter

  • 142 grams/5 ounces (5/8 cup) buttermilk

Additions:

  • 3/8 teaspoon ground cinnamon (added with the dry ingredients)

  • 80 grams/2.8 ounces (about 1/2 cup) chocolate chunks

Topping:

  • 1 egg, lightly beaten and thinned with about 1 tablespoon water, for brushing on top

  • Sparkling sugar, for topping

Directions
Heat the oven to 375°F. Line a rimmed baking sheet with kitchen parchment. Place the flour, sugar, baking powder, baking soda, salt and cinnamon in the bowl of a food processor and pulse a few times to combine. Add the butter and pulse until it is in large pea-sized pieces, 10-12 pulses.

Add the buttermilk and run only until everything is evenly moistened and an even sandy texture. It won’t completely come together into a cohesive dough but will still be quite crumbly, this is okay. Transfer the loose dough to the counter and scatter the chocolate chunks on top. Knead a few times to bring everything together and evenly distribute the chocolate.

Shape the dough into a circle (approximately 5 inches in diameter and 1 1/2 inches thick). Cut into 6 even wedges with a pastry scraper. Transfer scones to the baking sheet and brush with the egg wash. Cover each scone with a nice sprinkling of sanding sugar.

Bake until the scones are deep golden brown, 27 to 30 minutes, rotating the baking sheet halfway through. Cool on the baking sheets on wire racks for 5 minutes, then transfer directly to a rack and cool for at least another 5 minutes. Serve warm or at room temperature.

Variations:

IMG_7423.jpeg

Lemon Lavender Buttermilk Scones
I personally found this a little too lemony which is saying something for me. I do love lemon. But I added the zest of an entire lemon which was too much for me. It wasn’t bad in the least, I just would have preferred less. It really reminded me of a lemon poppyseed muffin so if you like those then you will love these! So add as much lemon zest as you’d like!

The tablespoon of lavender was subtle but perceptible. Maybe with a little less lemon you’d taste more lavender. I thought it was a nice subtle lavender flavor. A little more wouldn’t be bad though. To the base add:

  • Zest of up to 1 lemon (see note above)

  • 1 tablespoon dried lavender

IMG_7531.jpeg

Date Walnut Buttermilk Scones
This one turned out great! The buttery and nutty walnuts melt into the scone and give it such a nice rich flavor. The dates are just tiny pockets of sweetness that you almost don’t notice! I would have added more dates but I only had about 8-10 Deglet Noor dates in the pantry. I plan on making these again with Medjool dates and adding even more. I’d add more walnuts too. I didn’t measure either of these, but probably no more than 1/2 cup total. I want MORE! :)

  • 1/2 teaspoon cinnamon

  • Pinch of cardamom

  • Chopped Dates, to taste

  • Chopped walnuts, to taste

IMG_7944.jpeg

Lilac Almond Scones
I went foraging in my neighborhood and came home with a bag full of lilac blooms. They smell soooo good, but don’t last long. I’ll be honest, the flavor is so so mild that I actually didn’t taste it a whole lot in these finished scones, but they were still delicious and beautiful! It can be a little tedious to pull the lilac flowers off the blooms but it’s also relaxing and methodical. For a glaze, I mixed powdered sugar and water. No specific measurements, you just want it to be very thick so add water VERY SLOWLY! Drizzle and spread the first layer of glaze on the scones right after they come out of the oven and are still hot. This will help the thick glaze spread a little. You do have to play with it a little to spread out and cover the top. Then repeat the glazing a few more times as the scones slowly cool until you have the amount of glaze you desire. There’s no right or wrong. For these scones, add the following to the scones base:

  • 1 cup fresh lilac flowers

  • 1/2 cup slivered almonds

  • Powdered sugar and water (to glaze)

Lavender Honey Scones
I had this combination at a local coffee shop a year or two back and loved it! They unfortunately no longer make it, so I’ll just have to make it for myself! One tablespoon of the lavender was perfect for me. A strong lavender flavor, but not overpowering or “soapy”. If you’re not so sure about lavender then add a little less. If you want to see how far you can push it then add a little more (at your own risk!). I topped these with a simple glaze that contained a little honey. I don’t have exact measurements because for glazes I just go by feel and looks. You want this glaze to be very thick to start as it will melt and spread on top of the hot scones. I add the glaze on top of the scones immediately after they come out of the oven. It’s easiest to do this in layers. The first couple of layers will melt a little more and spread out over the top as the glaze heats up. As the scones cool, the next layers will stay thicker and more opaque. It’s completely up to you how much you add, and how thick the glaze is.

  • 1 tablespoon dried lavender

  • 2 tablespoons honey, powdered sugar and water to glaze (just eyeball it, and make it THICK!)

Lahmajoun (or Lahmacun)

IMG_7265.jpeg
IMG_7259.jpeg

I got a new Milk Street magazine this week. This is the second Milk Street magazine I’ve gotten. Lara and I decided that for the coming year, whenever we get one of the magazines we have to make at least 2 or 3 recipes. I starred several recipes for the future, but not surprisingly this recipe for Lahmajoun is the first thing we ended up making! It’s basically a twist on a pizza. From my quick online search, lahmajoun (also spelled lahmacun) is a Turkish or Armenian flatbread typically topped with a minced meat mixture. Another take on pizza? Yes please!

IMG_7261.jpeg

You start with making a yogurt flatbread dough in a food processor. I did change up this recipe a little in order to use up some leftover sourdough starter. (if interested, I used 185 grams of flour, 112 grams of leftover sourdough starter, 3/4 teaspoons instant yeast, 1¾ teaspoons kosher salt, 21 grams honey, and NO additional water since it’s in the sourdough starter).

Let the dough do it’s thing while you make the topping which is a minced meat mixture with roasted red peppers, ground lamb, a little tomato paste and then some smoked paprika and cumin. Easy to blitz up in the food processor. Once everything is ready to go you shape the dough and top with the raw meat mixture. Into a 500 degree oven for 10-12 minutes and it’s done.

The recipe calls for you to drizzle with a little thinned out Greek yogurt which I thought needed a little jazzing up so I added a nice squeeze of fresh lemon juice and lemon zest as well as a hefty dose of sumac, a little salt and a drizzle of olive oil. I highly recommend these additions! I didn’t have any arugula for topping but think that would be a great way to finish it off.

I only made half of the recipe (one of two flatbreads) the first night. The second night I changed it up a bit and topping it with a mix of za-atar and olive oil with a little salt. I did not hold back on the spices and it was great! Then added a bit of goat cheese at the end. A very simple and delicious option!

IMG_7297.jpeg
IMG_7281.jpeg

I think any variation on this recipe would be fun to make for a get-together or party as an appetizer or a little snack. It would be just as good hot, warm, or room temperature. If you want to serve it fresh from the oven it would be easy to have everything ready to go and finish putting it together in just a few minutes whenever you’re ready.

————————————————————————

Lahmajoun (or Lahmacun)
From 177 Milk Street
Ingredients
For the flatbreads:

  • 241 grams (1¾ cups) bread flour, plus more for dusting

  • 1½ teaspoons instant yeast

  • 1¾ teaspoons kosher salt

  • ¾ cup plain whole-milk Greek yogurt (my homemade Greek yogurt weighed in at 180 grams)

  • 1 tablespoon (21 grams) honey

  • ¼ cup (57 grams) water

For the topping:

  • 1 small yellow onion, roughly chopped

  • ¼ cup chopped drained roasted red peppers

  • 2 tablespoons tomato paste

  • 2 teaspoons smoked paprika

  • 1½ teaspoons ground cumin

  • ¾ teaspoon red pepper flakes

  • Kosher salt and ground black pepper

  • 8 ounces ground beef or ground lamb

  • ¼ cup plain whole-milk Greek yogurt

  • Semolina flour, for dusting the pizza peel

  • 2 tablespoons extra-virgin olive oil, divided

  • 2 cups (1 ounce) lightly packed baby arugula

Directions
To make the dough, in a food processor, combine the flour, yeast and salt; process until combined, about 5 seconds. Add the yogurt, honey and ¼ cup water. Process until the mixture forms a ball, about 30 seconds; the dough should be tacky to the touch and should stick slightly to the sides of the bowl. If it feels too dry, add more water, 1 tablespoon at a time, and process until incorporated. Continue to process until the dough is shiny and elastic, about 1 minute.

Transfer the dough to a lightly floured counter. Flour your hands and knead a few times to form a smooth ball. Divide the dough in half and form each half into a taut ball by rolling it against the counter in a circular motion under a cupped hand. Space the balls about 6 inches apart on a lightly floured counter, then cover with plastic wrap. Let rise until doubled in volume, 1 to 1½ hours.

Meanwhile, to make the topping, in a food processor, pulse the onion until finely chopped, about 5 pulses. Add the roasted peppers, tomato paste, paprika, cumin, pepper flakes and 1 teaspoon each salt and black pepper. Process until smooth, about 10 seconds, scraping the bowl as needed. Add the beef and pulse just until incorporated, 3 or 4 pulses. Transfer to a medium bowl. In a small bowl, stir together the yogurt and 1 tablespoon water, adding more water as needed to thin to drizzling consistency. Cover both bowls and refrigerate until needed.

About 1 hour before shaping the dough, heat the oven to 500°F with a baking steel or stone on the upper-middle rack. Working one at a time, gently stretch each dough ball on a lightly floured counter to an oval approximately 6 inches wide and 12 inches long.

Dust a baking peel, inverted baking sheet or rimless cookie sheet with semolina. Transfer one shaped dough to the peel and, if needed, reshape into an oval. Brush the entire surface with 1 tablespoon of oil. Using a spatula, spread half the meat mixture on the dough, leaving a ½-inch border around the edge. Slide the dough onto the the baking steel and bake until well browned, 9 to 12 minutes.

Using the peel, transfer the flatbread to a wire rack. Repeat with the remaining dough, oil and meat mixture. After the second flatbread has cooled on the rack for a couple minutes, top both with the arugula. Drizzle with yogurt, then serve.

Simple Carrot Cake

IMG_7149.jpeg

A weird Easter this year. No church to go to (although thankfully live streaming is going well - but it’s just NOT the same as being in community with your fellow believers) and no family to get together with. It’s just been such a strange few weeks, and more to come. Lara and I wanted to at least do something festive to celebrate the most exciting day for Christians around the world. We decided to make something a little special for lunch, and finish it off with some cake!

Lara found a carrot cake recipe that seemed perfect so she got up early this morning to bake it. I also got up early to make my favorite yogurt galette dough to have ready for lunch. After some quiet time in the kitchen we took an Easter morning walk. We had wanted it to be a sunrise walk, but it was way to cloudy. Still a beautiful morning full of bird sounds. The heaven’s were sure declaring the glory of God!

IMG_7089.jpeg
IMG_7092.jpeg

We then live-streamed church followed by lunch of a beautiful leek and bacon galette with pecorino which was just lovely. Since the weather is going to get crummy again starting tonight we then went off on a nice afternoon walk at Millenium Park. Grey and cool, but beautiful in it’s own way.

IMG_7099.jpeg

When we got home it was coffee time! Which also meant cake time! The carrot cake was a definite winner, and perfect with a hot cup of coffee! The cake itself is not that sweet, but it was perfectly cooked, moist and tender with a hint of cinnamon. While it would be a nice cake to eat plain, or with some powdered sugar or a simple glaze, cream cheese frosting is definitely the way to really jazz it up! The cake recipe also had an accompanying frosting, but since I had some cream cheese frosting in the freezer (from my work Christmas party cupcakes) I just used that.

IMG_7137.jpeg
IMG_7152.jpeg
IMG_7157.jpeg
IMG_7169.jpeg

Lara halved the original recipe (I have the halved recipe written out below, see the link for the original full recipe) and baked it in a 9-inch round cake pan. It baked for 36 minutes which seemed perfect. It was cooked through yet not dry at all. I wouldn’t be opposed to adding some walnuts to the batter itself, but whatever you prefer. This is definitely a winner of a recipe. Simple enough to not be intimidating, but special enough to feel celebratory. Highly recommended.

———————————————————————————————————————————————————————————————

Simple Carrot Cake
From The Kitchn
Ingredients
For the Cake

  • 1 (120 grams) cups all-purpose flour (or a mix of all purpose and whole wheat flours)

  • 1 teaspoon ground cinnamon

  • 1 teaspoon baking powder

  • 1/2 teaspoon baking soda

  • 1/2 teaspoon salt

  • 2 large eggs, at room temperature

  • 1/2 teaspoon vanilla extract

  • 1/2 cup (100 grams) granulated sugar

  • 3/8 cup (75 grams) canola oil

  • 2 cups grated carrot

For the frosting:

  • 4 ounces cream cheese, at room temperature

  • 2 tablespoons unsalted butter, at room temperature

  • 1 1/2 cups powdered sugar

  • 1/2 teaspoon vanilla extract

  • Pinch salt

Directions
Make the cakeArrange a rack in the middle of the oven and heat to 350°F. Coat an 8-inch cake pan with cooking spray; set aside.

Place the flour, cinnamon, baking powder, baking soda, and salt in a medium bowl and whisk to combine. Place the eggs and vanilla in a medium bowl and whisk to combine; set both bowls aside.

Place the sugar and oil in a the bowl of a stand mixer fitted with the paddle attachment. (Alternatively, use an electric hand mixer or whisk and large bowl.) With the mixer on low (or by hand), beat 1/3 of the flour into the sugar mixture. Beat in 1/3 of the egg mixture. Continue adding the flour and eggs in alternating additions. Stop mixing when the last of the flour is just barely incorporated. Add the carrots and fold them in by hand with a rubber spatula, working slowly and gently until the carrots are distributed and no more dry flour remains.

Pour the batter into the baking dish and gently tap the dish a few times against the counter to work out the air bubbles. Bake for 34-38 minutes, rotating halfway through, until the cake is slightly puffed in the middle and browned on the edges, and a toothpick inserted in the middle should come out clean.

Place the cake on a wire rack and let cool completely before frosting.

Make the frostingPlace the cream cheese and butter in the bowl of a stand mixer fitted with the paddle attachment. (Alternatively, use an electric hand mixer and large bowl.) Beat on medium speed until combined. Gradually beat in the powdered sugar, vanilla, and salt until the frosting starts to come together into lumps. Increase the speed to high and continue to beat until fluffy and creamy, scraping down the sides of the bowl as needed. Dollop the frosting over the cake and spread into an even layer.

Braised Pork Sandwiches with Broccoli Rabe and Provolone

IMG_6997.jpeg

This recipe appeared somewhere in my social media browsing and it look so good, and the timing was right, so Lara and I decided to just go for it! It was a good choice!

The recipe was super simple, as are most roasts/braises, and absolutely delicious, especially with such a great piece of pork from my favorite butcher. Look at the fat on that thing!

Lara made this on a Monday she had off. Throw everything in a pan and let it cook until done. Easy! She had to adjust the cooking method because the original recipe calls for this to be made in the slow cooker, but it was easy enough to adjust for the oven. Just be sure to watch the pork near the end of the braising time to ensure the water hasn’t all evaporated. After 3.5 hours most of the water was gone and the pork was looking very dark, in a good way, but it would have been easy to go a little too far.

I would definitely not skip the broccoli rabe either, it was a great addition, especially with all the lemon - Don’t Skimp on the Lemon!

IMG_1887.jpeg

One recommendation; the recipe calls for you to serve this on a hoagie roll. I didn’t have any but I had plenty of sourdough so I used slices of that instead. This was tasty, but very messy. The pork is so VERY juicy and fatty and so the slices of bread kind of fell apart while eating. A sturdy hoagie or something similar would do a much better job holding up to this type of sandwich.

A great make ahead meal for a crowd.

Braised Pork Sandwiches with Broccoli Rabe and Provolone
Adapted from Bon Appétit
Ingredients

  • 3 pounds boneless, skinless pork shoulder

  • ¼ cup extra-virgin olive oil

  • ¼ cup red wine vinegar

  • 1 head of garlic, halved lengthwise through root end

  • 3 sprigs rosemary

  • 2 tablespoons honey

  • 2 teaspoons fennel seeds

  • 1 teaspoon crushed red pepper flakes

  • 1 tablespoon kosher salt, plus more

Broccoli Rabe and Assembly

  • Kosher salt

  • 2 bunches broccoli rabe, woody ends trimmed

  • ¼ cup extra-virgin olive oil

  • 6 garlic cloves, thinly sliced

  • ½ teaspoon crushed red pepper flakes

  • 4 seeded semolina or hoagie rolls

  • 4 ounces sharp provolone, thinly sliced

  • 1 lemon, cut into wedges

Directions
Pork
Preheat oven to 325 degrees. Combine pork, oil, vinegar, garlic, rosemary, honey, fennel, red pepper flakes, 1 Tbsp. salt, and 1 cup water in a Dutch Oven. Turn pork several times with tongs to coat and mix ingredients. Place lid on the Dutch oven and place in the preheated oven and braise until pork is very tender and shreds easily, about 3 1/2 hours. Keep an eye on the roast in the last hour of cooking to ensure the liquid has not all evaporated. Add more water as needed.

Transfer pork to a medium bowl and let rest until cool enough to handle. Pour cooking liquid through a fine-mesh sieve into a medium saucepan; discard solids. Let liquid settle so fat rises to the top, then pour off and discard all but a thin layer of fat. Bring liquid to a simmer over medium heat and cook, stirring occasionally, until reduced by about a third, 12–18 minutes.

Meanwhile, shred pork with your fingers or 2 forks, discarding any large bits of fat. Season with salt.

Set aside 1 cup cooking juices for serving, then add shredded pork to saucepan with remaining juices and toss to coat and rewarm pork.

Do Ahead: Pork can be cooked 2 days ahead. Shred and add to reduced juices, then let cool, cover, and chill. Reheat over low.

Broccoli Rabe and Assembly
Bring a large pot of salted water to a boil over high heat. Fill a large bowl with ice water and have at the ready. Add broccoli rabe to pot and cook just until stems are tender, about 2 minutes. Using tongs, transfer broccoli rabe to bowl of ice water and agitate to rapidly cool down. Drain and pat dry on paper towels. Transfer to a cutting board and slice into 1" pieces on the diagonal, all the way from stem to leaves.

Heat oil in a large skillet over medium. Cook garlic and red pepper flakes, stirring often, until garlic is golden around the edges, about 2 minutes. Increase heat to medium-high and add broccoli rabe; season with salt. Cook, tossing constantly, until leafy bits are just starting to crisp slightly, 5–10 minutes.

Divide pork among bottoms of rolls or on a piece of toasted bread. Top with provolone, shingling slices. Spoon broccoli rabe over, then squeeze lemon wedges over broccoli rabe. Close up sandwiches and cut in half. Serve with reserved juices for dipping.

Do Ahead: Broccoli rabe can be blanched 1 day ahead. Pat dry, cover, and chill.

Open Crumb Sourdough Bread

I’ve been following Full Proof Baking on Instagram for a while now and find her breads absolutely beautiful! I finally sat down and really looked at her method (video available on her YouTube page) and attempted her Basic Open Crumb Sourdough. I had tried her 50% whole wheat sourdough a few weeks back and it failed miserably for some reason even though the whole process seemed to go very well. I figured I’d step back and start at the beginning with a more basic recipe with a lower percentage of whole wheat. I’ve now made this bread twice. The first time it turned out pretty well, but the crumb was a little uneven and it didn’t look like it really rose fully, the bottom of the loaf was a little dense. Second attempt went a lot better. I didn’t really change a lot, figuring practice and repetition is really what will make a successful loaf.

One thing I did change slightly was at the end of the overnight proof. She calls for you to bake the bread straight from the fridge while it is still cold. I feel like when I do this sometimes it doesn’t work. It seemed to me that my bread needed just a little bit more rise before baking. So on the second attempt I took the bread out when I turned my oven on to preheat. So it was out for 45-60 minutes in a fairly warm room (with the oven on to 500 degrees). I feel like this gave it just a bit more lift without overproofing. There is the possibility that I am in fact overproofing and that’s why it’s not getting enough lift but I just didn’t think so.

I’m going to keep playing with the recipe, and my technique, but this second attempt was a definite success! I’m excited to keep experimenting!

——————————————————————————————

IMG_6972.jpg

Basic Open Crumb Sourdough Bread
Recipe from: Full Proof Baking
Note: A 20% Whole grain wheat bread. The higher hydration makes the dough ingredients easier to mix by hand. 

Specs:

  • Baker’s Percentages: 20% whole grain hard red spring wheat, 79% bread flour, 1% whole grain rye (from levain)

  • 20% levain inoculation

  • 2.1% sea salt

  • 80% final hydration

Levain: (5 hours)
5 hour young levain built 1:2:2

  • 15 g mature starter + 30 g water + 30 g bread flour 

Keep at 80% F until more than tripled in volume, approximately 5 hours at around 80 degrees.

Autolyse (2-4 hours)
This is a pre-soak of flour and water to jump-start gluten development and increase dough extensibility which can be great for maximizing open crumb in the final loaf of bread. 

  • 70 grams whole wheat flour

  • 255 grams bread flour

  • 253 grams water

Add water to flour mix and stir until there is no more dry flour remaining. Let sit for 2-4 hours. At this point there should be much more extensibility in the dough. 

Add levain to Autolyse:
Add 65 g (20%) levain (brings final hydration to 80%) to the autolyse.

Add the levain right on top of autolysed dough. Begin hand mixing to get it into the dough. Shouldn’t take long, approximately 3-4 minutes. A short mix prevents over-oxidizing of the dough. Once fully mixed, form a taught ball of dough, let rest 30 minutes before adding salt. 

Add salt:
After resting for 30 minutes, add 7.5 grams fine grain sea salt (around 1 teaspoon) . Wet your hand and dimple in the sea salt. Then pinch and mix it in. The salt helps tighten the gluten structure and adds strength to the dough. It also slows fermentation. This is also the last step where you can easily easily add more water to the dough. If the dough feels a little tight you can add a small splash of water as needed. This is mainly done by feel. Takes about 5 minutes to fully incorporate the salt. Then let the dough rest for another 30 minutes. 

Perform a Fold:
Next perform a fold: Lightly mist the counter with water. Wet your hands with water and flip the dough out onto the counter. Using a bench scraper, pull the dough from the top down folding the dough onto itself. Repeat this process on all four sides of the dough. Flip the dough over, round it up and return to the bowl. Cover and let rest 30 minutes. 

Lamination: 
Mist the counter with water again. Transfer dough to counter. Lift and gently stretch the dough out from the center with wet hands. Work delicately and slowly. Try not to pull from the edges but pull from the center out, you don’t want the dough to tear. Form a large, thin rectangle of dough. Pick up one edge of the dough and fold into the center approximately ⅓ of the way across, being sure to eliminate any large air pockets. Then fold the other side into the center over the first section. Finish by folding the top down halfway and then the bottom over the top forming a square in the end. Move your dough to a small square Pyrex-type dish. Let rest 45 minutes. 

Stretch and Folds: (strengthening the dough)
The number and frequency of the folds is dependent on the length of bulk as well as your dough’s extensibility and how the dough develops over the course of the bulk. For this dough 3 sets of coil folds performed at 45 minute intervals is typically enough.

With wet hands reach under the dough and pull it up slowly and evenly, detaching the dough on the side farther away from you. The dough will naturally wrap itself under. Rotate the dish and perform the same coil fold again on the other three sides. The top part of the dough is the part detaching from the dish and coiling under. 4 total coil folds. While doing this be sure to pop and large air pockets as these are not signs of fermentation, they are pockets introduced during mixing and lamination. Cover and let rest 45 minutes. This bulk fermentation should be around 75 degrees F.    

Perform the next stretch and coil folds on all 4 side of the dough. If your dough still seems a little loose you can perform another 1-2 stretch and folds during the bulk fermentation. Let rest 45 minutes. 

Perform the last set of stretch and folds. Note the temperature (again, around 75 degrees is ideal). Let bulk fermentation continue for another 1.5-2 hours (this is where you can add in another series of coil folds as needed). 

Shaping: 
About 90 min later, about 6 hours after adding levain, the dough should be around 74-75 degrees F and is ready to shape. Dough should appear puffy and somewhat light, with some roundness at the edges. Overall it should have grown approximately 50% in volume since adding the levain. 

Flour the counter top with flour. Release dough from top of dish and flip the dish over and allow it to release from the dish onto the counter. Use a bench scraper to tuck flour under the edges of the dough. Then remove the excess flour from the workspace. 

Use the scraper to help pick up the side (top) flap of your dough and gently pull out just a bit before folding up on top of the center of the dough (about ⅓ of the way in, like a letter). Gently pat the dough during this stage to remove any large air bubbles to ensure a more even crumb. Repeat the fold with the other side of the dough, folding it into the center. Then lift the top of the dough and begin to roll down onto itself. Use your thumbs to gently but firmly tuck the dough in creating a more taught surface on top of the dough. Once you roll fully up and get to the seam, seal the edge using your fingers. The use your fingers to pinch the edges to seal.

Dust the top of your dough with brown rice flour (this is ideal to prevent sticking to your banneton) and keeps the dough dry and prevents the surface from getting tacky. Use your scraper to flip over the dough so the seam side is up and the top of the dough is facing down. Gently lift and transfer the dough to the banneton. Cover and move on to the proofing stage. 

Proof: 
Let the dough sit at room temperature for an initial short proof (15-20 mins), then move to the fridge for an overnight retard for approximately 12-16 hours at 38 degrees F. Anything less then 39-40 degrees will prevent any significant rise. Any warmer and you may over proof/over ferment. 

Bake: 
The next day it’s time to bake. I use the Dutch oven method currently. Preheat oven with Dutch Oven in it for 1 hour at 500 degrees. Transfer dough, cold from fridge, to piece of parchment paper. Score at 45 degree angle. Transfer to preheated Dutch oven and put the lid on. Place in oven and turn temperature down to 450 degrees. Bake, covered, for 20 minutes. Remove the lid and return the bread to the oven and continue baking another 10 minutes at 450 degrees. Decrease the temperature to 425 degrees and bake for an additional 10-15 minutes. You can remove the bread from the Dutch oven for these last 15 minutes if desired. I find it helps the crust brown up more then it does when left in the pot.

Remove bread from over and place on a wire cooling rack. Allow to cool at least 2 hours before cutting, but waiting until bread is completely cooled is ideal.

Digestive Cookies (with sourdough option)

IMG_7848.jpeg

Coronovirus and COVID19 are upon us. State order starting yesterday is to shelter in place and only essential business are to be open. Phew. What a crazy time we’re living in. What better way to get through this then with some baking.

Lara baked up these cookies/biscuits yesterday. We’ve both really love any digestive biscuit, who doesn’t? They really are just cookies, which this Bon Appetit recipe endorses and calls them what they are.

IMG_7015.jpeg

These baked up very nicely, crispy and light with a lot of good whole wheat flavor. While they are not necessarily sugary sweet in the way a classic cookie is sweet, they definitely are sweet and overall delicious!

I also have made these with some alterations as a way to use up my leftover sourdough starter. I’ve posted this option below as well. Both are delicious! There’s a lot of room for variation with this recipe!

——————————————————————————————

Digestive Cookies
From Bon Appetit
Ingredients

  • ½ cup (1 stick) chilled unsalted butter, cut into pieces

  • ½ cup (33 g) wheat germ

  • 6 Tbsp. (75 g) sugar

  • 1 tsp. baking powder

  • 1 tsp. kosher salt

  • 1⅓ cups (167 g) whole wheat flour, plus more for surface

  • ¼ cup (65g) milk

  • 2 oz. chocolate (any percentage), chopped (optional)

  • 1 tsp. refined coconut oil (optional)

Directions
Place racks in upper and lower thirds of oven; preheat to 350°. Process 1⅓ cups whole wheat flour, wheat germ, sugar, baking powder, salt, and butter in a food processor until butter virtually disappears and you have a fine, floury meal. Add milk and pulse until a damp and crumbly dough forms. Turn dough out onto an unfloured surface and gently knead just to bring it into a ball; flatten into a disk.

Lightly flour surface and roll out dough until just shy of ¼” thick. Lightly flour a 2-inch round cookie cutter and punch out cookies, dusting with more flour as needed to avoid sticking. Dust any excess flour off of cookies with a dry pastry brush. Using a spatula, transfer cookies to 2 parchment-lined baking sheets. Gently knead scraps together, reroll, and punch out more cookies.

Prick each cookie 3 times with a fork and bake, rotating baking sheets top to bottom and front to back halfway through, until bottoms and edges are browned, 15–18 minutes. Let cool on baking sheets (cookies will crisp up as they cool).

If using, melt chocolate and oil in a microwave-safe bowl in the microwave in 20-second increments, stirring after each burst, until mostly melted and smooth, about 1 minute total. (Alternatively, melt in a heatproof bowl set over a saucepan of simmering water, stirring occasionally, until melted; do not let bowl touch water.) Stir chocolate mixture until fully melted, then continue to stir until slightly cooled and thickened, about 3 minutes. (This makes it easier to get a thick layer of chocolate on the cookies.)

Using a small offset spatula or butter knife and working one at a time, spread a scant 1 tsp. chocolate over the flat underside of each cookie. Using the edge of the spatula and starting from one side and working your way to the other, gently and quickly press a few lines into chocolate as desired. Chill cookies on baking sheets until chocolate is set, about 10 minutes.

Sourdough Digestive Cookies
Ingredients

  • ½ cup (1 stick) chilled unsalted butter, cut into pieces

  • ½ cup (33 g) wheat germ

  • 4-6 Tbsp. (50-75 g) sugar

  • 1 tsp. baking powder

  • 1 tsp. kosher salt

  • 102 grams whole wheat flour

  • 130 grams discarded sourdough starter

Directions
Place racks in upper and lower thirds of oven; preheat to 350°. Process whole wheat flour, wheat germ, sugar, baking powder, salt, and butter in a food processor until butter virtually disappears and you have a fine, floury meal. Add sourdough starter and pulse until a damp and crumbly dough forms. Turn dough out onto an unfloured surface and gently knead just to bring it into a ball; flatten into a disk.

Lightly flour surface and roll out dough until just shy of ¼” thick. Lightly flour a 2-inch round cookie cutter and punch out cookies, dusting with more flour as needed to avoid sticking. Dust any excess flour off of cookies with a dry pastry brush. Using a spatula, transfer cookies to 2 parchment-lined baking sheets. Gently knead scraps together, reroll, and punch out more cookies.

Prick each cookie 3 times with a fork and bake, rotating baking sheets top to bottom and front to back halfway through, until bottoms and edges are browned, 25-30 minutes. Let cool on baking sheets (cookies will crisp up as they cool).

Cornmeal Honey Digestive Cookies
Ingredients

  • ½ cup (1 stick) chilled unsalted butter, cut into pieces

  • ½ cup (33 g) wheat germ

  • 1 tsp. baking powder

  • 1 tsp. kosher salt

  • 100 grams whole wheat flour

  • 3 tablespoons (27 grams) coarse cornmeal

  • 54 grams honey (3 tablespoons) honey

  • 130 grams discarded sourdough starter

Directions
Place racks in upper and lower thirds of oven; preheat to 350°. Process whole wheat flour, wheat germ, sugar, baking powder, salt, and butter in a food processor until butter virtually disappears and you have a fine, floury meal. Add sourdough starter and pulse until a damp and crumbly dough forms. Turn dough out onto an unfloured surface and gently knead just to bring it into a ball; flatten into a disk.

Lightly flour surface and roll out dough until just shy of ¼” thick. Lightly flour a 2-inch round cookie cutter and punch out cookies, dusting with more flour as needed to avoid sticking. Dust any excess flour off of cookies with a dry pastry brush. Using a spatula, transfer cookies to 2 parchment-lined baking sheets. Gently knead scraps together, reroll, and punch out more cookies.

Prick each cookie 3 times with a fork and bake, rotating baking sheets top to bottom and front to back halfway through, until bottoms and edges are browned, 25-30 minutes. Let cool on baking sheets (cookies will crisp up as they cool).