Sesame-Walnut Manoushe with Zucchini And Yufka Flatbread

My friend Ilana recently let me borrow a cookbook of hers that she thought I would like. Soframiz by Ana Sortun and Maura Kilpatrick. They run a restaurant called Sofra Bakery and Cafe in Cambridge, Massachusetts which Ilana has been to and highly recommends.

The cookbook has a lot of good breakfast and lunch options, as well as a great dessert section. There is a whole section of sandwiches/flatbreads which is definitely what I am drawn too. Most of these are made on a homemade flatbread called Yufka which from what I can tell is very similar to a tortilla (and similar to other homemade tortillas I’ve made). It’s a simple dough of flour, salt, water and olive oil. You do have to let the dough sit for about 4 hours before rolling out but it’s so quick and easy to put together this isn’t a big deal. Mix it all up and let it sit!

IMG_3858.jpeg
IMG_0366.jpeg

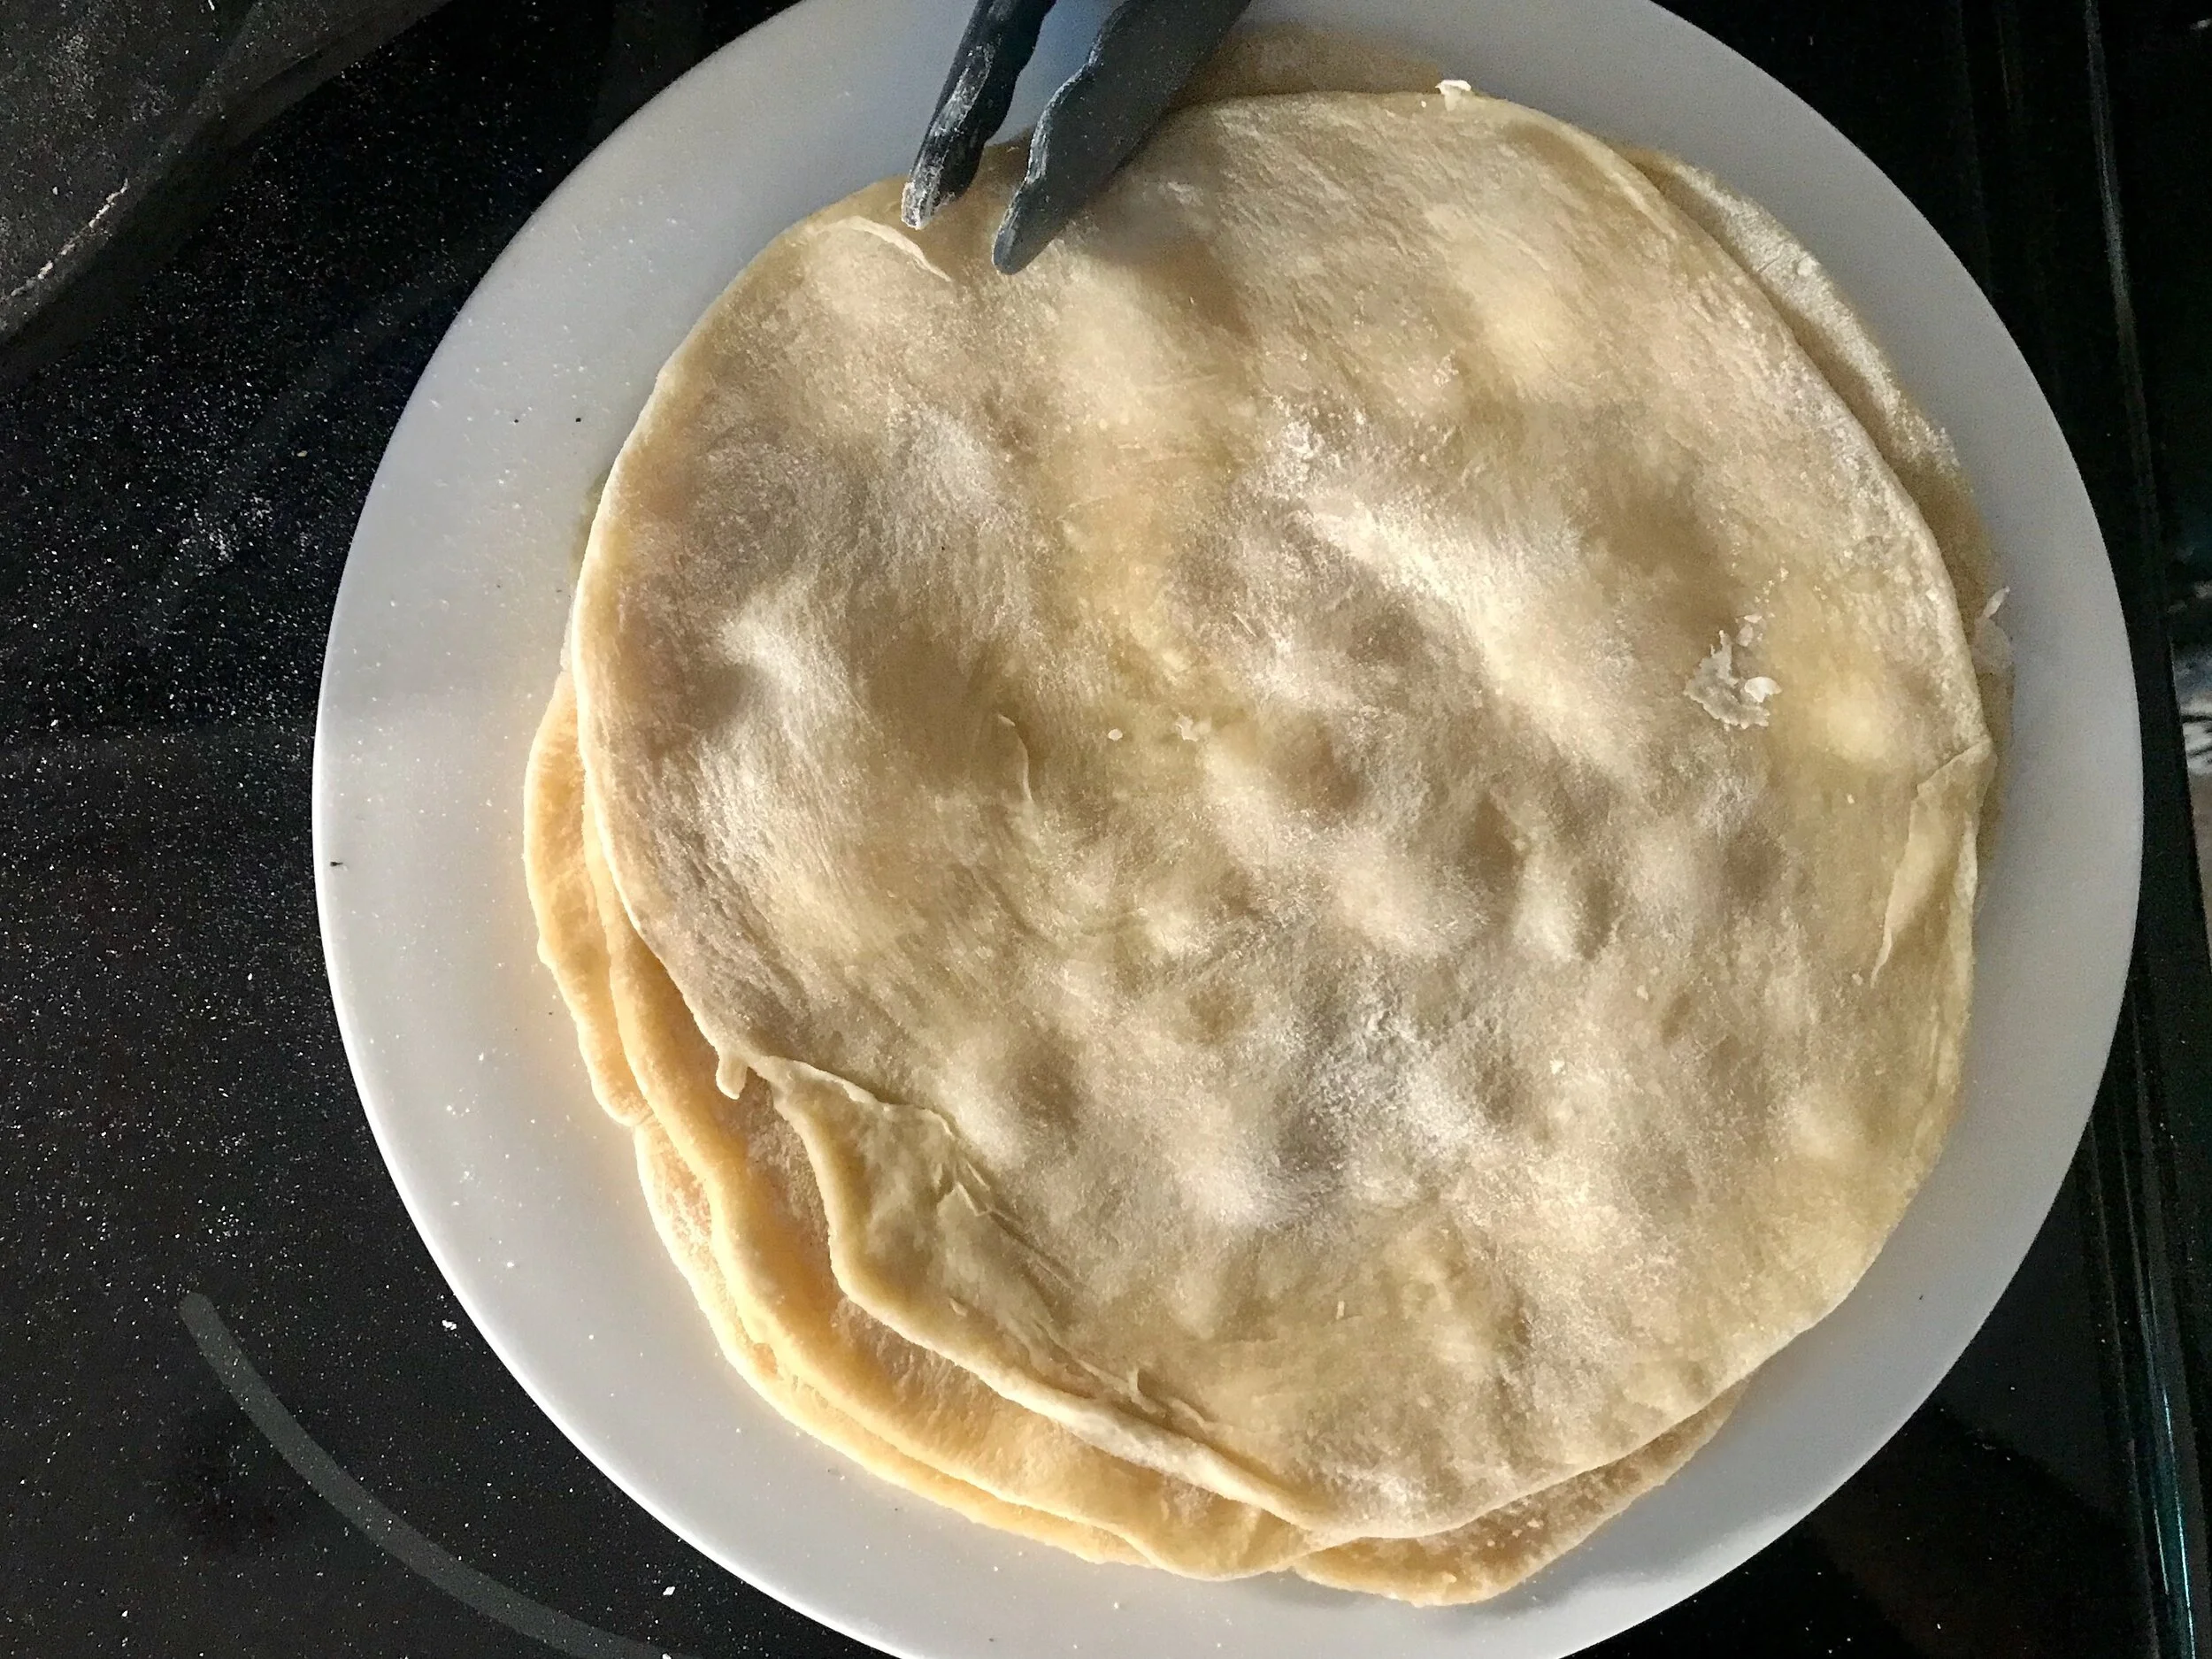
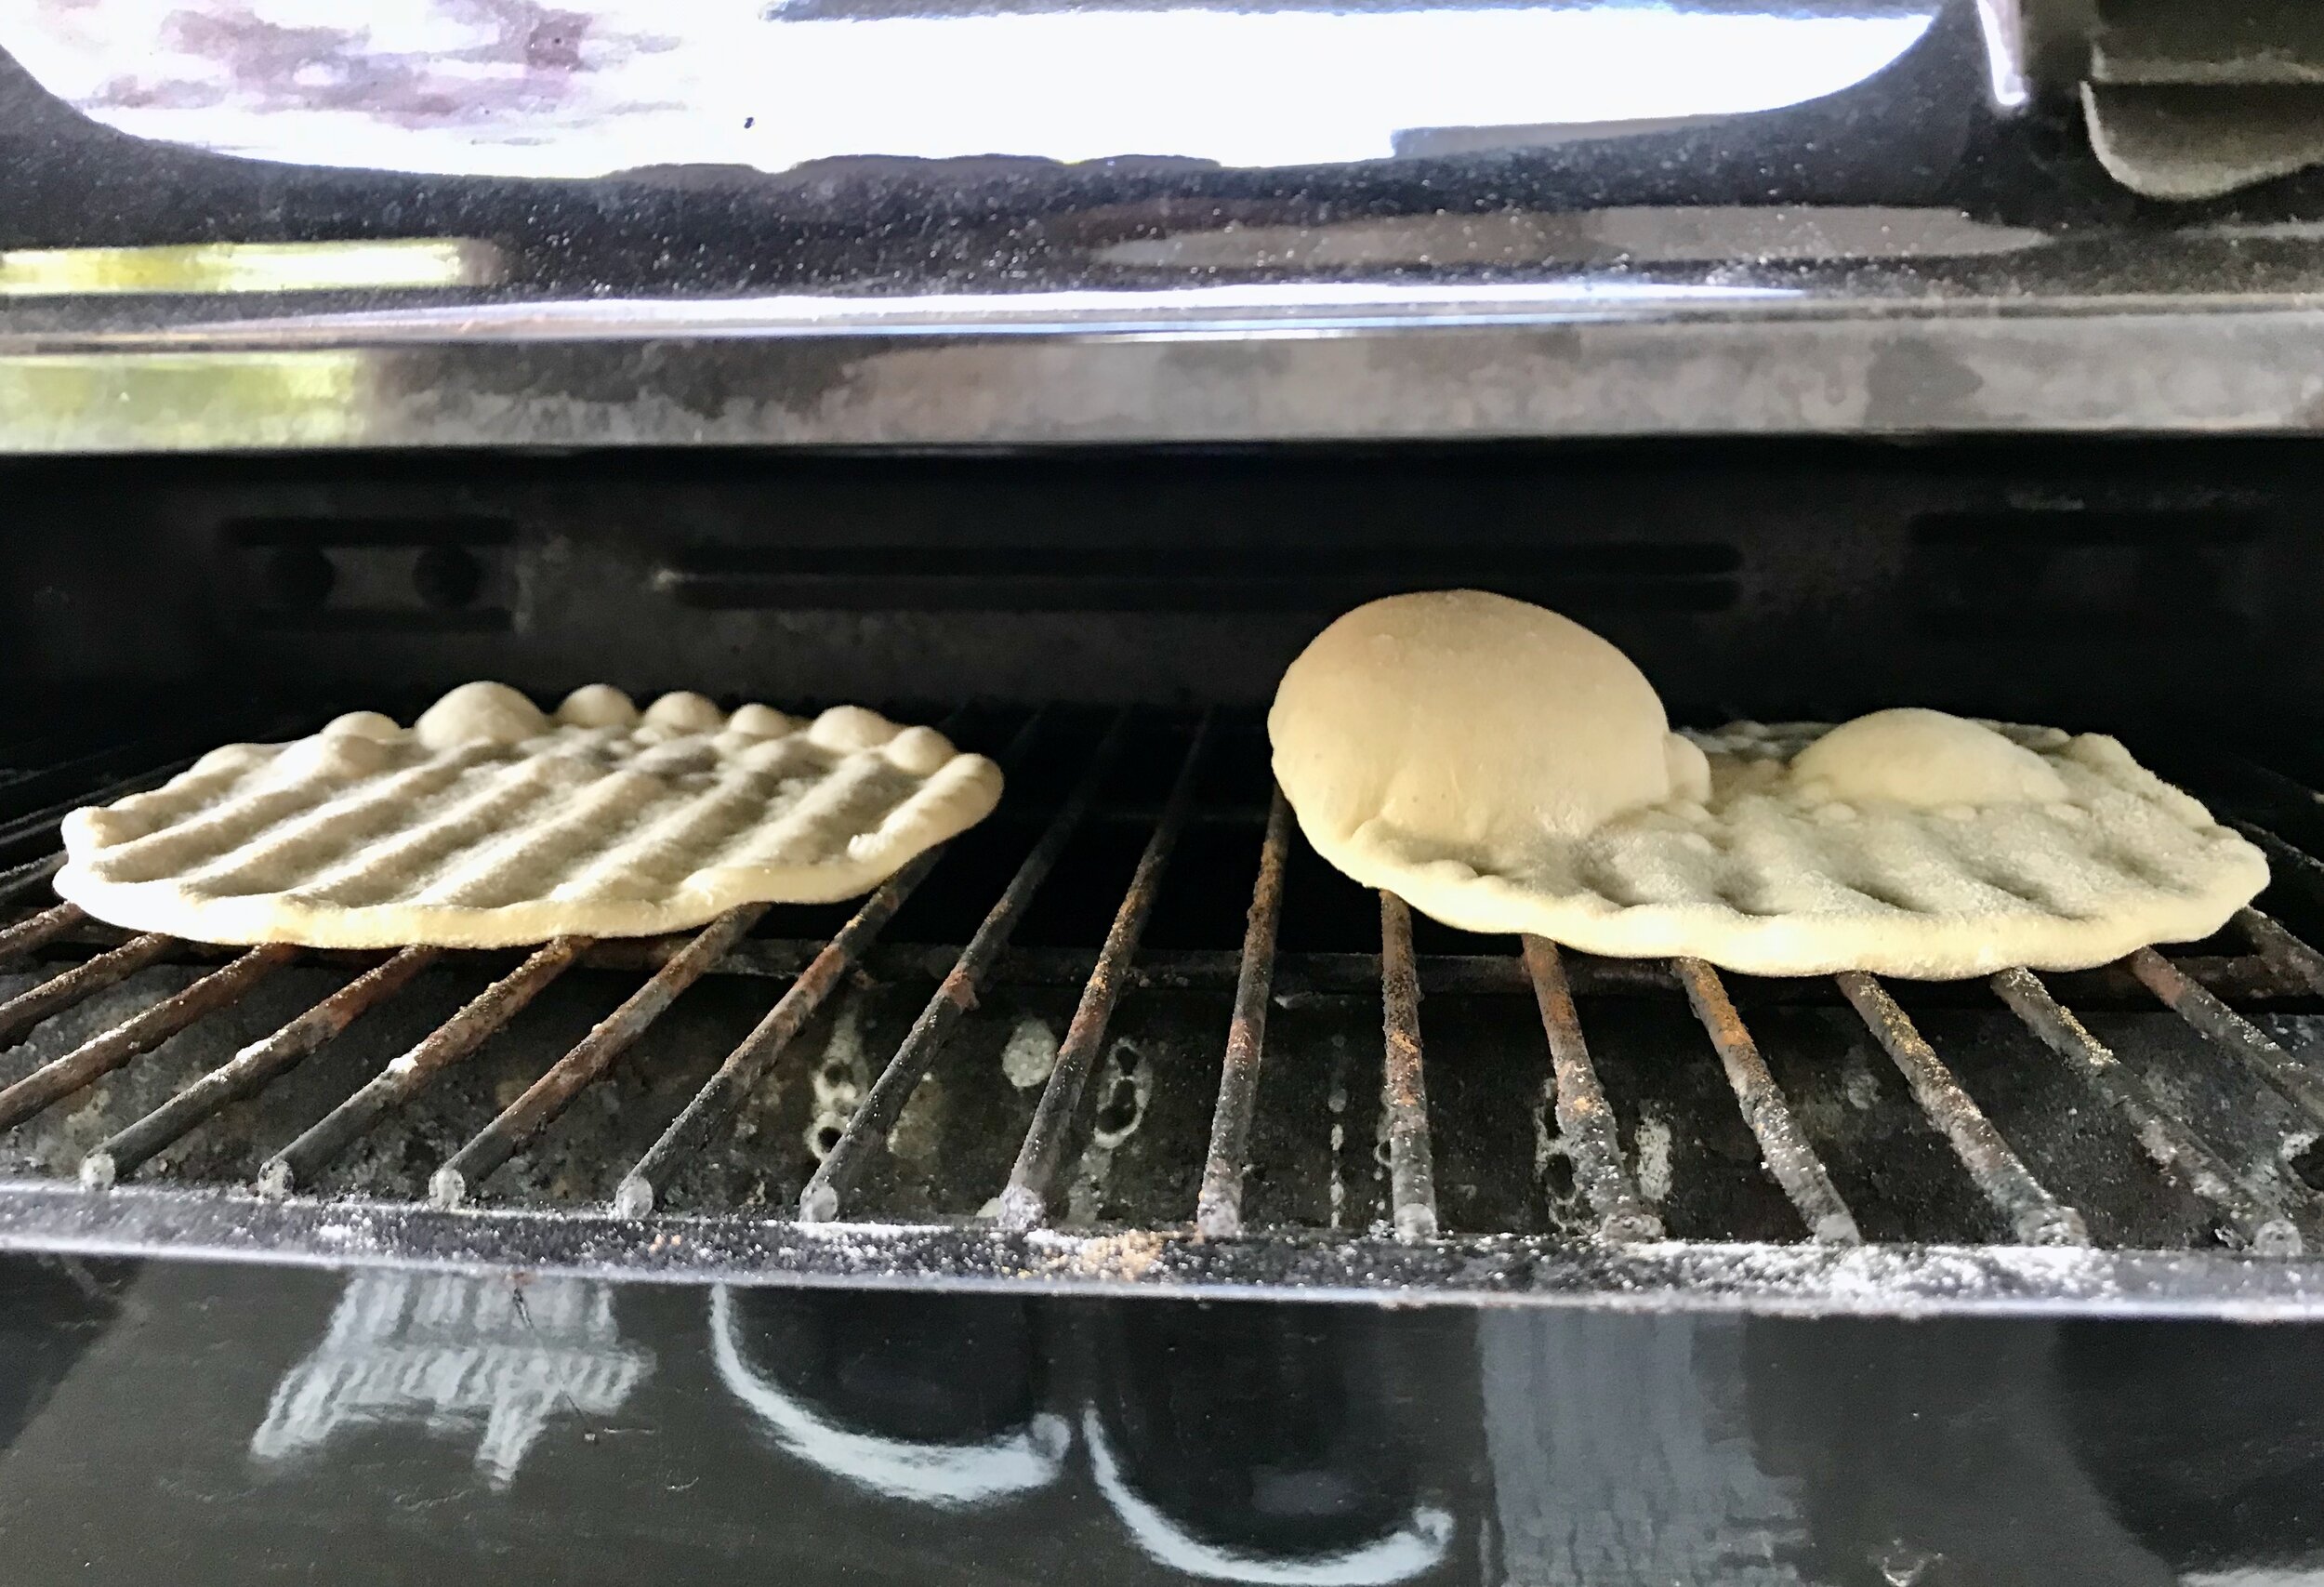
Rolling out the dough: with all flatbreads the question is always, how well/easily will the dough roll out? This one wasn’t too bad. It’s 100% white flour which helps, and it’s enriched with olive oil which also helps. After it sat for about 4 hours it was fairly easy to roll out. I shaped the dough into 6 balls. I then went through and did an initial rolling out of the six pieces during which they didn’t roll out very thin, they definitely wanted to spring back as I went. However, I just went through all six pieces and gave them this initial roll, and then I went back around to roll them out again. After this initial roll and short rest they then rolled out very nicely without much problem at all. I cooked them up in a 12 inch cast iron skillet which worked great. I really like how this recipe calls for you to only cook one side of the flatbreads. I’ve never tried that before but I feel like it really helped keep them from drying out which sometimes happens with thin flatbreads. I’ll probably do this with other recipes in the future.

IMG_8222.jpeg

I did not follow the filing recipe exactly as it is written below from the cookbook, but I used it as a loose guide using what I had on hand, not measuring everything. I started with grating about 1/2 an onion and a fairly large zucchini which I squeezed to get rid of excess water before adding to the pan. Towards the end of cooking I added a minced clove of garlic, and two bunches of Tatsoi from my CSA that I needed to use followed by a couple tablespoons of ricotta once it was off the heat. I mixed this all together and then add nice chunks of deliciously creamy French feta and folded in gently to maintain the large pieces. I didn’t have any haloumi so I skipped this, and instead of pomegranate molasses I used balsamic vinegar. I didn’t have any Maras pepper or sesame seeds. As for herbs, I threw in what was on the counter; a little basil, mint and Italian parsley.

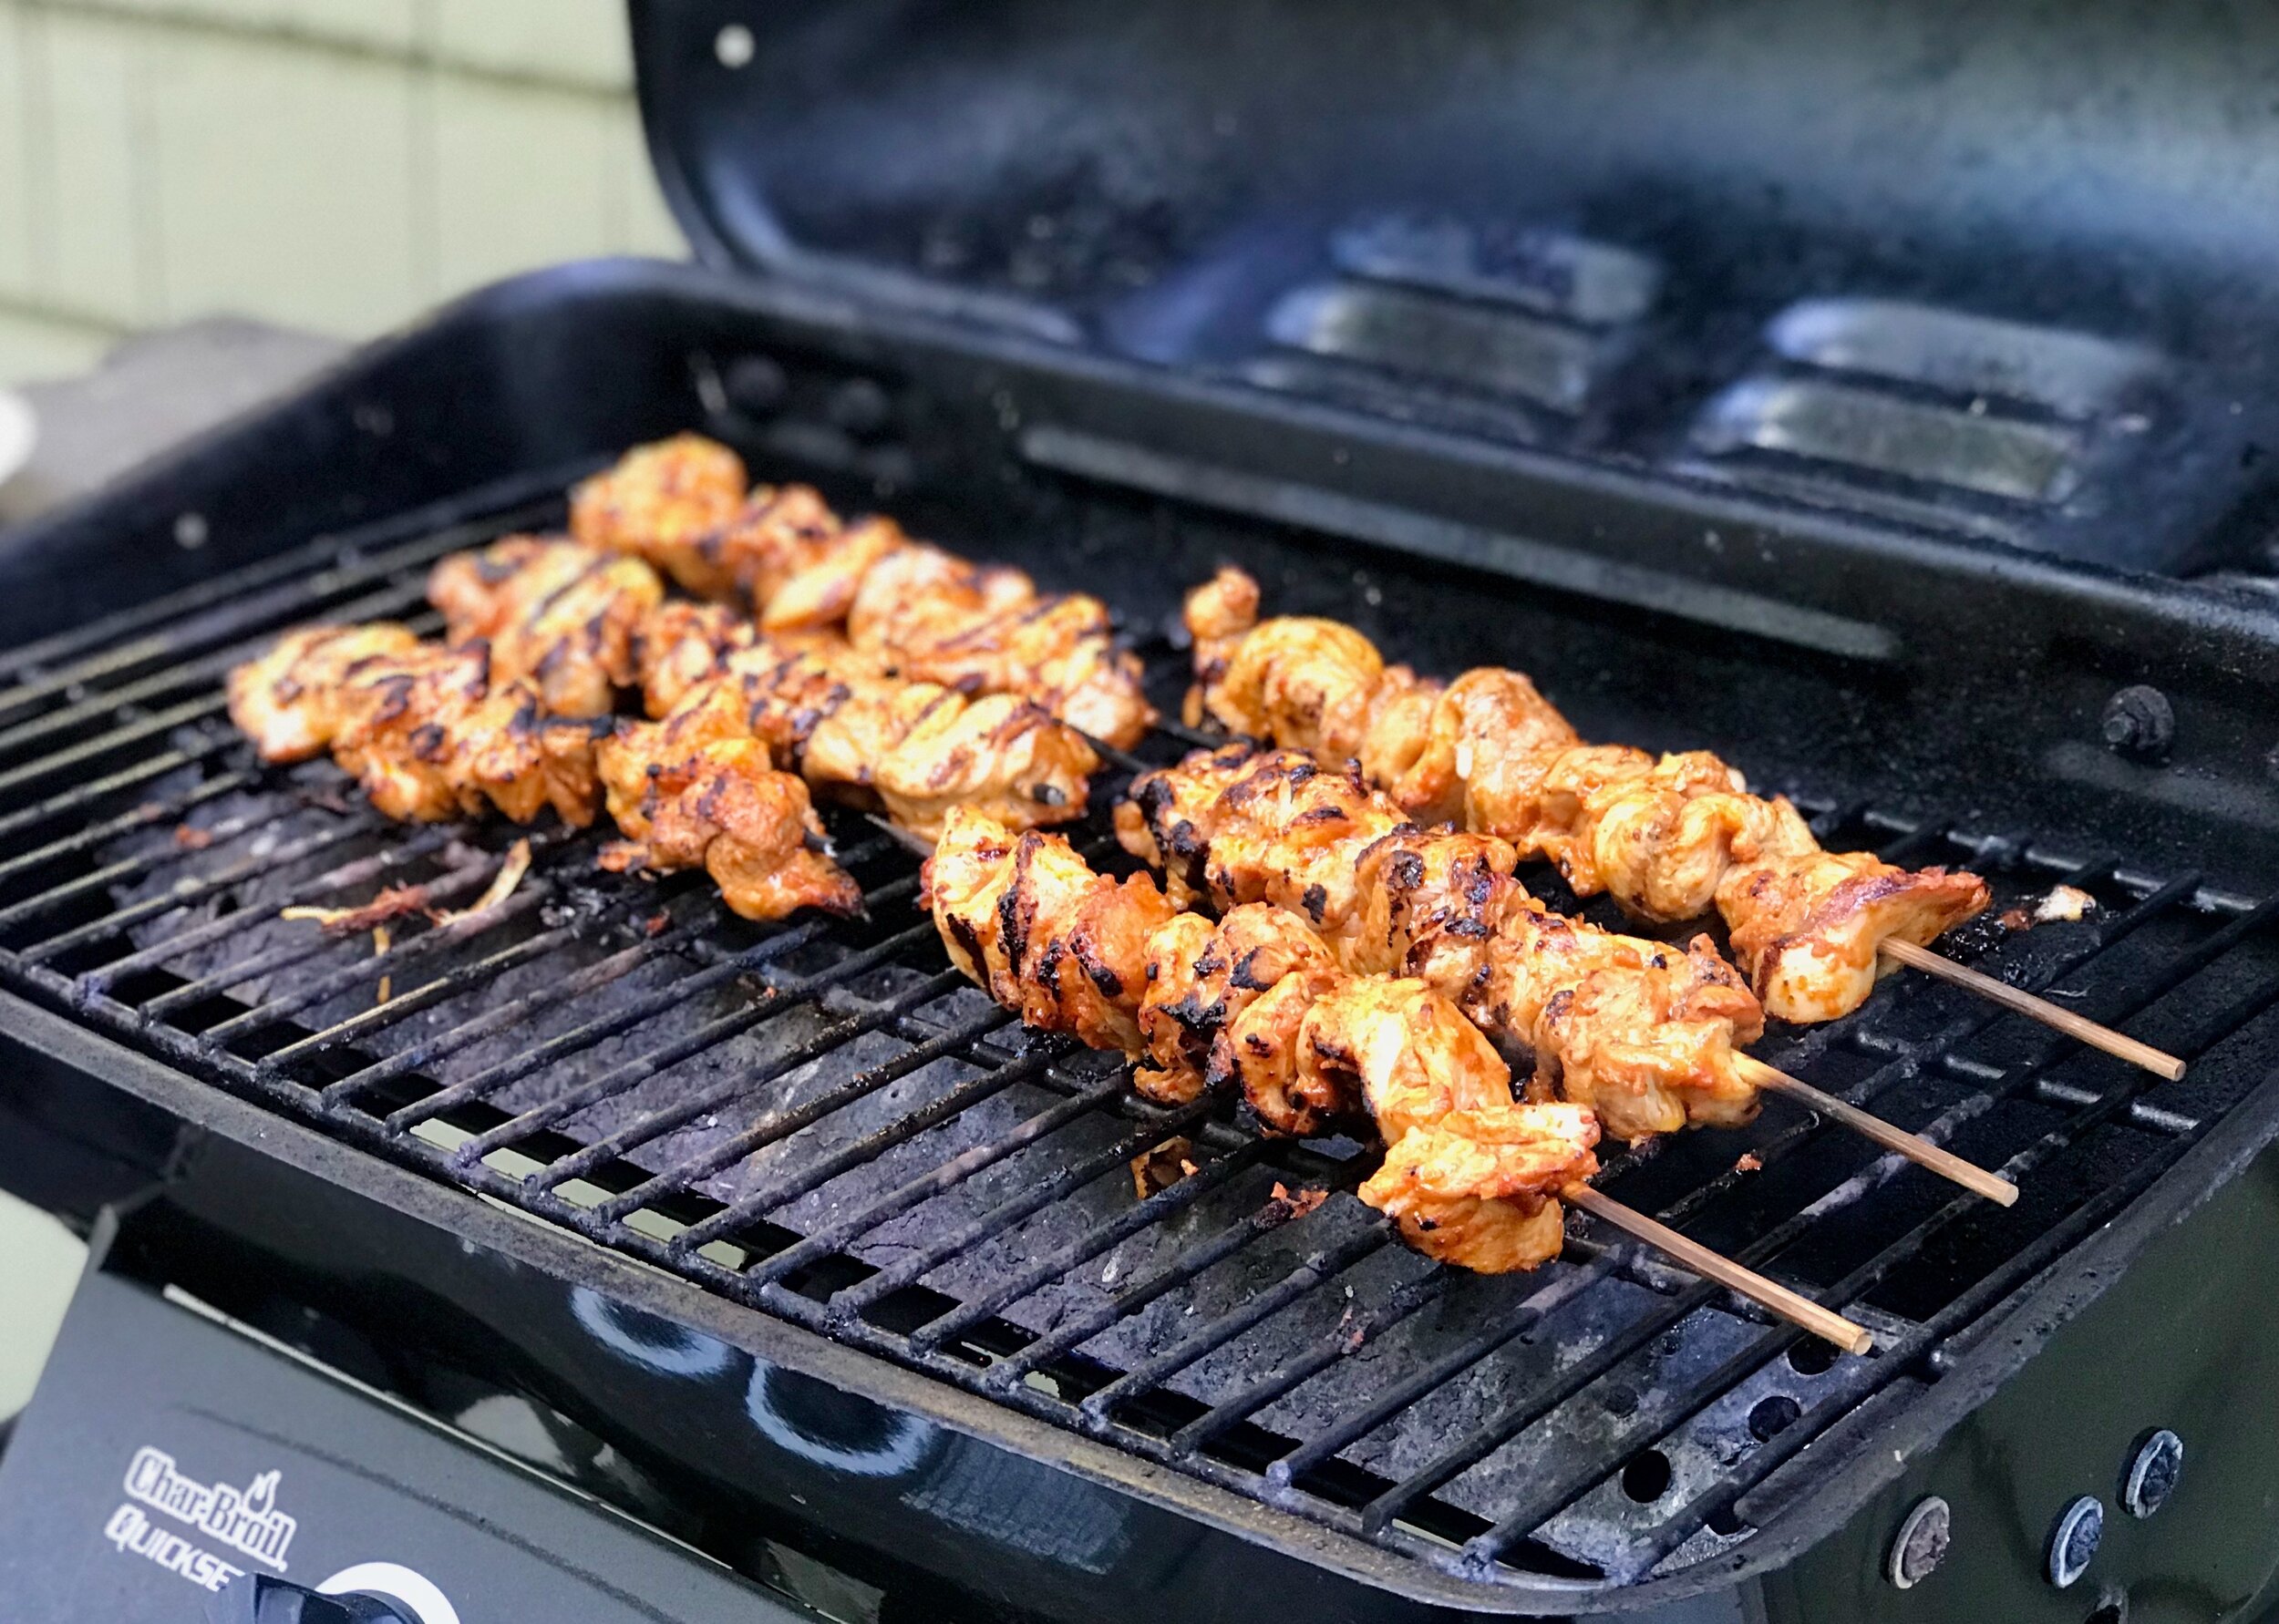
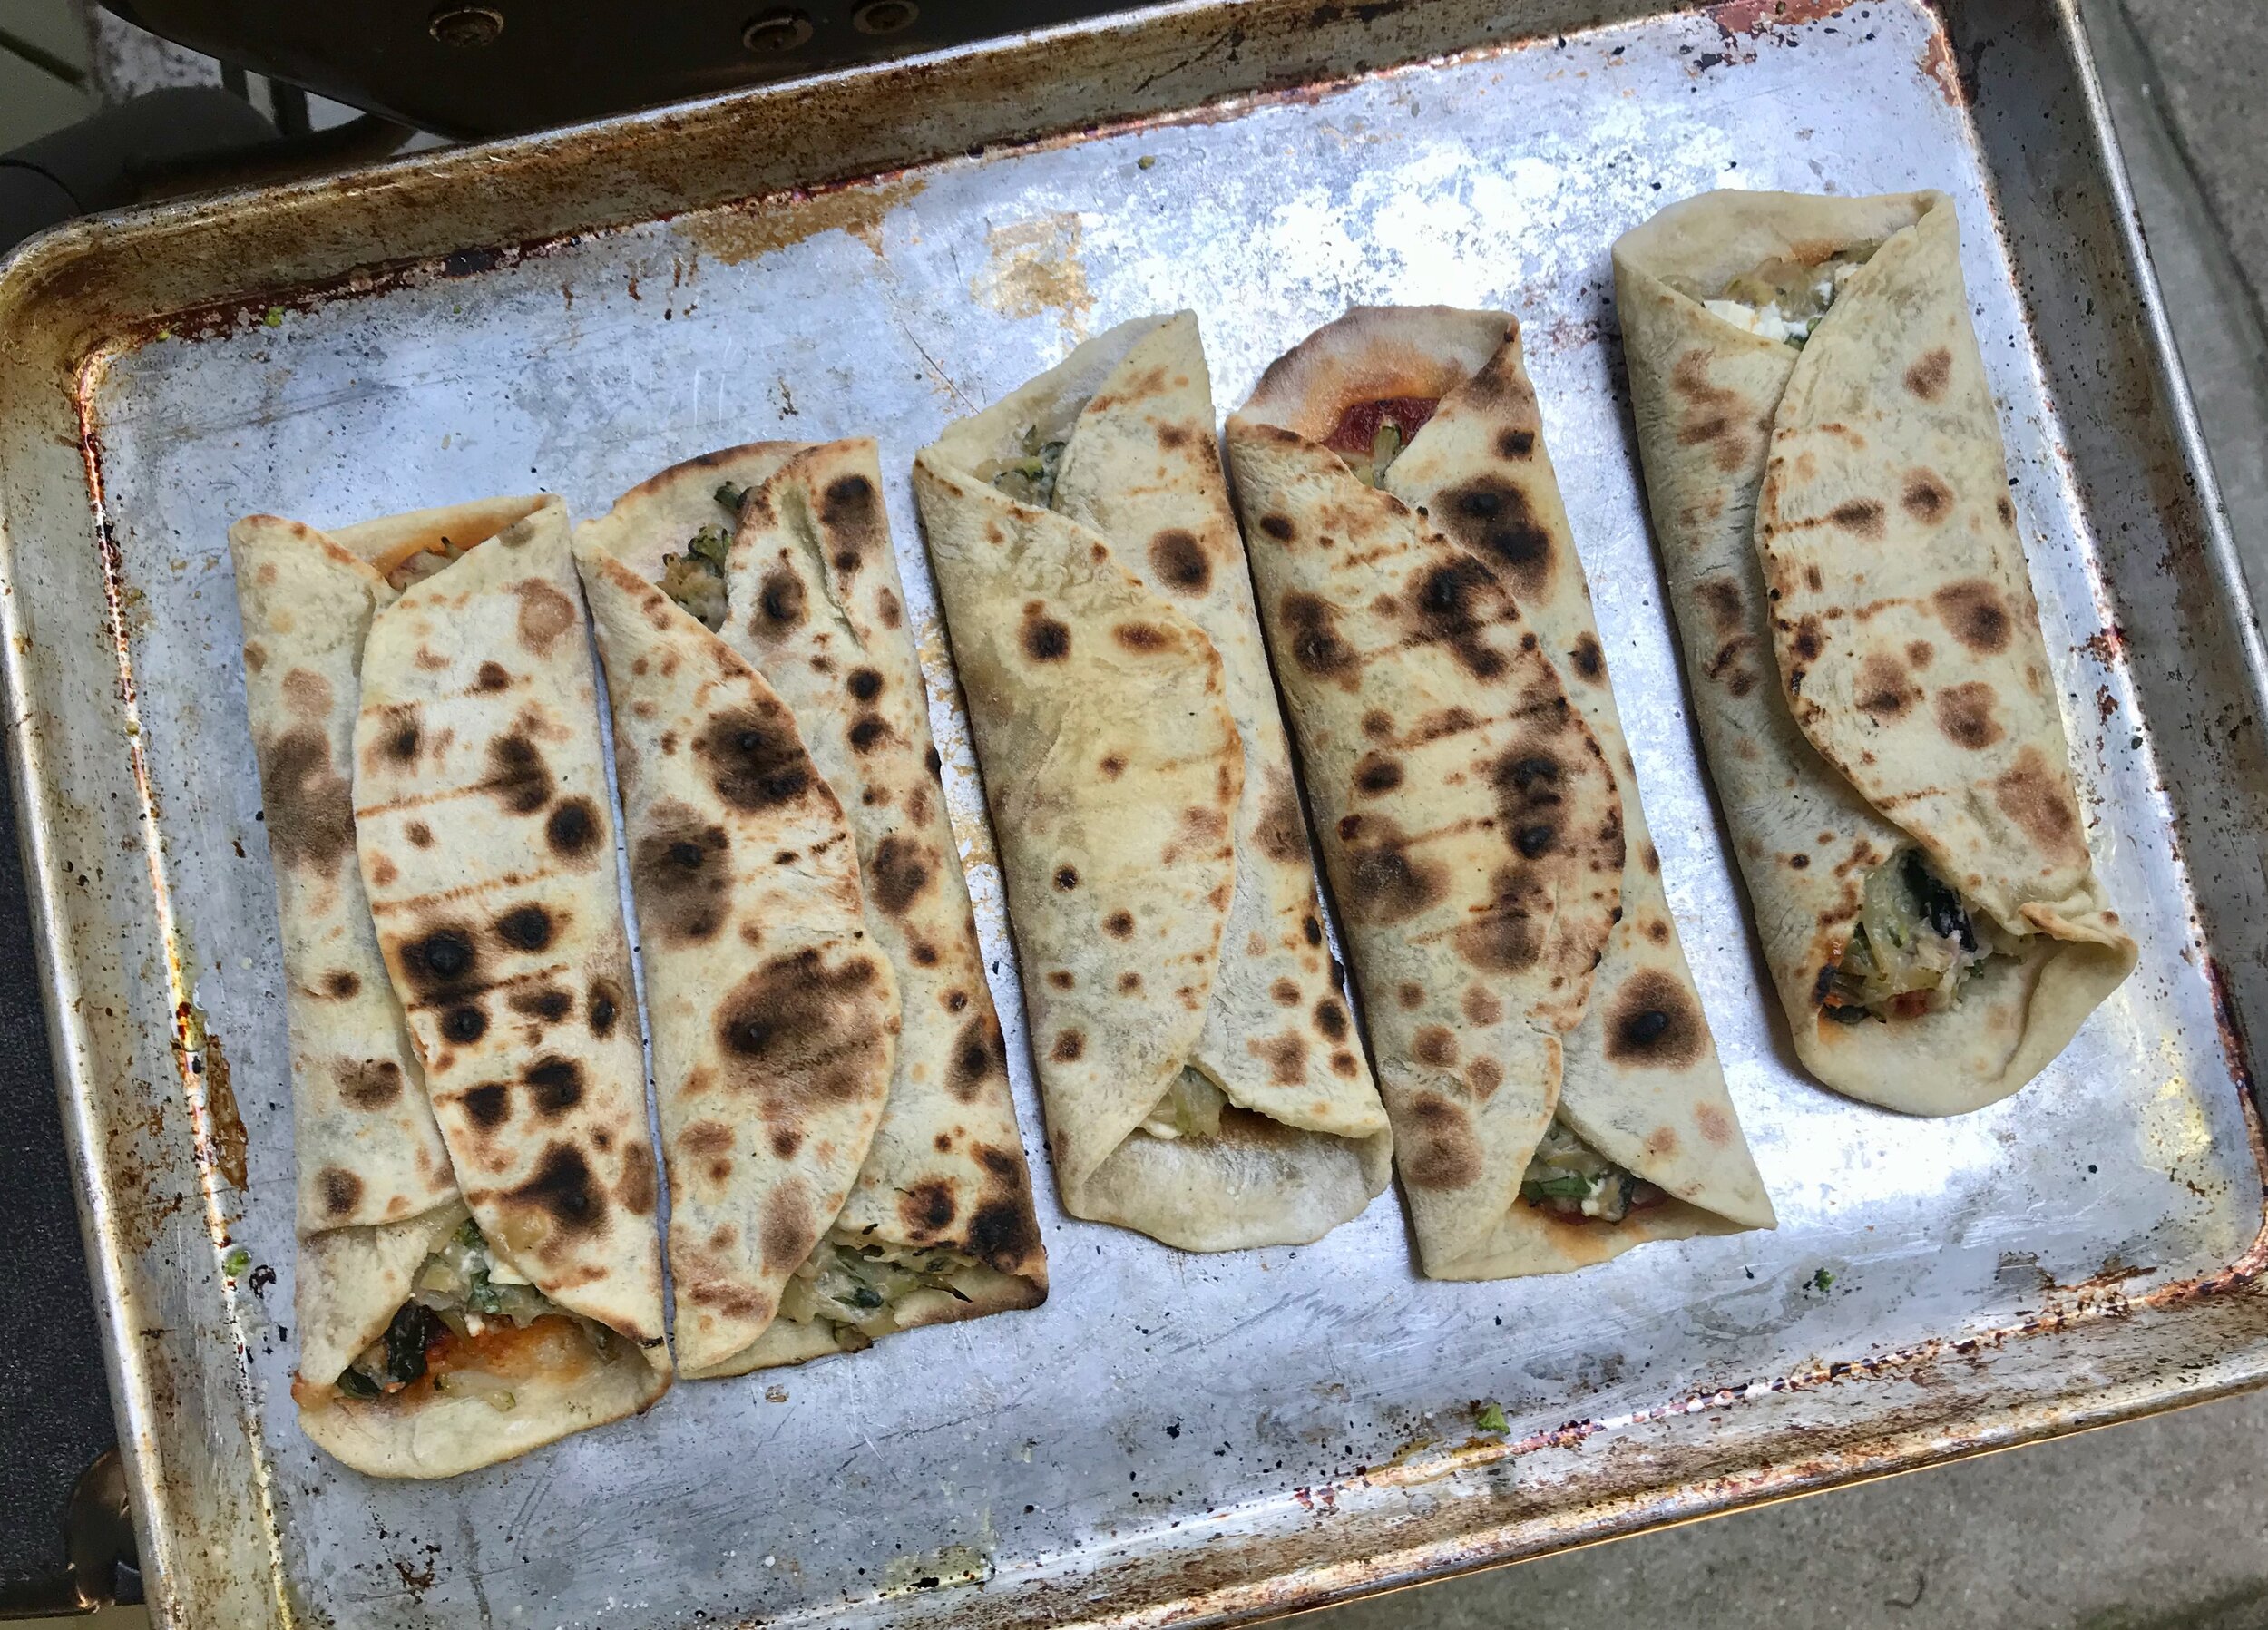
The filling turned out wonderfully! It was a fun mix of different things that I eat, but maybe wouldn’t typically put together this way! It was delicious and perfect to fill the flatbreads with. I put down a nice layer of my favorite red pepper sauce to start, and then topped with the filling. I finished with extra feta. Then fold in the dough on both sides and press to hold in place. I then grilled these up on the grill. This was a tiny bit tricky to make sure the filling didn’t all out when I flipped them over (I probably over filled them a bit too) but in the end I was very successful, just had to be careful. You could definitely just bake in the oven for a few minutes, or fry up in a pan as the recipe stated. Just get them heated up and warmed through.

I had the leftovers for lunch the next few days and it was delicious! Definitely not as crispy as day-of, but still wonderful, and easy for a nice lunch! If I was at home would have reheated in either a skillet or the oven and I imagine it would have been just as good as the day they were made!

Sesame-Walnut Manoushe with Zucchini
Ingredients

  • Yufka Dough (recipe below)

  • 2 cups grated zucchini or cousa squash

  • 1/2 teaspoon kosher salt

  • 1 Spanish onion

  • 2 tablespoons plus 2 teaspoons extra-virgin olive oil

  • 1/4 cup cup walnuts, lightly toasted and finely ground in a food processor

  • 1/2 cup grated haloumi cheese

  • 3 to 4 ounces crumbled feta, or 4 ounces buffalo milk mozzarella, broken up into small pices

  • 1 tablespoon pomegranate molasses

  • 3/4 teaspoon Maras pepper

  • 2 tablespoons toasted sesame seeds

  • 2 tablespoons chopped fresh flat-leaf parsley

  • 1/4 cup sliced fresh basil leaves

Directions
Follow the directions to make the yufka dough, transfer to a plastic bag and store at room temperatures. Sprinkle the zucchini with the salt and let stand in a colander or a bowl for 5 minutes to draw out water.

Using the large holes of a box grater, grate the onion over a plate with sides. Place in a strainer and rinse with cold water. Squeeze dry by placing it in the palm of your hand, making a ball and then flattening it as hard as you can to get the water out. Repeat the squeezing with the zucchini. Sweat the zucchini with 2 teaspoons olive oil in a spall saute pan over medium heat until it is barely tender, about 3 minutes.

In a large mixing bowl, combine the onion, zucchini, walnuts, haloumi, feta, pomegranate molasses, Maras pepper, sesame seeds, remaining 2 tablespoons olive oil, parsley and basil. Mix until the filling is spreadable.

When you are ready to assemble, put about 1/3 cup filling on each yufka and smooth it to the edges in a very thin layer. Fold the left side in towards the middles and then the right sides towards the middle, overlapping by about 1/2 inch, to form a rectangle shape with an open top and bottom.

When the manoushe are assembled, heat an 11-to-12 inch cast iron or nonstick pan over medium-low heat. Place two manoushe at a time, seam side down, in the pan. Cook until the filling is hot and the bread is lightly toasted on one side but still soft on the other, 3 to 4 minutes. Flip to the other side and cook 1 minute more to heat through. Place on a tray and cover with aluminum foil to keep warm while you cook the remaining four manoushe. Cut into halves or strips and serve immediately.


Yufka Dough
Ingredients

  • 1 2/3 cup (200 grams) all purpose flour

  • 1 teaspoon kosher salt

  • 2/3 cup (150 grams) warm water

  • 2 tablespoons extra virgin olive oil

Directions
In a medium bowl, whisk together the flour and salt. Make a well in the center and pour in the water and olive oil. Using your fingers, draw the flour in from all sides, working the mixture until it’s sticky and forms into a ball. Turn the dough onto a floured surface and knead until smooth and elastic, about 3 minutes. Transfer back to the bowl, drizzle with a little bit of oil and turn to coat. Cover with plastic wrap and let rest at room temperature for at least 4 hours, or up to overnight.

Divide the dough in half, then divide each half into three equal pieces; you should have six equal pieces, each weighting about 2 ounces of 60 grams.

Roll out each yufka ball into a very thin 8-to-9-inch round, using plenty of flour to keep the dough from sticking to the rolling pin.

Heat an 11-to-12 inch cast-iron or nonstick pan over medium heat and cook the yufka on one side until it starts to bubble up and lightly brown on the bottom, about 2 minutes. You only need to partially cook each flatbread at this stage; don’t get them too crispy or they will be dry and hard to work with. Stack them on top of each other as you cook each one so that they lightly steam and keep each other soft and pliable.

Transfer the warm yufka to a large zip-top plastic bag and store at room temperature up to overnight, or freeze for later use.

Memorial Weekend 2020 (and Chili-Red Pepper Chicken Kebabs [Tavuk Şiş])

IMG_8210.jpeg

It was a bit different of a Memorial Weekend this year. No annual Memorial Day parade. No Monday morning waffle tradition with friends. No big cookout in the afternoon. It was a much quieter and more low key weekend. I really had no plans going into the weekend, but as each day passed they filled up with small gatherings and outings with a few friends and family members. It turned into one of the most lovely and relaxing holiday weekends! And tasty, very tasty…

IMG_8209.jpeg

Friday night I had a friend over to grill out and relax in the back yard. She provided the burgers and wine, while Lara and I provided the grill and the remainder of the food. We grilled up some juicy burgers, topped them with sharp and crumbly Irish Cheddar (one of my favorites!) and garlicky red pepper sauce that is to die for. The sauce was actually made to use on chicken skewers that were on the menu later in the weekend (see below) but it is so good that I doubled the recipe and ate it on pretty much everything this week including these burgers. The juicy meat, sharp cheese, and sweet and garlicky sauce were a perfect combination that I will definitely do again!

We grilled up some asparagus to have on the side which I tossed with a super garlicky Parmesan vinaigrette. My basic go-to of lemon juice and zest, whole grain mustard, salt, garlic and olive oil. This time I added a lot of extra raw garlic, 2 full cloves (if you’re a little nervous about raw garlic then this would not have been for you… but I LOVED it!) as well as a couple of handfuls of grated Parmigiano-Reggiano. The resulting dressing was almost more of a paste at this point. I tossed it together with the hot asparagus straight off the grill and it was so good.

IMG_7989.jpeg

The next day started with a lovely scone and coffee breakfast on the porch. It was the perfect weather for lounging outside for as long as I wanted. Hot coffee, buttery scone, and great company!

Later that afternoon my parents came over for a cook out. We grilled up a new chicken skewer recipe with red pepper paste with homemade Greek yogurt pita, and a fresh green salad. This red pepper paste is the sauce that I was talking about above that we also served with the burgers. Super versatile! It’s apparently a take on a Turkish red pepper paste called biber salçası. This was the first time I’ve heard of this recipe so I know nothing
about it other than that it was delicious!

IMG_8020.jpeg
IMG_8025.jpeg
IMG_8023.jpeg

We ate outside again, enjoying each others company (it had been a long while since I’d seen my dad!), and finally getting the dead branches out of the trees in the backyard. Thanks dad! :)

IMG_8026.jpeg

Finally, on Memorial Day, after another fantastic front porch scones breakfast —> (it was so lovely the day before we had to do it again!) we headed out to a nearby state park that I had never heard of to go kayaking and paddle boarding with friends.

I had never paddle boarded before so I was excited. The lake was lovely, the weather was perfect and the company was great. Since our friends provided the entertainment, Lara and I provided the food.

IMG_8032.jpeg
IMG_8038.jpeg

We thought long and hard (as always!) about what would be best for a picnic after kayaking. We ended up making chicken pesto salad wraps. We grilled up a few boneless skinless chicken breast, cubed it up, and tossed it with plenty of pesto sauce, chunks of fresh mozzarella (similar size to the chicken), and halved cherry tomatoes. It was soooooo good! I’ve made similar things, but never this exact recipe. I loved the soft fresh mozzarella that had marinated in the pesto by the time we ate it. We ate this on more of the homemade Greek yogurt pita. Served with more grilled asparagus, some cold drinks and fruit, it was a perfect picnic!

That was about it for the weekend. Other than one more simple treat, my first iced latte of the summer! What better way to end the weekend!

——————————————————————————————

Chili-Red Pepper Chicken Kebabs (Tavuk Şiş)
Recipe from 177 Milk St
Ingredients

  • 1/2 cup drained roasted red bell peppers, patted dry (I roasted my own and used one full roasted pepper)

  • 6 medium garlic cloves, smashed and peeled

  • 2 fresno chilies, stemmed, seeded and roughly chopped (I wasn’t able to find any fresno chilies so I omitted this and the recipe was still delicious but I would love to make again with the fresnos to see what they add to the mix)

  • 1/4 cup (50 grams) extra virgin olive oil

  • 2 tablespoons dried mint

  • 2 tablespoons aleppo pepper (or 1 tablespoon sweet paprika plus 1/4 teaspoon cayenne pepper) (I used the paprika + cayenne)

  • 1 tablespoon (21 grams) honey

  • 1 tablespoon tomato paste

  • Kosher salt

  • 1 1/2 tablespoons fresh lemon juice

  • 2 lbs boneless, skinless chicken thighs, trimmed and cut crosswise into 1-inch strips (I bought 6 bone-in thighs and boned them myself, this was around 2 lbs)

  • 3 tablespoons chopped fresh mint (I didn’t use, my mint plant isn’t big enough yet!)

Directions
In a food processor (or high-speed blender, I used my Vitamix), combine the roasted red peppers, garlic, chilies, oil, dried mint, Aleppo pepper, honey, tomato paste and 2 teaspoons salt. Process until almost smooth, 45 to 60 seconds, scraping the sides as needed. Measure 3 tablespoons of the puree into a small bowl, then stir in the lemon juice; cover and refrigerate. Transfer the remaining puree to a medium bowl, add the chicken and toss to coat. Cover and refrigerate for at least 1 hour or up to 12 hours.

Prepare a charcoal or gas grill for direct, medium-high heat. For a charcoal grill, ignite a large chimney three-quarters full of coals, let burn until lightly ashed over, then distribute evenly over one side of the grill bed; open the bottom grill vents and the lid vent. For a gas grill, turn all burners to high. Heat the grill, covered, for 5 to 10 minutes; clean and oil the grate. Remove the reserved puree from the refrigerator.

While the grill heats, thread the chicken onto eight 10- to 12-inch metal skewers (I only got 6 skewers out of this, not 8), evenly dividing the pieces and scraping off excess marinade. If using a gas grill, turn all burners to medium-high. Place the skewers on the grill, on the hot side if using charcoal, and cook, uncovered, turning every 2 to 3 minutes, until evenly charred on all sides and the thickest piece is opaque when cut into, 10 to 12 minutes. Transfer to a serving platter. Stir the fresh mint into the reserved puree and serve with the kebabs.

Blubarb Snack Cake

IMG_7883.jpeg

I seem to have a theme going. Loaf cakes with lemon. Probably because I love them so much, and they seem perfect in the spring. I’d eyed this particular recipe before and decided to make it yesterday, a dreary and rainy Sunday. It literally rained all day with hardly any breaks. That rarely happens. I think my newly planted garden loved it, but I hope it doesn’t just keep going and flood out the plants!

I got the recipe off of Food52, but it’s originally from Yotam Ottolenghi’s cookbook, Sweet: Desserts from London's Ottolenghi. My neighbor had dropped off a few stalks of rhubarb that I wanted to do something with so I cooked it down into a quick tart rhubarb and. blueberry (aka “blubarb”) jam and swirled it into the cake. (my “jam” was 4-5 stalks of rhubarb, 4 handfuls of frozen blueberries, and 1/4 cup of sugar. Not super sweet at all. I wanted it just sweet enough to be tasty but still nice and tart and not overwhelmingly sweet. This worked out well,) This jam replaced the poppyseeds and a lot of the lemon zest, although I still used zest from probably 1/2 a lemon or so.

Other little tweaks: It called for sour cream which I don’t usually have so I substituted with my homemade Greek yogurt which is nice and thick and rich. I cut back slightly on the sugar and used 200 grams (1 cup) instead of the 225 called for. Also, my lemon wasn’t super juicy so I made 3/4 of the glaze which worked out fine.

IMG_7898.jpeg

As I transferred the cake to the pan I dropped in spoonfuls of the blubarb jam and swirled it in with a toothpick. Into the oven it went. The recipe specifically states to not open the door of the oven for the first 45 minutes which is killer for me but I did it! Mine ended up baking for exactly 55 minutes which seemed just right.

Overall I think it’s a pretty cake, but I was hoping it would baked up taller and more domed. The crumb of my cake also looked nothing like the picture on the website. It was much spongier and wet looking, not fluffy and cake-like. Now, I know sometimes cakes made with yogurt can look like this so that may be my problem since I basically replaced cream with milk (sour cream vs yogurt) which are very different things. I may have to attempt this recipe again the next time I happen to have some sour cream just to see how big of a different it makes. I do love the lemon glaze on top and will do that for other cakes too.

The flavor is very nice. A good amount of lemon, obvious but not overwhelming. I like the swirl of jam but would do more next time. I like to eat mine with a dollop of plain yogurt on top. The combination of sweet cake with tart and creamy yogurt is the best!

———————————————————————————————————————————————————————————————

Blubarb Jam Snack Cake
Adapted from Food52
Ingredients

  • 3 large eggs

  • 1 cup plus 2 tablespoons (225 grams) granulated sugar [I only used 1 cup/200 grams]

  • 1/2 cup (120 grams) sour cream [I substituted with Greek yogurt, same weight]

  • 5 tablespoons (70 grams) unsalted butter, cubed, plus extra for greasing

  • 1 tablespoon poppy seeds Finely grated zest of 3 lemons (1 tablespoon) [I omitted the poppy seeds and used less lemon zest]

  • 1 1/3 cups (170 grams) all-purpose flour

  • 1 1/4 teaspoons baking powder

  • 1/4 teaspoon salt 3/4 cup (90 grams) confectioners' sugar, sifted

  • 2 tablespoons lemon juice

Directions
Heat the oven to 325° F. Grease a 8 1/2 x 4 1/2-inch loaf pan and line with parchment paper, then set aside.

In a small saucepan over low heat melt the butter. Stir in the poppy seeds and lemon zest and set aside to cool. Sift the flour, baking powder, and salt together into a bowl, set aside.

Place the eggs and granulated sugar in the bowl of an electric mixer with the whisk attachment in place and whisk on medium-high speed for about 2 minutes, until pale and frothy. Add the sour cream and continue to beat for about 2 minutes, until the mixture has combined.

Use a rubber spatula to fold the flour mixture into the egg mixture until mostly combined. Then fold in the butter mixture until everything is just combined, don’t overmix. Spoon the mixture into the loaf pan. Bake for 55 to 65 minutes, or until a skewer inserted into the center comes out clean [Mine took 55 minutes and seemed perfectly cooked]. Do not open the oven door to check the cake during the first 45 minutes of baking.

While the cake bakes make the glaze: Whisk the confectioners' sugar with the lemon juice in a bowl. Pour the glaze over the top of the cake as soon as it comes out of the oven, spreading it over the top so that it sinks in and creates a nice coating. Set aside to cool for 30 minutes before removing from the pan. Leave to come to room temperature before serving.

Greek Yogurt Pita Bread

IMG_7726.jpeg

I love soft, tender flatbreads, still warm from cooking. There’s almost nothing better! I’ve made pita and tortillas occasionally over the years, but I’ve been wanting to try Molly Yeh’s Greek yogurt pita bread for a while now. I just hadn’t gotten around to it until this weekend.

IMG_7721.jpeg

I love baking with yogurt, it tenderizes and adds a slight tangy flavor to whatever it is you bake and this recipe was no exception. I’ve posted the original recipe (with a few tweaks to the instructions) below, and I also posted my adaptation which used my leftover sourdough starter. Since I’ve been making a lot of sourdough bread recently I’m always on the lookout for ways to use up my discarded starter. This pita was a great option!

IMG_7717.jpeg

The dough was soft, tender, and easy to roll out. I made half a batch of the sourdough version and ended up making 8 pita (the original recipe called for you to make 12 for the full recipe, so this would be 6 for a half batch) and I thought they were a nice size. Not too big and not too small.

IMG_7727.jpeg
IMG_7729.jpeg

The original recipe calls for you to bake these in the oven. I decided to grill them instead which I find fun to do. They only took 1.5-2 minutes on the grill at around medium heat. I’m sure baking them as instructed turns out a good pita as well but at this point I can’t say for sure.

I served these with some lamb meatballs that I also grilled. No recipe for those, I kind of just threw them together. I added a nice amount of allspice, some cumin, coriander, and smoked paprika to the ground lamb as well as minced green onion, ramps, garlic and a few breadcrumbs for good measure.

Finally, I whipped up a delicious yogurt sauce that also had some of the garlic, ramps and green onion as well as olive oil and a lot of sumac. Fantastic!

——————————————————————————————

Greek Yogurt Pita Bread
Recipe from Molly Yeh via Joy the Baker
Ingredients

  • 2 1/4 teaspoons instant yeast

  • 1 teaspoon plus 1 tablespoon granulated sugar

  • 3 3/4 cups bread flour, plus more for dusting

  • 1 1/2 teaspoons kosher salt

  • 3 tablespoons olive oil, plus more for the bowl

  • 3/4 cup warm water (105 to 110 degrees F)

  • 3/4 cup whole-milk Greek yogurt

Directions
In a stand mixer with a dough hook attachment combine the flour, salt, sugar, yeast. Add the oil, water and yogurt and mix to combine. Stir the mixture with a spatula to lightly bring it together then knead with the dough hood on medium speed into a slightly sticky and soft ball. Add more flour or water as needed.

Remove the dough from the bowl. Add a splash of olive oil and return the dough to the greased bowl. Cover with plastic wrap and allow to rest in a warm place until doubled in size - about 1 1/2 hours.

Preheat the oven to 500 degrees. Line two baking sheets with parchment paper and set aside. While the oven preheats, turn the dough out onto a clean work surface and divide into 12 equal balls. Roll the balls out into circles that are 1/4-inch to 1/2-inch thick. Cover loosely with plastic wrap or a clean kitchen towel and let rest for 15 minutes. Place the pita on the prepared baking sheets an inch apart. Bake until they're puffy and lightly browned on top. Check their doneness after 5 minutes. They cook fast. Somewhere between 5 and 7 minutes should do the trick. Remove from the oven and clean kitchen towel, cover and let cool.

IMG_7722.jpeg

Sourdough Variation

Sourdough Greek Yogurt Pita Bread
Ingredients

  • 140 grams bread flour

  • 3/4 teaspoon kosher salt

  • 1 teaspoon instant yeast

  • 1 1/2 teaspoons honey

  • 1 1/2 tablespoons olive oil

  • 3/8 cup (90 grams) Greek yogurt

  • 170 grams discarded sourdough starter

Directions
In a stand mixer with a dough hook attachment combine the flour, salt and yeast. Add the honey, oil, water, yogurt and starter. Mix to combine. Follow the remainder of instructions as above.

Lemon-Blueberry Drizzle Cake

IMG_7553.jpg

I’ve gotten into the habit of having some kind of cake on hand at all times. While I try to eat very healthy the vast majority of the time, I like a little piece of cake at night before bed. It’s generally not huge, and I try to pick things that aren’t over-the-top decadent and rich (although from time to time this is okay!). This is one of my recent recipes. A fairly standard loaf cake. Some flour, a stick of butter, some sugar, eggs and milk, etc. The lemon blueberry combination is always a winner so this recipe sounded nice.

IMG_7559.jpg
IMG_7569.jpg

So, Lara actually made this twice within a week because the first round did not turn out well. It was under baked even though it went longer than the stated time and looked like it was done when it came out of the oven. It sunk shortly after coming out of the oven which is always sad. Also, she used an older loaf pan the first time and it just didn’t seem to bake up well in this pan. The resulting cake was somewhat disappointing visually, but don’t worry, it didn’t go to waste!

IMG_7570.jpg

We decided to try it again because I hate failing at something, especially something that should be delicious! The second round went much better! A better pan, and more close monitoring of the “done-ness”. It ended up taking an additional 11 minutes or so, a total of 61 minutes which was perfect. This second successful loaf was perfectly cooked. The edges were beautifully browned and crispy. I typically like the softer interior of cakes, but for this one the crispy outside edges are probably the best part!

Interestingly when I was looking back at this recipe to document it below I noticed something that likely explained why the original bread didn’t turn out. Lara had been looking at this recipe on William Sonoma’s Blog (found here) where it was labeled as “cake”. I found it on the Williams Sonoma’s website (found here) where it was labeled as bread. They are the same exact ingredients, BUT, on the blog it states to bake at 350 degrees for 50 minutes, and on the website it says to bake at 375 degrees for 55 minutes. A HUGE discrepancy! Lara had baked them both and did 350 degrees, and she started checking around 50 minutes. So if it’s actually supposed to be baked at 375 for 55 minutes, no wonder it was under baked the first time! Kind of an interesting accidental experiment. But thankfully baking it for 61 minutes at 350 degrees turned out to be perfect the second time around!

We like this cake, and many like it, with a dollop of plain Greek yogurt on the side. The combination of the cool tart yogurt pairs well with the creamy sweet cake.

Below are a few pictures of the original “failed cake”. As you can see, we didn’t end up getting to the final lemon glaze above, so at least you can see how it's supposed to look on this version, although without the sunken middle! :)

IMG_7383.jpg

——————————————————————————————————————————————————————————————-

Lemon Blueberry Drizzle Cake
From Williams Sonoma
Ingredients
For the cake:

  • 1 1/2 cups (7 1/2 oz./235 g) plus 1 tsp. all-purpose flour

  • 1 tsp. baking powder

  • 1/2 tsp. kosher salt

  • 8 Tbs. (1 stick) (4 oz./125 g) unsalted butter

  • 3/4 cup (6 oz./185 g) granulated sugar

  • 1 Tbs. finely grated lemon zest

  • 3 eggs

  • 1/2 cup (4 fl. oz./125 ml) whole milk

  • 1 tsp. vanilla extract 1 cup (4 oz./125 g) blueberries

For the syrup

  • 3 Tbs. fresh lemon juice

  • 3 Tbs. granulated sugar

For the glaze:

  • 1/2 cup (2 oz./60 g) confectioners’ sugar

  • 3 tsp. fresh lemon juice

Directions
Preheat an oven to 375°F (190°C). Butter and flour a 9-by-5-inch loaf pan. Sift the flour, the baking powder, and salt into a bowl. Set aside

In the bowl of a stand mixer, beat the butter, sugar, and lemon zest on medium-high speed until lightened. Add the eggs one at a time, beating well after each addition. Add the milk and vanilla and stir until blended. Add the dry ingredients and stir just until blended.

In a small bowl, toss the blueberries with the 1 tsp. flour. Gently fold into the batter. Scrape the batter into the prepared pan. Bake until the cake is golden brown and a toothpick inserted into the center comes out clean, about 55 minutes (mine took 61 minutes when baked at 350 degrees, see above). Let the cake cool in the pan on a wire rack for a few minutes, then turn out onto the rack to cool while you make the syrup.

To make the syrup, in a small saucepan over medium heat, simmer the lemon juice and granulated sugar until syrupy, about 2 minutes. Using a long wooden skewer, pierce the sides and bottom of the warm cake at least 1 inch (2.5 cm) deep all over. Brush the cake generously with the syrup.

To make the glaze, in a small bowl, stir together the confectioners’ sugar and lemon juice until smooth. When the cake is completely cool, turn it right side up and drizzle the glaze over the top.

Chicken and Orzo Soup with Garlic and Paprika

IMG_7437.jpeg
IMG_7429.jpeg

There’s a local butcher shop that’s been in Grand Rapids for several years now (EA Brady’s), but last fall they closed up shop to move to a new location. Where is their new space? Less than a quarter mile from my house! I could not be more pleased. It will be so convenient in the months and years to come! I had never actually been to their old location, it just wasn’t as convenient and I already have a great local butcher (I love Matt at Louise Earl), but they opened their doors in the new space today (a very soft opening in the midst of COVID quarantine) and I was there within a few hours of their opening. Had to welcome them to the new neighborhood!

I decided that on this cold and dreary day soup sounded like a good dinner plan. I had bookmarked this very simple soup so decided to try it tonight, all I needed were a few chicken thighs which the butcher fixed me up with right away.

This recipe looks very simple, and it was so quick and easy, but don’t let the short ingredient list fool you, this soup was full of flavor and super satisfying. It only took about 20-30 minuter to make and it was so good. The combination of garlic, plenty of tomato paste, and chicken thighs packs a lot of flavor into just a few ingredients. A little paprika and mint (I had to substitute a little basil in the form of homemade pesto which was quite a nice sub) along with some pasta finish it all off.

There are many ways you could adapt this, different spices, different protein, different starch, but I know this is something I will come back to in the future again and again! This would be a great option for a weeknight meal with friends if you need something quick, simple and delicious after work!

——————————————————————————————————————————————————————————————-

Chicken and Orzo Soup with Garlic and Paprika
From 177 Milk Street
Ingredients

  • 3 tablespoon extra virgin olive oil, plus more to serve

  • 1/3 cup tomato paste

  • 4 medium garlic cloves, finely chopped

  • 1 tablespoon sweet paprika

  • 2 teaspoons dried mint

  • Kosher salt and ground black pepper

  • 1 1/2 pounds boneless skinless chicken thighs

  • 1 cup orzo pasta

Directions
In a large saucepan, combine the oil, tomato paste and garlic. Cook, stirring, until several shades darker. Add the paprika and mint, then cook, stirring, just until fragrant. Add the chicken, 7 cups water and 2½ teaspoons salt. Simmer, uncovered, until a skewer inserted into the chicken meets no resistance. Transfer the chicken to a bowl. Add the orzo to the pot and cook until al dente. Shred the chicken. When the orzo is done, add the chicken and season with salt and pepper. Serve drizzled with additional oil.

Optional garnishes: A dollop of yogurt OR squeeze of lemon OR torn fresh mint OR a sprinkle of Aleppo pepper

White Cake Testing

IMG_0219.jpeg

A friend of mine recently got engaged and she has asked if Lara and I would make a cake for her wedding! We’ve done a few weddings together in the past (cupcakes, cake pops and a small cake for the bride and groom to cut) and are excited to get to do it again!

Although we don’t have the details finalized, it will most likely be a white cake base so I decided that I needed to test out a few white cakes prior to this since I don’t really have a go-to white cake.

After some online searching and research I decided to start by testing 3 separate recipes to see what my thoughts were, and go from there, either testing a few more recipes or making a decision based on the three initial tests.

The Competition:

The three cakes we ended up testing were:

  1. White Mountain Layer Cake from Bravetart by Stella Parks

  2. Classic White Cake from The Perfect Cake by America’s Test Kitchen

  3. Martha Stewart’s White Cake from Martha Stewart’s Baking Handbook

I first made the White Mountain Cake and the ATK white cake on the same day. About a week later I got around to making Martha Stewart’s. I scaled down all the recipes because I didn’t really need 3 full cakes in my house all at once! I know that scaling back can sometimes be tricky, and recipes don’t always do as well when you make them smaller but I went for it anyway. (They all baked up ok, but the ATK cake did end up being the smallest amount of batter volume-wise, and of the three it was my least favorite and it is possible that my alteration of the recipe had something to do with it.)

I wanted to try the White Mountain Cake because it sounded interesting because she calls for coconut oil and butter, and describes the cake as:


Rich and velvety to the point of creaminess, heady with vanilla, and almost as fluffy as angel food cake. The secret is virgin coconut oil, which amplifies the aroma of butter and vanilla while creaming up lighter (and whiter) than butter alone.


This description sounded amazing so I had to try it.

I went for the ATK cake because I’ve had good success with many of their recipes and this one seemed straightforward and a good standard white cake.

Finally Martha' Stewart. I had actually made the Martha Stewart recipe before, as cupcakes for my cousins wedding! But I had never made it into a layer cake, and it’s been years since I have made it so I couldn’t remember what it was like exactly, but I do remember thinking it made some lovely cupcakes. I didn’t really want to make this one because of the three, it’s the one recipe that calls for beating the egg whites separate and folding them into the batter. I try to avoid this step in any recipe if I can, but sometimes it can’t be helped.

The Results:

White Mountain Cake

America’s Test Kitchen

Martha Stewart

IMG_6743.jpeg

Here is the White Mountain Cake on the left with the ATK cake on the right

White Mountain Cake on the top, ATK on the bottom

IMG_6891.jpeg
IMG_6904.jpeg

This is Martha Stewart’s White Cake

Conclusion:

There was a clear winner and loser in this cake testing competition. Lara and I agreed right away. Martha Stewart was the clear favorite. The White Mountain Layer Cake was a very close second, but it was not quite as light as Martha’s cake, and not quite as rich. The Martha Stewart cake baked up beautifully with a nice tight crumb and was airy and super light, yet very rich and buttery tasting. In my opinion the perfect wedding cake base.

The White Mountain Layer Cake was fantastic, but just slightly denser in texture and mouthfeel. It is a great recipe that I am sure to make again, but it didn’t seem quite right for a wedding cake. I loved the little hint of almond from the almond extract. And while I couldn’t taste the coconut oil in this (so if you’re worried about that, don’t be), there was a slightly different flavor that was very nice.

The ATK cake was super not impressive and not really all that good to be honest. The flavor was the most uninteresting, just flat and boring, and the texture wasn’t very nice. It was kind of gummy and a bit courser than the other two cakes. All in all I didn’t care for it at all. I do have to say, as I already mentioned above, when I scaled this recipe down it did end up being the smallest volume of batter and it is possible that if I made the original recipe as written it would have turned out better. However, with two other wonderful options I don’t feel the need to test it again.

The Recipes:

Note: the original recipes are listed below with my scaled down ingredient lists in italics

Martha Stewart’s White Cake
From Martha Stewart’s Baking Handbook
Ingredients

  • 3 cups cake flour | 1 cup, 120 grams

  • 2 teaspoons baking powder | 2/3 teaspoon

  • 1 teaspoon salt | 1/3 teaspoon

  • 3 sticks butter, at room temperature | 1 stick, 8 tablespoons

  • 2 1/4 cups sugar, divided | 3/4 cup, 150 grams

  • 1/2 teaspoon vanilla extract | 1/4 teaspoon

  • 1 cup milk | 1/3 cup, 2 2/3 ounces

  • 8 large egg whites | 2 2/3 egg whites, 93 grams

Directions
Preheat the oven to 350 degrees. Butter two 9-by-2 inch round cake pans and line the bottoms with parchment paper. Dust with flour, tapping out the excess. Set aside.

In the bowl of an electric mixer fitted with the paddle attachment, beat the butter and 2 cups of sugar until light and fluffy, 3 to 4 minutes, scraping down the sides of the bowl as needed. Beat in the vanilla. With mixer on low speed, add flour mixture in three parts, alternating with the milk and beginning and ending with the flour; beat until just combined. Transfer mixture to a large bowl; set aside.

In the clean bowl of an electric mixer fitted with the whisk attachment, beat egg whites on low speed until foamy. With mixer running, gradually add remaining 1/4 cup sugar; beat on high until stiff, flossy peaks form, about 4 minutes. Do not overbeat. Gently fold a third of the egg-white mixture into the butter-flour mixture until combined. Gently fold in the remaining whites.

Divide batter evenly between prepared pans and smooth with an offset spatula. Bake, rotating pans halfway through, until cakes are golden brown and a cake tester inserted in the centers comes out with just a few moist crumbs. 30 to 35 minutes. Transfer pans to a wire rack to cool 20 minutes. Invert cakes onto rack; peel off parchment. Reinvert cakes and let them cool completely, top sides up.

———————————————————————————————————————————————————————————————

White Mountain Layer Cake
From Bravetart by Stella Parks
Ingredients

  • 4 cups (16 oz) bleached cake flour | 4 ounces

  • 2 sticks butter | 1/2 stick

  • 2/3 cup (4 oz) virgin coconut oil, solid but creamy | 1 ounce

  • 2 1/4 cups (16 oz) sugar | 4 ounces

  • 2 1/2 teaspoons baking powder | 5/8 teaspoon

  • 1 teaspoon baking soda | 1/4 teaspoon

  • 3/4 teaspoon Diamond Crystal kosher salt (half as much if iodized) | 3/16 teaspoon

  • 1 cup (8 1/2 oz) egg whites, from about 8 eggs | 2 1/8 ounces

  • 2 tablespoons vanilla extract | 1 1/2 teaspoons

  • 1 teaspoon almond extract | 1/4 teaspoon

  • 2 cups (16 oz) cultured low-fat buttermilk | 1/2 cup (4 ounces)

Directions
Preheat oven to 325 degrees F. Line three 8-by-3-inch aluminum cake pans with parchment and grease with pan spray.

Combine butter, coconut oil, sugar, baking powder, baking soda and salt in the bowl of a stand mixer fitted with the paddle attachment. Mix on low speed to moisten, then increase to medium and cream until fluffy and light, about 5 minutes, pausing to scrap the bowl and beater halfway through. With the mixer running, add the egg white one at a time, follow by vanilla and almond extracts.

Reduce speed to low and sprinkle in one-third of the flour, followed by one-third of the buttermilk. Alternate between the two, allowing each addition to be roughly incorporated before adding the next. Once smooth, fold with a flexible spatula to ensure it’s well mixed from the bottom up. Divide among the prepared caked pans, about 22 ounces each.

Bake until the cakes are firm but pale, browned only around the very edges, about 40 minutes (My small cake took about 35.5 minutes at 350 degrees —> I did accidentally bake at the incorrect temperature but it didn’t seem to do any harm!). A toothpick inserted into the center will emerge with a few crumbs still attached, and your fingertip will leave a slight indentation in the puffy crust.

Cool until no trace of warmth remains, about 90 minutes. Loosen the cakes from their pans with a knife. Invert onto a wire rack, peel off the parchment, and re-invert.

———————————————————————————————————————————————————————————————

Classic White Layer Cake
From The Perfect Cake by America’s Test Kitchen
Ingredients

  • 1 cup whole milk | 1/4 cup

  • 6 large egg whites | 1.5 egg whites

  • 1 teaspoon vanilla extract | 1/4 teaspoon

  • 2 1/4 cups (9 ounces) cake flour | 2.25 ounces

  • 1 3/4 cups (12 1/4 ounces) sugar | 3 ounces

  • 4 teaspoons baking powder | 1 teaspoon

  • 1 teaspoon salt | 1/4 teaspoon

  • 12 tablespoons butter, cut into 12 pieces and softened | 3 tablespoons

Directions
Adjust oven rack to middle position and heat oven to 350 degrees. Grease two 9-inch round cake pans, line with parchment paper, grease parchment, and flour pans. Whisk milk, egg whites, and vanilla together in a bowl.

Using stand mixer fitted with paddle, mix flour, sugar, baking powder, and salt on low speed until combined. Add butter, 1 piece at a time, and mix until only pea-size pieces remain, about 1 minute. Add all but 1/2 cup milk mixture, increase speed to medium-high, and beat until light and fluffy, about 1 minute. Reduce speed to medium-low, add remaining 1/2 cup milk mixture, and beat until incorporated, about 30 seconds. Give batter a final stir by hand.

Divide batter evenly between prepared pans and smooth tops with a rubber spatula. Gently tap pans on counter to settle batter. Bake until toothpick inserted in center comes out with few crumbs attached, 23 to 25 minutes, switching and rotating pans halfway through baking. Let cakes cool in pans on wire rack for 10 minutes. Remove cakes from pans, discarding parchment, and let cool completely on rack, about 2 hours.

Chocolate Chunk Buttermilk Scones (with variations)

IMG_7336.jpeg

I absolutely love scones. Most scone recipes out there can be put into a few general categories; they can be made with just cream, with just butter, with cream AND butter, with butter and buttermilk, with an egg or without an egg. I personally don’t think something should be considered a true scone unless it has butter, cream, or both. But within this group I don’t discriminate, they’re all good if made well!

I had tried this recipe a few months back and wasn’t blown away, but thought that with a few tweaks they could be really good so I decided to try them again this week. I’m glad I did as they turned out really well. The instructions in the original recipe was a little finicky in my opinion, calling for you cut the butter into only half of the dry ingredients, and then transferring to a new bowl and adding the remaining dry ingredients followed by the buttermilk. I didn’t find that this seemed to help at all, and I prefer to dump everything into the food processor at the beginning, cut in the butter, and then add the buttermilk before transferring to the counter to finish up the mixing and shaping.

I also made some changes to the recipe itself. I did only make half a batch of the original recipe so that is reflected below. I increased the sugar by about 50% because I like a sweeter scone, and also decreased the salt. The original recipe called for 2.5 teaspoons of kosher salt which is way to much my opinion. I ended up only using 1/2 teaspoon for the half batch (so 1 teaspoon in the full batch) which is significantly less than called for but I much preferred this amount of salt. I want to state that I am NOT afraid of salt, I love salt, I typically like a little more salt than is called for in a lot of recipes but not in this one. I think the decreased amount of salt is much better, but do as you will.

The original recipe is for a triple ginger scone with chocolate chunks and included ginger (ground, fresh grated, and crystalized), nutmeg, orange zest and black pepper along with the chocolate. I decided to skip the ginger and spices and just included chocolate chunks and a little cinnamon. In the end it doesn’t really matter what put in the scones. When you start with a good base you can customize however you would like and it should turn out just fine!

———————————————————————————————————————————————————————————————

Chocolate Chunk Buttermilk Scones
Adapted from 177 Milk Street
Ingredients
Scone Base:

  • 227 grams/8 ounces (1.75 cups plus 2 tablespoons) all-purpose flour

  • 50-67 grams (1/4 -1/3 cup) sugar

  • 2 teaspoons baking powder

  • 1/4 teaspoon baking soda

  • 1/2 teaspoon kosher salt (I used Mortin)

  • 128 grams/4.5 ounces (9 tablespoons) butter

  • 142 grams/5 ounces (5/8 cup) buttermilk

Additions:

  • 3/8 teaspoon ground cinnamon (added with the dry ingredients)

  • 80 grams/2.8 ounces (about 1/2 cup) chocolate chunks

Topping:

  • 1 egg, lightly beaten and thinned with about 1 tablespoon water, for brushing on top

  • Sparkling sugar, for topping

Directions
Heat the oven to 375°F. Line a rimmed baking sheet with kitchen parchment. Place the flour, sugar, baking powder, baking soda, salt and cinnamon in the bowl of a food processor and pulse a few times to combine. Add the butter and pulse until it is in large pea-sized pieces, 10-12 pulses.

Add the buttermilk and run only until everything is evenly moistened and an even sandy texture. It won’t completely come together into a cohesive dough but will still be quite crumbly, this is okay. Transfer the loose dough to the counter and scatter the chocolate chunks on top. Knead a few times to bring everything together and evenly distribute the chocolate.

Shape the dough into a circle (approximately 5 inches in diameter and 1 1/2 inches thick). Cut into 6 even wedges with a pastry scraper. Transfer scones to the baking sheet and brush with the egg wash. Cover each scone with a nice sprinkling of sanding sugar.

Bake until the scones are deep golden brown, 27 to 30 minutes, rotating the baking sheet halfway through. Cool on the baking sheets on wire racks for 5 minutes, then transfer directly to a rack and cool for at least another 5 minutes. Serve warm or at room temperature.

Variations:

IMG_7423.jpeg

Lemon Lavender Buttermilk Scones
I personally found this a little too lemony which is saying something for me. I do love lemon. But I added the zest of an entire lemon which was too much for me. It wasn’t bad in the least, I just would have preferred less. It really reminded me of a lemon poppyseed muffin so if you like those then you will love these! So add as much lemon zest as you’d like!

The tablespoon of lavender was subtle but perceptible. Maybe with a little less lemon you’d taste more lavender. I thought it was a nice subtle lavender flavor. A little more wouldn’t be bad though. To the base add:

  • Zest of up to 1 lemon (see note above)

  • 1 tablespoon dried lavender

IMG_7531.jpeg

Date Walnut Buttermilk Scones
This one turned out great! The buttery and nutty walnuts melt into the scone and give it such a nice rich flavor. The dates are just tiny pockets of sweetness that you almost don’t notice! I would have added more dates but I only had about 8-10 Deglet Noor dates in the pantry. I plan on making these again with Medjool dates and adding even more. I’d add more walnuts too. I didn’t measure either of these, but probably no more than 1/2 cup total. I want MORE! :)

  • 1/2 teaspoon cinnamon

  • Pinch of cardamom

  • Chopped Dates, to taste

  • Chopped walnuts, to taste

IMG_7944.jpeg

Lilac Almond Scones
I went foraging in my neighborhood and came home with a bag full of lilac blooms. They smell soooo good, but don’t last long. I’ll be honest, the flavor is so so mild that I actually didn’t taste it a whole lot in these finished scones, but they were still delicious and beautiful! It can be a little tedious to pull the lilac flowers off the blooms but it’s also relaxing and methodical. For a glaze, I mixed powdered sugar and water. No specific measurements, you just want it to be very thick so add water VERY SLOWLY! Drizzle and spread the first layer of glaze on the scones right after they come out of the oven and are still hot. This will help the thick glaze spread a little. You do have to play with it a little to spread out and cover the top. Then repeat the glazing a few more times as the scones slowly cool until you have the amount of glaze you desire. There’s no right or wrong. For these scones, add the following to the scones base:

  • 1 cup fresh lilac flowers

  • 1/2 cup slivered almonds

  • Powdered sugar and water (to glaze)

Lavender Honey Scones
I had this combination at a local coffee shop a year or two back and loved it! They unfortunately no longer make it, so I’ll just have to make it for myself! One tablespoon of the lavender was perfect for me. A strong lavender flavor, but not overpowering or “soapy”. If you’re not so sure about lavender then add a little less. If you want to see how far you can push it then add a little more (at your own risk!). I topped these with a simple glaze that contained a little honey. I don’t have exact measurements because for glazes I just go by feel and looks. You want this glaze to be very thick to start as it will melt and spread on top of the hot scones. I add the glaze on top of the scones immediately after they come out of the oven. It’s easiest to do this in layers. The first couple of layers will melt a little more and spread out over the top as the glaze heats up. As the scones cool, the next layers will stay thicker and more opaque. It’s completely up to you how much you add, and how thick the glaze is.

  • 1 tablespoon dried lavender

  • 2 tablespoons honey, powdered sugar and water to glaze (just eyeball it, and make it THICK!)