Lahmajoun (or Lahmacun)

IMG_7265.jpeg
IMG_7259.jpeg

I got a new Milk Street magazine this week. This is the second Milk Street magazine I’ve gotten. Lara and I decided that for the coming year, whenever we get one of the magazines we have to make at least 2 or 3 recipes. I starred several recipes for the future, but not surprisingly this recipe for Lahmajoun is the first thing we ended up making! It’s basically a twist on a pizza. From my quick online search, lahmajoun (also spelled lahmacun) is a Turkish or Armenian flatbread typically topped with a minced meat mixture. Another take on pizza? Yes please!

IMG_7261.jpeg

You start with making a yogurt flatbread dough in a food processor. I did change up this recipe a little in order to use up some leftover sourdough starter. (if interested, I used 185 grams of flour, 112 grams of leftover sourdough starter, 3/4 teaspoons instant yeast, 1¾ teaspoons kosher salt, 21 grams honey, and NO additional water since it’s in the sourdough starter).

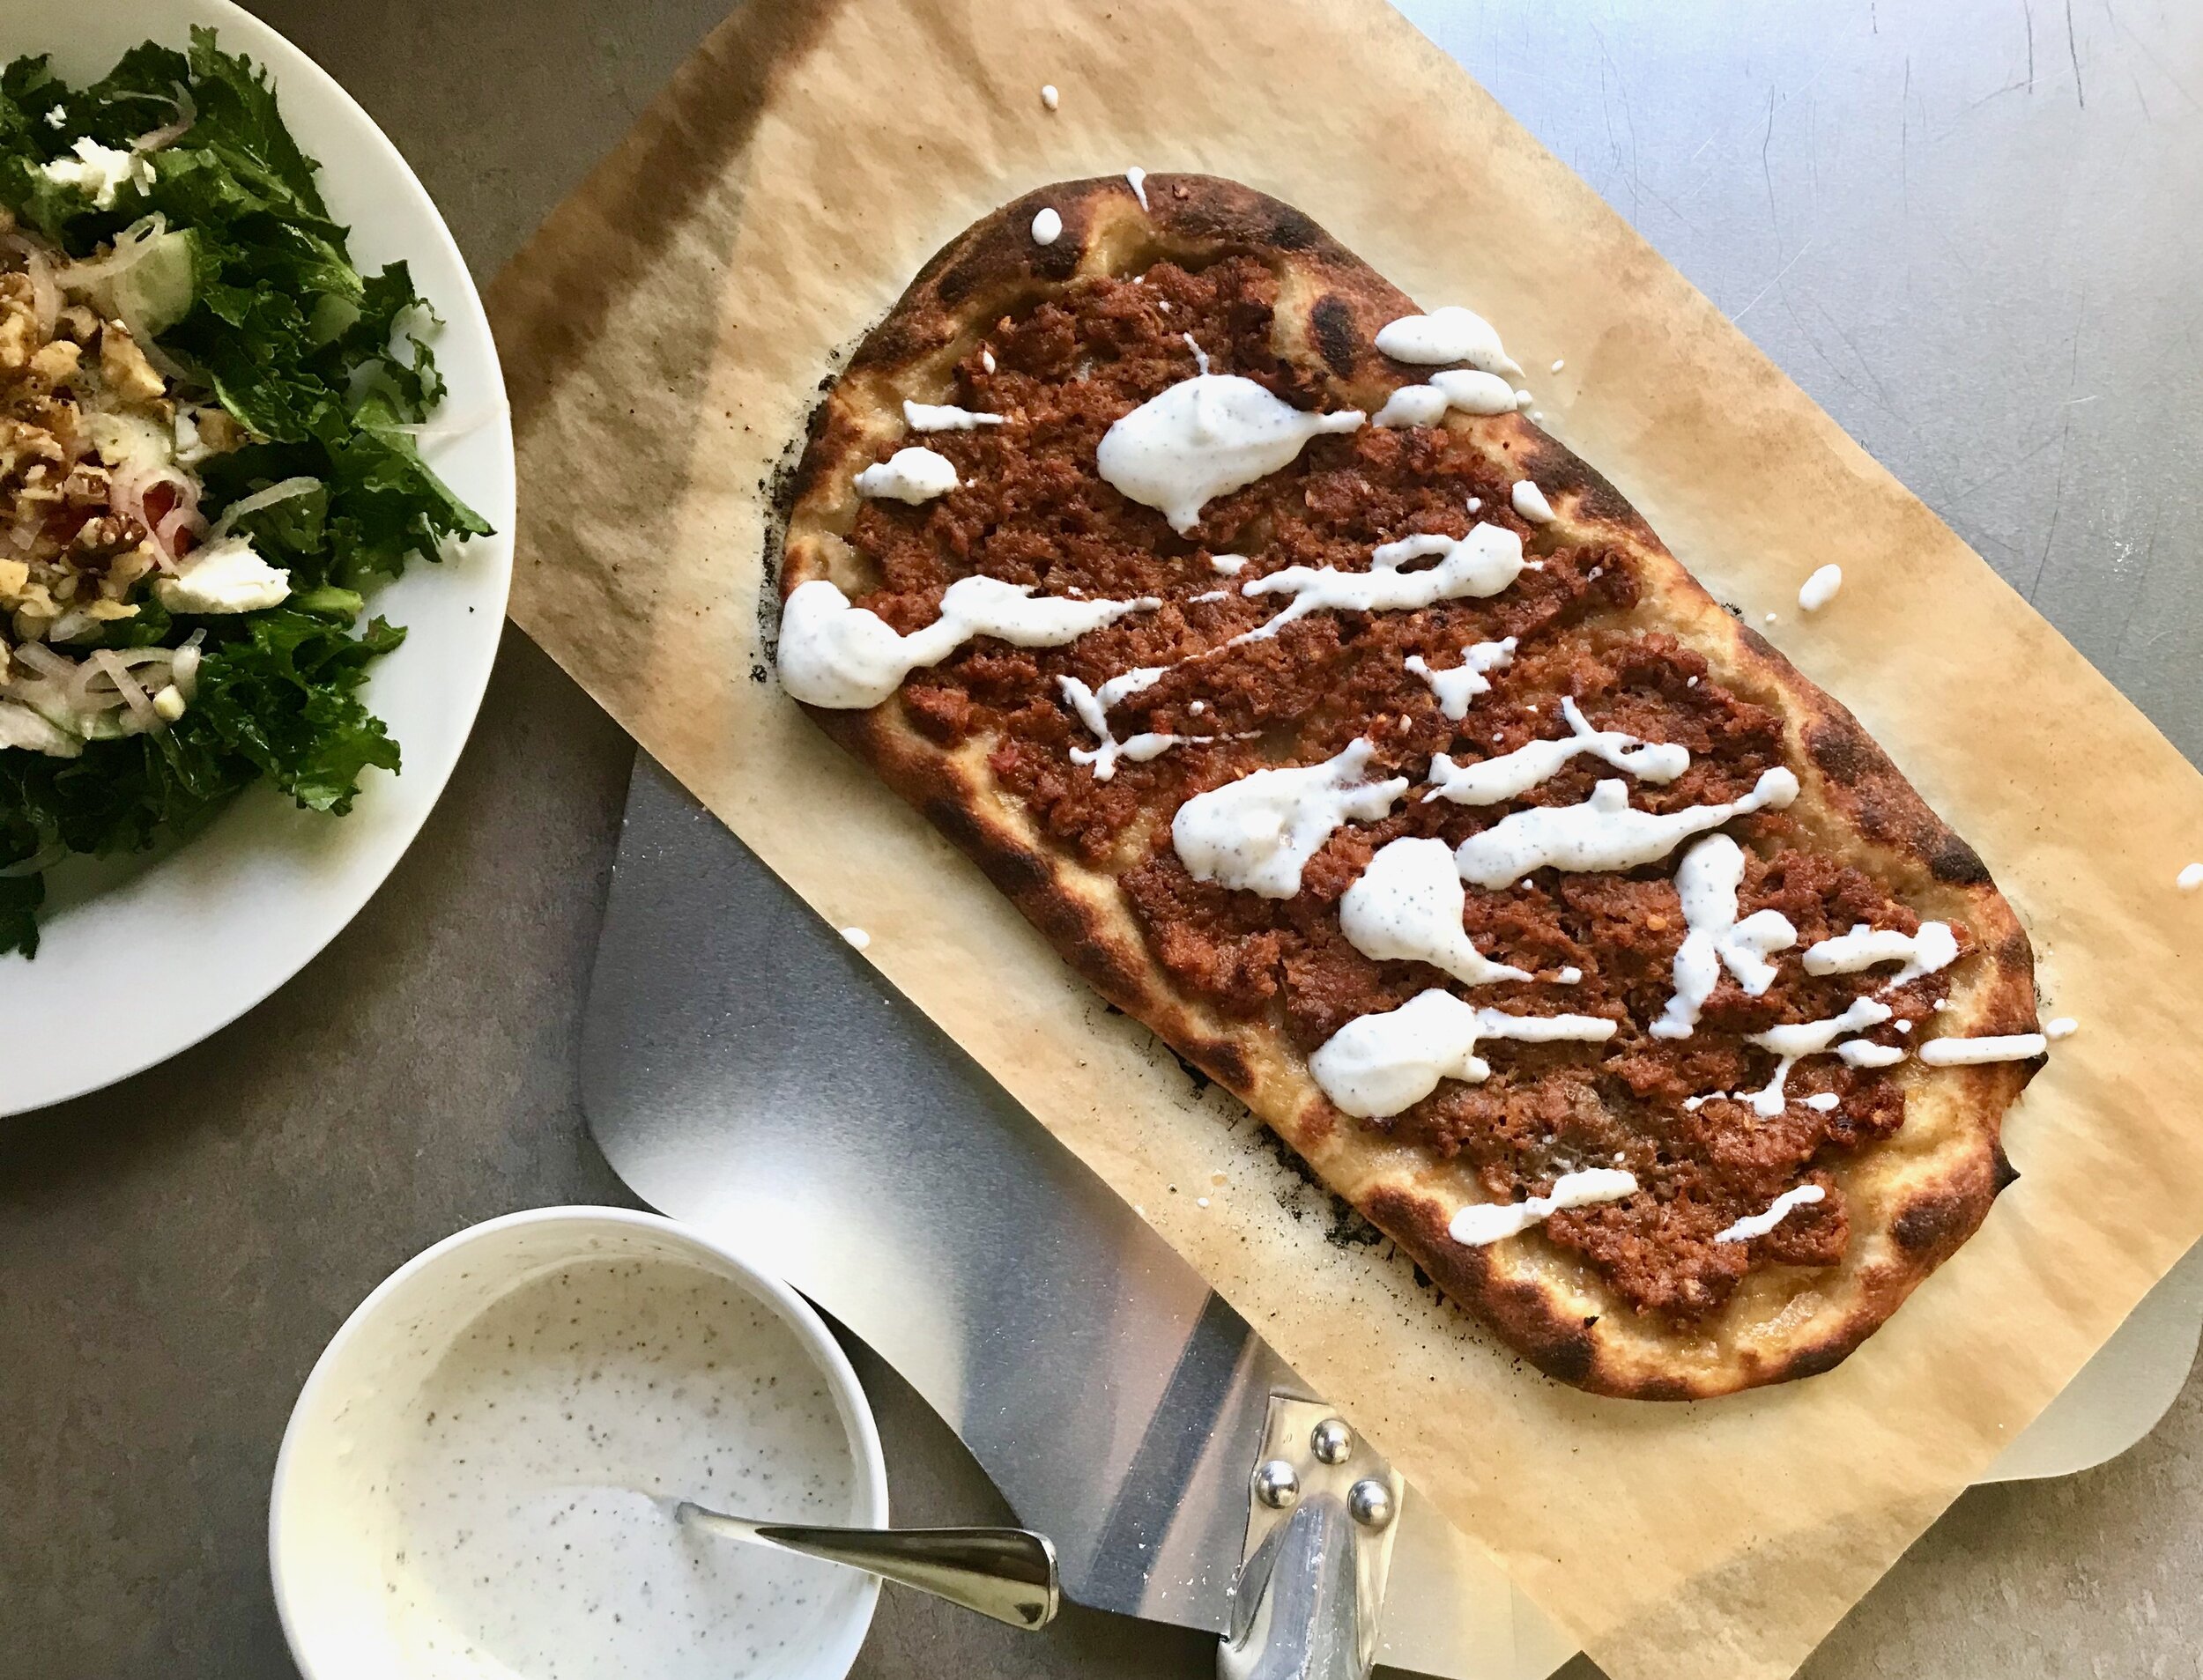
Let the dough do it’s thing while you make the topping which is a minced meat mixture with roasted red peppers, ground lamb, a little tomato paste and then some smoked paprika and cumin. Easy to blitz up in the food processor. Once everything is ready to go you shape the dough and top with the raw meat mixture. Into a 500 degree oven for 10-12 minutes and it’s done.

The recipe calls for you to drizzle with a little thinned out Greek yogurt which I thought needed a little jazzing up so I added a nice squeeze of fresh lemon juice and lemon zest as well as a hefty dose of sumac, a little salt and a drizzle of olive oil. I highly recommend these additions! I didn’t have any arugula for topping but think that would be a great way to finish it off.

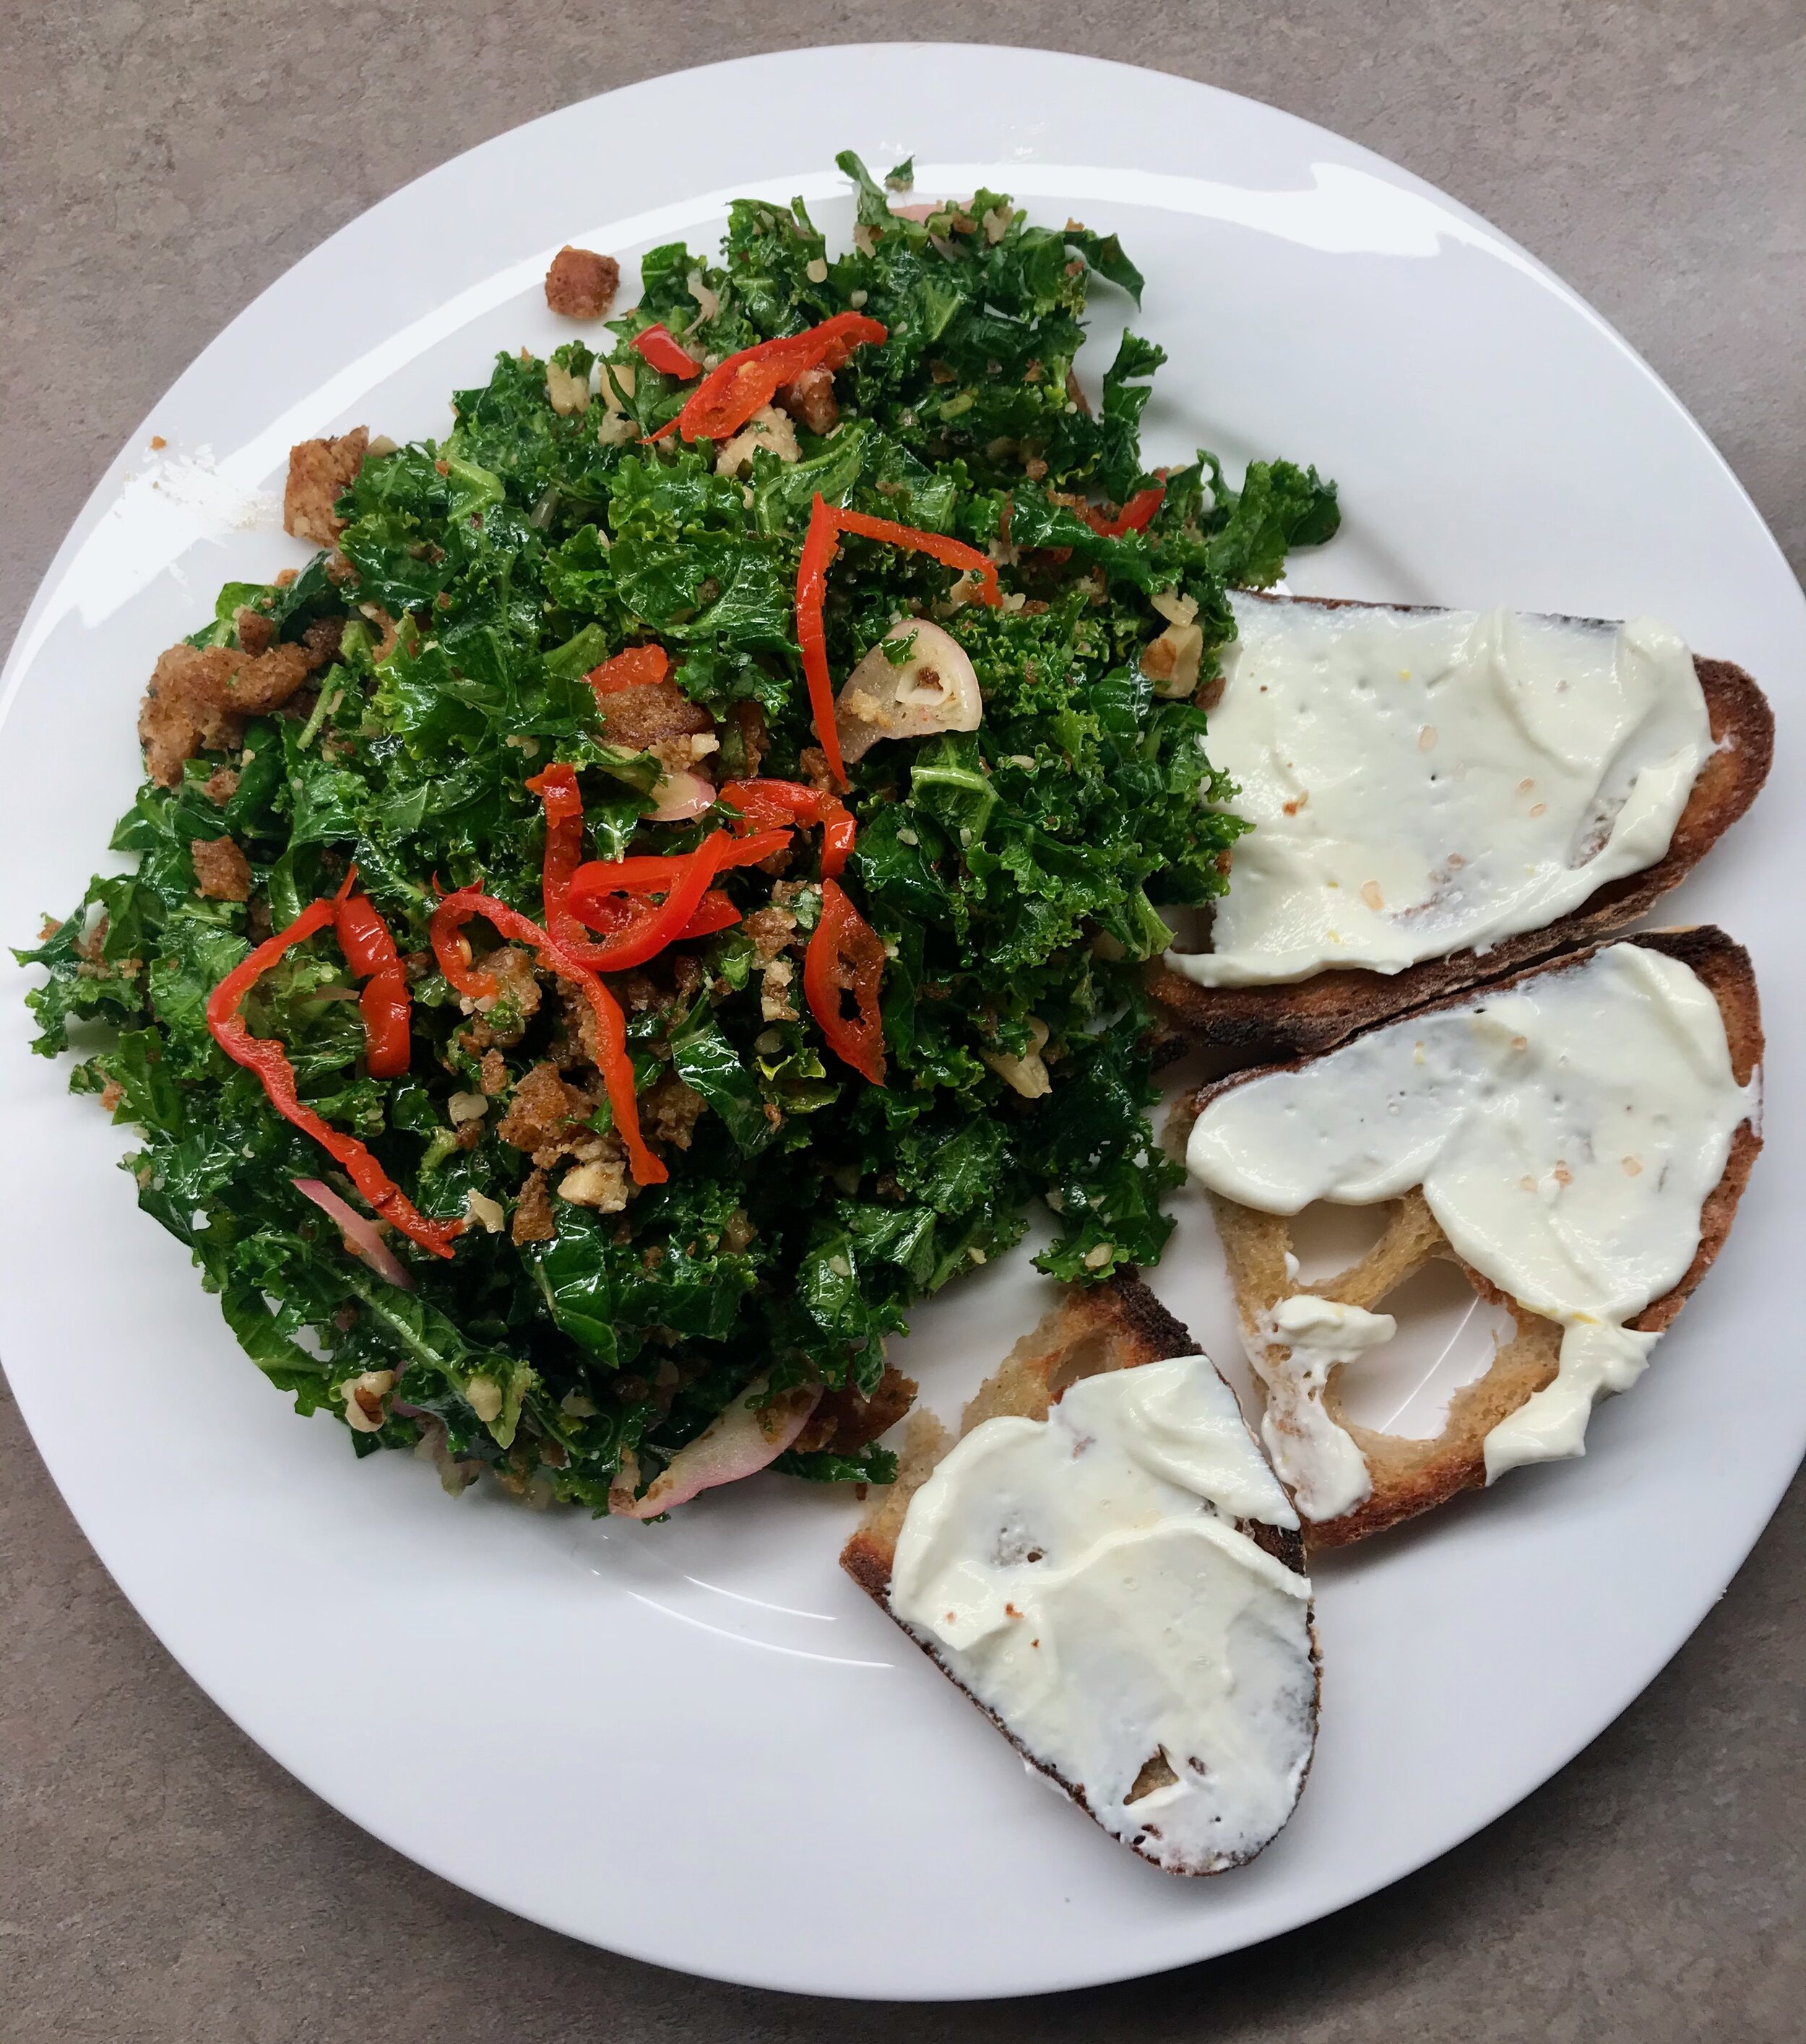
I only made half of the recipe (one of two flatbreads) the first night. The second night I changed it up a bit and topping it with a mix of za-atar and olive oil with a little salt. I did not hold back on the spices and it was great! Then added a bit of goat cheese at the end. A very simple and delicious option!

IMG_7297.jpeg
IMG_7281.jpeg

I think any variation on this recipe would be fun to make for a get-together or party as an appetizer or a little snack. It would be just as good hot, warm, or room temperature. If you want to serve it fresh from the oven it would be easy to have everything ready to go and finish putting it together in just a few minutes whenever you’re ready.

————————————————————————

Lahmajoun (or Lahmacun)
From 177 Milk Street
Ingredients
For the flatbreads:

  • 241 grams (1¾ cups) bread flour, plus more for dusting

  • 1½ teaspoons instant yeast

  • 1¾ teaspoons kosher salt

  • ¾ cup plain whole-milk Greek yogurt (my homemade Greek yogurt weighed in at 180 grams)

  • 1 tablespoon (21 grams) honey

  • ¼ cup (57 grams) water

For the topping:

  • 1 small yellow onion, roughly chopped

  • ¼ cup chopped drained roasted red peppers

  • 2 tablespoons tomato paste

  • 2 teaspoons smoked paprika

  • 1½ teaspoons ground cumin

  • ¾ teaspoon red pepper flakes

  • Kosher salt and ground black pepper

  • 8 ounces ground beef or ground lamb

  • ¼ cup plain whole-milk Greek yogurt

  • Semolina flour, for dusting the pizza peel

  • 2 tablespoons extra-virgin olive oil, divided

  • 2 cups (1 ounce) lightly packed baby arugula

Directions
To make the dough, in a food processor, combine the flour, yeast and salt; process until combined, about 5 seconds. Add the yogurt, honey and ¼ cup water. Process until the mixture forms a ball, about 30 seconds; the dough should be tacky to the touch and should stick slightly to the sides of the bowl. If it feels too dry, add more water, 1 tablespoon at a time, and process until incorporated. Continue to process until the dough is shiny and elastic, about 1 minute.

Transfer the dough to a lightly floured counter. Flour your hands and knead a few times to form a smooth ball. Divide the dough in half and form each half into a taut ball by rolling it against the counter in a circular motion under a cupped hand. Space the balls about 6 inches apart on a lightly floured counter, then cover with plastic wrap. Let rise until doubled in volume, 1 to 1½ hours.

Meanwhile, to make the topping, in a food processor, pulse the onion until finely chopped, about 5 pulses. Add the roasted peppers, tomato paste, paprika, cumin, pepper flakes and 1 teaspoon each salt and black pepper. Process until smooth, about 10 seconds, scraping the bowl as needed. Add the beef and pulse just until incorporated, 3 or 4 pulses. Transfer to a medium bowl. In a small bowl, stir together the yogurt and 1 tablespoon water, adding more water as needed to thin to drizzling consistency. Cover both bowls and refrigerate until needed.

About 1 hour before shaping the dough, heat the oven to 500°F with a baking steel or stone on the upper-middle rack. Working one at a time, gently stretch each dough ball on a lightly floured counter to an oval approximately 6 inches wide and 12 inches long.

Dust a baking peel, inverted baking sheet or rimless cookie sheet with semolina. Transfer one shaped dough to the peel and, if needed, reshape into an oval. Brush the entire surface with 1 tablespoon of oil. Using a spatula, spread half the meat mixture on the dough, leaving a ½-inch border around the edge. Slide the dough onto the the baking steel and bake until well browned, 9 to 12 minutes.

Using the peel, transfer the flatbread to a wire rack. Repeat with the remaining dough, oil and meat mixture. After the second flatbread has cooled on the rack for a couple minutes, top both with the arugula. Drizzle with yogurt, then serve.

Simple Carrot Cake

IMG_7149.jpeg

A weird Easter this year. No church to go to (although thankfully live streaming is going well - but it’s just NOT the same as being in community with your fellow believers) and no family to get together with. It’s just been such a strange few weeks, and more to come. Lara and I wanted to at least do something festive to celebrate the most exciting day for Christians around the world. We decided to make something a little special for lunch, and finish it off with some cake!

Lara found a carrot cake recipe that seemed perfect so she got up early this morning to bake it. I also got up early to make my favorite yogurt galette dough to have ready for lunch. After some quiet time in the kitchen we took an Easter morning walk. We had wanted it to be a sunrise walk, but it was way to cloudy. Still a beautiful morning full of bird sounds. The heaven’s were sure declaring the glory of God!

IMG_7089.jpeg
IMG_7092.jpeg

We then live-streamed church followed by lunch of a beautiful leek and bacon galette with pecorino which was just lovely. Since the weather is going to get crummy again starting tonight we then went off on a nice afternoon walk at Millenium Park. Grey and cool, but beautiful in it’s own way.

IMG_7099.jpeg

When we got home it was coffee time! Which also meant cake time! The carrot cake was a definite winner, and perfect with a hot cup of coffee! The cake itself is not that sweet, but it was perfectly cooked, moist and tender with a hint of cinnamon. While it would be a nice cake to eat plain, or with some powdered sugar or a simple glaze, cream cheese frosting is definitely the way to really jazz it up! The cake recipe also had an accompanying frosting, but since I had some cream cheese frosting in the freezer (from my work Christmas party cupcakes) I just used that.

IMG_7137.jpeg
IMG_7152.jpeg
IMG_7157.jpeg
IMG_7169.jpeg

Lara halved the original recipe (I have the halved recipe written out below, see the link for the original full recipe) and baked it in a 9-inch round cake pan. It baked for 36 minutes which seemed perfect. It was cooked through yet not dry at all. I wouldn’t be opposed to adding some walnuts to the batter itself, but whatever you prefer. This is definitely a winner of a recipe. Simple enough to not be intimidating, but special enough to feel celebratory. Highly recommended.

———————————————————————————————————————————————————————————————

Simple Carrot Cake
From The Kitchn
Ingredients
For the Cake

  • 1 (120 grams) cups all-purpose flour (or a mix of all purpose and whole wheat flours)

  • 1 teaspoon ground cinnamon

  • 1 teaspoon baking powder

  • 1/2 teaspoon baking soda

  • 1/2 teaspoon salt

  • 2 large eggs, at room temperature

  • 1/2 teaspoon vanilla extract

  • 1/2 cup (100 grams) granulated sugar

  • 3/8 cup (75 grams) canola oil

  • 2 cups grated carrot

For the frosting:

  • 4 ounces cream cheese, at room temperature

  • 2 tablespoons unsalted butter, at room temperature

  • 1 1/2 cups powdered sugar

  • 1/2 teaspoon vanilla extract

  • Pinch salt

Directions
Make the cakeArrange a rack in the middle of the oven and heat to 350°F. Coat an 8-inch cake pan with cooking spray; set aside.

Place the flour, cinnamon, baking powder, baking soda, and salt in a medium bowl and whisk to combine. Place the eggs and vanilla in a medium bowl and whisk to combine; set both bowls aside.

Place the sugar and oil in a the bowl of a stand mixer fitted with the paddle attachment. (Alternatively, use an electric hand mixer or whisk and large bowl.) With the mixer on low (or by hand), beat 1/3 of the flour into the sugar mixture. Beat in 1/3 of the egg mixture. Continue adding the flour and eggs in alternating additions. Stop mixing when the last of the flour is just barely incorporated. Add the carrots and fold them in by hand with a rubber spatula, working slowly and gently until the carrots are distributed and no more dry flour remains.

Pour the batter into the baking dish and gently tap the dish a few times against the counter to work out the air bubbles. Bake for 34-38 minutes, rotating halfway through, until the cake is slightly puffed in the middle and browned on the edges, and a toothpick inserted in the middle should come out clean.

Place the cake on a wire rack and let cool completely before frosting.

Make the frostingPlace the cream cheese and butter in the bowl of a stand mixer fitted with the paddle attachment. (Alternatively, use an electric hand mixer and large bowl.) Beat on medium speed until combined. Gradually beat in the powdered sugar, vanilla, and salt until the frosting starts to come together into lumps. Increase the speed to high and continue to beat until fluffy and creamy, scraping down the sides of the bowl as needed. Dollop the frosting over the cake and spread into an even layer.

Braised Pork Sandwiches with Broccoli Rabe and Provolone

IMG_6997.jpeg

This recipe appeared somewhere in my social media browsing and it look so good, and the timing was right, so Lara and I decided to just go for it! It was a good choice!

The recipe was super simple, as are most roasts/braises, and absolutely delicious, especially with such a great piece of pork from my favorite butcher. Look at the fat on that thing!

Lara made this on a Monday she had off. Throw everything in a pan and let it cook until done. Easy! She had to adjust the cooking method because the original recipe calls for this to be made in the slow cooker, but it was easy enough to adjust for the oven. Just be sure to watch the pork near the end of the braising time to ensure the water hasn’t all evaporated. After 3.5 hours most of the water was gone and the pork was looking very dark, in a good way, but it would have been easy to go a little too far.

I would definitely not skip the broccoli rabe either, it was a great addition, especially with all the lemon - Don’t Skimp on the Lemon!

IMG_1887.jpeg

One recommendation; the recipe calls for you to serve this on a hoagie roll. I didn’t have any but I had plenty of sourdough so I used slices of that instead. This was tasty, but very messy. The pork is so VERY juicy and fatty and so the slices of bread kind of fell apart while eating. A sturdy hoagie or something similar would do a much better job holding up to this type of sandwich.

A great make ahead meal for a crowd.

Braised Pork Sandwiches with Broccoli Rabe and Provolone
Adapted from Bon Appétit
Ingredients

  • 3 pounds boneless, skinless pork shoulder

  • ¼ cup extra-virgin olive oil

  • ¼ cup red wine vinegar

  • 1 head of garlic, halved lengthwise through root end

  • 3 sprigs rosemary

  • 2 tablespoons honey

  • 2 teaspoons fennel seeds

  • 1 teaspoon crushed red pepper flakes

  • 1 tablespoon kosher salt, plus more

Broccoli Rabe and Assembly

  • Kosher salt

  • 2 bunches broccoli rabe, woody ends trimmed

  • ¼ cup extra-virgin olive oil

  • 6 garlic cloves, thinly sliced

  • ½ teaspoon crushed red pepper flakes

  • 4 seeded semolina or hoagie rolls

  • 4 ounces sharp provolone, thinly sliced

  • 1 lemon, cut into wedges

Directions
Pork
Preheat oven to 325 degrees. Combine pork, oil, vinegar, garlic, rosemary, honey, fennel, red pepper flakes, 1 Tbsp. salt, and 1 cup water in a Dutch Oven. Turn pork several times with tongs to coat and mix ingredients. Place lid on the Dutch oven and place in the preheated oven and braise until pork is very tender and shreds easily, about 3 1/2 hours. Keep an eye on the roast in the last hour of cooking to ensure the liquid has not all evaporated. Add more water as needed.

Transfer pork to a medium bowl and let rest until cool enough to handle. Pour cooking liquid through a fine-mesh sieve into a medium saucepan; discard solids. Let liquid settle so fat rises to the top, then pour off and discard all but a thin layer of fat. Bring liquid to a simmer over medium heat and cook, stirring occasionally, until reduced by about a third, 12–18 minutes.

Meanwhile, shred pork with your fingers or 2 forks, discarding any large bits of fat. Season with salt.

Set aside 1 cup cooking juices for serving, then add shredded pork to saucepan with remaining juices and toss to coat and rewarm pork.

Do Ahead: Pork can be cooked 2 days ahead. Shred and add to reduced juices, then let cool, cover, and chill. Reheat over low.

Broccoli Rabe and Assembly
Bring a large pot of salted water to a boil over high heat. Fill a large bowl with ice water and have at the ready. Add broccoli rabe to pot and cook just until stems are tender, about 2 minutes. Using tongs, transfer broccoli rabe to bowl of ice water and agitate to rapidly cool down. Drain and pat dry on paper towels. Transfer to a cutting board and slice into 1" pieces on the diagonal, all the way from stem to leaves.

Heat oil in a large skillet over medium. Cook garlic and red pepper flakes, stirring often, until garlic is golden around the edges, about 2 minutes. Increase heat to medium-high and add broccoli rabe; season with salt. Cook, tossing constantly, until leafy bits are just starting to crisp slightly, 5–10 minutes.

Divide pork among bottoms of rolls or on a piece of toasted bread. Top with provolone, shingling slices. Spoon broccoli rabe over, then squeeze lemon wedges over broccoli rabe. Close up sandwiches and cut in half. Serve with reserved juices for dipping.

Do Ahead: Broccoli rabe can be blanched 1 day ahead. Pat dry, cover, and chill.

Open Crumb Sourdough Bread

I’ve been following Full Proof Baking on Instagram for a while now and find her breads absolutely beautiful! I finally sat down and really looked at her method (video available on her YouTube page) and attempted her Basic Open Crumb Sourdough. I had tried her 50% whole wheat sourdough a few weeks back and it failed miserably for some reason even though the whole process seemed to go very well. I figured I’d step back and start at the beginning with a more basic recipe with a lower percentage of whole wheat. I’ve now made this bread twice. The first time it turned out pretty well, but the crumb was a little uneven and it didn’t look like it really rose fully, the bottom of the loaf was a little dense. Second attempt went a lot better. I didn’t really change a lot, figuring practice and repetition is really what will make a successful loaf.

One thing I did change slightly was at the end of the overnight proof. She calls for you to bake the bread straight from the fridge while it is still cold. I feel like when I do this sometimes it doesn’t work. It seemed to me that my bread needed just a little bit more rise before baking. So on the second attempt I took the bread out when I turned my oven on to preheat. So it was out for 45-60 minutes in a fairly warm room (with the oven on to 500 degrees). I feel like this gave it just a bit more lift without overproofing. There is the possibility that I am in fact overproofing and that’s why it’s not getting enough lift but I just didn’t think so.

I’m going to keep playing with the recipe, and my technique, but this second attempt was a definite success! I’m excited to keep experimenting!

——————————————————————————————

IMG_6972.jpg

Basic Open Crumb Sourdough Bread
Recipe from: Full Proof Baking
Note: A 20% Whole grain wheat bread. The higher hydration makes the dough ingredients easier to mix by hand. 

Specs:

  • Baker’s Percentages: 20% whole grain hard red spring wheat, 79% bread flour, 1% whole grain rye (from levain)

  • 20% levain inoculation

  • 2.1% sea salt

  • 80% final hydration

Levain: (5 hours)
5 hour young levain built 1:2:2

  • 15 g mature starter + 30 g water + 30 g bread flour 

Keep at 80% F until more than tripled in volume, approximately 5 hours at around 80 degrees.

Autolyse (2-4 hours)
This is a pre-soak of flour and water to jump-start gluten development and increase dough extensibility which can be great for maximizing open crumb in the final loaf of bread. 

  • 70 grams whole wheat flour

  • 255 grams bread flour

  • 253 grams water

Add water to flour mix and stir until there is no more dry flour remaining. Let sit for 2-4 hours. At this point there should be much more extensibility in the dough. 

Add levain to Autolyse:
Add 65 g (20%) levain (brings final hydration to 80%) to the autolyse.

Add the levain right on top of autolysed dough. Begin hand mixing to get it into the dough. Shouldn’t take long, approximately 3-4 minutes. A short mix prevents over-oxidizing of the dough. Once fully mixed, form a taught ball of dough, let rest 30 minutes before adding salt. 

Add salt:
After resting for 30 minutes, add 7.5 grams fine grain sea salt (around 1 teaspoon) . Wet your hand and dimple in the sea salt. Then pinch and mix it in. The salt helps tighten the gluten structure and adds strength to the dough. It also slows fermentation. This is also the last step where you can easily easily add more water to the dough. If the dough feels a little tight you can add a small splash of water as needed. This is mainly done by feel. Takes about 5 minutes to fully incorporate the salt. Then let the dough rest for another 30 minutes. 

Perform a Fold:
Next perform a fold: Lightly mist the counter with water. Wet your hands with water and flip the dough out onto the counter. Using a bench scraper, pull the dough from the top down folding the dough onto itself. Repeat this process on all four sides of the dough. Flip the dough over, round it up and return to the bowl. Cover and let rest 30 minutes. 

Lamination: 
Mist the counter with water again. Transfer dough to counter. Lift and gently stretch the dough out from the center with wet hands. Work delicately and slowly. Try not to pull from the edges but pull from the center out, you don’t want the dough to tear. Form a large, thin rectangle of dough. Pick up one edge of the dough and fold into the center approximately ⅓ of the way across, being sure to eliminate any large air pockets. Then fold the other side into the center over the first section. Finish by folding the top down halfway and then the bottom over the top forming a square in the end. Move your dough to a small square Pyrex-type dish. Let rest 45 minutes. 

Stretch and Folds: (strengthening the dough)
The number and frequency of the folds is dependent on the length of bulk as well as your dough’s extensibility and how the dough develops over the course of the bulk. For this dough 3 sets of coil folds performed at 45 minute intervals is typically enough.

With wet hands reach under the dough and pull it up slowly and evenly, detaching the dough on the side farther away from you. The dough will naturally wrap itself under. Rotate the dish and perform the same coil fold again on the other three sides. The top part of the dough is the part detaching from the dish and coiling under. 4 total coil folds. While doing this be sure to pop and large air pockets as these are not signs of fermentation, they are pockets introduced during mixing and lamination. Cover and let rest 45 minutes. This bulk fermentation should be around 75 degrees F.    

Perform the next stretch and coil folds on all 4 side of the dough. If your dough still seems a little loose you can perform another 1-2 stretch and folds during the bulk fermentation. Let rest 45 minutes. 

Perform the last set of stretch and folds. Note the temperature (again, around 75 degrees is ideal). Let bulk fermentation continue for another 1.5-2 hours (this is where you can add in another series of coil folds as needed). 

Shaping: 
About 90 min later, about 6 hours after adding levain, the dough should be around 74-75 degrees F and is ready to shape. Dough should appear puffy and somewhat light, with some roundness at the edges. Overall it should have grown approximately 50% in volume since adding the levain. 

Flour the counter top with flour. Release dough from top of dish and flip the dish over and allow it to release from the dish onto the counter. Use a bench scraper to tuck flour under the edges of the dough. Then remove the excess flour from the workspace. 

Use the scraper to help pick up the side (top) flap of your dough and gently pull out just a bit before folding up on top of the center of the dough (about ⅓ of the way in, like a letter). Gently pat the dough during this stage to remove any large air bubbles to ensure a more even crumb. Repeat the fold with the other side of the dough, folding it into the center. Then lift the top of the dough and begin to roll down onto itself. Use your thumbs to gently but firmly tuck the dough in creating a more taught surface on top of the dough. Once you roll fully up and get to the seam, seal the edge using your fingers. The use your fingers to pinch the edges to seal.

Dust the top of your dough with brown rice flour (this is ideal to prevent sticking to your banneton) and keeps the dough dry and prevents the surface from getting tacky. Use your scraper to flip over the dough so the seam side is up and the top of the dough is facing down. Gently lift and transfer the dough to the banneton. Cover and move on to the proofing stage. 

Proof: 
Let the dough sit at room temperature for an initial short proof (15-20 mins), then move to the fridge for an overnight retard for approximately 12-16 hours at 38 degrees F. Anything less then 39-40 degrees will prevent any significant rise. Any warmer and you may over proof/over ferment. 

Bake: 
The next day it’s time to bake. I use the Dutch oven method currently. Preheat oven with Dutch Oven in it for 1 hour at 500 degrees. Transfer dough, cold from fridge, to piece of parchment paper. Score at 45 degree angle. Transfer to preheated Dutch oven and put the lid on. Place in oven and turn temperature down to 450 degrees. Bake, covered, for 20 minutes. Remove the lid and return the bread to the oven and continue baking another 10 minutes at 450 degrees. Decrease the temperature to 425 degrees and bake for an additional 10-15 minutes. You can remove the bread from the Dutch oven for these last 15 minutes if desired. I find it helps the crust brown up more then it does when left in the pot.

Remove bread from over and place on a wire cooling rack. Allow to cool at least 2 hours before cutting, but waiting until bread is completely cooled is ideal.

Digestive Cookies (with sourdough option)

IMG_7848.jpeg

Coronovirus and COVID19 are upon us. State order starting yesterday is to shelter in place and only essential business are to be open. Phew. What a crazy time we’re living in. What better way to get through this then with some baking.

Lara baked up these cookies/biscuits yesterday. We’ve both really love any digestive biscuit, who doesn’t? They really are just cookies, which this Bon Appetit recipe endorses and calls them what they are.

IMG_7015.jpeg

These baked up very nicely, crispy and light with a lot of good whole wheat flavor. While they are not necessarily sugary sweet in the way a classic cookie is sweet, they definitely are sweet and overall delicious!

I also have made these with some alterations as a way to use up my leftover sourdough starter. I’ve posted this option below as well. Both are delicious! There’s a lot of room for variation with this recipe!

——————————————————————————————

Digestive Cookies
From Bon Appetit
Ingredients

  • ½ cup (1 stick) chilled unsalted butter, cut into pieces

  • ½ cup (33 g) wheat germ

  • 6 Tbsp. (75 g) sugar

  • 1 tsp. baking powder

  • 1 tsp. kosher salt

  • 1⅓ cups (167 g) whole wheat flour, plus more for surface

  • ¼ cup (65g) milk

  • 2 oz. chocolate (any percentage), chopped (optional)

  • 1 tsp. refined coconut oil (optional)

Directions
Place racks in upper and lower thirds of oven; preheat to 350°. Process 1⅓ cups whole wheat flour, wheat germ, sugar, baking powder, salt, and butter in a food processor until butter virtually disappears and you have a fine, floury meal. Add milk and pulse until a damp and crumbly dough forms. Turn dough out onto an unfloured surface and gently knead just to bring it into a ball; flatten into a disk.

Lightly flour surface and roll out dough until just shy of ¼” thick. Lightly flour a 2-inch round cookie cutter and punch out cookies, dusting with more flour as needed to avoid sticking. Dust any excess flour off of cookies with a dry pastry brush. Using a spatula, transfer cookies to 2 parchment-lined baking sheets. Gently knead scraps together, reroll, and punch out more cookies.

Prick each cookie 3 times with a fork and bake, rotating baking sheets top to bottom and front to back halfway through, until bottoms and edges are browned, 15–18 minutes. Let cool on baking sheets (cookies will crisp up as they cool).

If using, melt chocolate and oil in a microwave-safe bowl in the microwave in 20-second increments, stirring after each burst, until mostly melted and smooth, about 1 minute total. (Alternatively, melt in a heatproof bowl set over a saucepan of simmering water, stirring occasionally, until melted; do not let bowl touch water.) Stir chocolate mixture until fully melted, then continue to stir until slightly cooled and thickened, about 3 minutes. (This makes it easier to get a thick layer of chocolate on the cookies.)

Using a small offset spatula or butter knife and working one at a time, spread a scant 1 tsp. chocolate over the flat underside of each cookie. Using the edge of the spatula and starting from one side and working your way to the other, gently and quickly press a few lines into chocolate as desired. Chill cookies on baking sheets until chocolate is set, about 10 minutes.

Sourdough Digestive Cookies
Ingredients

  • ½ cup (1 stick) chilled unsalted butter, cut into pieces

  • ½ cup (33 g) wheat germ

  • 4-6 Tbsp. (50-75 g) sugar

  • 1 tsp. baking powder

  • 1 tsp. kosher salt

  • 102 grams whole wheat flour

  • 130 grams discarded sourdough starter

Directions
Place racks in upper and lower thirds of oven; preheat to 350°. Process whole wheat flour, wheat germ, sugar, baking powder, salt, and butter in a food processor until butter virtually disappears and you have a fine, floury meal. Add sourdough starter and pulse until a damp and crumbly dough forms. Turn dough out onto an unfloured surface and gently knead just to bring it into a ball; flatten into a disk.

Lightly flour surface and roll out dough until just shy of ¼” thick. Lightly flour a 2-inch round cookie cutter and punch out cookies, dusting with more flour as needed to avoid sticking. Dust any excess flour off of cookies with a dry pastry brush. Using a spatula, transfer cookies to 2 parchment-lined baking sheets. Gently knead scraps together, reroll, and punch out more cookies.

Prick each cookie 3 times with a fork and bake, rotating baking sheets top to bottom and front to back halfway through, until bottoms and edges are browned, 25-30 minutes. Let cool on baking sheets (cookies will crisp up as they cool).

Cornmeal Honey Digestive Cookies
Ingredients

  • ½ cup (1 stick) chilled unsalted butter, cut into pieces

  • ½ cup (33 g) wheat germ

  • 1 tsp. baking powder

  • 1 tsp. kosher salt

  • 100 grams whole wheat flour

  • 3 tablespoons (27 grams) coarse cornmeal

  • 54 grams honey (3 tablespoons) honey

  • 130 grams discarded sourdough starter

Directions
Place racks in upper and lower thirds of oven; preheat to 350°. Process whole wheat flour, wheat germ, sugar, baking powder, salt, and butter in a food processor until butter virtually disappears and you have a fine, floury meal. Add sourdough starter and pulse until a damp and crumbly dough forms. Turn dough out onto an unfloured surface and gently knead just to bring it into a ball; flatten into a disk.

Lightly flour surface and roll out dough until just shy of ¼” thick. Lightly flour a 2-inch round cookie cutter and punch out cookies, dusting with more flour as needed to avoid sticking. Dust any excess flour off of cookies with a dry pastry brush. Using a spatula, transfer cookies to 2 parchment-lined baking sheets. Gently knead scraps together, reroll, and punch out more cookies.

Prick each cookie 3 times with a fork and bake, rotating baking sheets top to bottom and front to back halfway through, until bottoms and edges are browned, 25-30 minutes. Let cool on baking sheets (cookies will crisp up as they cool).

Paprika Potato and Bell Pepper Soup

IMG_6736.jpeg
IMG_6716.jpeg

The picture of this potato and pepper soup in my new magazine (177 Milk Street) was so bright and sunny that I kept coming back to it even though a potato soup isn’t generally something I’m drawn too. I decided to go for it last weekend, to get outside of my comfort zone and try something I typically wouldn’t. I’m glad I did. It is a beautiful soup. Burnt orange and creamy. It’s not flashy flavor-wise, but I found it well-balanced and comforting. The potato gives it great body and mouth-feel, and the pepper and paprika shine through and turn it this beautiful color. Finishing with a couple tablespoons of lime juice gives it the perfect amount of acidity. The only thing I would probably want to change is adding a little bit of heat which would be easy with a red jalapeño or fresno chili.

The toppings are important in this recipe as well. I used both feta, and plain yogurt and they were both great options for that creamy tang on top. The cilantro adds freshness. I did not have avocado or green onion, but I’m sure they would be great as well.

Overall a fairly simple recipe that turns out a large quantity of beautiful creamy soup. Recommended!

——————————————————————————————————————————————————————

Paprika Potato and Bell Pepper Soup
From 177 Milk Street Magazine, March-April 2020
Ingredients

  • 2 tablespoons extra-virgin olive oil

  • 1 large white onion, halved and thinly sliced

  • 3 red or orange bell peppers, stemmed, seeding and sliced

  • 1 bunch cilantro, chopped, stems and leaves reserved separately

  • 1 bunch scallions, thinly sliced, white and green parts reserved separately

  • 6 medium garlic cloves, smashed and peeled

  • 2 tablespoons sweet paprika

  • 1 tablespoon ground cumin

  • 2 pounds russet potatoes, unpeeled, cut into 1-inch cubes

  • 2 quarts (64 ounces, 8 cups) low-sodium chicken broth or water

  • Kosher salt and ground black pepper

  • 2 tablespoons lime juice

  • Crumbled or grated queso fresco, to serve

  • Dice avocado, to serve

Directions
In a large Dutch over over medium, heat the oil until shimmering. Add the onion, bell peppers, cilantro stems and scallion whites. Cook, stirring occasionally, until the vegetables are softened and beginning to brown, 6-9 minutes. Add the garlic, paprika and cumin, then cook, stirring until fragrant, about 30 seconds. Stir in the potatoes, broth and 1 tablespoon of salt.

Bring to a boil over medium-high, then cover, reduce to low and cook, stirring occasionally and adjusting the heat as needed to maintain a simmer, until a skewer inserted into the potatoes meets no resistance, about 40 minutes. Remove from the heat and cool for about 10 minutes.

Using a blender and working in batches, puree the mixture until completely smooth. (Alternately, use an immersion blender and puree directly in the pot.) Return the soup to the pot and cook over medium, stirring occasionally, until heated through.

Off heat, stir in the lime juice, then taste and season with salt and pepper. Serve the soup topped with the cilantro leaves, scallion greens, queso fresco and avocado.

German Apple Cake (Apfelkuchen)

IMG_6652.jpeg
IMG_6641.jpeg

I had the itch to bake something this week. I had two sad looking apples sitting on the counter, and a package of almond paste in the freezer, leftover from Christmas, so when I found this recipe I knew it was meant to be! This is a beautifully simple cake and turned out exactly as I had hoped. The almond flavor really shines through and the almond pastes gives the crumb a little “stickiness” that I enjoy. Topped with thinly sliced apples, the combination couldn’t be more delicious, or beautiful. Highly recommended.

German Apple Cake (Apfelkuchen)
From 177 Milk Street
Ingredients

IMG_6662.jpeg
  • 1 cup (130 grams) all purpose flour [I used 110 grams all purpose and 20 grams whole wheat]

  • 1 1/2 teaspoons baking powder

  • 1 cup (214 grams) granulated sugar, plus 2 tablespoons for sprinkling [I cut back to 3/4 cup, 160 grams]

  • 4 ounces almond paste, broken into small pieces

  • 1/2 teaspoon kosher salt

  • 1 stick (8 tablespoons) butter, room temperature

  • 3 large eggs, room temperature

  • 2 teaspoons vanilla extract

  • 2 small granny smith apples, about 12 ounces total, peeled and cored and halved lengthwise [I used the apples I had, I think one was a red delicious and one was a golden delicious]

Directions
Preheat the oven to 375 degrees. Line a 9-inch springform pan parchment paper and spray with cooking spray, then dust with flour; tap out the excess and set aside. In a small bowl, whisk together the flour and baking powder.

In a stand mixer with the paddle attachment, mix the 1 cup of sugar, the almond paste and salt on low until the paste has broken into crumbly bits, 2 to 3 minutes. Add the butter and mix until combined, about 30 seconds. Increase to medium-high and beat until the mixture is pale and fluffy, about 3 minutes, scraping the bowl as needed. Reduce to medium, then, one at a time, add the eggs, beating for about 20 seconds after each addition.

Scrape down the bowl, then add the vanilla and continue mixing on medium until well-combined, about 2 minutes. Reduce to low, add the flour mixture and mix just until the batter is evenly moistened, about 10 seconds; it will be thick. Using the spatula, scrape the bottom and sides of the bowl and give the batter a few folds to ensure no pockets of butter or flour remain. Transfer to the prepared pan and spread in an even layer, smoothing the surface.

Slice each apple half lengthwise into ⅛-inch-thick half circles; do not separate the slices. With your hand, gently press down on each half to fan the slices. Divide the fanned apples into 8 equal portions without undoing the fanned effect. Slide a thin spatula or butter knife under the apples, then slide the slices off the spatula near the outer edge of the cake with the slices fanning outward from the center. One at a time, position another 6 sets of slices on the cake, creating an evenly spaced spoke pattern. Place the last set of apple slices in the center. Sprinkle the remaining 2 tablespoons sugar evenly over the top.

Bake until the edges of the cake are deep golden brown and a toothpick inserted at the center comes out clean, 50 to 60 minutes. Cool in the pan on a wire rack for 30 minutes. Run a paring knife around the inside of the pan to loosen, then remove the pan sides. Serve warm or at room temperature; dust with powdered sugar just before serving.

Kale Salad with Smoked Almonds and Picada Crumbs

Made this for dinner on a whim the last night of my vacation, after getting home from Arizona the night before. Something light and fresh sounded great. This was a wonderful salad, without cheese! I couldn’t believe it. Rarely do I make a salad without cheese on purpose!. It would be an easy salad to make ahead. There is so much flavor, and what I especially liked was how acidic it was. There are a lot of acidic components which really add a punch of flavor. I think it would be great with a piece of grilled fish. I just had it with some toasts which was also good. Definitely something to make again.

There are a lot of places you could go with this one, changing the flavors a little bit here and there. I did make some changes based on what I had.

What did I change/do differently: I used less olive oil than the recipe called for by a long shot. Didn’t have smoked almonds, so used toasted walnuts instead. Didn’t have thyme, but did have parsley, cilantro and mint so in that all went. Added a little smoked paprika since I didn’t have any smoked almonds. Used regular curly kale not lacinato. I only used a small amount of honey, maybe 1-2 teaspoons, not 2 tablespoons. Added sweet red pickled peppers, sliced thin, for a little extra flavor, color and acid. I also think some olives would be a lovely addition.

Kale Salad with Smoked Almonds and Picada Crumbs
From 177 Milk Street
Ingredients

  • 2 shallots, peeled and thinly sliced

  • 5 tablespoons sherry vinegar

  • Kosher sald

  • 2 Tablespoons of honey

  • 8 tablespoons extra virgin olive oil

  • Ground black pepper

  • 1 cup smoked almonds

  • 4 ounces white bread, cut into 1-inch cubes

  • 2 teaspoons fresh thyme leaves

  • 1 tablespoon sweet paprika

  • 2 bunches lacinato kale, stemmed, washed, spun dry and thinly sliced crosswise (10 cups)

  • 1 cup fresh mint leaves, chopped

Directions
In a small bowl, whisk together the shallots, vinegar and ½ teaspoon salt. Allow to sit 10 minutes. Whisk in the honey, 5 tablespoons of the oil and ½ teaspoon pepper; set aside.

In a food processor, process the almonds until coarsely chopped, about 8 pulses; transfer to a large bowl. Add the bread to the processor and process to rough crumbs, about 20 seconds. Add the thyme, remaining 3 tablespoons oil, paprika, ½ teaspoon salt and ½ teaspoon pepper. Process until incorporated, about 10 seconds. Transfer the crumb mixture to a large skillet over medium heat and cook, stirring frequently, until crisp and browned, 8 to 10 minutes. Transfer to a plate to cool.

over medium heat and cook, stirring frequently, until crisp and browned, 8 to 10 minutes. Transfer to a plate to cool.

Add the kale and mint to the bowl with the almonds and massage the greens until the kale softens and darkens, 10 to 20 seconds. Add the dressing and crumbs and toss to combine. Taste, then season with salt and pepper