Louiseville, Kentucky

Oh my goodness! I have not been very active here over the past few months! Sorry about that! I had a busy, but exciting couple of months. I finished off my second year of residency, went on a couple of vacations, and most excitingly - I moved to a new house! My sister Lara bought a house and asked me to come live with her. Of course I jumped at this opportunity. Although I've loved my little apartment for 3 1/2 years, I felt like it was a good time to move on. For some time now, both Lara and I have felt the urge to get some more space that we can use to share our love of hospitality, celebrations and sharing our home with others. 

So there have been some crazy weeks over the past few months, and this little did not get much of the love. We are settled in now, and things have calmed down so I think it's time to get back to blogging! I will certainly be sharing more of the new house in the coming months, but for now I'm going back to the beginning of June to share my vacation to Louisville, Kentucky. 

At the beginning of June, Lara and I headed south to visit our friend from college who is now living in Louisville with her husband. We made a long weekend of it and had a blast. I really enjoyed exploring the city, so many historic homes, great bars and restaurants, and fun places to explore. 

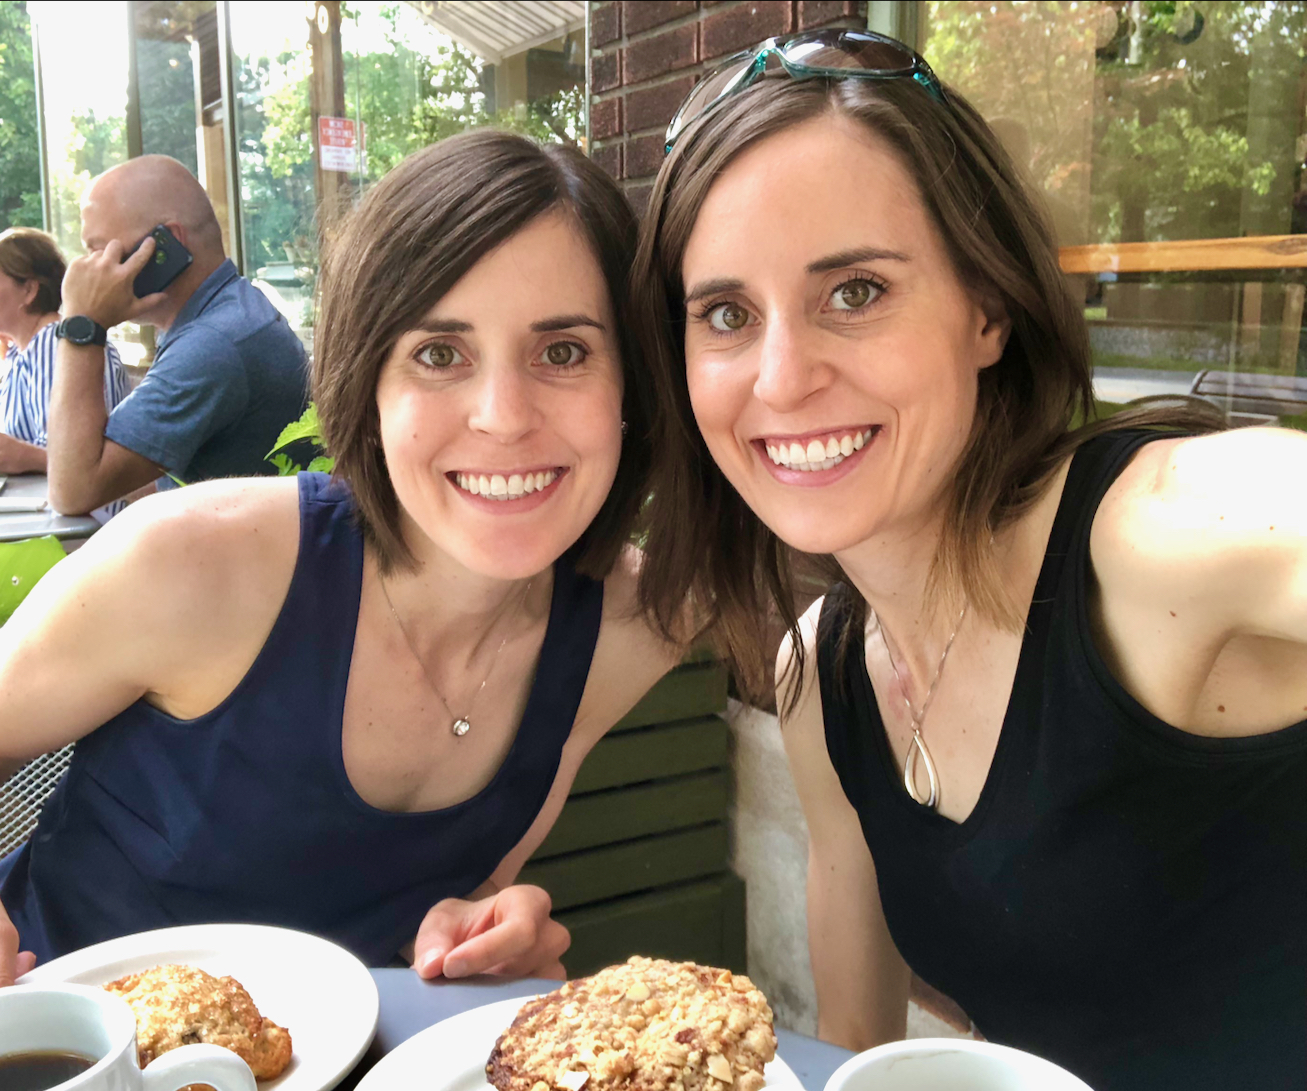
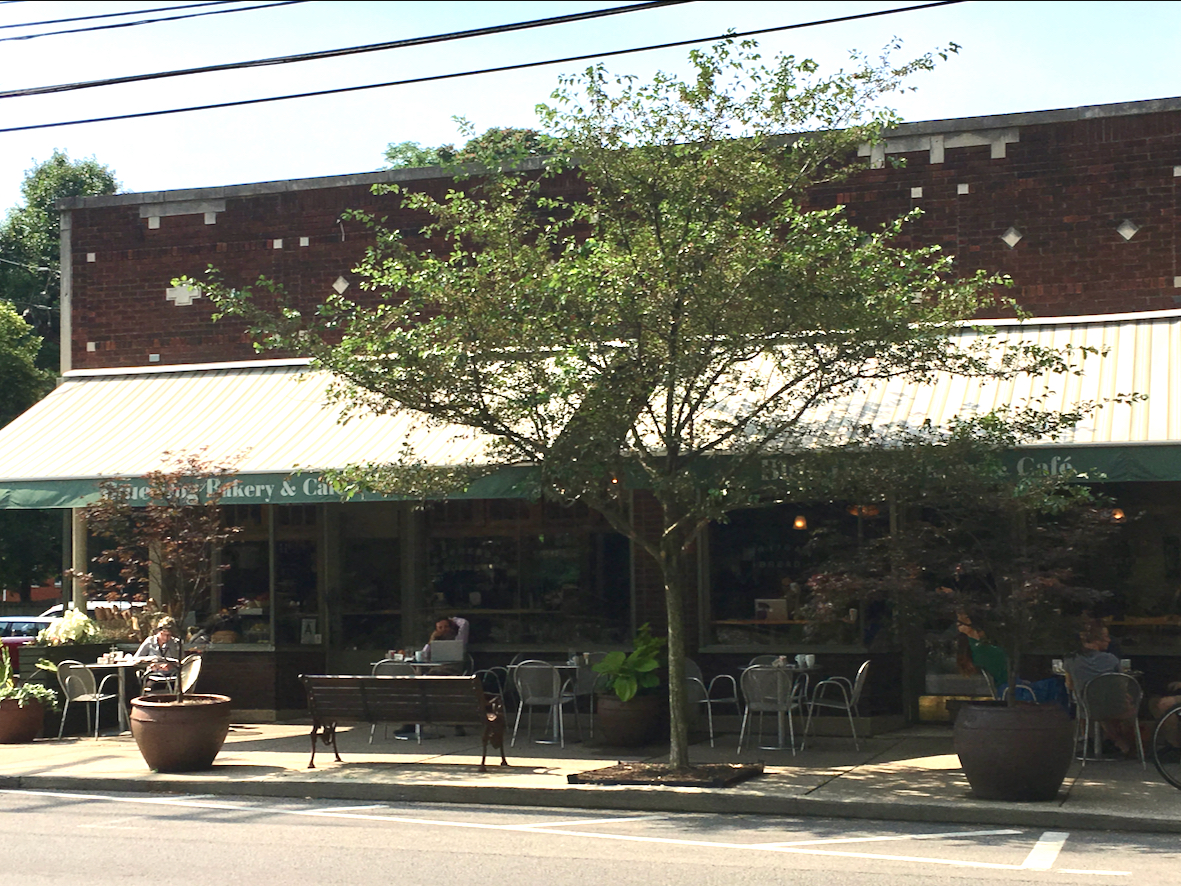
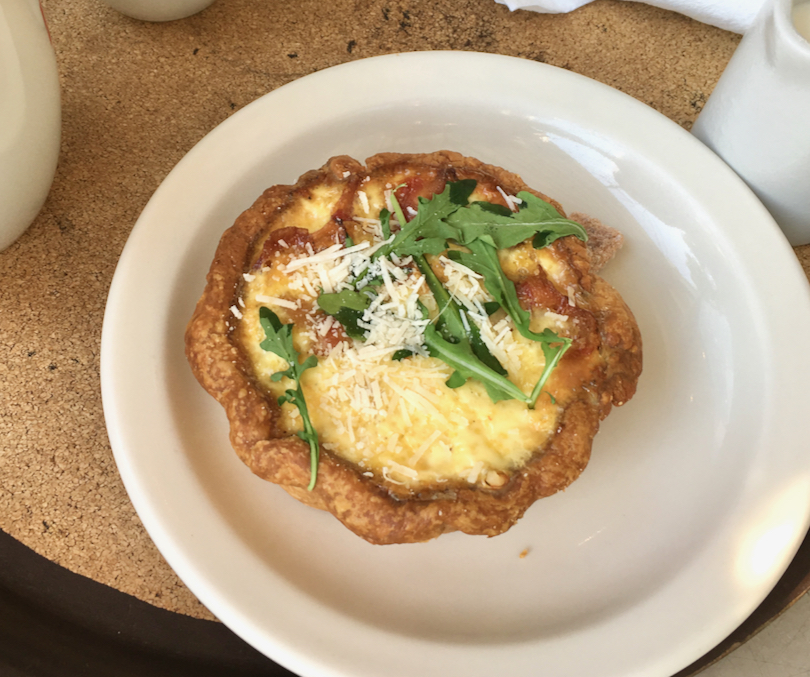
We drove in Thursday night, and Friday morning my friend had to work so Lara and I did what we do best - found the best looking bakery and settled in for coffee and pastries. Blue Dog Bakery and Cafe did not disappoint. This cute little place had amazing looking bread, delicious pastries, sandwiches, salads and more. I wanted to try pretty much everything. 

IMG_0448.jpg
IMG_2440.jpg

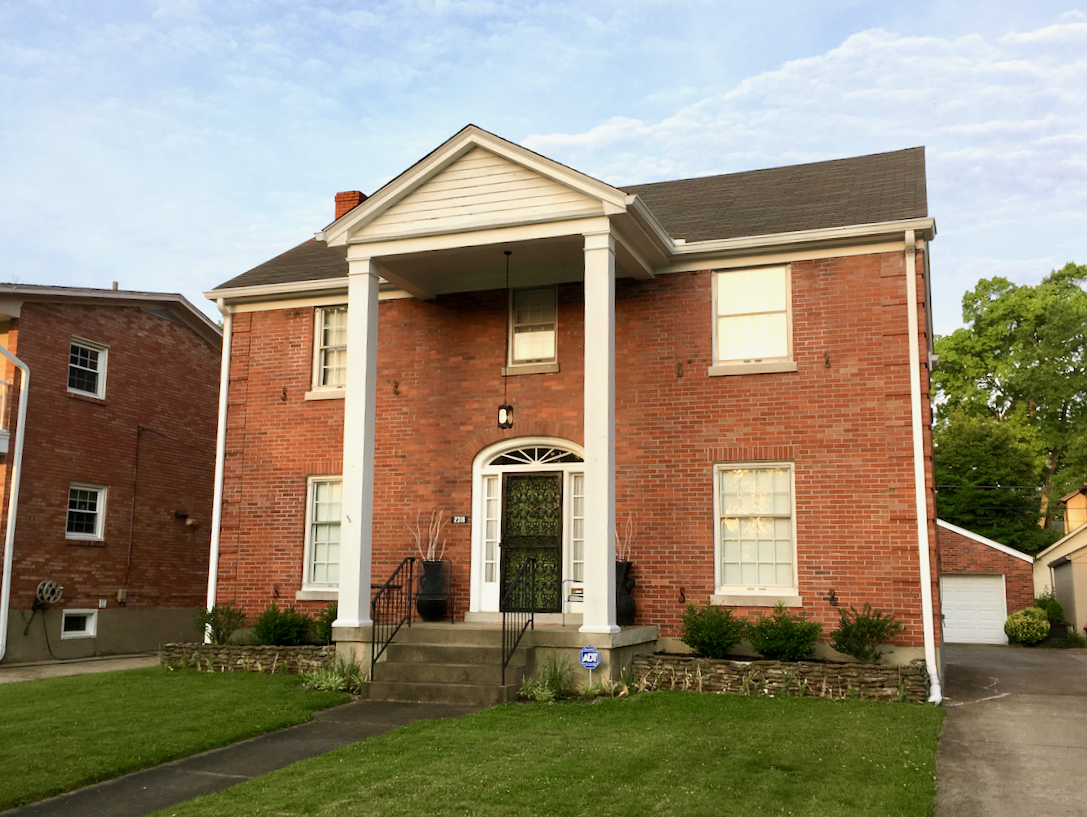
Our lovely home for the weekend. 

IMG_2439.jpg
IMG_2437.jpg
IMG_2442.jpg
IMG_2450.jpg
IMG_2446.jpg
IMG_2445.jpg
IMG_2447.jpg

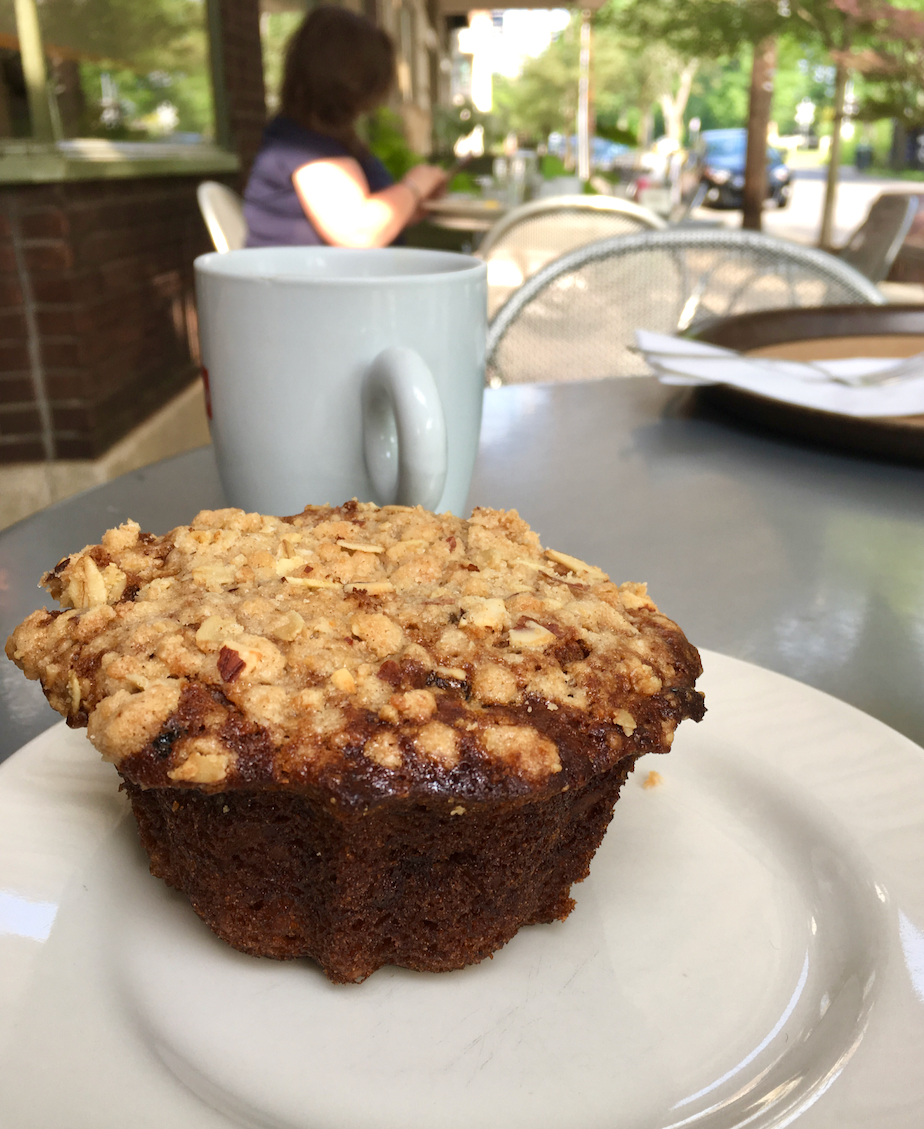
We tried out a plum ginger scone, and a morning glory muffin, both were delicious!

IMG_0448.jpg
IMG_2453.jpg
IMG_0454.jpg

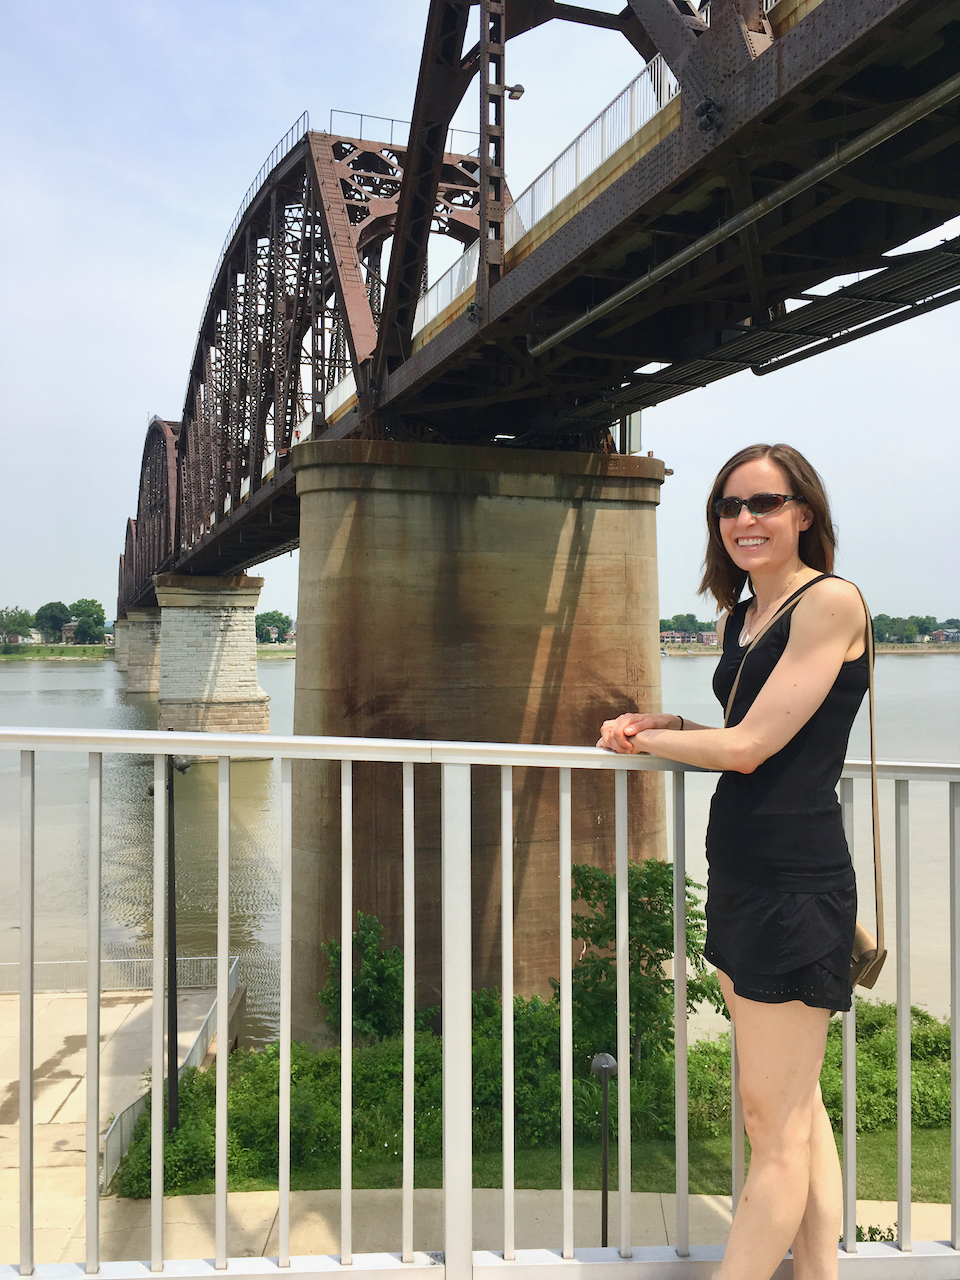
We took a stroll on the Big Four Bridge over the Ohio River to Jeffersonville, Indiana. A very cool bridge
and a fun walk, even in the 90 degree sunshine! 


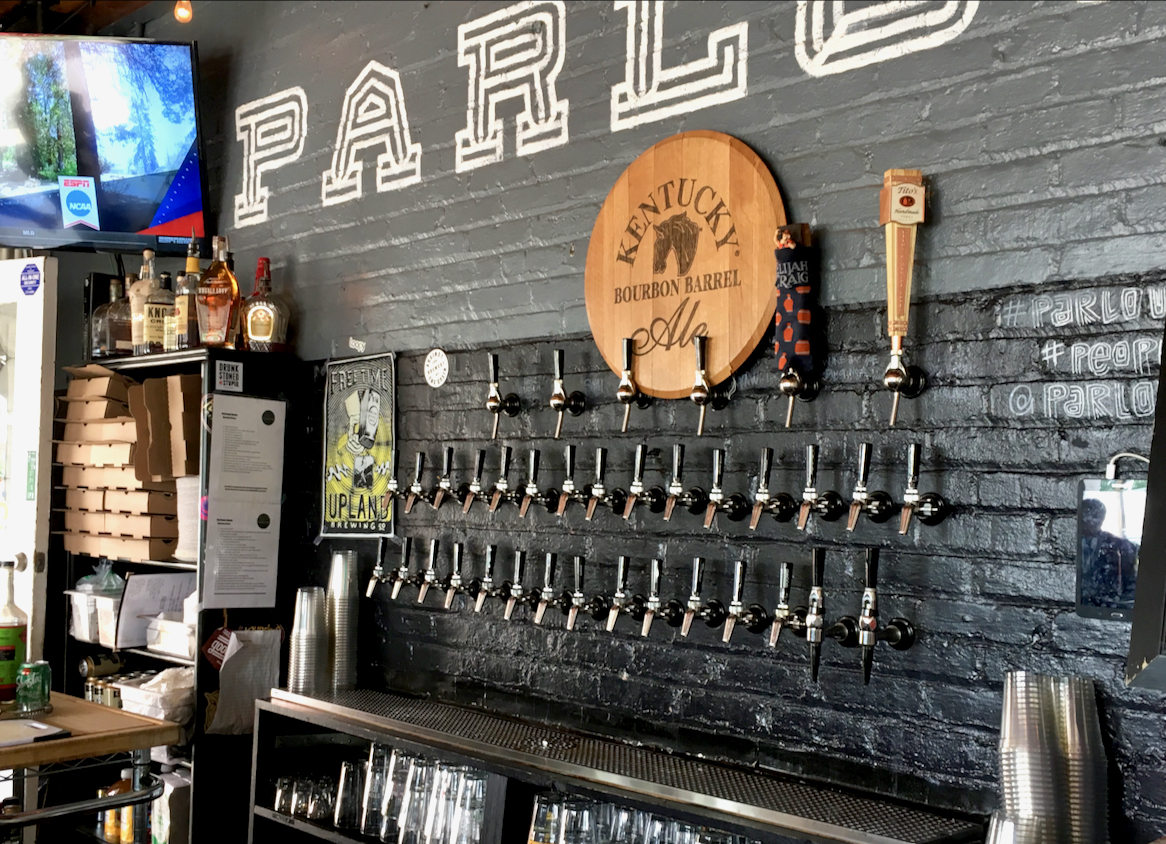
In Jeffersonville we checked out some of the shops, and then stopped for a cold beer at the Parlor. It was the perfect way to cool off after a lot of sweaty walking! Lara went for her favorite local (MI) beer, Founder's Rubaeus

IMG_2463.jpg
IMG_2469.jpg

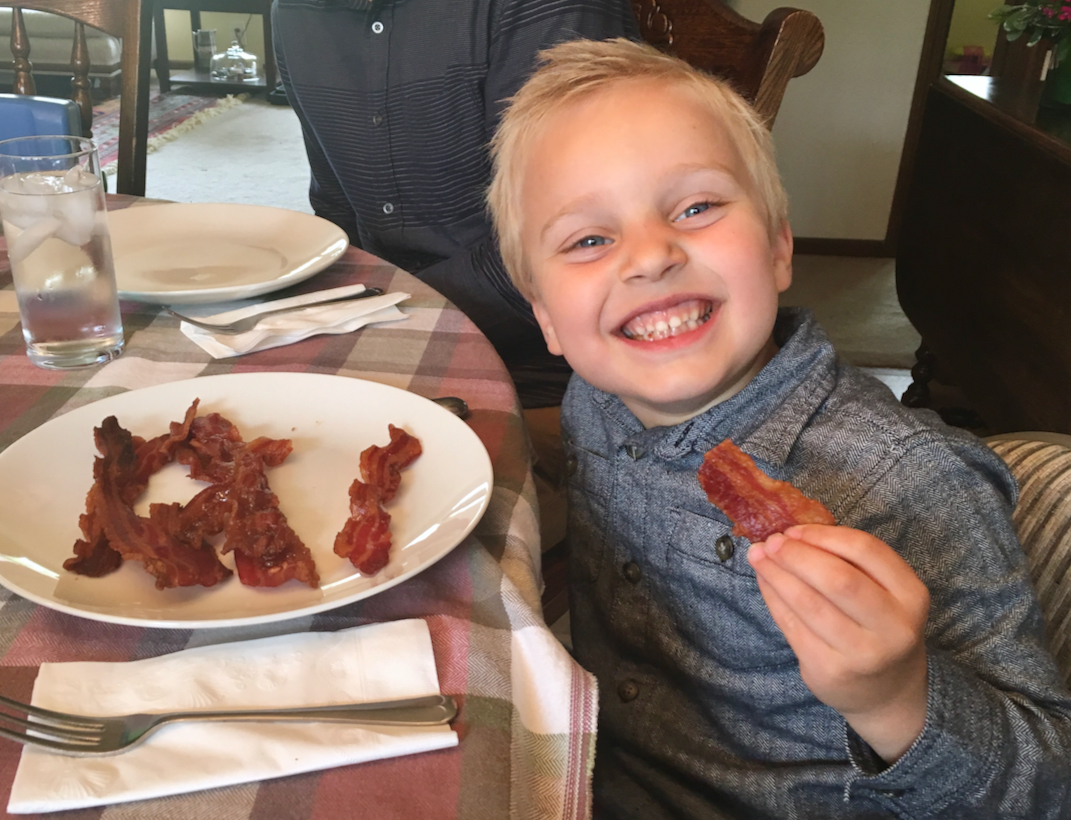
The man next to us asked if we wanted to help finish off his pizza! Um, YES!!!

IMG_2496.jpg
IMG_2472.jpg

Dinner and drinks that night at Holy Grale, a neat beer bar located in an old church. Awesome patio,
good beer, great friends! 

IMG_2482.jpg
IMG_2481.jpg
IMG_2485.jpg
IMG_2484.jpg

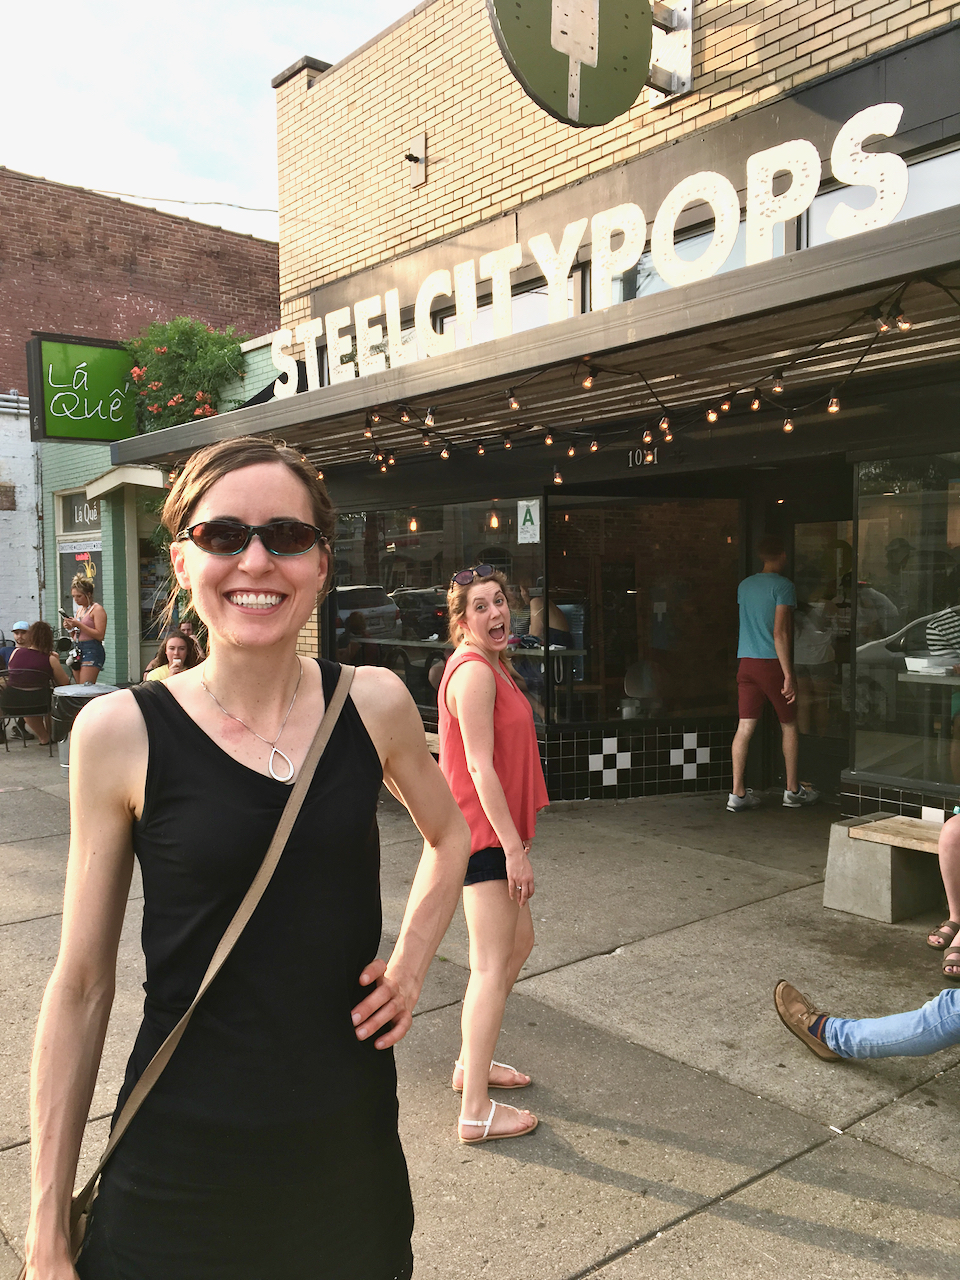
We finished off our hot day with some cool popsicles from Steel City Pops. Customized
popsicles, what a fun idea! I went with refreshing cantaloupe drizzled with chocolate. 

IMG_2491.jpg
IMG_2493.jpg
IMG_2488.jpg

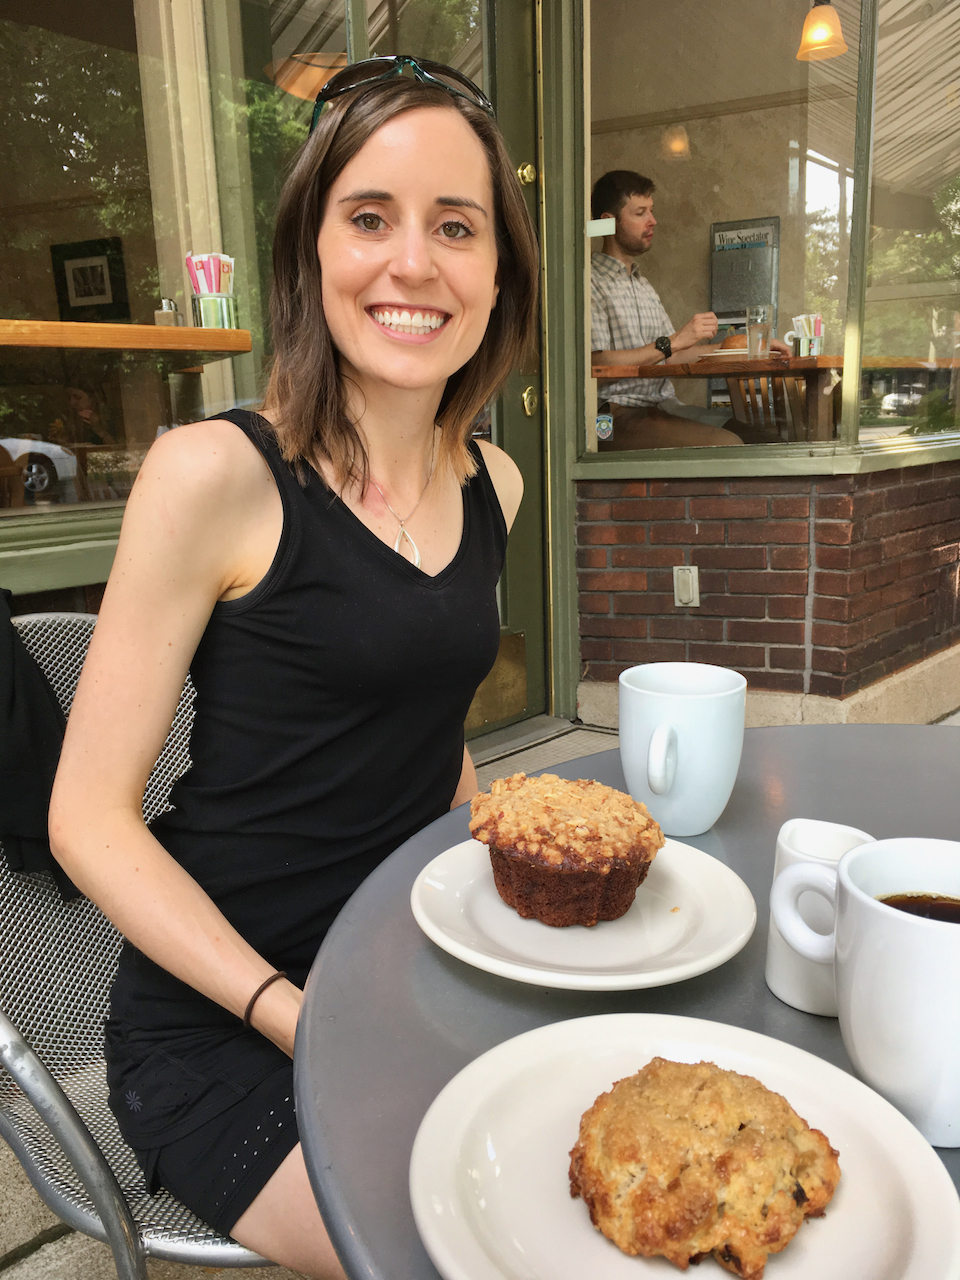
Since Lara and I are morning people, we couldn't help but head back to Blue Dog Bakery the next
morning while our hosts slept in. Then we of course had to check out one of the local farmer's markets
before heading back home. 

IMG_2511.jpg
IMG_2581.jpg

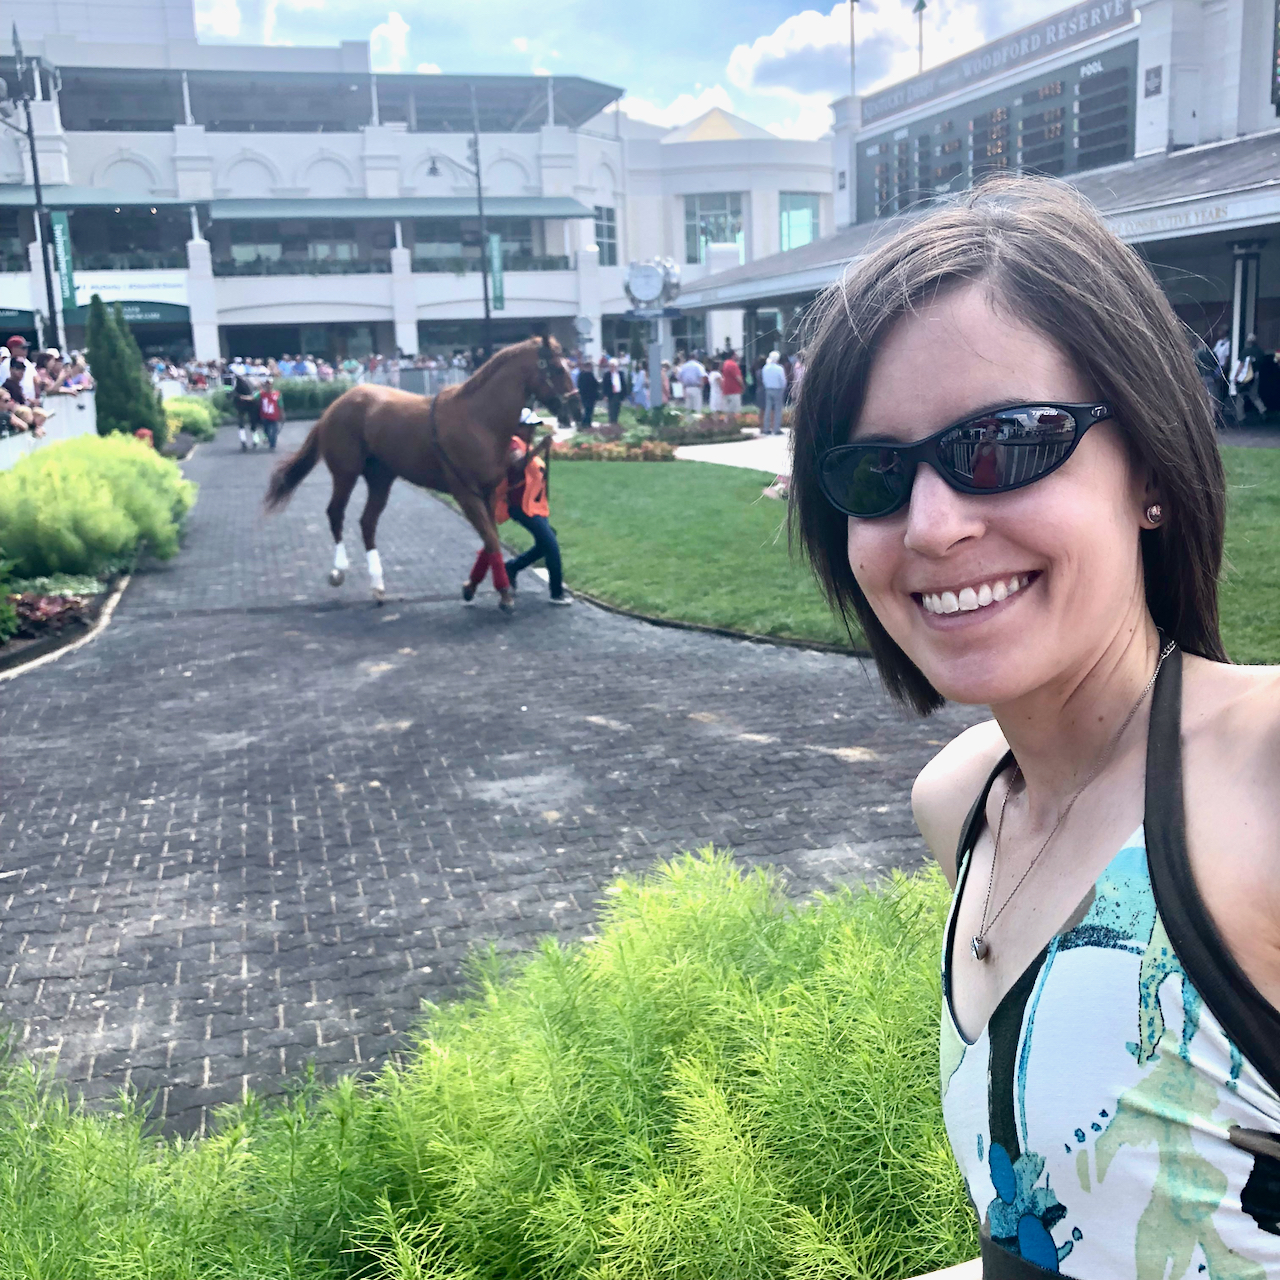
The afternoon was dedicated to the races! We went to Churchill Downs and enjoyed watching
the horses, and drinking in the history. I loved horse racing growing up so this was
kind of a dream come true! 

IMG_2528.jpg
IMG_2525.jpg

It may not have been Derby day, but we still had to wear our hats!

IMG_2573.jpg
IMG_2521.jpg
IMG_2587.jpg

And finally, dinner on our last night was at The Eagle, a southern restaurant that was the perfect choice. We started with the pickled country vegetables. A fresh bright start to the meal. For dinner I had a slow cooked pork sandwich with peppers, onions and cheese. So good. I also wanted to try the spoonbread for a side; it was cooked in an iron skillet served with maple butter. Very tasty, but I was hoping this would be a little more custard-y.  It felt more like a regular cornbread to me, still good, but not as unique. Overall a very nice experience, and a place I would go to again. 

IMG_2563.jpg
IMG_2561.jpg
IMG_2569.jpg
IMG_2566.jpg

Strawberry Rhubarb Bakewell Tart

Happy Memorial Day a week late! For pretty much my entire life, this holiday has included the local Memorial Day parade which is nothing amazing, but it's tradition and I enjoy it. A lot of local businesses, schools, churches, organizations make up this event which is basically a huge ad. But I love it! And they throw candy!! :) After the parade, my family and I have been getting together with a group of good family friends for brunch which typically includes homemade waffles and whatever else people want to bring. This is usually a good time to try out a new recipe, see how it goes over with a crowd. This year I decided to go seasonal and picked a rhubarb recipe; a strawberry rhubarb Bakewell tart. A Bakewell tart is an English pastry made up of a shortcrust pastry shell with jam and frangipane. This one used strawberry jam and then topped everything with fresh rhubarb, the best combination!

I had such a fun time making this tart. I loved layering the beautiful pink rhubarb in a herringbone pattern on top of the delicious frangipane. There are quite a few different components to this dish. None of them are especially difficult, but it does take some time to put together. I found that the amount of frangipane that this recipe made was too much from my tart pan. When making this again, I would probably cut back to 3/4 of the frangipane recipe, or even 2/3, as my frangipane overflowed all over the place. Good thing I had a baking sheet underneath the tart pan! You can see the explosion in the pictures below! It still turned out well after a little bit of clean up, no problem, just a little messy!

IMG_0716.jpg
IMG_2356.jpg
IMG_2360.jpg
IMG_2363.jpg
IMG_2357.jpg
IMG_2362.jpg
IMG_2364.jpg
IMG_2371.jpg

The saddest part of this whole Memorial Day party post is the fact that I didn't even make it to any of the festivities. I drove to my parents house in the morning to watch the parade, but as soon as I got there I was contacted by the hospital. I was on call on Memorial Day and had to turn right around and go to the hospital where I spent the next 5 hours. Sigh. I missed the parade and brunch. My sister brought my tart to lunch so everyone else could enjoy, but I did not get to join in the party. I was super bummed. But such is life. At least I got to have a fun time putting it all together!

IMG_2380.jpg

Strawberry Rhubarb Bakewell Tart
Adapted from Broma Bakery
Ingredients
For the Tart Shell (pate sucree)

  • 6 tablespoons butter, room temperature
  • 1/4 cup granulated sugar
  • 3 egg yolks, room temperature
  • 1 1/2 cups all purpose flour

For the rhubarb

  • 500 grams rhubarb, cut into short lengths (bias cut if using “herringbone” pattern on top)
  • 1 cup granulated sugar
  • 1 small orange, zested and 2 tablespoons juice
  • 8 ounces Strawberry preserves

For the frangipane

  • 12 tablespoons butter, softened
  • 3/4 cup granulated sugar
  • 1 cup (100 grams) ground almonds
  • 2 large eggs
  • 1 teaspoon almond extract
  • 1 teaspoon baking powder
  • 1/2 teaspoon salt
  • 6 tablespoons all purpose flour

Directions
For the pate sucree: With paddle attachment cream the butter and sugar together in a bowl until fluffy then beat in the egg yolks, one at a time, until fully incorporated into the mixture. Mix in the flour until it comes together as a ball of dough being careful not to overmix and then, by hand finish incorporating flour remaining at bottom of bowl.|

Form into a dis and wrap the pastry then chill for 30 minutes, but up to 1 day.

When ready to bake: Roll out, between cling wrap and fit into standard sized tart shell. Prick the dough (and rechill if it has warmed up too much) and then using baking beads or rice, blind bake at 350°F until the dough is golden brown (about 20 min).

Toss the rhubarb with sugar, orange juice, and orange zest. Let sit in fridge (up to overnight).
Spread strawberry jam over bottom of par cooked shell.

For the Frangipane: Beat together the sugar, butter, almonds, eggs, almond extract, baking powder, salt and flour until creamy. Spoon the mixture over the strawberry-rhubarb purée.

Arrange the rhubarb on top of the frangipane. If using the herringbone method, place rhubarb accordingly. Bake for 50-55 minutes, or until golden and risen. Cool in the tin until warm. 

Lemon Poppyseed Sugar Cookies

For Mother's Day a few weeks ago, I got together with my sister, and my brother and his family at my parent's house for a little after church brunch/lunch. We kept things simple, yet delicious. Lara and I provided the savory element (an asparagus ricotta stratta, so good) along with some fresh fruit, while my brother and sister-in-law brought along a sweet option and some tasty drinks. My parent's provided the space. Altogether it was delicious and low key. Really how I like it.

Now, brunch doesn't typically include dessert, at least not in my opinion, but I was itching for an excuse to do some baking so I made a batch of these lemon poppyseed cookies and brought them along anyway. I had stubbled across this recipe a few weeks back and it look so fresh and spring-y that I was dying to try it out. I'm so glad I did. It was just what I was hoping for. A thick and crackly sugar cookie with a little zing from the citrus, and crunch from the poppyseeds. Rolling each cookie in sugar before baking created a delicate crust that was perfect next to the softness of the cookie. The edges were just slightly crisp all the way around. The perfect end to our relaxing spring brunch. 

IMG_0699.jpg

I followed the recipe as written except for one small change; I increased the salt from 1/4 teaspoon to 1/2 teaspoon because I really hate when baked goods don't have enough salt and I didn't think that 1/4 teaspoon sounded like enough for this whole batch. I thought the 1/2 teaspoon was perfect. 1/4 tsp would not have been enough in my opinion. I love the combination of sweet and salty. If you're not as big of a fan of salt as I am then go ahead and use the original amount, the 1/4 teaspoon. 

IMG_0695.jpg
IMG_2313.jpg

Sweet and savory, we had it all. A little something for everyone, or a little big of everything for everyone!

IMG_2311.jpg
IMG_2308.jpg

My nephew, aka bacon boy! He was thrilled with the bacon as you can tell.  

IMG_2316.jpg

Mom had a great day spending time with the family, espeically the grandkids!! :) 

Lemon Poppyseed Sugar Cookies
Adapted from A Cozy Kitchen
Ingredients

  • 2 1/4 cups (270 grams) all-purpose flour
  • 1/4 cup (40 grams) cornmeal
  • 2 tablespoons poppy seeds
  • 1/2 teaspoon baking soda
  • 1/2 teaspoon kosher salt**
  • 1/2 cup (1 stick, 4 ounces) butter, at room temperature
  • 1 cup (200 grams) white granulated sugar, plus more for sprinkling
  • 1 1/2 teaspoons lemon zest
  • 1 1/2 teaspoons orange zest
  • 1/4 cup (50 grams) extra-virgin olive oil
  • 1 large egg
  • 2 tablespoons lemon juice
  • 1/4 cup to 1/2 cup granulated sugar, for rolling

Directions
Preheat the oven to 350 degrees F. Line a baking sheet with parchment paper and set aside.
In a medium bowl, whisk together the dry ingredients. Set aside.

In a stand-up mixer fitted with the paddle attachment, cream together the butter, sugar and zests on medium speed until well combined. Add in the oil, egg, and lemon juice. Continue mixing until pale and evenly combined, about 1 minute, scraping down the sides every so often. Add the dry ingredients to the creamed ingredients, mixing on low speed until just combined. 

Using a cookie scoop (I used a 1.5 tablespoon scoop), scoop out the dough onto the prepared baking sheet. Carefully roll or lightly sprinkle the cookies with sugar. Bake for 12 minutes, rotating the pan halfway through. Don't overbake. Let cool on the pan for a few minute before transferring to a cooling rack to cool completely. 

** I like a little extra salt in my baked goods so I increased the salt in this recipe from 1/4 teaspoon Kosher salt to 1/2 teaspoon of Kosher salt. If you are not as big of a fan of the sweet and salty combination, you may go back to the 1/4 teaspoon. Either way will be delicious. 

Yields: 26 cookies

Coffee Break

A few weeks ago I took a week staycation. It was lovely to have time off to do nothing. To refresh and recharge, and overall relax for more than a day at a time. I was hoping that by April I might have at least one or two decent days to do some stuff outside. Unfortunately, to say that the weather did not cooperate would be the understatement of the year. The entire week was so cold, and rained or snowed most days. At the end of the week we had a sleet/hail/snow storm with tons of school, church and work activities were cancelled. I was quite disappointed with the whole weather situation. But that's April in Michigan for you. You never know what you're going to get. 

Due to the nasty weather, I was able to enjoy a few extra coffee shops as there was not a whole lot else I wanted to do! It was the perfect weather for that at least. Lara and I also took a morning for a special afternoon tea at one of our favorite spots, the cutest little macaroon shop just down the street called Le bon Macaron. If you are ever in Grand Rapids, Ann Arbor or in East Lansing where their other shops are located, I highly recommend a stop for some of the best macaroons you'll ever had. They are fantastic. And the whole shop is styled in the cutest French inspired way. A pleasant way to spend a morning or afternoon. Our "tea" consisted of scones, crackers, cheese, tea, and macaroons. So good, and so fun! Overall, I tried to make the best of the less than ideal week! Good coffee certainly helps!

IMG_2114.jpg
 

Finally got over to the West side of Grand Rapids to check out a new coffee shop called Corridor Coffee. It's a very cute little place with a lot of charm. The actual coffee is not the best I've had, but I'd go back for the atmosphere for sure. And they sell some delicious local baked goods, some that are allergy friendly if that's important to you. 

IMG_2117.jpg
IMG_2140.jpg
IMG_2120.jpg
IMG_2130.jpg
IMG_2133.jpg
IMG_2135.jpg
 

Tea Time at Le bon Macaron! Such fun, and delicious! Really the best macarons I've had. They know what they're doing, and the shop is the most adorable place you could imagine. 

IMG_2134.jpg
 

Did just a little bit of work as well while on vacation. Not ideal, but at least I found a cozy place with delicious coffee to make it more palatable. Lightfast Coffee is another great place in Grand Rapids. If you look beyond the coffee in this picture you can see the lovely weather I was up against this week... ick. 

IMG_2165.jpg
IMG_2184.jpg
 

Finally a sunny day! It was cold, but beautiful! Went out for breakfast with my mom to Nonna's Pantry in Ada for some delicious baked goods. All house made and delicious. The coffee was nothing special, but altogether a lovely morning. 

Whole grain Peanut Butter Oat Cookies

Here's a no-brainer cookie to try out ASAP. Naturally sweetened, full of whole grains, healthy fat and protein. Need I say more? Well, one more important thing I suppose, they're delicious! The most important point in my book. While I love eating healthy and feeling good about my food choices, if they don't taste good I'm not interested. They have to be both. Have no fear, these cookies definitely are. I love me a hearty, filling cookie. I'm also addicted to peanut butter, and go through a Costco sized package of rolled oats on my own very quickly. These two ingredients are the star of this recipe. Add a little apple, a little banana, and a little honey and you're golden. Give it a shot and tell me if you agree! 

IMG_2147.jpg

These cookies don't have an egg or gluten which always makes me a little nervous when waiting to see how well they will stick together. These cookies pass the test with flying colors. They are nice and sturdy, not all crumbly and delicate. The peanut butter and the sweeteners help with this. You can go ahead and add in any number of mix-ins to suit your taste preferences. Obviously chocolate will be the best choice (😊) put choose your own adventure!

 
IMG_2149.jpg
IMG_2152.jpg
 

Whole Grain Peanut Butter Oat Cookies
From Delectably Mine
Ingredients

  • 1/2 cup (128 grams) natural peanut butter
  • 1/2 medium banana (about 55-60 grams), mashed
  • 1/4 cup (70 grams) applesauce
  • 1/4 cup (80 grams) honey
  • 2 cups (160 grams) old fashioned oats
  • 1 tablespoon chia seeds
  • 1/4 teaspoon salt
  • Optional add ins: chopped nuts, dried fruit, chocolate

Directions
Preheat oven to 350 degrees. Line a baking sheet with parchment paper and set aside.

In a medium bowl, mix together the peanut butter, mashed banana, applesauce, and honey until smooth and well combined. Add the oats, chia seeds and salt and mix. When mostly combined, add and additional add-ins that you desire and continue to mix until a uniform dough forms. It will be soft and sticky. 

Using a cookie scoop, or a pair of spoons, transfer dough to cookie sheet to form 10-12 cookies. Flatten the tops of the cookies with a few wet fingers if desired (the cookies will not really spread much with baking). 

Bake shaped cookies for 20-25 minutes, until edges are just slightly firm to the touch. Remove from oven and let cool on baking sheet for a few minutes. Then transfer to a wire rack to cool completely. 

Yields: 10 cookies


Chocolate Greek Yogurt Banana Bread

My sister served me this bread last week for breakfast and I enjoyed it quite a bit, so this weekend I decided to make myself a loaf. It's a wholesome chocolate banana bread made with whole wheat flour and Greek yogurt. When eating a breakfast bread, I like like having a nice thick slice; something I can really sink my teeth into. This bread is perfect for that. And topped with a little peanut butter for a little extra protein umph is my favorite way to finish it off! 

IMG_0682.jpg

I streamlined the original recipe here, just so I didn't have to use as many bowls! Mix the wet ingredients in one bowl, the wet in another and mix them together. Done. I also did what I seem to always do and cut back on the sugar from 1/2 c honey, to 2 tbs honey + 2 tbs brown sugar (so 1/4 cup total). Feel free to double this for a sweeter and more indulgent bread. 

 
IMG_0675.jpg
IMG_0677.jpg
 

Chocolate Greek Yogurt Banana Bread
Adapted from The Baker Mama 
Ingredients

  • 1 1/2 cups (180 grams) whole wheat flour
  • 1/2 cup (40 grams) unsweetened cocoa powder
  • 1 1/2 teaspoons baking powder
  • 1/2 teaspoon kosher salt
  • 1/2 cup plain Greek yogurt
  • 2 tablespoons (42 grams) honey
  • 2 tablespoons (25 grams) brown sugar
  • 1 large egg
  • 1 teaspoon vanilla
  • 1/2 cup (110 grams) milk
  • 1 cup (225 grams) mashed ripe banana; about 2 large bananas
  • 1/2 - 1 cup dark chocolate chips or chunks (optional)

Directions
Preheat oven to 350°F. Lightly grease and flour a 9x5-inch loaf pan and set aside. In a medium bowl, whisk together the flour, cocoa powder, baking powder and salt, set aside.

In a large bowl, beat together the remaining ingredients until well combined. Add the dry mixture to the wet mixture and mix with a spatula until mostly combined. Add in the chocolate chips or chocolate chunks if using, and continue to mix until completely combined with no more streaks of dry flour in the batter. Batter will be thick.

Spread batter evenly into prepared loaf pan. Press more chocolate chips into the top of the batter before baking, if desired. Bake on the middle rack of the oven for about 50 minutes, turning halfway through, or until a toothpick inserted in the center of the loaf comes out with a few moist crumbs. Let the bread cool in the pan for about 20 minutes before removing to a wire rack to cool completely and serve.

Yields: 8-10 slices

Orange and Almond Cake

I ran across this lovely recipe a few weeks ago and was very intrigued. I knew right away that I needed to try it soon, and I'm so glad I did. Today I'm sharing an interesting but simple recipe from Claudia Roden, a well loved food writer and cookbook author, especially known for her writings on Middle Easter food. What initially peaked my interest was the fact that this recipe calls for whole oranges, that you boil for several hours, and then puree directly into the rest of the batter, skin, pith, flesh and all! And besides this strange (at least to me) method, the rest of the recipe is simple, with few ingredients. Sugar, eggs, an almonds. That's basically it. 

The finished cake is dense but incredibly moist, full of texture and flavor. The whole orange imparts just a slight bitterness to the cake that is balanced nicely with just the right amount of sugar. The almonds add richness, as do the eggs which also help with the structure a little. The orange flavor is, not surprisingly, very pronounced (with whole oranges and all!). A small slice of this cake for breakfast, or after dinner for dessert, is refreshing and satisfying. Delicious on its own, or my favorite way with a nice spoonful of plain yogurt on the side for a creamy and smooth contrasting element (I decided to try this out on my own and thought it was amazing!). 

IMG_2171.jpg

I ended up halving the original recipe, and baking it into a small, 6 inch, cake. Perfect for me and a few friends. Feel free to double the quantities below and bake in a larger pan (I imagine 8 or 9 inches would be good). I highly recommend having some nice and thick plain Greek yogurt (make sure it's plain, the contrast with the sweet cake is ideal) on the side. I'm sure a little whipped cream would also be nice, but just a bit richer/heavier. 

 
IMG_2159.jpg
IMG_2179.jpg
 

Orange and Almond Cake
Adapted from A New Book of Middle Eastern Food by Claudia Roden
Ingredients

  • 1 large orange
  • 3 eggs
  • 125 grams ground almonds
  • 125 grams sugar
  • 1/2 teaspoon baking powder

Directions
Wash and boil the orange (unpeeled) in a little water for 1 1/2 - 2 hours, until very soft. Let cool. Preheat the oven to 375°F. Grease a 6 inch cake pan. 

Cut open the cooled orange and remove the seeds. Place orange in a food processor and process until smooth. Add the sugar and process again until well combined. Then add the eggs and process once more. Finally, add the almonds and baking powder and process until everything just comes together. 

Pour the batter into the prepared cake pan and bake for about 1 hour. If it is still very wet, leave it in the oven for a little longer. Cool in the pan before turning out.

Protein Breakfast Cookies with Oats and Chocolate

I'm a big fan of breakfast cookies. They are so fun, and delicious. I love being able to eat a cookie at any time of day or night. I've seen various cookie and bar recipes that incorporate some beans or legumes for a healthy protein boost and have been wanting to try it. I finally did with these cookies. They start out seemingly like a pretty typical oat cookies, but then there's a little surprise; 1/2 cup cooked white beans! It's a nice little way to add some nutrition to your breakfast, but still make it feel like a treat. 

Once these cookies bake up, it really is hard to tell that there are beans mixed in. They do taste a little different than a "normal" cookie, but not at all in a bad way. They are delicious, and are a feel-good way to start the day. Enjoy!

After I made these cookies I had a sneaking suspicion that I may have accidentally doubled the coconut oil... Oh well! I couldn't remember for sure how much I put in but it may have been 1/4 cup instead of the 2 tablespoons I call for. I'm going to have to try them again and find out. What a problem!


Protein Breakfast Cookies with Oats and Chocolate
Adapted from Foolproof Living
Ingredients

  • 1 1/2 teaspoon chia seeds
  • 1 1/2 tablespoons water
  • 3/4 cup + 2 tablespoons (70 grams) old fashioned oats
  • 3/4 cup (60 grams) oat flour
  • 1/2 teaspoon baking powder
  • 1/2 teaspoon baking soda
  • 1 teaspoon cinnamon
  • 1/2 teaspoon kosher salt
  • 1/2 can (120 grams) white beans, drained and rinsed
  • 2 tablespoons (56 grams) coconut oil
  • 2 tablespoons (56 grams) maple syrup
  • 2 tablespoons (42 grams) Greek yogurt
  • 1/2 teaspoon vanilla extract
  • 1/2 cup chocolate chips

Directions
Preheat the oven to 350 Degrees. Line a sheet pan with parchment paper and set it aside. Mix chia seeds and water in a small bowl and let it sit on the counter for 10-15 minutes.

Meanwhile, process 1 1/2 cups of the rolled oats in a food processor until it turns into flour. Transfer it to a large mixing bowl. Stir in the rest of the rolled oats, baking powder, baking soda, cinnamon, and salt. Set aside.

Place the white beans and coconut oil into the bowl of the food processor and process until creamy. Add in the chia seeds (with water), maple syrup, orange zest, applesauce, and vanilla extract. Pulse until everything is combined and it is smooth mixture.

Pour the white bean mixture over the rolled oats mixture. Add in the chocolate. Stir to combine. 

Shape the dough into 12 equal balls and place them on the prepared baking sheet. Bake for 16-20 minutes, flipping the sheet halfway through the baking process.