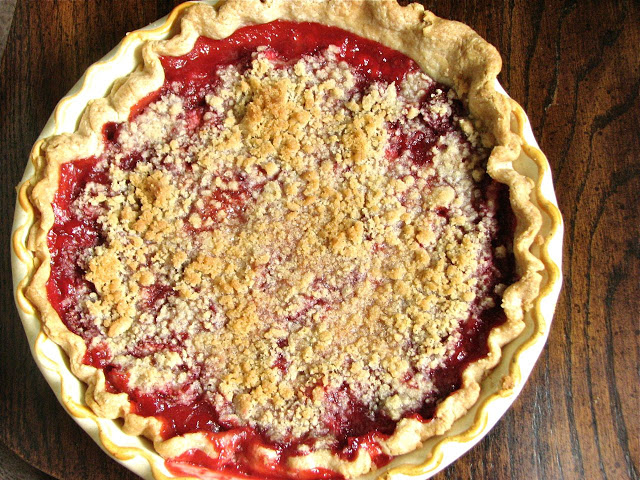
French Apple Tart

I had the opportunity to celebrate my very first friendsgiving this weekend and I had such a good time! Any excuse to get together with friends and celebrate is a good idea in my book. I got together at my friend Lindsay's condo to eat good food, have great conversation, and just enjoy being together before the busyness of the holiday season really picks up steam. We had a lovely meal, the main event being one of my all-time favorites, roasted chicken with clementines and fennel. Of course I had to make a dessert, and I decided to try my hand at a simple and elegant French Apple Tart. seasonal and beautiful in an understated way. It was the perfect way to end such a wonderful meal. 

IMG_1720.jpg

Of course I had to use local Jonagold apples from my favorite stand at the farmers market and they were perfect. The whole thing came together quite easily, and was fun to arrange. I made a frangipane to place under the apples which I think was a nice touch, but you can certainly make this without. Whatever you decide, apples, butter and sugar are always going to be a winning combination. 

 
IMG_1707.jpg
 
 
friendsgiving.jpg
 

French Apple Tart
Adapted from Alexandra Cooks
Ingredients
Pate Brisee

  • 1 1/4 cups flour
  • 1 tablespoon sugar (optional)
  • 8 tbsp. unsalted butter, cubed and chilled, divided
  • 1/2 tsp. table salt
  • 3-4 tablespoons ice water

Tart

  • 5 to 7 apples, peeled, cored, and halved (I used jonagold, but really any apple will do)
  • 2-4 tablespoons sugar
  • 4 tablespoons butter

Frangipane

  • 3/4 cup almonds
  • 2 tablespoons sugar
  • pinch salt
  • 2 tablespoons butter at room temperature
  • 1 small egg
  • 2 teaspoons vanilla, rum, brandy or bourbon

For finishing:

  • Whipped cream or vanilla ice cream, for serving

Instructions
Making the pastry: Combine flour, sugar, 8 tbsp. butter, sugar and salt in a food processor and pulse until pea­-size crumbles form, about 10 pulses. Drizzle in 3 tbsp. ice­-cold water and pulse until dough is moistened, about 3 to 4 pulses. (Do not pulse so much that the dough forms a mass — It will clump together when you form it into a disk.) Add more water if needed, but use as little as possible, just until the dough is just coming together. If you add too much water it will be tough and will shrink when baking. Transfer dough to a work surface and form into a flat disk; wrap it in plastic and refrigerate at least 1 hour, and up to three days. When ready to use, transfer dough to a lightly floured work surface. Using a rolling pin, flatten dough into a 13″ circle and then transfer to a tart pan with a removable bottom; trim edges; chill for at least 1 hour.

Meanwhile make frangipane: add all ingredients to a food processor and process until comes together into a smooth mass. This may take a little time and require some scraping down the sides of the food processor from time to time. Be patient and it will eventually come together. 

When ready to bake; heat oven to 375º. Spread a thin layer (about 2 tablespoons) of frangipane across the bottom surface of your tart shell. Working with one apple half at a time, thinly slice into sections, keeping slices together. Press sliced apple half gently to fan it out; repeat with remaining apple halves. Place 1 fanned apple half on outer edge of the tart dough, pointing inward; repeat with 7 more apple halves (or as many as you are able to fit — with a smaller tart pan, you won't be able to fit as many). Separate remaining apple slices. Starting where the apple halves touch and working your way in, layer apples to create a tight rose pattern. Fill in any gaps with remaining apple.

Sprinkle with sugar and dot with remaining 4 tablespoons butter. Place in the oven (I recommend placing a baking sheet lined with aluminum foil underneath the tart to catch any dripping butter that may otherwise fall to the bottom of the oven and burn) and bake until golden brown, about 70 minutes. Let cool completely before removing from pan and carefully transferring to serving platter. 

Strawberry Rhubarb Pie

Strawberry season is basically over, this is always a sad realization to me since strawberries are my favorite fruit. I love buying a couple quarts at the farmers market and then stuffing my face full of sweet, juicy berries because we all know that freshly picked strawberries last about a day before they start going bad. To me this means I am required to eat as many as possible because I can't let any of these early summer jewels go to waste. This is a task I attack with pleasure.

This year I definitely did my share helping out the local strawberry farmers. This sometime required me to become creative with the baskets and baskets lining my counter. I had a wonderful time figuring out what to do with all of my strawberries, what a fantastic problem! When my neighbor called and told me she had rhubarb galore and I needed to come take some off of her hands I jumped at the opportunity. I had never made a strawberry rhubarb pie, but that was all about to change. Strawberry and rhubarb are my favorite combination. The juicy sweetness of the strawberries combined with the puckering tartness of the rhubarb is a match made in heaven. I'm already looking forward to next year!

While I've been making more pies and tarts recently, I still would definitely call myself an amateur. I'm getting better, but I still have things I need to work on. Regardless, this pie turned out absolutely delicious, even if it lacks a little in the looks department. I like to think of it as rustic. In the end it really doesn't matter what the pie looks like, the most important thing is what it tastes like, and this one did not disappoint.

Note: This is a rough estimate of my strawberry rhubarb pie recipe. It was delicious, but it could definitely have used more filling, both strawberries and rhubarb. Feel free to play around with the quantities, increasing the filling until you are satisfied with it.

For the topping: this time around I didn't melt the butter, but for future use I probably would. I think you get bigger chunks of streusel then. Also, if you are a big streusel fan (like me) you'll want to increase the amount of streusel. Try doubling it perhaps!

Strawberry Rhubarb Pie

Ingredients

Pie

  • 1/2 recipe Pate Brisee (or your favorite pie dough)
  • 1 3/4 cup chopped rhubarb
  • 4 cups sliced strawberries
  • 1/4 cup granulated sugar
  • 1/4 cup brown sugar
  • 1/4 cup cornstarch
  • 1/4 teaspoon vanilla
  • 2 tablespoons Yukon Jack Liquor (or whatever you happen to have in your cupboard, this was what was in mine!)

Topping

  • 3 tablespoons room temperature butter
  • 1/4 cup brown sugar
  • 2 tablespoons granulated sugar
  • 1/2 cup flour
  • pinch salt

Directions

Preheat oven to 375 degrees. Make the filling: Mix together rhubarb, strawberries, granulated sugar, brown sugar, cornstarch, vanilla, and liquor. Set aside.

Make the crust: Roll out pate brisee to a 1/8-inch thickness on a lightly floured surface. Fit dough into a 9-inch pie plate. Place in refrigerator or freezer for 15-30 minutes, until well chilled. 

Drain excess juice from the rhubarb/berry mixture. Pour filling into chilled pie crust. Bake pie for 45-55 minutes, until crust is well browned. Remove from oven and cool. Enjoy with vanilla ice cream or lightly whipped cream. 

Almond Peach Tartlets

After making my Tomato Tart last week I had a good chunk of tart dough leftover. Not wanting to waste any of this buttery goodness I pressed the pieces I had left into a few mini tart pans and threw them in the freezer. This week I had a few peaches sitting on the counter just crying out to be used. What to do? Then, what do you know, the King Arthur Flour Baker's Companion magazine showed up in the mail with a recipe for an almond tart. Out of all of this inspiration these peach tartlets appeared. It was the perfect solution to a very wonderful problem!

I took the recipe for the almond tarts and added some delicious peaches. I love the combination of almond and peach so I knew this was going to be good. I spread the peaches on the chilled crust and then topped with the filling. It worked out quite well, but when I try it again I would try to remember to save a few peach slices to lay on top of the filling too. This would make the finished product look even better I think. But they were still delicious as they were. This is a great versatile tart that I can think will be the perfect starting point for many other delicious tarts this summer!

Almond Peach Tartlets

Adapted From 

King Arthur Flour

Ingredients

Filling

  • 1/4 cup (4 tablespoons) soft butter
  • 1/4 teaspoon salt
  • 1 cup sugar
  • 2 tablespoons Flour
  • 1 teaspoon almond extract
  • 1 teaspoon vanilla extract
  • 3 large eggs
  • 1 1/4 cups almond flour or finely ground sliced or slivered almonds
  • 3-4 peaches, cut into slices

Glaze

  • 1 cup glazing sugar or confectioners' sugar
  • 2 tablespoons milk

Directions

You'll need to start with 6 mini tart pans filled with your favorite tart/pie dough. I used some leftover  Pate brisee, but whatever you like will work. (Here's the easy press in press in crust that King Arthur Flour suggests)

To make the filling: Beat together the butter, salt, sugar, flour, and extracts. Beat in the eggs, then add the almond flour, stirring just to combine.

Lay sliced peaches onto the well chilled crust. Spread the filling over the peaches.

Bake the tarts for 18 to 24 minutes, until their tops are lightly browned. Remove from the oven, and cool in the pans.

To make the glaze: Stir together the sugar and milk until smooth.

Spread the glaze over the cooled tarts. Top with some whipped cream or a scoop of ice cream if desired.

Yield: 6 mini tarts.

Tomato Tart

While it's not tomato season yet in Michigan, the farmers market is starting to have some very nice greenhouse tomatoes that are actually pretty good. I've picked up a few over the last couple weeks and have been quite happy with them, on sandwiches or salads. Over the winter I've forgotten how much I love having fresh tomatoes around, they are so useful and so delicious. They may not be fresh from the garden, still warm from the sun tomatoes, but I am happy with them for now, and they worked perfectly in this tomato tart.

This tart is basically just a pizza in a different form, and it was delicious. Spreading an entire head of roasted garlic on the crust is a brilliant start. Since I had mozzarella in the freezer, I used that instead of the Fontina which was called for. I would have loved to use Fontina, but the mozzarella was still very good. Fresh basil on top was the perfect finishing touch. I thought this tart was just wonderful, and I can't wait to make it again with my very own tomatoes, fresh from the garden.

Tomato Tart
From Martha Stewart's Baking Handbook
Ingredients

  • 1 head garlic

  • 3 tablespoons extra virgin olive oil

  • All purpose flour for dusting

  • 1/2 recipe Pate Brissee (recipe follows)

  • 3/4 cup grated Fontina or mozzarella (about 3 ounces)

  • 1 1/2 pounds ripe but firm tomatoes, sliced 1/4 inch thick

  • course salt and freshly ground pepper

  • 12 fresh basil leaves

Directions
Preheat oven to 350 degrees. Place the garlic on a piece of foil; drizzle with 1 tablespoon of the olive oil. Fold the foil up around the garlic, sealing the edges, and place on a baking sheet. Roast in the oven until golden brown and the tip of a sharp knife easily pierces the flesh, about 45 minutes. Remove from oven and set aside.

Raise the oven temperature to 450 degrees. When garlic is cool enough to handle, squeeze the clovees out of their skins and into a small bowl, mash with fork and set aside.

On a lightly floured work surface, roll out the dough to a 13 inch round, about 1/8 inch thick. Fit the dough into a 10 inch fluted tart pan with removable bottom, pressing into the edges. Using a rolling pin or a sharp paring knife, trim dough flush with the top edge of the tart pan; chill tart shell until firm, about 30 minutes.

Spread roasted garlic evenly on the bottom of the chilled shell. Sprinkle with 1/4 cup cheese. Arrange the tomato slices in an overlapping circular pattern on top of the cheese, working from the out edge toward the center. Season with salt and pepper. Sprinkle with remaining 1/2 cup cheese, and drizzle with remaining 2 tablespoons oil.

Reduce oven temperature to 425 degrees. Bake tart until crust is golden and tomatoes are soft but still retain their shape, 45 to 55 minutes. Cool on a wire rack for 20 minutes. Thinly slice basil leaves lengthwise. Sprinkle tart with basil, and serve warm.

Pate Brisee
Ingredients

  • 2 1/2 cups all purpose flour

  • 1 teaspoon salt

  • 2 sticks (1 cup) unsalted butter, cold, cut into small pieces

  • 1/4 cup ice water, plus more if needed

Directions
In the bowl of a food processor, combine flour and salt; pulse to combine. Add the butter and pulse until mixture resembles coarse crumbs with some larger pieces remaining, about 10 seconds. (To mix by hand, combine dry ingredients in a large mixing bowl, then cut in butter with a pastry blender or two fork.)

With the machine running, add the ice water through the feed tube in a slow, steady stream, just until the dough holds together with out being wet or sticky. Do not process more than 30 seconds. Test by squeezing a small amount of the dough together; if it is still to crumbly, add a bit more water, 1 tablespoon at a time.

Turn out the dough onto a clean work surface. Divide in half, and place each half on a piece of plastic  wrap. Shape into flattened disks. Wrap in plastic, and refrigerate at least 1 hour, or overnight. The dough can be frozen for up to 1 month; thaw overnight in the refrigerator before using.