100% Whole Wheat Dinner Rolls with Tanzhong Starter

I haven’t been making all that much bread recently. Once the kitchen reno commenced in Jan I didn’t bake bread for months. Once the kitchen was done I just didn’t get back into it. There were so many other things to do in the kitchen! I’ve also just been eating less bread for various reasons. I don’t think bread is bad or evil, but I try not to eat too much of it, even though I love it so much!

I was thinking ahead to Thanksgiving next week though and stumbled across this recipe. I like a nice dinner roll on Thanksgiving, but I do try to stay away from white squishy bread, so when I saw this recipe for 100% whole wheat rolls I wanted to give it a try. 100% whole wheat anything is tricky, and especially in a yeasted bread. This recipe used the Tanzhong method which I have wanted to try for years so I thought I’d give it a go and see how it went. I’ve heard that using a Tangzhog started can help keep bread softer and moister which sounded ideal for 100% whole wheat.

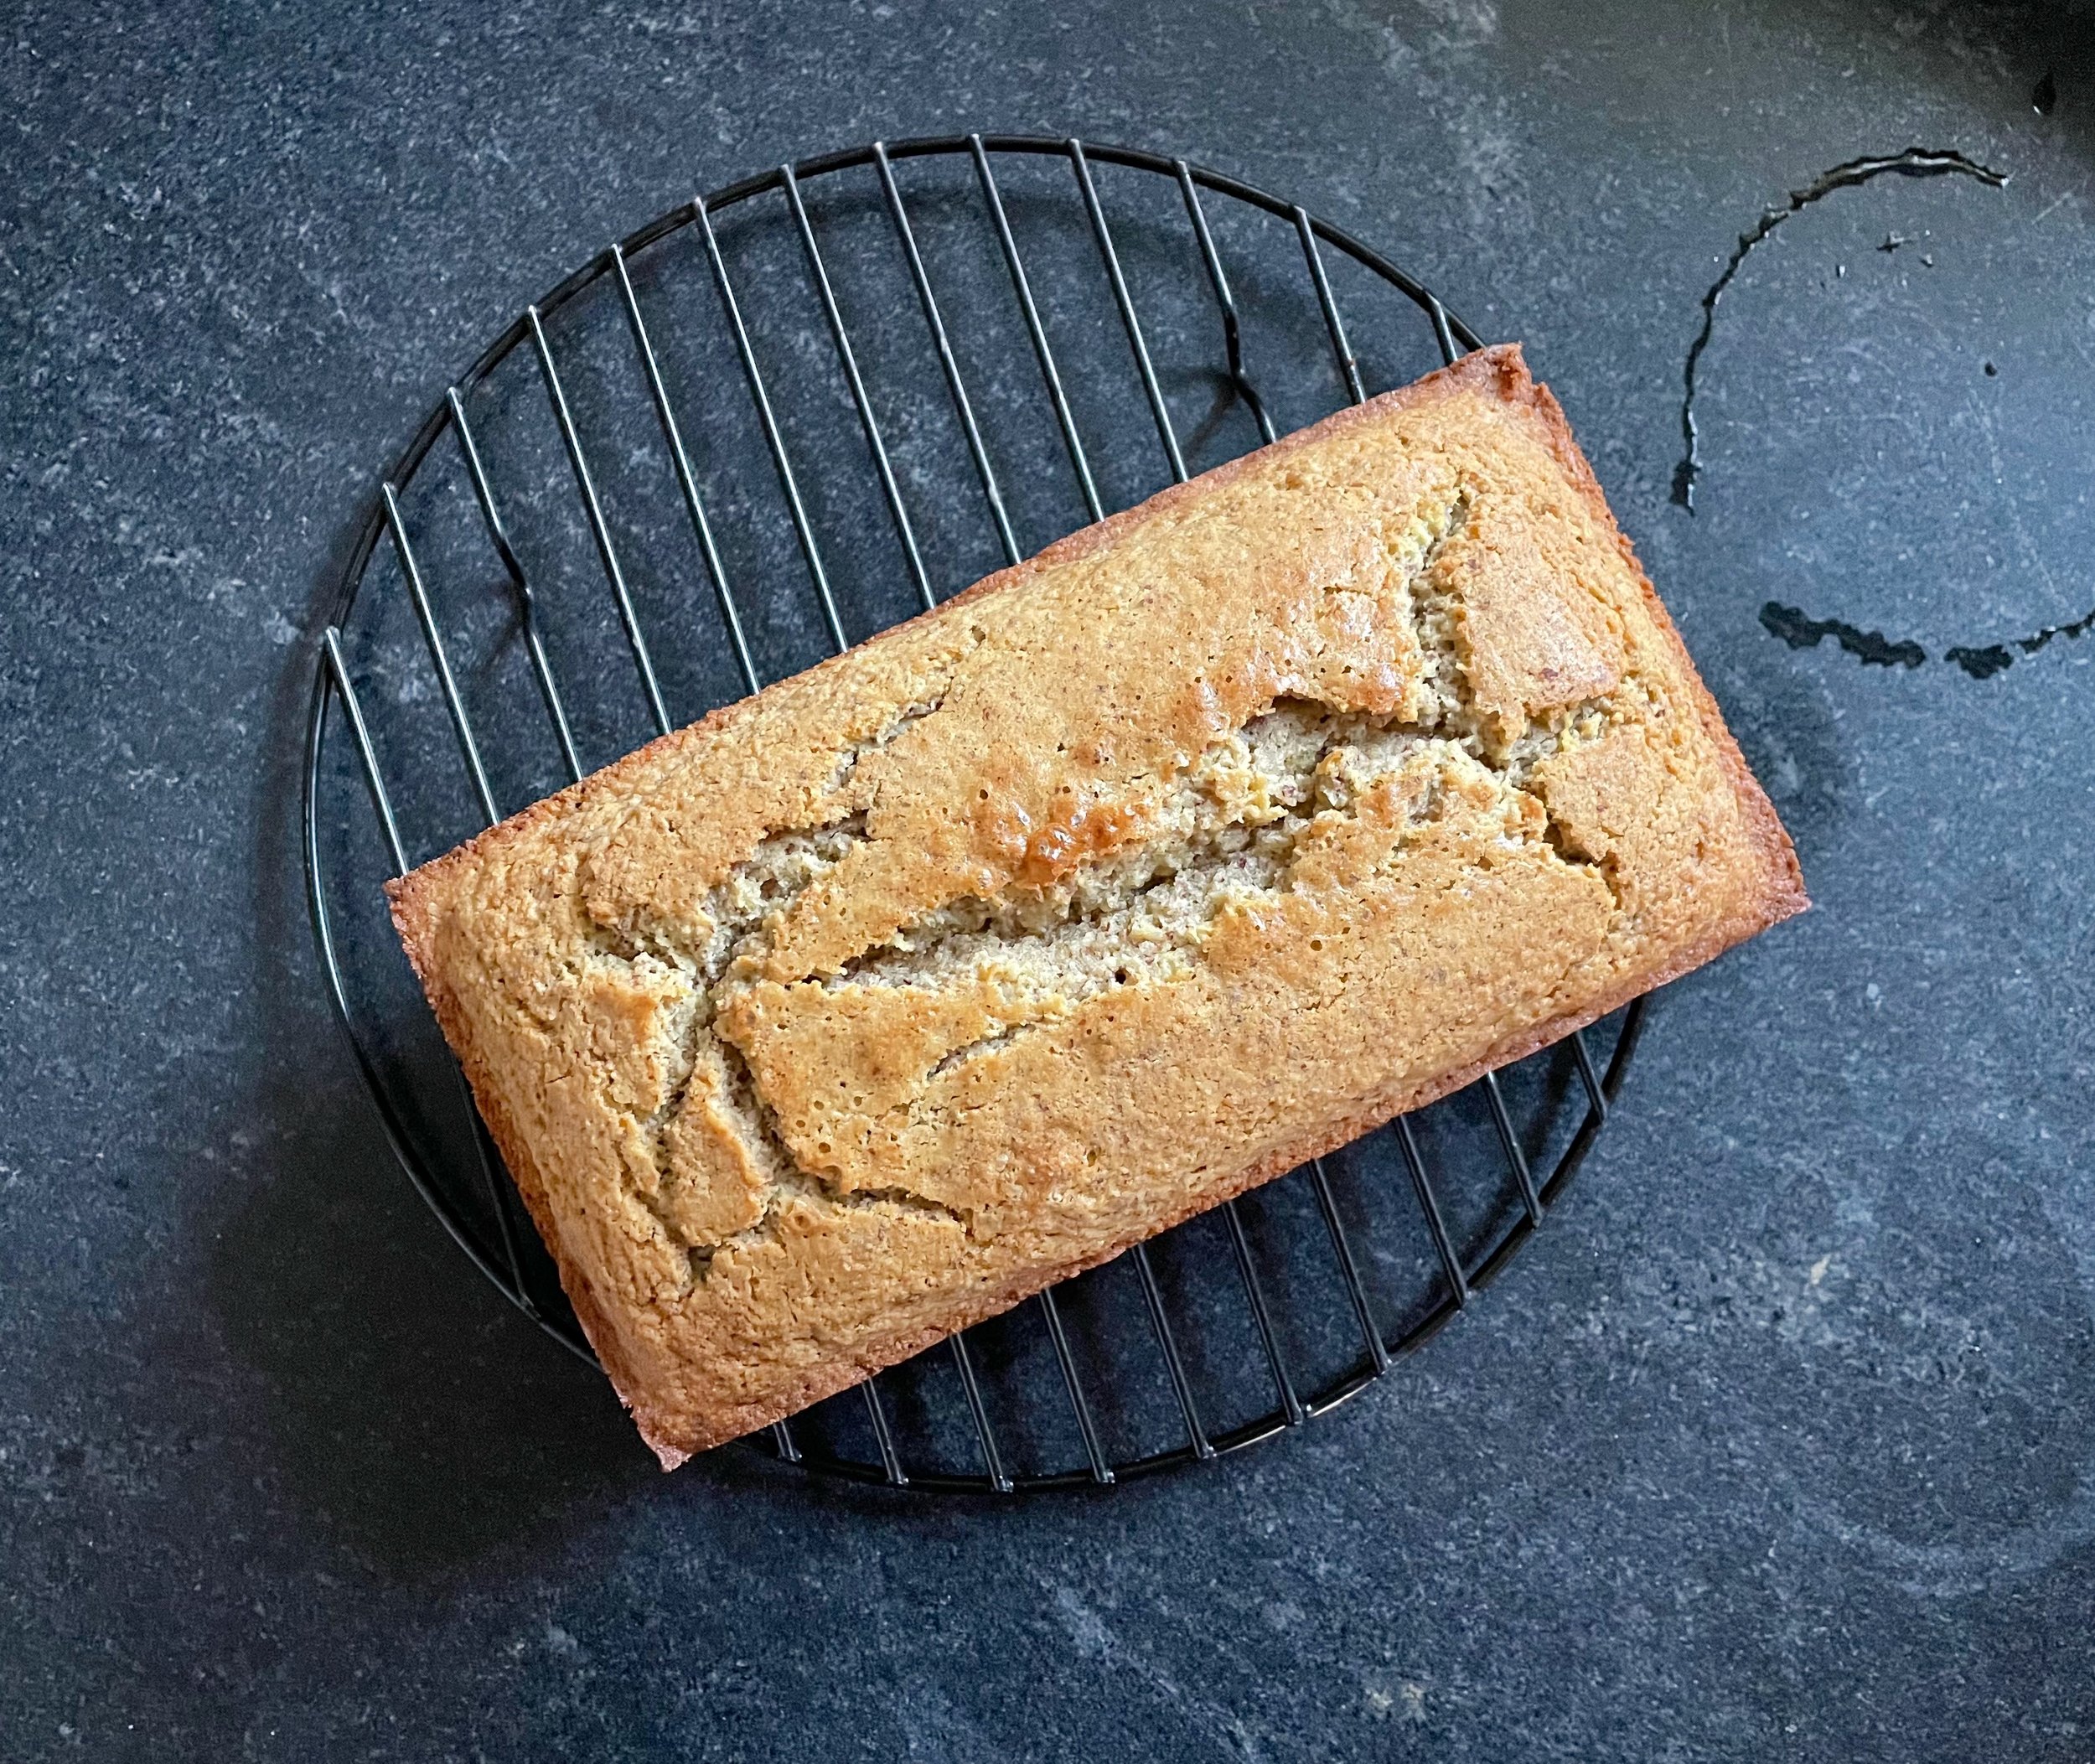
The recipe was super simple and came together from start to finish in less than an afternoon. You can start these after lunch and have them done at dinner! I found them to be fun to make, they came together well although I did have to add significantly more flour than the recipe called for when kneading so be forewarned. Otherwise no issues. They rose well, were easy to shape, and had good oven spring.

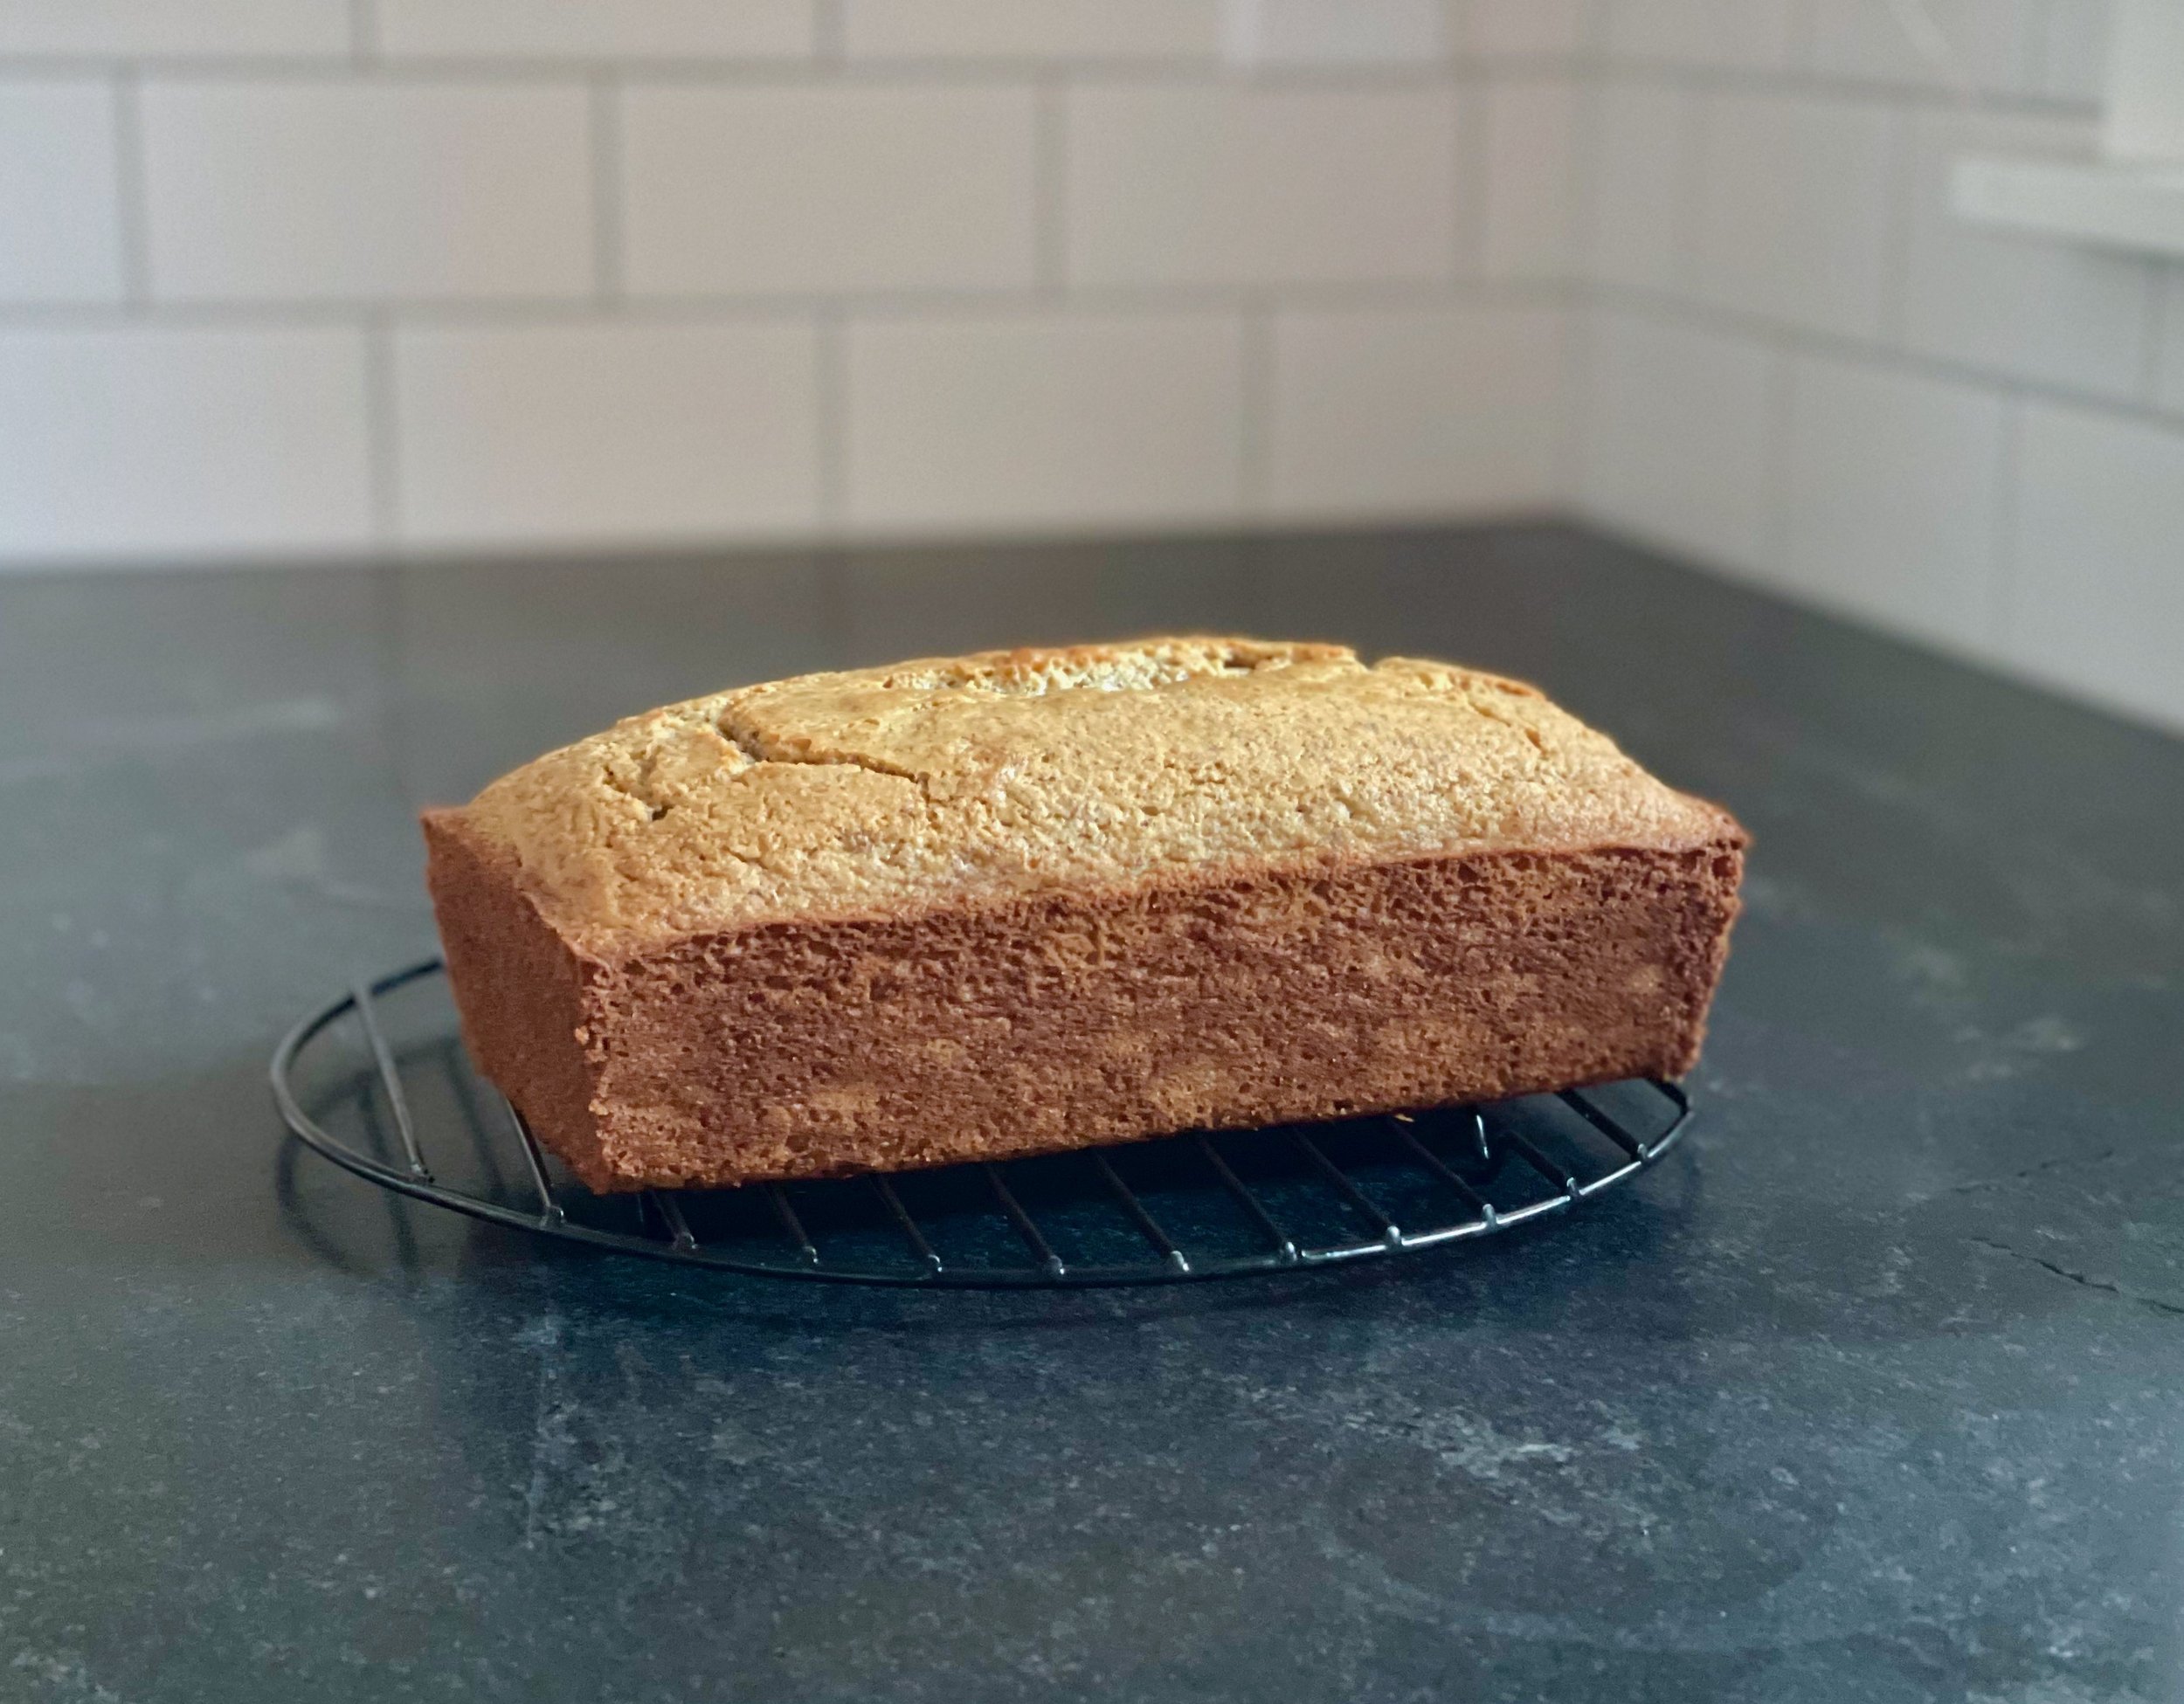
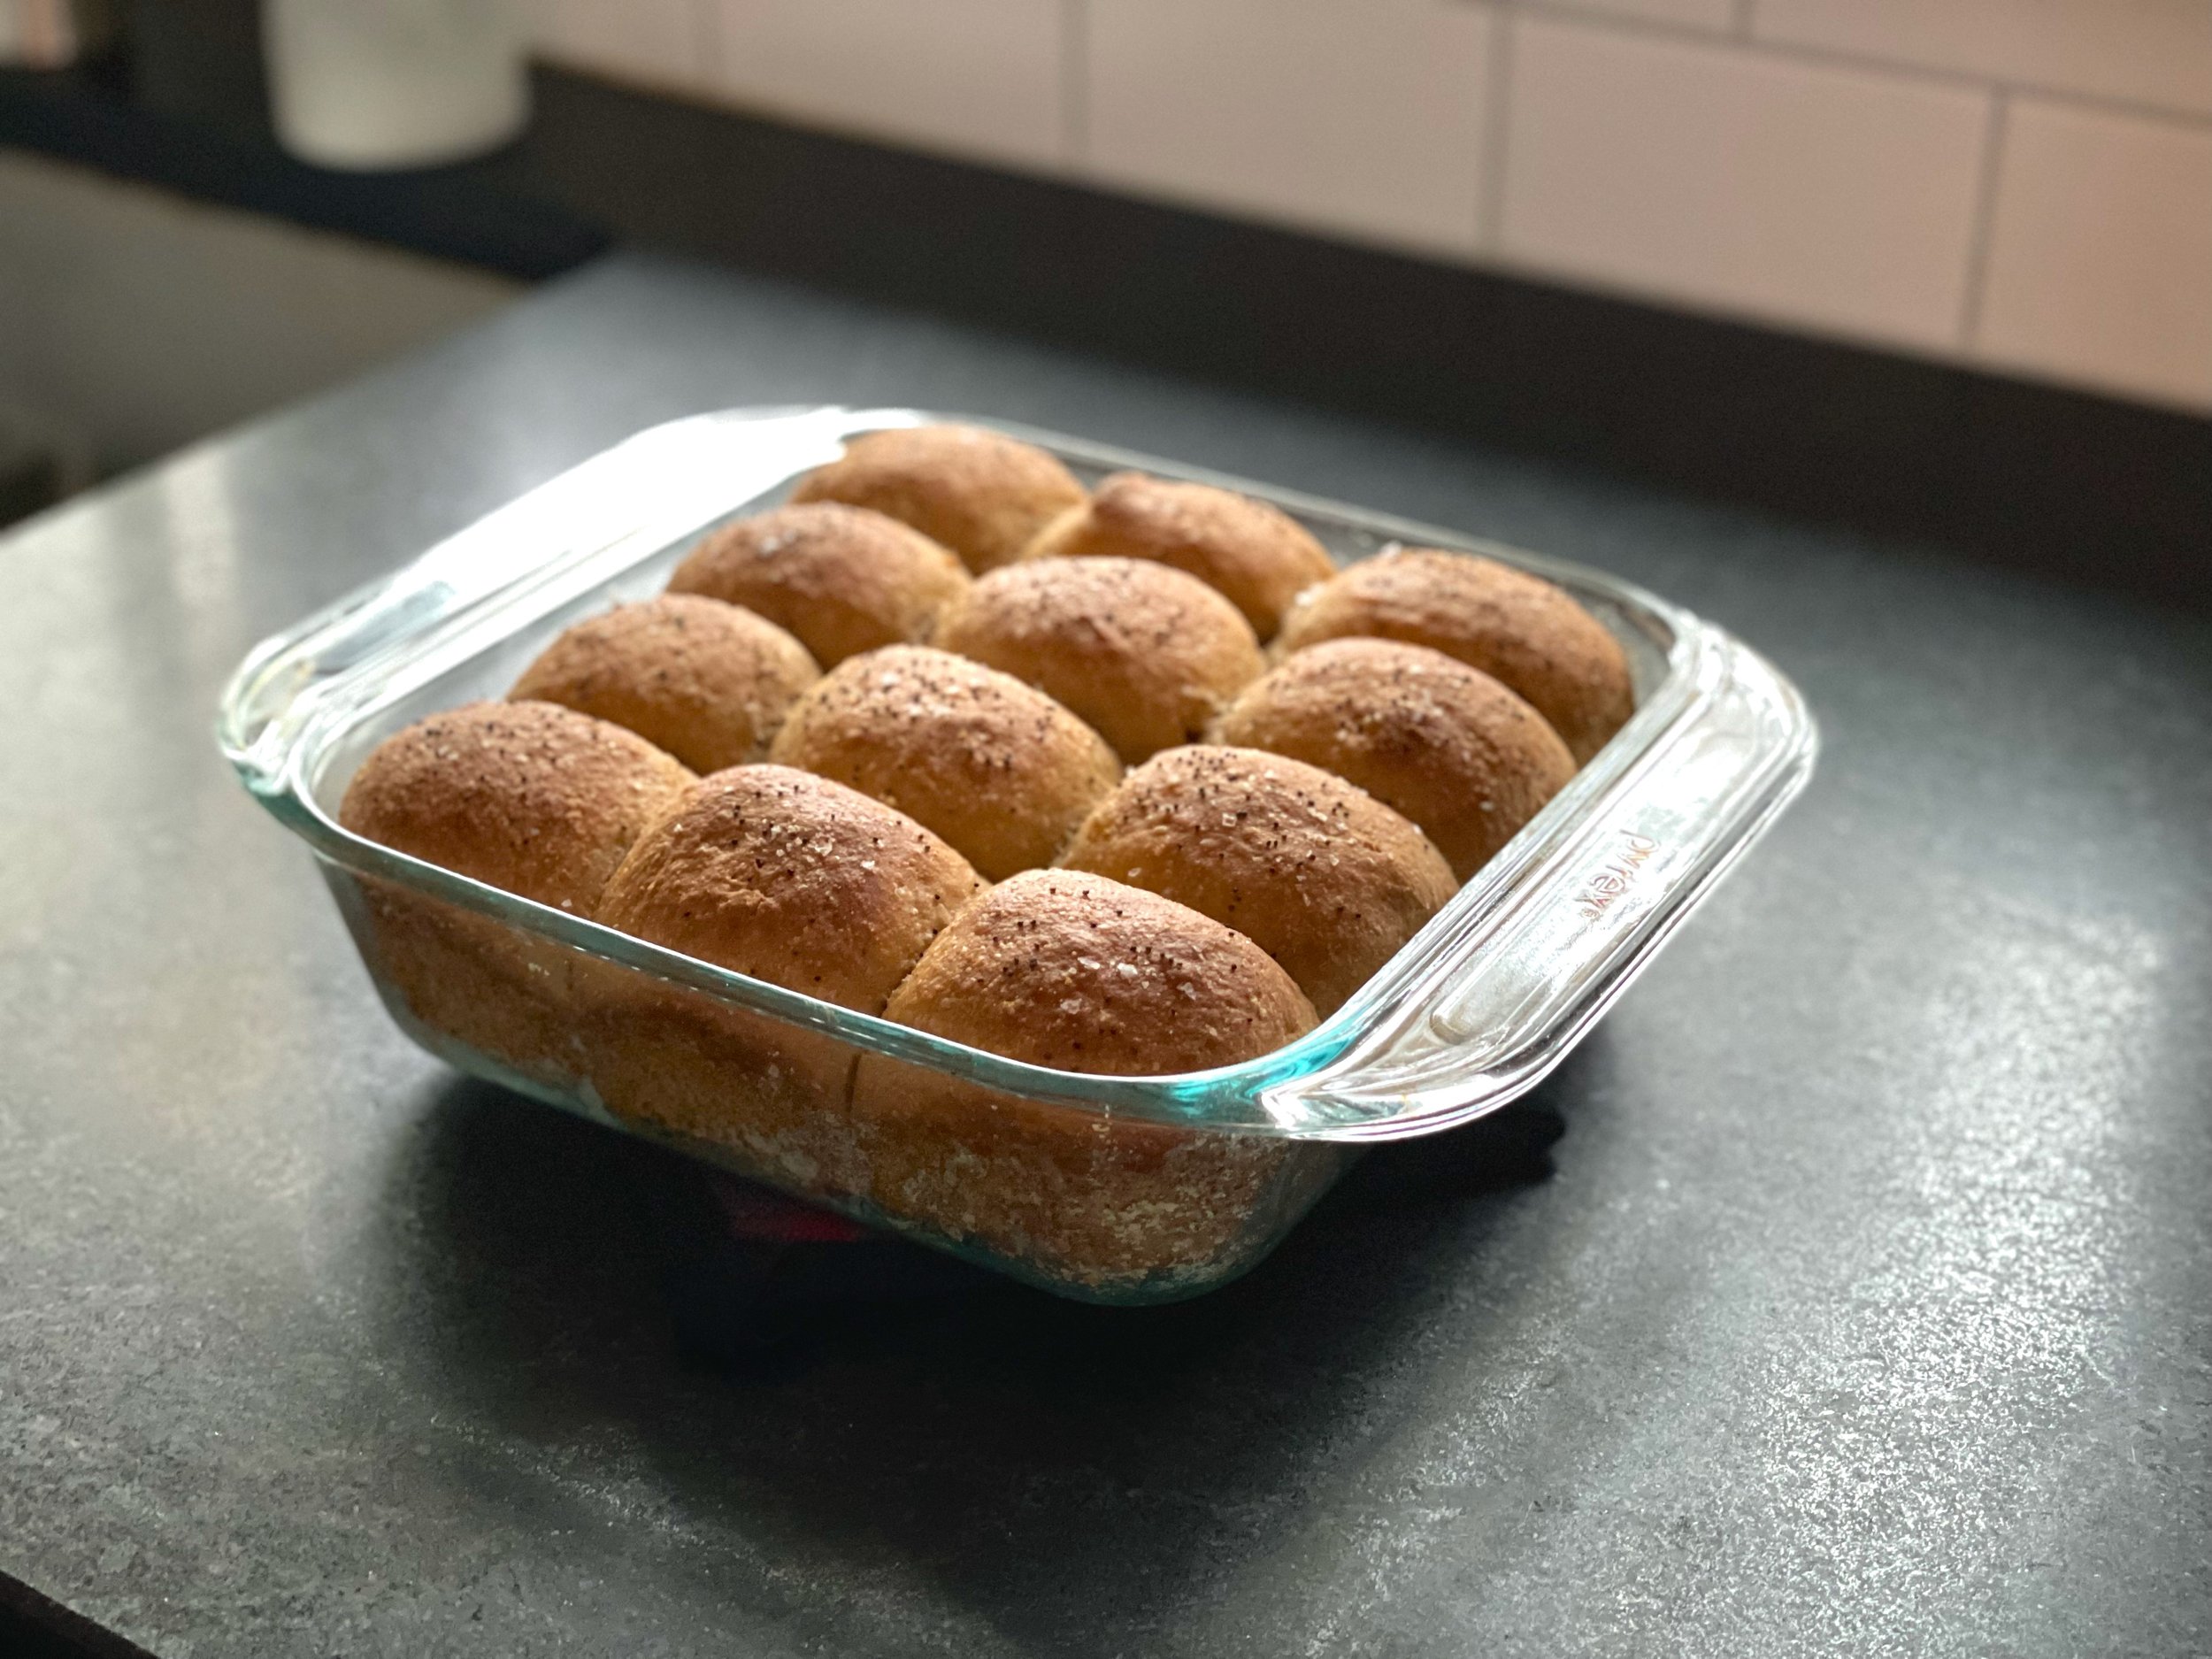
I did end up baking them quite a bit longer than the recipe called for as well. Closer to 35-40 minutes (recipe said 20-22 minutes). I did this because of the internal temperature of the bread. I’ve heard that 100% whole wheat bread should be closer to 200 degrees, and it wasn’t even close to this after 22 minutes. I think they definitely needed more than 22 minutes, but maybe not quite 35-40? I’ll have to test it again to see!

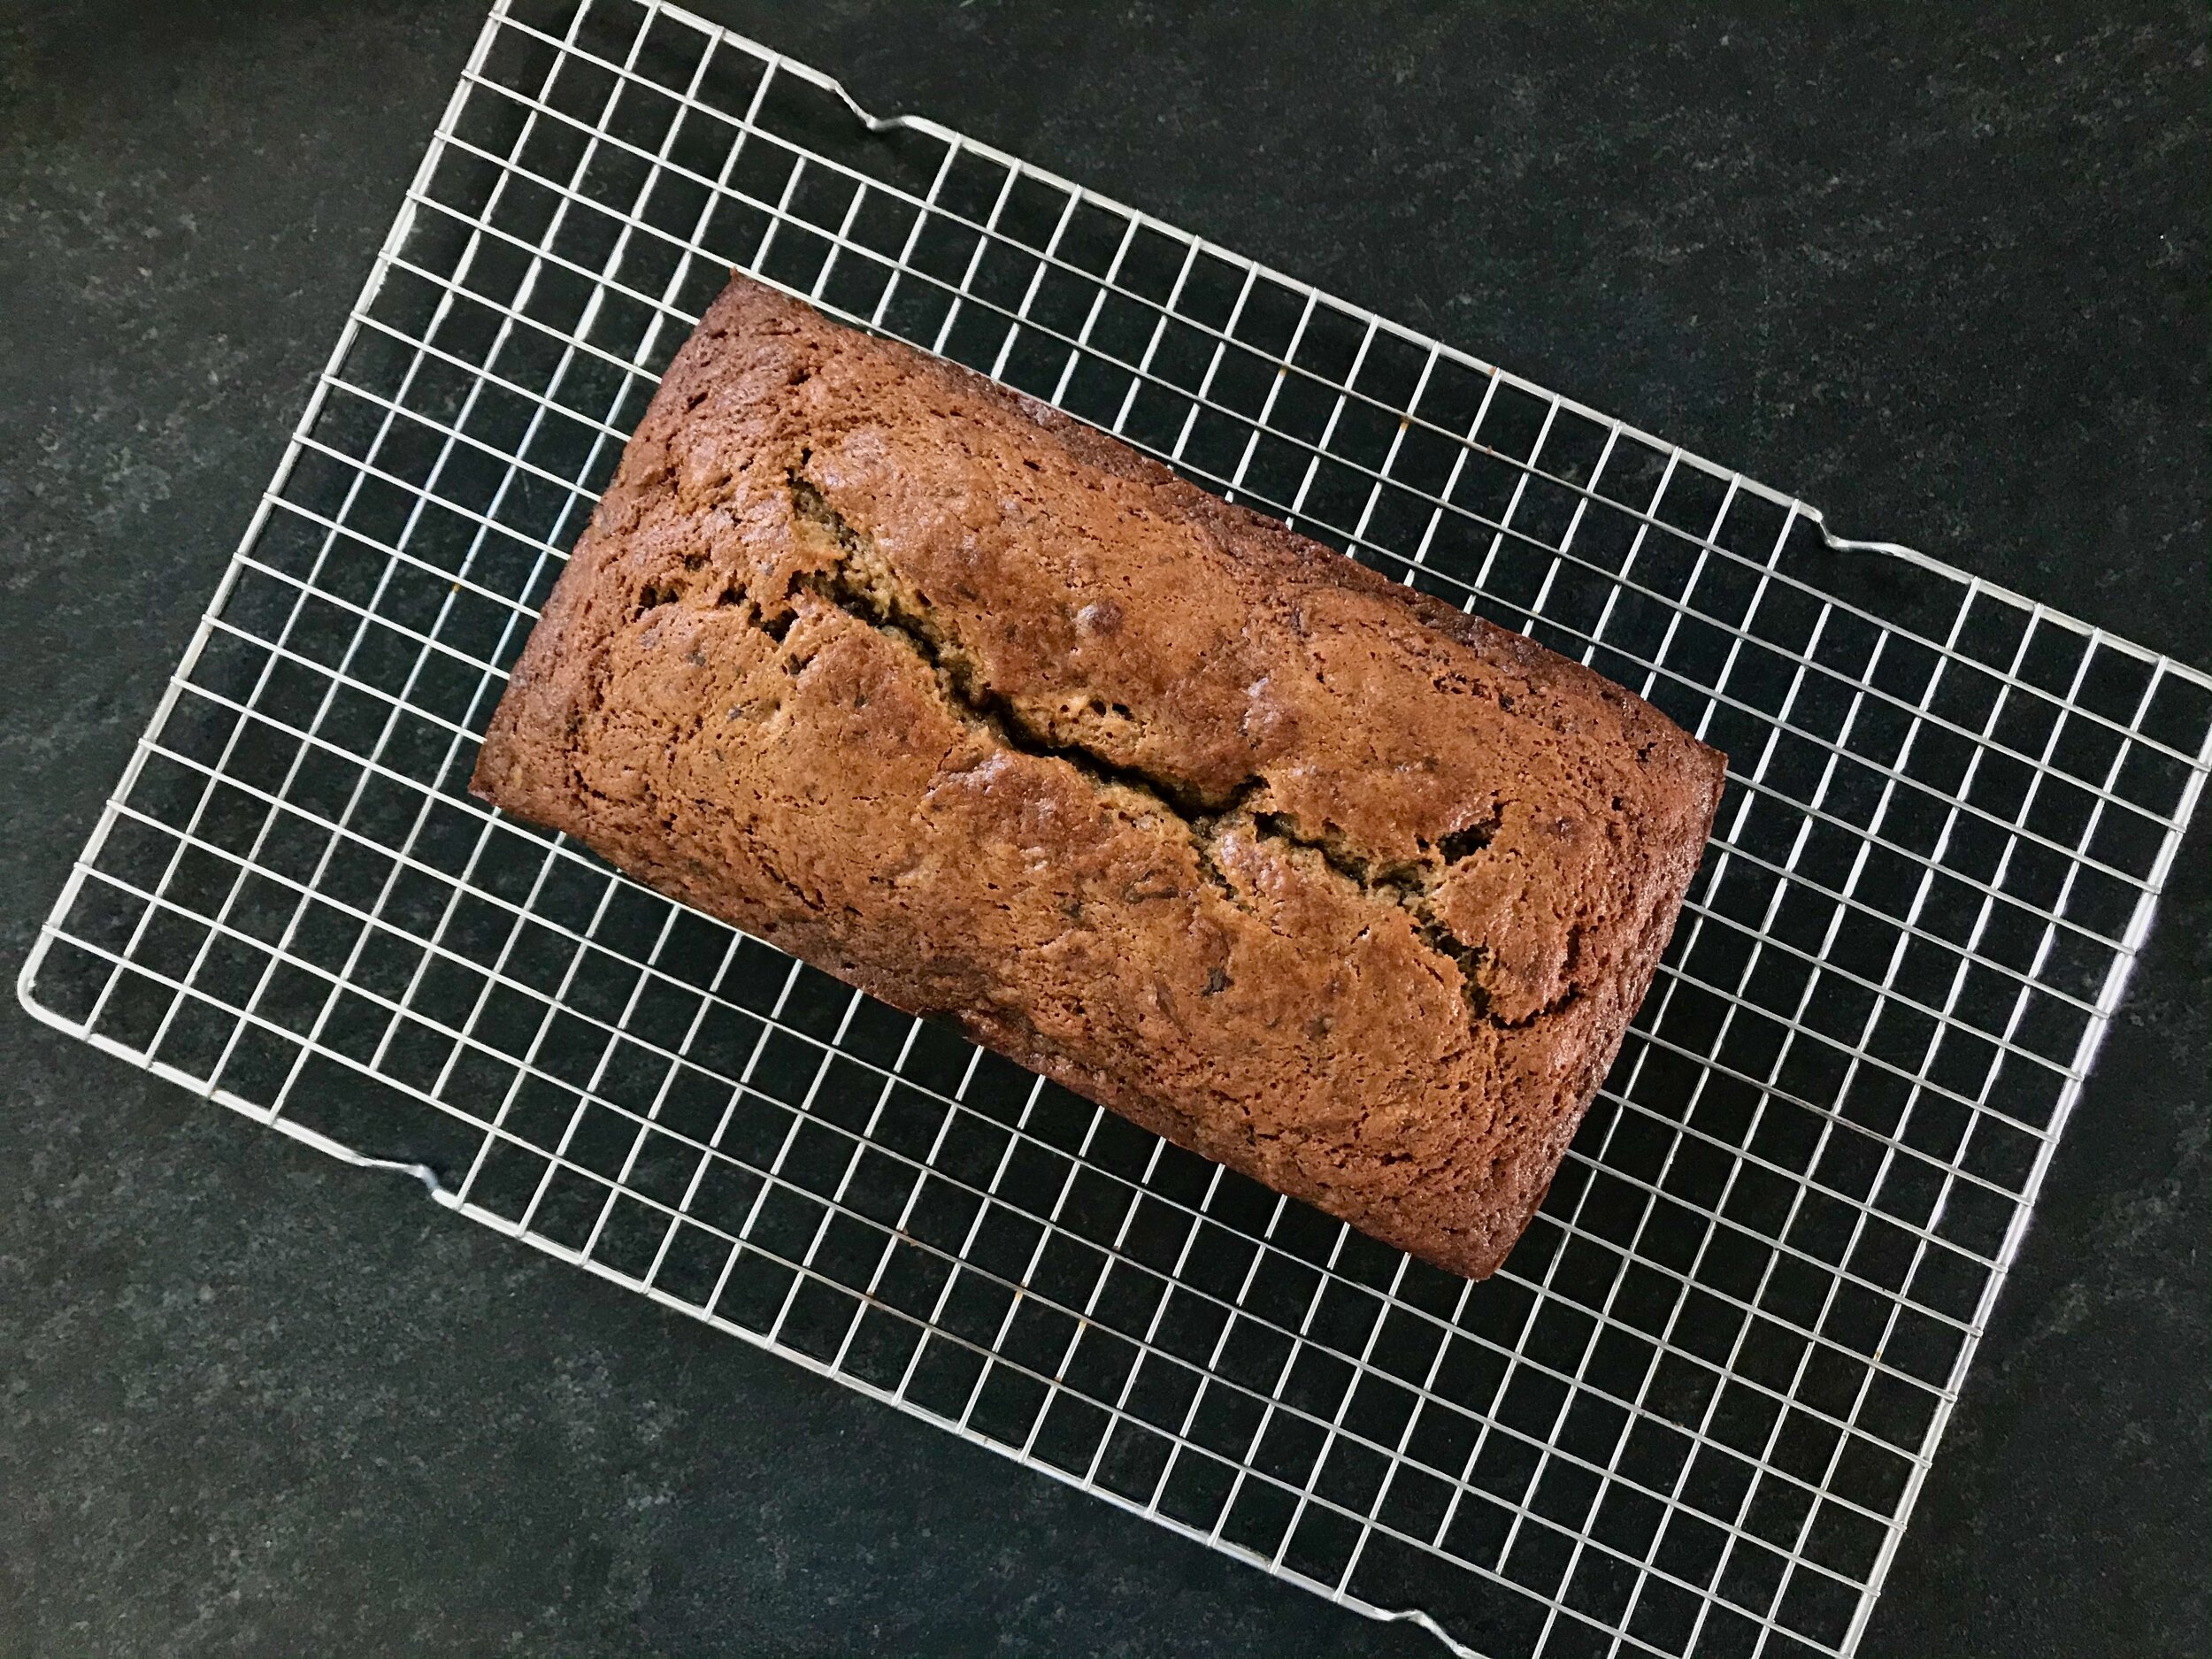
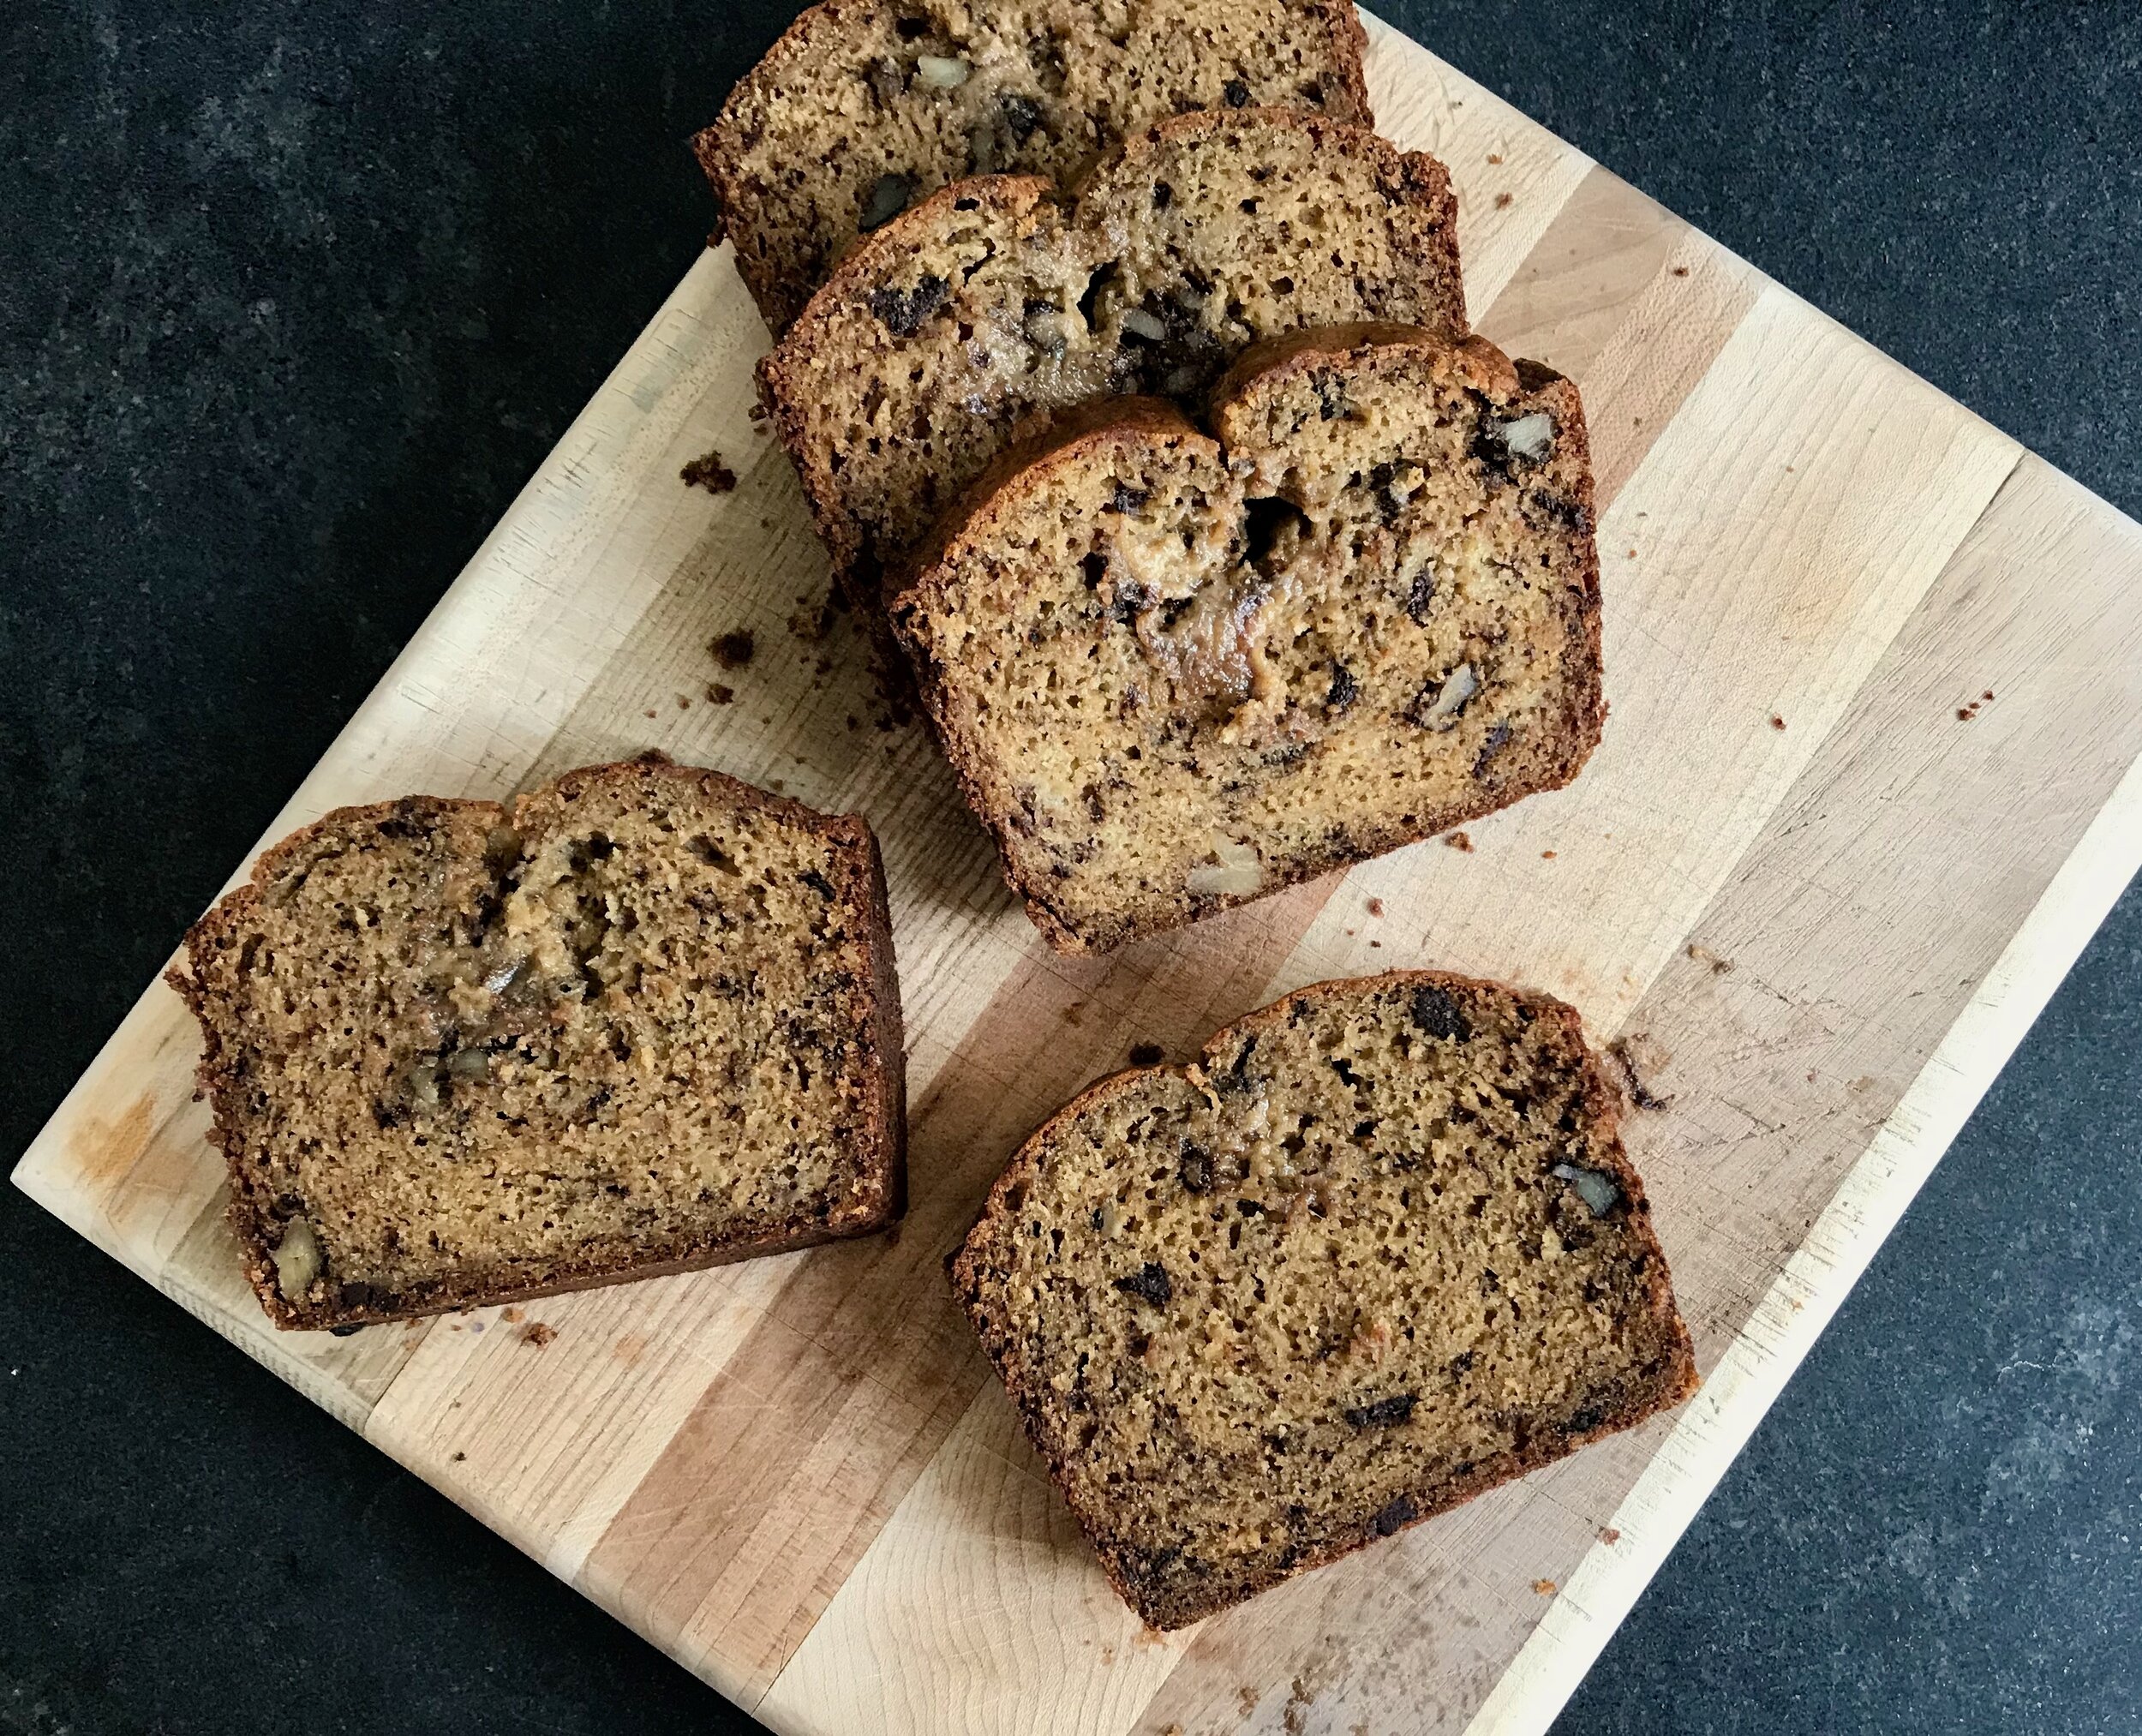
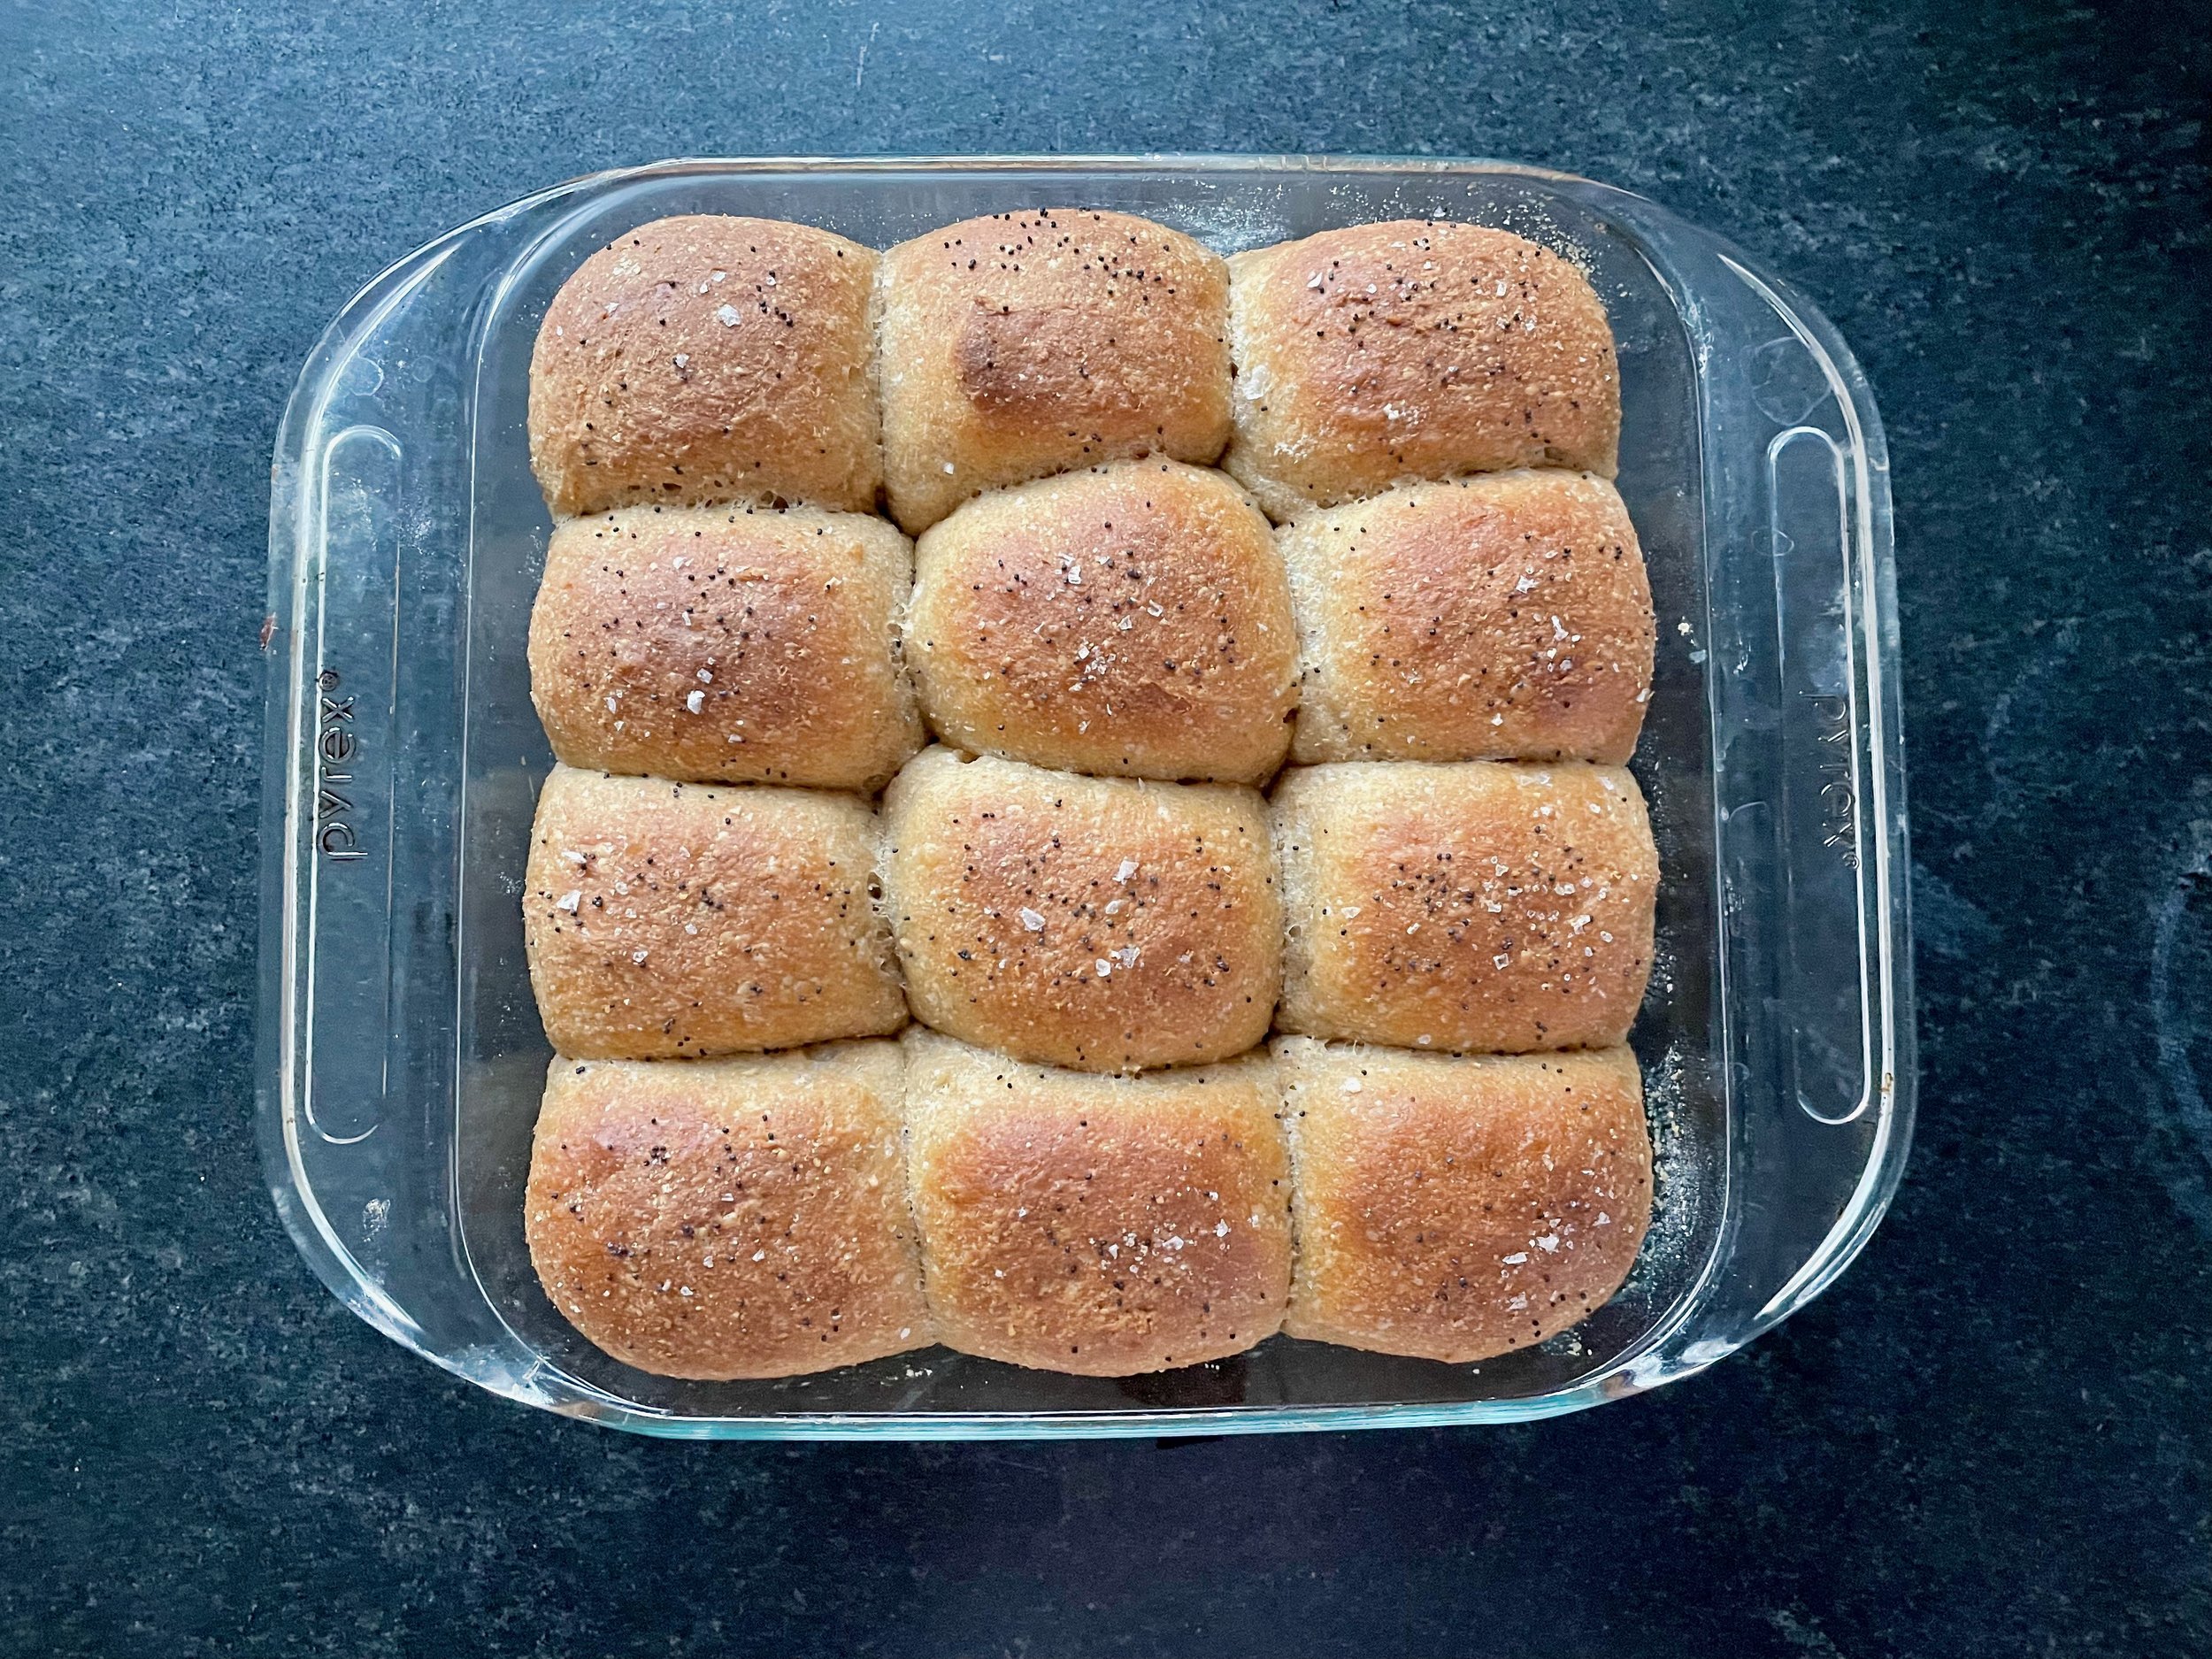
The final product was very nice! Soft and tender. Slightly dry (as in 100% whole wheat “dry”) but overall really lovely for 100% whole wheat rolls. They are definitely “wheat'-y” in flavor so use good quailty flour for the best flavor. I think I may add a little more salt next time just for a little additional flavor.

100% Whole Wheat Dinner Rolls with Tanzhong Starter
From Vegan Richa
Ingredients

Tangzhong:

  • 1/4 (0.25 ) scant cup whole wheat flour a bit less than 1/4 cup

  • 1/2 cup (125 ml) water

Sponge:

  • 1 cup (120 g) whole wheat flour

  • 1 cup (250 ml) warm water

  • 2.5 tbsp maple syrup or other sweetener of choice

  • 1 tbsp/3 tsp active yeast

Bread:

  • 2 cups (240 g) whole wheat flour or 1 cup whole wheat and 1 cup whole spelt flour [I used 1 cup whole wheat and 1 cup some soft white wheat that I ground myself!]

  • 1 tsp salt [maybe try 1.5 tsp?]

  • 3 tbsp extra virgin olive oil

  • 1 tsp lemon juice

  • 1/4 tsp (0.25 tsp) almond extract optional, adds nice bakery like smell [did not try, interesting idea though…]

Directions
In a small saucepan combine 1/4 cup flour and 1/2 cup water over medium heat. mix well and cook until gel like, smooth and starting to get shiny, stirring frequently. Set this tangzhong starter lump aside.

Mix all the Sponge ingredients in a bowl. Mix with a large spoon for 2 minutes until the batter is very smooth and starting to get gluten-ny.

Let the bowl sit covered for 1 hour in a warm place. (Use a large bowl as the sponge will triple).

In a stand mixer, add the sponge and tangzhong. Mix the salt into the 2 cups flour and add the flour to the stand mixer. Start kneading. Add in the oil, lemon juice and continue to knead for 5 minutes. Let the dough rest for 2 minutes. Check the dough to see if it needs more flour or water (it should be soft and smooth. not stiff and not sticky). Add more flour 1 tbsp at a time if needed. The dough should be soft and slightly tacky, but not overly sticky or not too stiff.

Knead for another 5 to 7 minutes. The dough should not break immediately when a small portion is pulled out.

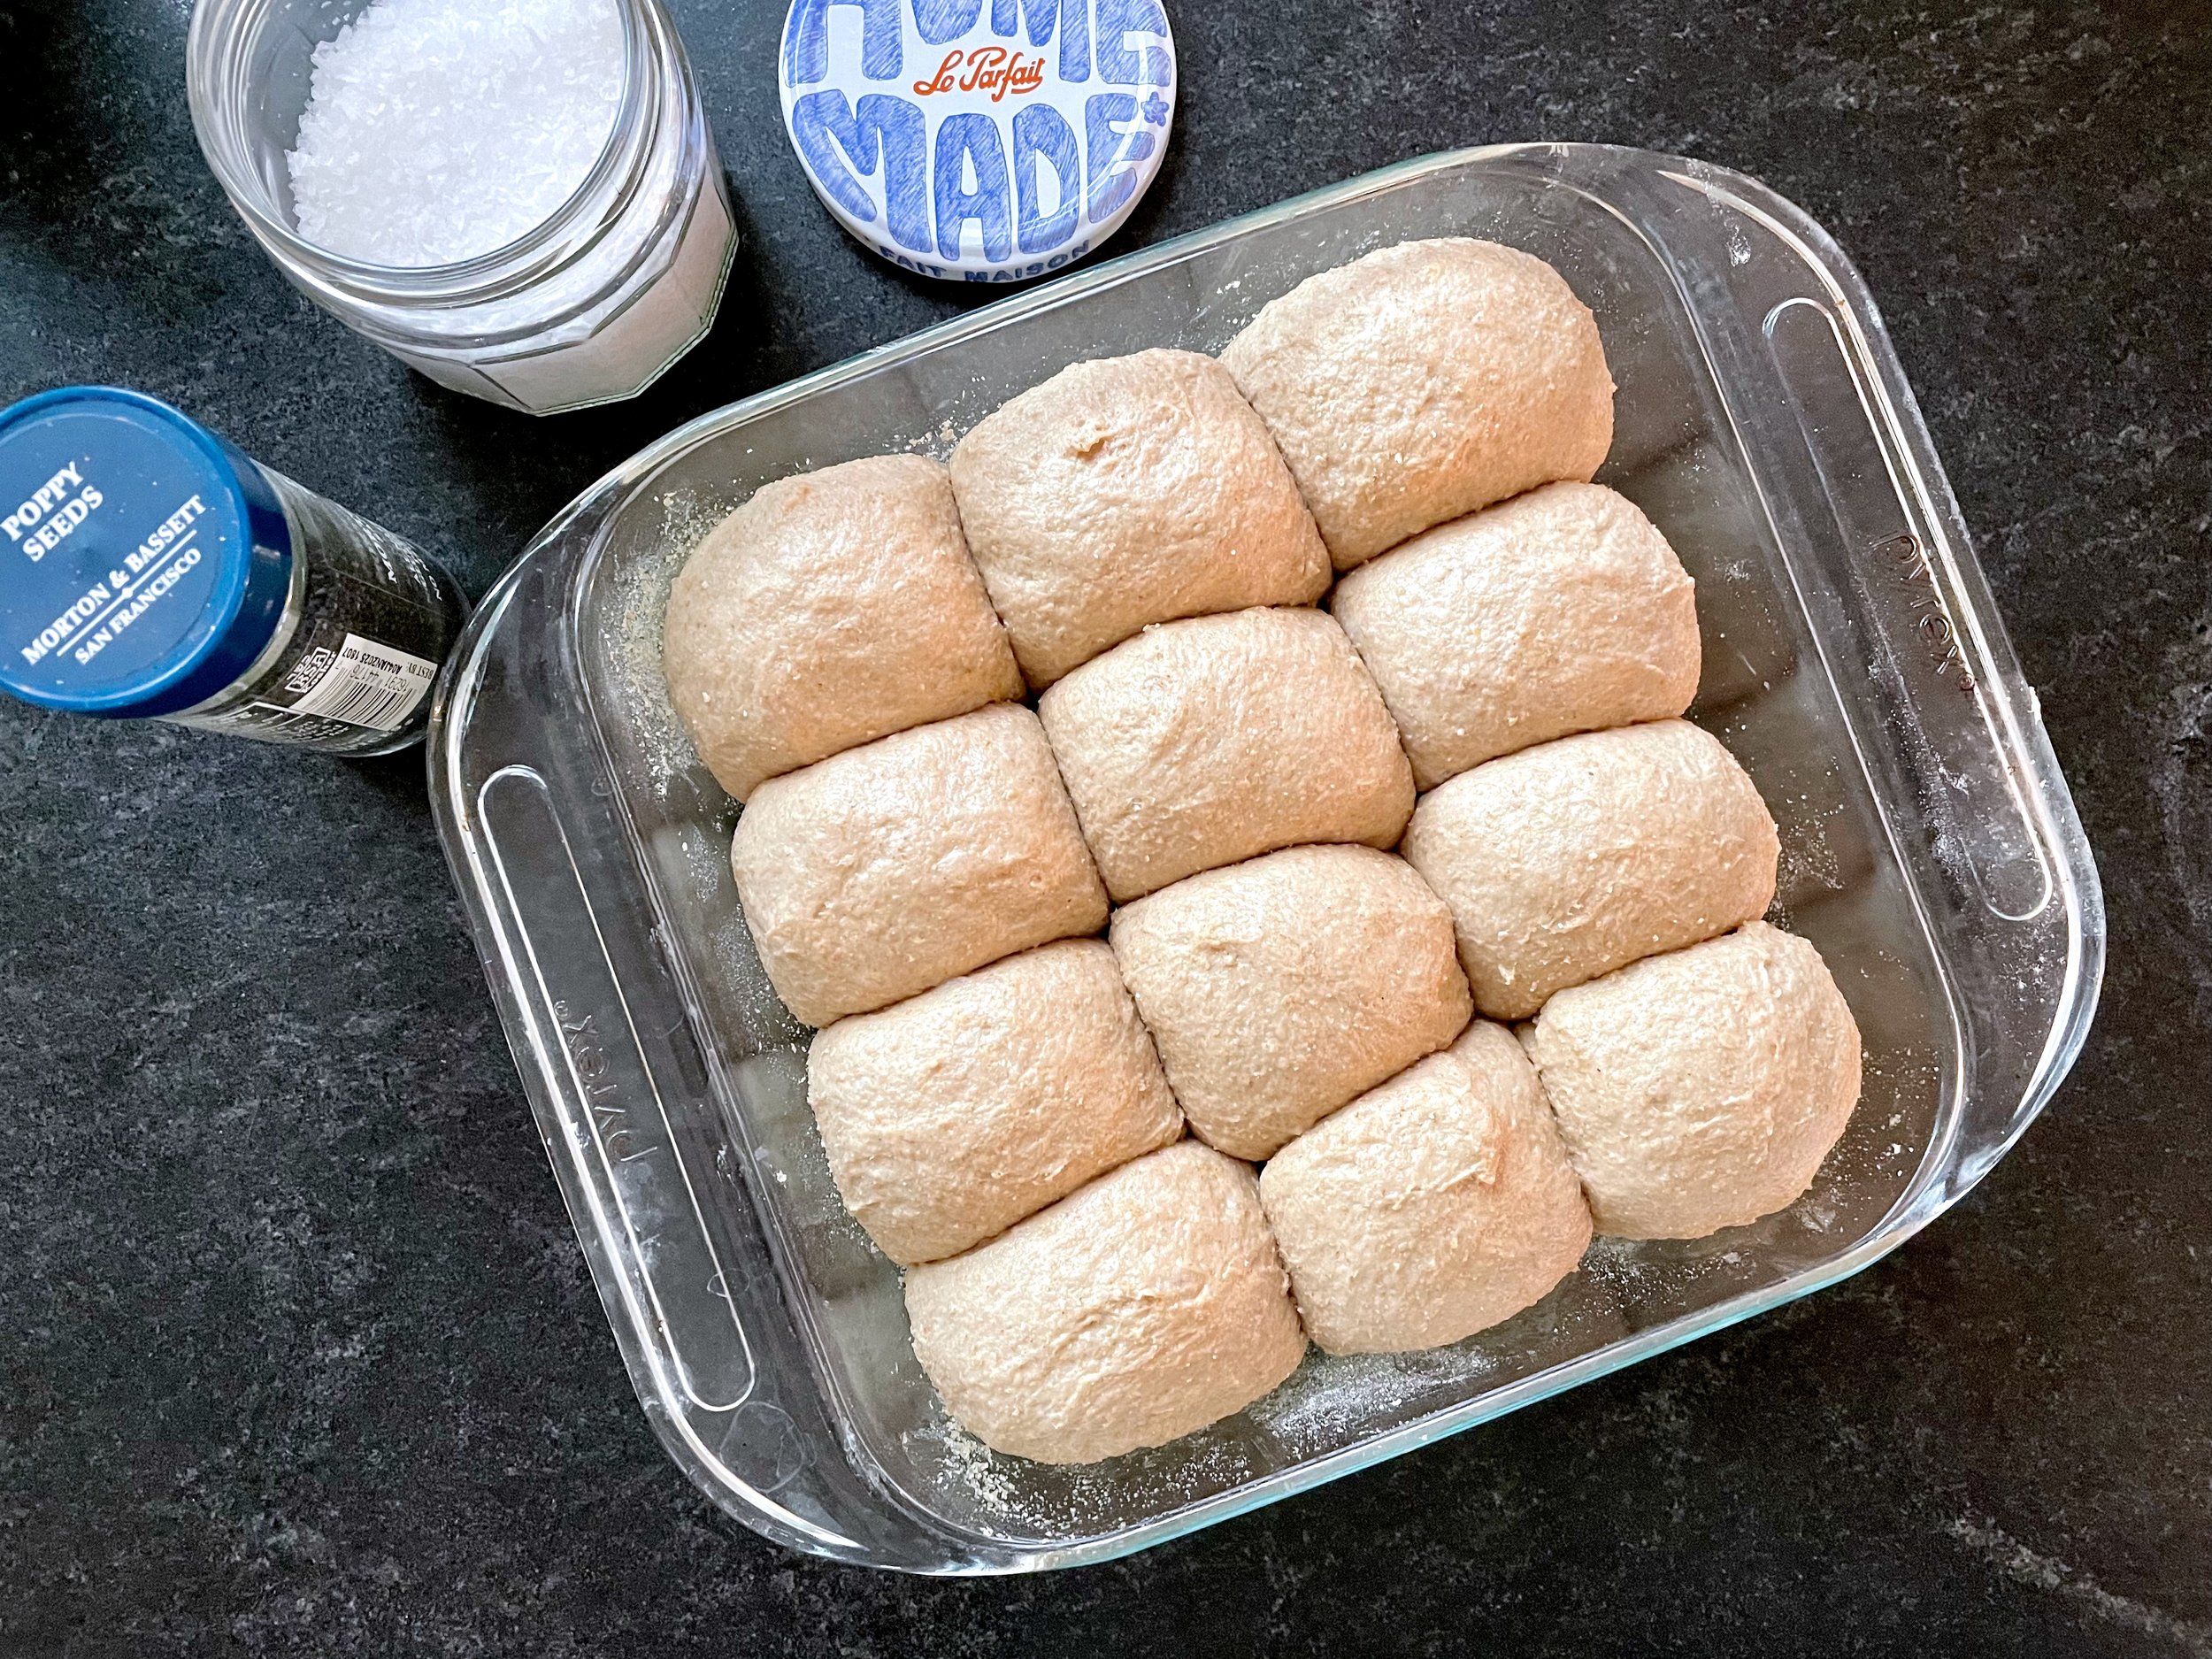
Divide the dough in 12 equal balls and form into rolls. Place seam side down in the baking pan. They will be fairly close together and that’s okay.

Cover the pan with plastic wrap and let rise for 25 to 40 minutes or until the rolls double in size.

Pre-heat the oven to 375 degrees F/ 190ºc. Bake the bread for 20 to 22 minutes. [mine definitely took closer to 35-40 minutes. I don’t remember exactly how long, but I didn’t want to underbake these rolls because they are 100% whole wheat. I baked them until the internal temperature was 200 degrees.]

Remove the pan from the oven and brush oil or butter on top. Remove the bread from the pan after 10 minutes. Wait for another 5 before serving. Or cool to room temperature before storing in an airtight container.

Glazed Lemon, Yogurt and Olive Oil Pound Cake

I made this cake last week on a whim. I’m almost positive I saw it on Bob’s Red Mill’s Instagram account, and know for a fact that’s where I got the recipe from, but now going back to find it on their website it appears to be gone! Thankfully I found it somewhere else online. And I plan to get my hands on the cookbook itself ASAP! If just came out a few weeks ago and sounds lovely!

The cake itself was lovely! It’s gluten free, and easily dairy free. I used homemade Greek yogurt, but the recipe also states you can use a home made coconut milk yogurt. It really was the easiest thing to make. It took 5 minutes to whisk everything together, then into the pan and into the oven. You can have the whole thing made before the oven is preheated!

I actually was looking for something a little less sweet so I reduced the sugar by 1/2 (dangerous I know…) and it turned out just fine! It didn’t seem to be lacking sugar at all, and the texture was lovely, didn’t seem any worse for the wear. I would definitely make it with less sugar again, and would have no problem serving it this way.

It baked up beautifully. Tender, soft, and not crumbly at all. It held together well without the gluten from traditional flour. I wouldn’t have even guessed it didn’t have wheat flour in it. A lovely cake all around.

Glazed Lemon, Yogurt and Olive Oil Pound Cake
From Cannelle et Vanille Bakes Simple by Aran Goyoaga
Ingredients

Cake

  • 1 cup (200g) granulated sugar [I used 1/2 cup, 100 g of sugar for a lower sugar option and felt that it turned out great! I would certainly do it with reduced sugar again!]

  • 1 tablespoon finely grated lemon zest (from 2 to 3 medium lemons)

  • 1 cup (140g) superfine brown rice flour

  • 1 cup (100g) almond flour

  • 3 large eggs

  • ½ cup (115g) whole-milk yogurt, or any dairy-free yogurt alternative you desire

  • ½ cup (110g) extra-virgin olive oil, plus more for greasing

  • 1 tablespoon vanilla extract

  • 1 tablespoon baking powder

  • ½ teaspoon kosher salt

Glaze

  • 2 cups (240g) powdered sugar

  • 2 to 3 tablespoons freshly squeezed lemon juice

  • 2 tablespoons finely chopped pistachios, for topping

Directions
Preheat the oven to 350°F. Grease the inside of an 8½-by-4½-inch loaf pan with a bit of olive oil.

MAKE THE CAKE: In a large bowl, rub together the sugar and lemon zest until fragrant. (This helps release the natural lemon oil.) Whisk in the remaining ingredients until the batter is smooth. Pour the batter into the prepared pan and bake for 45 to 50 minutes, until a toothpick inserted in the center comes out clean. Cool the cake in the pan for 15 minutes, then invert onto a wire rack. Let the cake cool completely if you want the glaze to stay thick on top of the cake. If the cake is warm, the glaze will melt and run off.

MAKE THE GLAZE: In a medium bowl, whisk together the powdered sugar and lemon juice until smooth and lump-free. As you begin to whisk, it might seem too thick, but as the sugar absorbs the juice, the glaze will thin out. The glaze should be pourable but not too runny.

Put a tray or baking sheet under the wire rack and pour the glaze all over the cake, letting it run over the edges. Wait a few minutes for the glaze to set. Sprinkle the top with the pistachios, then serve. The cake will keep at room temperature for 3 days. (If you refrigerate it, the glaze will soften.)

Funfetti Sugar Cookies

These were great sugar cookies! I’m always looking for a thick and chewy sugar cookie and am usually disappointed. These did not disappoint! I recommend making them large, this helps them stay big, thick and chewy. And don’t overbake!

Funfetti Cookies
From Kim’s Cravings
Ingredients

  • 2¾ cups (385g) all-purpose flour

  • 1 teaspoon baking soda

  • ½ teaspoon baking powder

  • ½ teaspoon salt

  • 1 cup (226g) salted butter

  • 1½ cups (300g) granulated sugar

  • 1 large egg

  • 2 teaspoon vanilla extract

  • 1/2 cup (80g) sprinkles, plus more for topping

  • ¼ cup (50g) granulated sugar for rolling cookies

Directions
Preheat oven to 375ºF. Line baking sheet with parchment paper. In a bowl, whisk together the flour, baking soda, baking powder, and salt. Set aside. Place the butter and sugar in a large mixing bowl. Use a stand mixer fitted with a paddle attachment and cream on medium-high speed until light in color and fluffy, about 3 minutes.

Add egg and vanilla and mix on low for about 30 seconds or until fully incorporated. Slowly add in dry ingredients and mix on low combined.

Scrape down the bowl, then add the sprinkles and mix on low until just combined. Scoop the dough into large balls. Roll the dough ball in sugar if desired.

Place cookie dough balls on your lined baking sheets. Bake the cookies for 12-13 minutes. Cookies are done when the edges are light golden brown and there is some crackling along the top. Do not over bake.

Cool for 5 minutes on the baking sheet. Transfer cookies to a cooling rack to cool completely.

Chocolate Zucchini Bread

IMG_5384.jpeg

I eat a lot of zucchini in the later summer and early fall. I always am telling myself that I should bake zucchini bread with some of it, but I always end up just eating it. It’s a cold and rainy early fall day in Michigan however, and I wanted to bake something. I had 1 1/2 large-ish zucchini in the fridge so decided to finally bake with some of it! I found the following recipe on Food52, it’s from the author of my current favorite baking cookbook so I figured I’d give it a try.

IMG_5390.jpeg

I made a few small adjustments. Well, the first was kind of a big change, but I didn’t feel like getting out walnuts or chocolate, plus I was looking for a more simple bread, so I omitted all of the add-ins (yes I know this changes a TON about the final product) and “replaced” them with a few spices. I added in just a hint of clove, along with some cinnamon. I really do enjoy the cinnamon/chocolate combo.

The final bread was so nice! It is super tender and soft. You definitely taste the whole wheat flour coming through along with a nice lightly spiced chocolate flavor. I really liked the spices I added. I would most definitely make this again. I may even try bumping up the amount of ingredients to get me a slightly larger/taller loaf but otherwise wouldn’t change a thing!

Chocolate Zucchini Bread
From Food52
Ingredients

  • 2 1/2 cups (~280 grams) grated zucchini

  • 3/4 cup (90 grams) all-purpose flour

  • 3/4 cup (90 grams) whole wheat flour

  • 1/4 cup (20 grams) Dutch process cocoa powder

  • 3/4 teaspoon baking soda

  • 1/2 teaspoon baking powder

  • 1 teaspoon sea salt

  • [I added in 1/8 tsp ground cloves and 1/2 tsp ground cinnamon to the dry ingredients]

  • 1/4 cup (2 ounces) unsalted butter, melted

  • 1/2 cup buttermilk [I did 60 grams sour cream + 60 grams milk]

  • 1 large egg

  • 3/4 cup (150 grams) light brown sugar

  • 1 teaspoon vanilla extract

  • 1/2 cup walnuts, chopped and toasted

  • 1 1/4 cups bittersweet dark chocolate (at least 70%), chopped

Directions
Preheat an oven to 350° F. Grease and line a 8 1/2 x 4 1/2-inch loaf pan with parchment paper, set it aside.

Place the grated zucchini on a baking tray lined with a lint-free kitchen towel, then place another kitchen towel on top, patting it down gently to absorb any additional moisture. Set aside.

In a large bowl, use a fork to whisk together the flours, cocoa powder, baking soda, baking powder and sea salt. Stir in the chopped walnuts and 1 cup of the dark chocolate.

In a separate large bowl, whisk together the butter and buttermilk. Add in the egg, light brown sugar, and vanilla, then whisk the liquid ingredients until smooth and uniform. Gently fold in the zucchini.

Pour the liquid ingredients into the dry ingredients and stir until just combined. [It was easier for me to whisk the dry ingredients in a small bowl and add the dry to the wet]

Pour the batter into the prepared loaf pan, then sprinkle the top of the batter with the remaining 1/4 cup of chopped dark chocolate.

Bake, rotating at least once half way through baking, until a skewer inserted into the bread comes out clean, 50 to 60 minutes. [I baked mine for 50 minutes exactly and it was perfectly cooked!. I checked it at 45 and 48 minutes and it didn’t seem done yet. The final loaf was completely cooked through but without any dryness/overcooking at all]

Let cool in the loaf pan for 15 to 20 minutes before inverting out onto a cooling rack to finish cooling completely.

Vanilla Layer Cake

I have my go-to white cake recipe, it’s Martha Stewart and I have used it for years and love it. It is the BEST cake! However, sometimes I don’t want to separate and whip up 8 egg whites, so it’s good to also have a basic butter, or vanilla cake in the repertoire as well. I didn’t really have a go-to prior to this year but I think this one may be in the running!

6D3C9E0F-727C-4789-9698-967C34F709B6.jpeg

I needed to make a cake for a co-worker and so looked around for a basic yellow cake recipe. This vanilla cake looked like it would do the trick. I was right. It baked up easily and beautifully and tasted great! I actually then ended up making it again for another friend a week later. She wanted a “smash cake” for her 1 year old’s birthday party. For this I cut the recipe in half and baked it in two 6-inch cake pans. This worked great! The perfect size, and super cute if I do say so myself!

I will definitely make this cake again if I need a good basic vanilla cake. Birthdays, holidays, etc. It will be good for anything and everything!

Vanilla Cake
From Liv For Cake
Ingredients

  • 2 1/4 cups all-purpose flour

  • 2 1/4 tsp baking powder

  • 3/4 tsp salt

  • 3/4 cup unsalted butter room temperature

  • 1 1/2 cup granulated sugar

  • 3 large eggs room temperature

  • 1 1/2 tsp vanilla

  • 1 cup buttermilk or whole milk, room temperature

Directions
Preheat oven to 350F. Grease and flour two 8" cake rounds and line with parchment.

In a medium bowl, whisk flour, baking powder, and salt until well combined. Set aside.

Using a stand mixer fitted with a paddle attachment, cream the butter and sugar on med-high until pale and fluffy (about 3mins). Reduce speed and add eggs one at a time fully incorporating after each addition. Add vanilla.

Alternate adding flour mixture and buttermilk, beginning and ending with flour (3 additions of flour and 2 of milk). Fully incorporating after each addition.

Bake for 30-35mins or until a toothpick inserted into the center comes out mostly clean.

Place cakes on wire rack to cool for 10mins then turn out onto wire rack to cool completely before frosting.

Vegan Date & Walnut Scones

Lara and I hosted a baby shower for our cousin earlier this summer. She gave us free rein to serve any food we wanted, just as long as it was dairy free since she doesn’t tolerate dairy well. This can be difficult for me because I love dairy so much, and love baking with butter and cream, etc. But it can also sometimes be a fun challenge and a way to get me out of my comfort zone, a reason to try some new recipes and techniques.

IMG_3125.jpeg

Since we were doing a brunch shower I knew I had to makes scones because they’re the best! But dairy free it had to be which I have not done before in a scone. I found a good looking recipe on Serious Eats from Stella Parks which gave me confidence though so I went for it!

For the shower I made the original recipe off the Serious Eats website (see link), shaped the dough into two rounds instead of one, and cut each round into 6 scones to make a total of 12 smaller scones. (The original recipes calls for you to make 6 scones total, but I didn’t want them that big for the shower.) They turned out great! Exactly what I wanted. I flavored them with lemon zest and fresh lavender from my garden and glazed them with a little powdered sugar/coconut milk/coconut oil glaze.

I liked this recipe so much I decided to adapt it for myself! I decided to cut the original recipe down by 25% to just make 3/4 of the original recipe and shaped the dough into 6 scones. I like the size of these scones; big enough to feel substantial but yet not huge. Then I went with another one of my favorite flavor combinations; date and walnut with cinnamon.

IMG_3112.jpeg

I am shocked and surprised to find out that these are probably the best scones I have made. I just didn’t expect that. I have made a lot of scones, and like pretty much all of them, but I have been on the lookout for a specific type of scone. I want one that is tender and rich, yet not too delicate. Most of the scones I have made are so soft and delicate that they seem to just fall apart. These are sturdier, but that doesn’t mean they aren’t tender. They bake up great with straight sides and the flavor is awesome. Don’t worry if you don’t like coconut, you won’t really taste it.

Vegan Date & Walnut Scones
Adapted from Serious Eats
Ingredients

  • 170 grams all purpose flour

  • 2 1/4 teaspoons baking powder

  • 3 tablespoons granulated sugar

  • 1/4 teaspoon kosher salt

  • 1 teaspoon cinnamon

  • 41 grams coconut oil

  • 120-150 grams full fat coconut milk

  • 3/4 cup (60 grams) walnuts

  • 6 medjool dates, chopped

Glaze

  • 85 grams powdered sugar

  • 20-25 grams coconut milk

Directions
Combine flour, baking powder, sugar, salt, cinnamon and coconut oil in the bowl of a food processor and pulse until oil disappears into a powdery meal. Transfer to a medium bowl, then toss with walnuts and dates. Stir in coconut milk with a flexible spatula to form a soft dough. Turn onto a lightly floured sheet of parchment paper, pat into a 6-7 inch round. Refrigerate for at least 15 minutes, or overnight Meanwhile, adjust oven rack to lower-middle position and preheat oven to 400°F .

When ready to bake, use a chef’s knife, or a pastry scraper to cut chilled wheel of dough into 6 wedges. Arrange on a parchment-lined half sheet pan. Bake until puffed and golden, about 20-22 minutes. While the scones are baking mix the powder sugar and coconut milk. You want a very thick glaze (it will be thicker than you think it should be but once it is spread on the hot scones you’ll see why). Once the scones are done baking spoon the glaze onto the top of each scone while still hot. You can gently spread the glaze with the back of a spoon to help it drip down the side of each scone. Let cool before serving. Serve warm or at room temperature.

Chocolate Sugar Cookies

Last week a friend of mine sent me a box of cookies from a bakery she knows and loves that is located in Boston. I’ve never been to this restaurant, or to Boston for that matter, but I have their cookbook and love it so my friend wanted to share some of it’s goodness with me. It was such a kind gift, and so delicious! It was full of fairly basic cookies, but several that came with a twist. There was a snickerdoodle with saffron, as well as a chocolate cookie with cardamom, and potentially some other spices, but I really honed in on the cardamom. There was also a lovely snowball cookie, nice and buttery, a thin glazed oat cookie, a delicous sable that may have had tahini in it, and a nutty pistachio sesame cookie. They were all so good, and such fun to try a little sampling of the restaurant’s baked goods.

IMG_2378.jpeg
This was the inspiration box!

This was the inspiration box!

I was inspired after this, to do some cookie baking of my own. I was really drawn to the chocolate cardamom combo so decided to try and come up with something similar. A recipe for a chocolate sugar cookie came across my Instagram feed about this time which looked like a perfect place to start.

IMG_2380.jpeg

I followed the recipe but changed up the flavorings. I added cinnamon and some speculaas spice to the cookie base (I was going to add a little cardamom at this step as well but forgot, silly me). I then mixed cardamom into the granulated sugar that the cookies were rolled in prior to baking. The end result was a lightly spiced chocolate cookie, tender in the center and crispy on the edges. Perfect! I would amp up the spices next time to really highlight these flavors, but I didn’t want to go too bold initially. I didn’t want it to be overpowering. I would also remember to add some cardamom to the dough itself next time and really make a cardamom cookie through and through!

I would highly recommend this sugar cookie whether you want to spice it up, or keep it classic. Super easy, and baked up great! It would be really nice with some peppermint extract at Christmas. I bet it would make a really nice sandwich cookie, or ice-cream sandwich cookie. I even wonder about added some chocolate chips or chunks to the dough and making it a double chocolate cookie. We’ll see! Stay tuned…

Some of my Notes:
- Definitely use 1 tsp salt (double the amount called for in the original recipe). The blogger that I took the recipe from said she likes salt and so doubled the original 1/2 tsp salt. I wholeheartedly agree. It was great.
- First batch: shaped dough into 50 gram balls, baked exactly 12 min which was perfect! Resulted in a 3.5 inch cookie that spread nicely without being too flat.
- Second batch: shaped dough into 25 gram balls, baked exactly 10 min, which was good for this size cookie. So you can go a little bigger and make a 50 gram cookie, or smaller and get a 25 gram cookie, either one turned out great.
- Added 1/2 tsp cinnamon and a little specula as spice (too lazy to get out the individual spices!). Forgot the cardamom in the cookie like I wanted so first added 1/2 tsp cardamom (I think it was 1/2, not 1/4) to 50 grams of sugar to roll.
- This recipe will yield 34 25-gram cookies or 17 50-gram cookies (if you don’t eat dough that is!)

Chocolate Sugar Cookies
From Alexandra Cooks
Ingredients

  • 2 cups (240 g) all-purpose flour

  • 1/2 cup (43 g) Dutch processed cocoa powder

  • 1 teaspoon baking soda

  • 1 teaspoon salt

  • 16 tablespoons (226 g) softened butter

  • 1 1/2 cups (300 g) dark brown sugar

  • 1 egg (50 g)

  • 1 teaspoon vanilla extract

  • Granulated sugar for rolling, 1/4 to 1/2 cup (50 to 100 g)

Directions
Heat the oven to 350ºF. Line a baking sheet with parchment paper.

Place the flour, cocoa powder, baking soda, and salt in a medium bowl and whisk to combine the ingredients. Set aside.

Put the butter and brown sugar in the bowl of a stand mixer. Fit the mixer with the paddle attachment and beat on medium speed for 2 to 3 minutes, stopping to scrape down the mixer once or twice, until the mixture is light and fluffy.

Turn off the mixer, add the egg and vanilla, and beat until the egg is thoroughly incorporated, 1 to 2 minutes.

Add the dry ingredients and mix on low speed until no flour is visible, stopping to scrape down the mixer once during the process.

Pour the granulated sugar into a small bowl. Portion out the dough using a 2-tablespoon scoop or measure or a scale — each portion should weigh 50 grams. You should have about 16 to 18 balls total. Roll each portion between your hands to form a ball; then roll in the sugar — coat each ball as generously as you are able to in the sugar. Transfer 6 balls to the prepared sheet. Bake for 12 minutes; remove from heat and allow cookies to cool completely on the sheet pan. Repeat this process, baking 6 cookies at a time.

Sour Cream Banana Walnut Bread

IMG_2176.jpeg

I’m loving baking in the new kitchen! Have I said that before? Probably! And I’ll be saying it again, I’m in love! So here’s another banana bread recipe. I just made a fantastic tahini banana bread which was so so good, but I saw this recipe not long after and really wanted to try it too! The tahini banana bread was oil based, and this one is butter based. I like having options so gave this one a try too. I’m so glad I did. I loved this banana bread. I can’t say whether I liked this one or the tahini one better (I didn’t have any slices left of the tahini version to compare) but there were both fantastic so you can’t go wrong either way.

As I said, this recipe uses 1 stick butter, and also has 1/2 cup of sour cream, so plenty of fat. The butter adds yummy flavor and the sour cream keeps it moist and tender. I added in walnuts and chocolate because that’s my favorite in banana bread. I’d probably add a bit more from the add-in standpoint next time, but it was still very acceptable! Add as much or as little as you like. Just make it!


IMG_2172.jpeg

Sour Cream Banana Walnut Bread
From The Vanilla Bean Blog
Ingredients

  • 1 1/2 cups (213 grams) all-purpose flour

  • 1 teaspoon baking soda

  • 1 teaspoon salt

  • 1/2 cup pecan halves, toasted and chopped (57 grams) [I used a mix of raw walnuts, 30 grams, and chocolate shavings, 25 grams]

  • 1 cup (300 grams) very ripe bananas (about 3 bananas)

  • 1 tablespoon pure vanilla extract

  • 1/2 cup (120 grams) sour cream

  • 8 tablespoons unsalted butter (1 stick, 113 grams) room temperature

  • 1/2 cup granulated sugar (100 grams)

  • 1/2 cup packed brown sugar (100 grams)

  • 2 large eggs

Directions
Adjust an oven rack to the lower middle position. Preheat the oven to 350F. Grease an 8x4 inch loaf pan and line with a parchment sling.

In a small bowl, whisk the flour, baking soda, salt and pecans together. In a separate bowl, mash the bananas. Add vanilla and sour cream and mix until combined.

In the bowl of a stand mixer fitted with a paddle, cream the butter and sugar together until fluffy, 2-3 minutes. Add the eggs and mix on medium until combined. Add the flour mixture and mix on low until almost incorporated. Add the banana mixture and mix on low until completely combined. Scrape down the sides of the bowl and finish mixing with a spatula until the batter is completely combined

Pour the batter into the prepared pan and bake 45 to 55 minutes, until the top is dark brown and a wooden skewer or toothpick inserted into the center comes out clean. [I baked mine for 53 minutes and it was cooked well, for banana bread at least. I can’t think of a time when a banana bread I’ve made has baked all the way through in the center without being dry on the edges. My loaf had a small gooey center, but the edges were all cooked well, and even the end piece wasn’t dry. I wouldn’t want to bake it any longer. I like the gooey center the best!]

Transfer the pan to a wire rack and let cool for 20 minutes. Using the parchment sling, lift the loaves out of the pan, peel off the paper, and let the bread finish cooling on the wire rack.