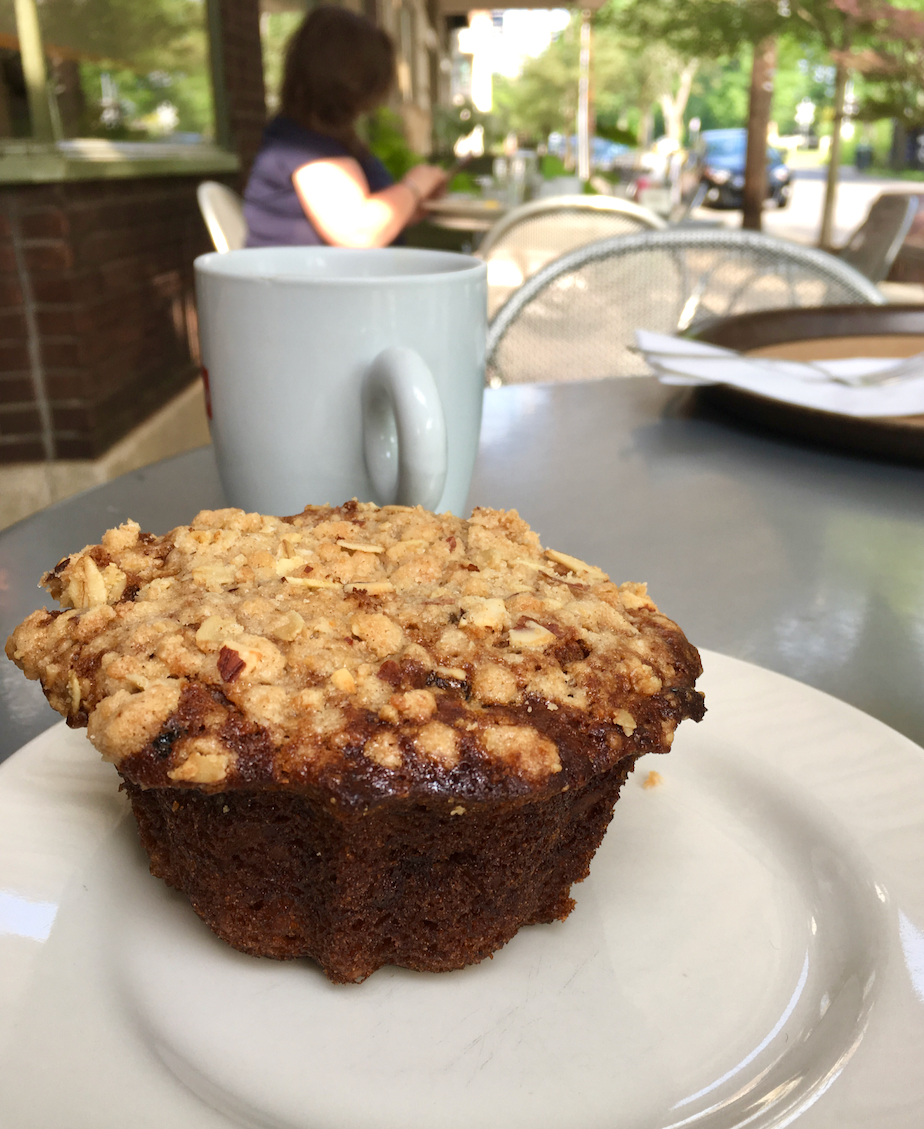
Bakery-Style Scones

We go through a lot of half-and-half at home between my sister and I. We each have a minimum of a morning cup of coffee every day during the week, and very often more whenever we can make it work, each with a little dollop of half-and-half because that’s the only way to drink it in my opinion. There are no boundaries on the weekend. In other words, we also go through a lot of coffee too.

Recently, when I walked to the neighborhood grocery store to pick up a pint of half-and-half they were out of my brand, at least in the pint size. But they did have the quart, so why not? Well, we did a good job working our way through that container, but as 3 weeks were quickly approaching I decided something had to be done to use up what was left. After thinking for a bit, I decided on scones because, well, scones. :) If you’re in the same predicament as I was, give this recipe a try, they’re delish!

IMG_3502.jpg

I made this recipe twice. The first time I made a 1.5x batch to get a really nice sized scone. They turned out beautifully, but unfortunately they were too salty. Since they just have a little sugar in them, as scones should, the salt was overpowering. Still completely edible with a nice spoonful of homemade jam, but certainly not top notch. I made them again with half the salt and a smidge more sugar and enjoyed them much more. The original recipe also calls for 2 tablespoons of milk and 4 tablespoons of cream. I just replaced all of the liquid with the half-and-half and it worked great. Perfect way to use up that last little bit of the carton!

 
IMG_3506.jpg
IMG_3503.jpg
 

Bakery-Style Scones
Adapted from Serious Eats
Ingredients

  • 9 ounces all-purpose flour (about 2 cups, spooned; 255g), plus more for dusting

  • 1 tablespoon baking powder

  • 2 teaspoons sugar

  • 1/2 teaspoon kosher salt

  • 2 ounces cold unsalted butter (4 tablespoons; 55g), cut into 1/2-inch cubes

  • 6 ounces roughly chopped milk chocolate (1 cup; 170g)

  • 6-8 ounces half-and-half (or a mix of milk [2 ounces] and heavy cream [4 ounces])

  • ~1 cup mixed nuts and dried fruit (I used almonds, pecans, cranberries and cherries)

Directions
Adjust oven rack to lower-middle position and preheat to 400°F (204°C). Sift flour into a medium bowl, then whisk in baking powder, sugar, and salt. Add butter and use a pastry blender, or two forks, to work the butter into the flour until it resembles a coarse meal. Add nuts and dried fruit and toss to combine, then stir in the 1/2 and 1/2 to form a soft (but not wet) dough.

Turn dough out onto a lightly floured surface and pat into a 7-inch round. Cut into 6 or 8 wedges with a chef’s knife or a bench scraper. Sprinkle generously with coarse sugar, and arrange on a parchment-lined half sheet pan. Bake until puffed and golden, 25-30 minutes. Serve warm with clotted cream, jam, or a spoonful of whipped cream.

Scones are best eaten the day they are made. They do freeze well however if you have leftovers. When ready to eat, thaw to room temperatures. Reheat in a preheated 425 degree oven for 4-6 minutes until heated through and crisp, but before they start to bake through again and dry out.

Braided Challah Ring

Is homemade bread ever a bad idea? I don’t think so! Judging from the success of this lovely braided challah that I recently brought to a potluck, I don’t think most other people think it’s a bad idea either! This is a quick and simple homemade bread. If you’ve never thought to bring fresh bread to a potluck, trust me, it’ll go over well. Especially if you bring a little jam and/or butter to go with it. Something different, and impressive, especially if you decide to go for the braided ring like I did here. You can just do a simple braid and leave it in a loaf shape if you prefer, but it’s fun to try something different. Any jam will go well with this rich and eggy bread. Trust me, you won’t be disappointed!

43913885_724297907949307_7234707295875747461_n.jpg

Braided Challah Ring
Adapted from King Arthur Flour
Ingredients
Quick Starter

  • 1 cup (120 grams) All-Purpose Flour

  • 1 cup (227 grams) lukewarm water

  • 2 teaspoons instant yeast

Dough

  • All of the starter

  • 3 1/2 cups (420 grams) All-Purpose Flour

  • 1 3/4 teaspoons salt

  • 1/4 cup (50 grams) sugar

  • 1/4 cup (50 grams) vegetable oil

  • 2 large eggs + 1 yolk (save 1 egg white for the glaze, below)

Glaze

  • 1 egg white, saved from above

  • 1 teaspoon sugar

  • 1 tablespoon water

Instructions
To make the starter: Mix the 1 cup flour, 1 cup water and yeast together in a large bowl or the bucket of a bread machine. Let the mixture sit for about 45 minutes. See "tips," below, for instructions using SAF Gold yeast.

To make the dough: Add the dough ingredients to the starter and mix and knead together — by hand, mixer or bread machine — until a smooth, supple dough is formed. This dough is a pleasure to work with; smooth and silky, it almost feels like you're rubbing your hands with lotion.

Place the dough in a greased bowl, turning it over once to coat it lightly with oil. Cover it and let it rise for 1 1/2 hours, or until it's not quite doubled in size.

To shape the dough: Turn the dough out onto a lightly floured surface and fold it over once or twice, to expel the carbon dioxide. Divide the dough into four pieces, and roll each into a snake about 18" long.

On the lightly greased or parchment-lined baking sheet, braid a four-strand braid (see instructions at King Arthur Flour) or fashion a simpler three-strand braid. Form the braid into a circle, pinching the two ends together.

In a small bowl, make the glaze by mixing together the reserved egg white, sugar, and water. Brush the loaf, reserving some for a second application.

Cover the loaf with lightly greased plastic wrap and allow it to rise for 45 minutes to 1 hour, or until it's almost doubled in size. Towards the end of the rising time, preheat the oven to 375°F.

To bake the loaf: Brush the loaf with the remaining glaze (this will give the finished loaf a beautiful, shiny crust, as well as provide "glue" for the seeds), sprinkle with poppy seeds, if desired, and bake for 35 to 40 minutes, or until the challah is golden brown, slightly firm to the touch, and the internal temperature is 195°F.

Remove the bread from the oven, and cool completely before slicing.

Pumpkin Bundt Cake

I have fallen off the posting train! But I’m trying to get back on board. It’s been a busy and fun fall, which means I have neglected this little hobby of mine. But this cake was too good not to share! I had a fun Oktober fest at a new friends house. It was outdoors on the perfect chilly, but lovely October night. They had grilled up two whole lambs, and brewed some homemade beer, and then invited a bunch of people over to share.

I decided to try out a new cake recipe. It’s pumpkin season and this cake did not disappoint. It has a mix of butter and oil for flavor and moisture with the perfect amount of fall spices. It baked up beautifully and came out of the pan easily. I topped with a simple yogurt glaze which had just enough tang to perfectly compliment the rich and sweet cake. Happy Fall!

IMG_3306.jpg

The original recipe had a cream cheese glaze. I didn’t have any cream cheese so I ended up making something up on my own. I didn’t measure anything so I can’t tell you exactly, but I used melted butter, milk, powdered sugar and plain Greek yogurt. I turned out great, but if you’re looking for exact measurements, follow the link to the original recipe and try hers out, I’m sure it’s great!

 
IMG_3303.jpg
IMG_3301.jpg
IMG_3300.jpg
IMG_3297.jpg
 

Pumpkin Bundt Cake
From Style Sweet CA
Ingredients

  • 3 cups all-purpose flour

  • 2 teaspoons baking powder

  • 1 teaspoon baking soda

  • 1 teaspoon salt

  • 2 teaspoons cinnamon

  • 1 teaspoon cardamom

  • 1 teaspoon ginger

  • ¼ teaspoon clove

  • pinch black pepper

  • ¾ cup Land O Lakes® European Style Unsalted Butter, softened

  • 1 cup brown sugar

  • 1 cup white sugar

  • ¼ cup flavorless oil, like grapeseed or canola

  • 3 large eggs

  • 2 teaspoons pure vanilla extract

  • 1/3 cup buttermilk

  • 14 ounces pumpkin puree

Directions
Pre-heat oven to 350°F. Generously brush the inside of a Bundt pan with very soft butter, sprinkle with flour, and tap out the excess. Set aside.

Sift together the flour, baking powder, baking soda, salt, and spices. Set aside.

In the bowl of an electric mixer, beat the butter on medium-low speed with the paddle attachment until smooth. Add in both sugars and mix on medium until light and fluffy, 3 to 5 minutes. Add the oil and vanilla. Mix until combined.

With the mixer on low, add in the eggs, one at a time. Stop the mixer and scrape down the sides and bottom of the bowl.

With the mixer on low, add in half of the flour mixture and mix until just combined. Add in the buttermilk and mix until combined. Add in the remaining half of the flour mixture and mix until just incorporated and few streaks of flour remain visible. Add in the pumpkin puree and mix until smooth. The batter will be thick.

Spoon the cake batter into the prepared pan. Tap the bottom of the filled pan on a hard work surface to release any air bubbles. Bake for 45 to 55 minutes, or until a long wooden skewer or thin paring knife inserted into the center of the cake comes out clean. Cool on a wire rack for about 15 minutes. Gently loosen the edges of the cake with a flexible rubber spatula. Place a wire rack or cutting board on top of the cake. Holding on to the edges of the pan and rack, carefully invert everything. Remove the cake pan and continue to completely cool the cake before adding the glaze.

Everyday Oatmeal Cookies

Looking for a classic? I’ve got the perfect thing for you. If you’re looking for a classic oatmeal cookie that is. This cookie was just what I was looking for last week. I wanted something simple, hearty, and delicious. Special enough for dessert, but also the perfect afternoon snack with a glass of milk or a cup of coffee. This cookie fit the bill perfectly. Toasted oats, butter, and cinnamon mixed with a handful of chopped nuts and dried fruit. So good. I promise, it is so good.

IMG_3130.jpg

I made a few small changes to the original recipe. I cut back just a smidge on the sugar, from 2/3 cup to 1/2 cup. I didn’t miss it at all. I also toasted the oats at 350 for about 15 minutes prior to mixing. This helped really bring out a nice toasted oat flavor, and a little extra crunch to the final cookie. You could skip this step, but I highly recommend it and it isn’t very difficult at all. You can just toast the oats up on the same cookie sheet that you plan on baking the cookies on. You don’t even have to wash another pan!

Finally, I used a mix of dried cranberries, almonds and pecans as add ins for this cookie and it was delicious. But you can use any combination of nuts, seeds, fruits and chocolate. Any of these options are sure to be good. Enjoy!

 
IMG_3119.jpg
IMG_3131.jpg
 

Everyday Oatmeal Cookies
Adapted from Joy the Baker
Ingredients

  • 1 1/2 cups (120 grams) old-fashioned rolled oats

  • 1/2 cup (1 stick) butter, softened

  • 1/2 cup (100 grams) brown sugar

  • 1 large egg

  • 1 teaspoon pure vanilla extract

  • 3/4 cup (90 grams) all-purpose flour, or a mix of half all-purpose and half whole wheat flour

  • 1/2 teaspoon baking soda

  • 3/4 teaspoon ground cinnamon

  • 1/2 teaspoon sea salt

  • 2 - 2 1/2 cups of your favorite add ins (nuts, seeds, dried fruit, chocolate, coconut, etc)

Directions
Preheat the oven to 350 degrees. Spread the oats on a baking sheet and toast for about 15 minutes, stirring every 5 minutes, until starting to turn golden brown and a nice toasty smell is coming from your oven. Watch the oats carefully to ensure they do not get too dark. Remove from the oven and let cool for a few minutes while you put the rest of the ingredients together.

In a large bowl, combine softened butter and brown sugar. Beat together using an electric hand beater until slightly more pale and fluffy. This will take about 3 to 5 minutes. Add egg and beat until thoroughly combined. Add the vanilla extract and beat until blended.

In a small bowl whisk together flour baking soda, spices, and salt. Add the flour mixture to the butter and egg mixture slowly beating on low speed until just incorporated. Stir in the oats, and whatever add-ins you’ve decided on.

Using a cookie scoop, portion out cookies on baking sheet that has been lined with parchment paper. Bake cookies for 12 to 15 minutes or until they’ve reached your desired doneness. Allow to cool on the cookie sheet for 5 minutes before transferring to a wire rack to cool completely. 

Yields: 12 cookies
Approximate nutrition: 190 calories (without add-ins)

Peach Yogurt Cake

August is now officially over, which means peach season is going to be winding down soon. Excuse me while I shed a tear or two. While I try to eat most things only when in season, there are times when I bend this rule. However, with peaches I am very strict. I will not buy peaches at any other time of year except in late summer. There is nothing as disappointing as biting into a beautiful golden peach and hearing a crunch, and find yourself looking at a dry, hard and very sad piece of fruit. Peaches just don't do well at all out of season. 

To celebrate these golden beauties for a little longer, Lara whipped together a light and delicious peach cake to bring to a friends house this weekend. We enjoyed it after feasting on grilled pizzas, hot and bubbly right off the grill. It was the perfect way to end a late summer Saturday night. 

IMG_3090.jpg

The original recipe called for figs instead of peaches, and then had you swirling mascarpone and jam into the batter before baking. This sounds absolutely divine, but unfortunately I had neither, and was not making another trip to the store so I ended up with a simpler version of the cake with only some chopped peaches. It was still absolutely wonderful, but if you're looking for something with just a bit more pizazz, I would definitely give the mascarpone and jam a try!

This cake baked up nice and tall, and had a lovely tender crumb. Nice and moist, and really not super sweet at all which I really like. It would be fantastic with some lightly whipped cream, or vanilla ice cream! Next time!

 
IMG_3095.jpg
 

Peach Yogurt Cake
Adapted from Joy the Baker
Ingredients

  • 2 1/2 cups all-purpose flour
  • 2 teaspoons baking powder
  • 1/2 teaspoon baking soda
  • 1/2 teaspoon salt
  • 1/2 cup granulated sugar
  • 1/4 cup unsalted butter, melted and slightly cooled
  • 2 large eggs
  • 1 1/2 cups buttermilk
  • 1 teaspoon pure vanilla extract or 1/4 teaspoon pure almond extract
  • 2 peaches, chopped

Directions
Place a rack in the center of the oven and heat oven to 350 degrees F. Butter an 8-inch wide and 3-inch tall cake pan and lightly dust with flour.

In a medium bowl, whisk together flour, baking powder, baking soda, and salt. Set aside.
In a small bowl, whisk together sugar, butter, eggs, and buttermilk. Whisk in the vanilla or almond extract.

Add the buttermilk mixture all at once to the dry ingredients. Stir until just combined and no lumps remain. Spoon batter into the prepared pan.

Bake for 35-40 minutes, or until a skewer inserted in the center of the cake comes out clean. Allow cake to cool to room temperature before slicing to serve. Serve plain or with sweetened whipped cream.

Chocolate Hazelnut Zucchini Bread

I try to make at least one zucchini bread every zucchini season. What usually ends up happening is I buy what I think is a lot of zucchini expecting to use some of it for a zucchini bread, but then I get busy and by the end of the week I've eaten all the zucchini and have none left to bake with! This week I decided that it was time to ensure that I got to the zucchini for baking before it was all eaten up. I found a recipe for zucchini bread with walnut oil. I didn't have any walnut oil, but I did have some hazelnut oil leftover from a recipe that I need to use and so this was perfect choice. With some added chopped hazelnuts and dark chocolate chunks studding the batter, this was the a wonderful breakfast treat for the week, and something I would make over and over again. 

IMG_3072.jpg

The recipe is simple, and I made just a few changes to suit my needs. I cut the sugar in half because I prefer my morning treats be less sweet, and then I replaced half of the oil with yogurt to lighten it up, a bit but still maintain moisture and flavor. It baked up beautifully and full of flavor. The hazelnut oil scented the batter just enough, and the addition of chopped hazelnuts really helped this flavor shine. I ended up baking it for only about 40 minutes, as opposed to the 55 minutes originally called for, and was happy with that. Overall a perfect breakfast treat for zucchini season!

IMG_3053.jpg
IMG_3064.jpg
IMG_3071.jpg

Chocolate Hazelnut Zucchini Bread
Adapted from Dishing Up the Dirt
Ingredients

  • 1/4 cup (50 grams) hazelnut oil
  • 1/4 cup (60 grams) plain Greek yogurt
  • 1/4 cup (84 grams) honey
  • 2 eggs, lightly beaten
  • 1 teaspoon pure vanilla extract
  • 1 1/2 cups (160 grams) coarsely grated zucchini - about 1 medium-sized zucchini
  • 3/4 cup (90 grams) all purpose flour
  • 3/4 cup (90 grams) whole wheat flour
  • 1/2 teaspoon baking powder
  • 1/2 teaspoon baking soda
  • 1/2 teaspoon salt
  • 1/4 cup dark chocolate chips
  • 1/4 cup coarsly chopped ha
  • Turbinado sugar, for topping (optional)

Directions
Place an oven rack in the middle position of your oven and pre-heat the oven to 350F. In a large bowl, beat together the oil and honey. Stir in the eggs, vanilla and zucchini. Mix until well combined.

In a separate bowl, whisk together the flours, baking powder, baking soda, and salt. Stir the dry ingredients into the wet ingredients (being careful to not over-mix) and add the chocolate chips. and hazelnuts. 

Pour the batter into a lightly greased 8 1/2-by-4 1/2-inch loaf pan. Sprinkle the top of the loaf with the turbinado sugar. Bake until a toothpick inserted in the center of the bread comes out clean, 35-40 minutes. Cool the zucchini bread in the pan for about 15 minutes, then transfer it to a wire rack to cool completely.

Yield: 10 slices
Approximate Nutrition: 223 calories/slice

Louiseville, Kentucky

Oh my goodness! I have not been very active here over the past few months! Sorry about that! I had a busy, but exciting couple of months. I finished off my second year of residency, went on a couple of vacations, and most excitingly - I moved to a new house! My sister Lara bought a house and asked me to come live with her. Of course I jumped at this opportunity. Although I've loved my little apartment for 3 1/2 years, I felt like it was a good time to move on. For some time now, both Lara and I have felt the urge to get some more space that we can use to share our love of hospitality, celebrations and sharing our home with others. 

So there have been some crazy weeks over the past few months, and this little did not get much of the love. We are settled in now, and things have calmed down so I think it's time to get back to blogging! I will certainly be sharing more of the new house in the coming months, but for now I'm going back to the beginning of June to share my vacation to Louisville, Kentucky. 

At the beginning of June, Lara and I headed south to visit our friend from college who is now living in Louisville with her husband. We made a long weekend of it and had a blast. I really enjoyed exploring the city, so many historic homes, great bars and restaurants, and fun places to explore. 

We drove in Thursday night, and Friday morning my friend had to work so Lara and I did what we do best - found the best looking bakery and settled in for coffee and pastries. Blue Dog Bakery and Cafe did not disappoint. This cute little place had amazing looking bread, delicious pastries, sandwiches, salads and more. I wanted to try pretty much everything. 

IMG_0448.jpg
IMG_2440.jpg

Our lovely home for the weekend. 

IMG_2439.jpg
IMG_2437.jpg
IMG_2442.jpg
IMG_2450.jpg
IMG_2446.jpg
IMG_2445.jpg
IMG_2447.jpg

We tried out a plum ginger scone, and a morning glory muffin, both were delicious!

IMG_0448.jpg
IMG_2453.jpg
IMG_0454.jpg

We took a stroll on the Big Four Bridge over the Ohio River to Jeffersonville, Indiana. A very cool bridge
and a fun walk, even in the 90 degree sunshine! 


In Jeffersonville we checked out some of the shops, and then stopped for a cold beer at the Parlor. It was the perfect way to cool off after a lot of sweaty walking! Lara went for her favorite local (MI) beer, Founder's Rubaeus

IMG_2463.jpg
IMG_2469.jpg

The man next to us asked if we wanted to help finish off his pizza! Um, YES!!!

IMG_2496.jpg
IMG_2472.jpg

Dinner and drinks that night at Holy Grale, a neat beer bar located in an old church. Awesome patio,
good beer, great friends! 

IMG_2482.jpg
IMG_2481.jpg
IMG_2485.jpg
IMG_2484.jpg

We finished off our hot day with some cool popsicles from Steel City Pops. Customized
popsicles, what a fun idea! I went with refreshing cantaloupe drizzled with chocolate. 

IMG_2491.jpg
IMG_2493.jpg
IMG_2488.jpg

Since Lara and I are morning people, we couldn't help but head back to Blue Dog Bakery the next
morning while our hosts slept in. Then we of course had to check out one of the local farmer's markets
before heading back home. 

IMG_2511.jpg
IMG_2581.jpg

The afternoon was dedicated to the races! We went to Churchill Downs and enjoyed watching
the horses, and drinking in the history. I loved horse racing growing up so this was
kind of a dream come true! 

IMG_2528.jpg
IMG_2525.jpg

It may not have been Derby day, but we still had to wear our hats!

IMG_2573.jpg
IMG_2521.jpg
IMG_2587.jpg

And finally, dinner on our last night was at The Eagle, a southern restaurant that was the perfect choice. We started with the pickled country vegetables. A fresh bright start to the meal. For dinner I had a slow cooked pork sandwich with peppers, onions and cheese. So good. I also wanted to try the spoonbread for a side; it was cooked in an iron skillet served with maple butter. Very tasty, but I was hoping this would be a little more custard-y.  It felt more like a regular cornbread to me, still good, but not as unique. Overall a very nice experience, and a place I would go to again. 

IMG_2563.jpg
IMG_2561.jpg
IMG_2569.jpg
IMG_2566.jpg

Strawberry Rhubarb Bakewell Tart

Happy Memorial Day a week late! For pretty much my entire life, this holiday has included the local Memorial Day parade which is nothing amazing, but it's tradition and I enjoy it. A lot of local businesses, schools, churches, organizations make up this event which is basically a huge ad. But I love it! And they throw candy!! :) After the parade, my family and I have been getting together with a group of good family friends for brunch which typically includes homemade waffles and whatever else people want to bring. This is usually a good time to try out a new recipe, see how it goes over with a crowd. This year I decided to go seasonal and picked a rhubarb recipe; a strawberry rhubarb Bakewell tart. A Bakewell tart is an English pastry made up of a shortcrust pastry shell with jam and frangipane. This one used strawberry jam and then topped everything with fresh rhubarb, the best combination!

I had such a fun time making this tart. I loved layering the beautiful pink rhubarb in a herringbone pattern on top of the delicious frangipane. There are quite a few different components to this dish. None of them are especially difficult, but it does take some time to put together. I found that the amount of frangipane that this recipe made was too much from my tart pan. When making this again, I would probably cut back to 3/4 of the frangipane recipe, or even 2/3, as my frangipane overflowed all over the place. Good thing I had a baking sheet underneath the tart pan! You can see the explosion in the pictures below! It still turned out well after a little bit of clean up, no problem, just a little messy!

IMG_0716.jpg
IMG_2356.jpg
IMG_2360.jpg
IMG_2363.jpg
IMG_2357.jpg
IMG_2362.jpg
IMG_2364.jpg
IMG_2371.jpg

The saddest part of this whole Memorial Day party post is the fact that I didn't even make it to any of the festivities. I drove to my parents house in the morning to watch the parade, but as soon as I got there I was contacted by the hospital. I was on call on Memorial Day and had to turn right around and go to the hospital where I spent the next 5 hours. Sigh. I missed the parade and brunch. My sister brought my tart to lunch so everyone else could enjoy, but I did not get to join in the party. I was super bummed. But such is life. At least I got to have a fun time putting it all together!

IMG_2380.jpg

Strawberry Rhubarb Bakewell Tart
Adapted from Broma Bakery
Ingredients
For the Tart Shell (pate sucree)

  • 6 tablespoons butter, room temperature
  • 1/4 cup granulated sugar
  • 3 egg yolks, room temperature
  • 1 1/2 cups all purpose flour

For the rhubarb

  • 500 grams rhubarb, cut into short lengths (bias cut if using “herringbone” pattern on top)
  • 1 cup granulated sugar
  • 1 small orange, zested and 2 tablespoons juice
  • 8 ounces Strawberry preserves

For the frangipane

  • 12 tablespoons butter, softened
  • 3/4 cup granulated sugar
  • 1 cup (100 grams) ground almonds
  • 2 large eggs
  • 1 teaspoon almond extract
  • 1 teaspoon baking powder
  • 1/2 teaspoon salt
  • 6 tablespoons all purpose flour

Directions
For the pate sucree: With paddle attachment cream the butter and sugar together in a bowl until fluffy then beat in the egg yolks, one at a time, until fully incorporated into the mixture. Mix in the flour until it comes together as a ball of dough being careful not to overmix and then, by hand finish incorporating flour remaining at bottom of bowl.|

Form into a dis and wrap the pastry then chill for 30 minutes, but up to 1 day.

When ready to bake: Roll out, between cling wrap and fit into standard sized tart shell. Prick the dough (and rechill if it has warmed up too much) and then using baking beads or rice, blind bake at 350°F until the dough is golden brown (about 20 min).

Toss the rhubarb with sugar, orange juice, and orange zest. Let sit in fridge (up to overnight).
Spread strawberry jam over bottom of par cooked shell.

For the Frangipane: Beat together the sugar, butter, almonds, eggs, almond extract, baking powder, salt and flour until creamy. Spoon the mixture over the strawberry-rhubarb purée.

Arrange the rhubarb on top of the frangipane. If using the herringbone method, place rhubarb accordingly. Bake for 50-55 minutes, or until golden and risen. Cool in the tin until warm.