Sourdough Cinnamon Rolls

IMG_5755.jpeg
IMG_5757.jpeg

I was invited over to my brother and sister-in-laws for Christmas day brunch this year. A casual gathering of her family and my family. It was a lovely time. Relaxing, doing a whole lot of nothing, and eating some good food. I wanted to make something special that I won’t make on a regular basis, but save for special occasions and celebrations. For brunch I always think of cinnamon rolls, they are my favorite! I had been eyeing this sourdough version for a bit now and thought this would be the perfect time to try them out.

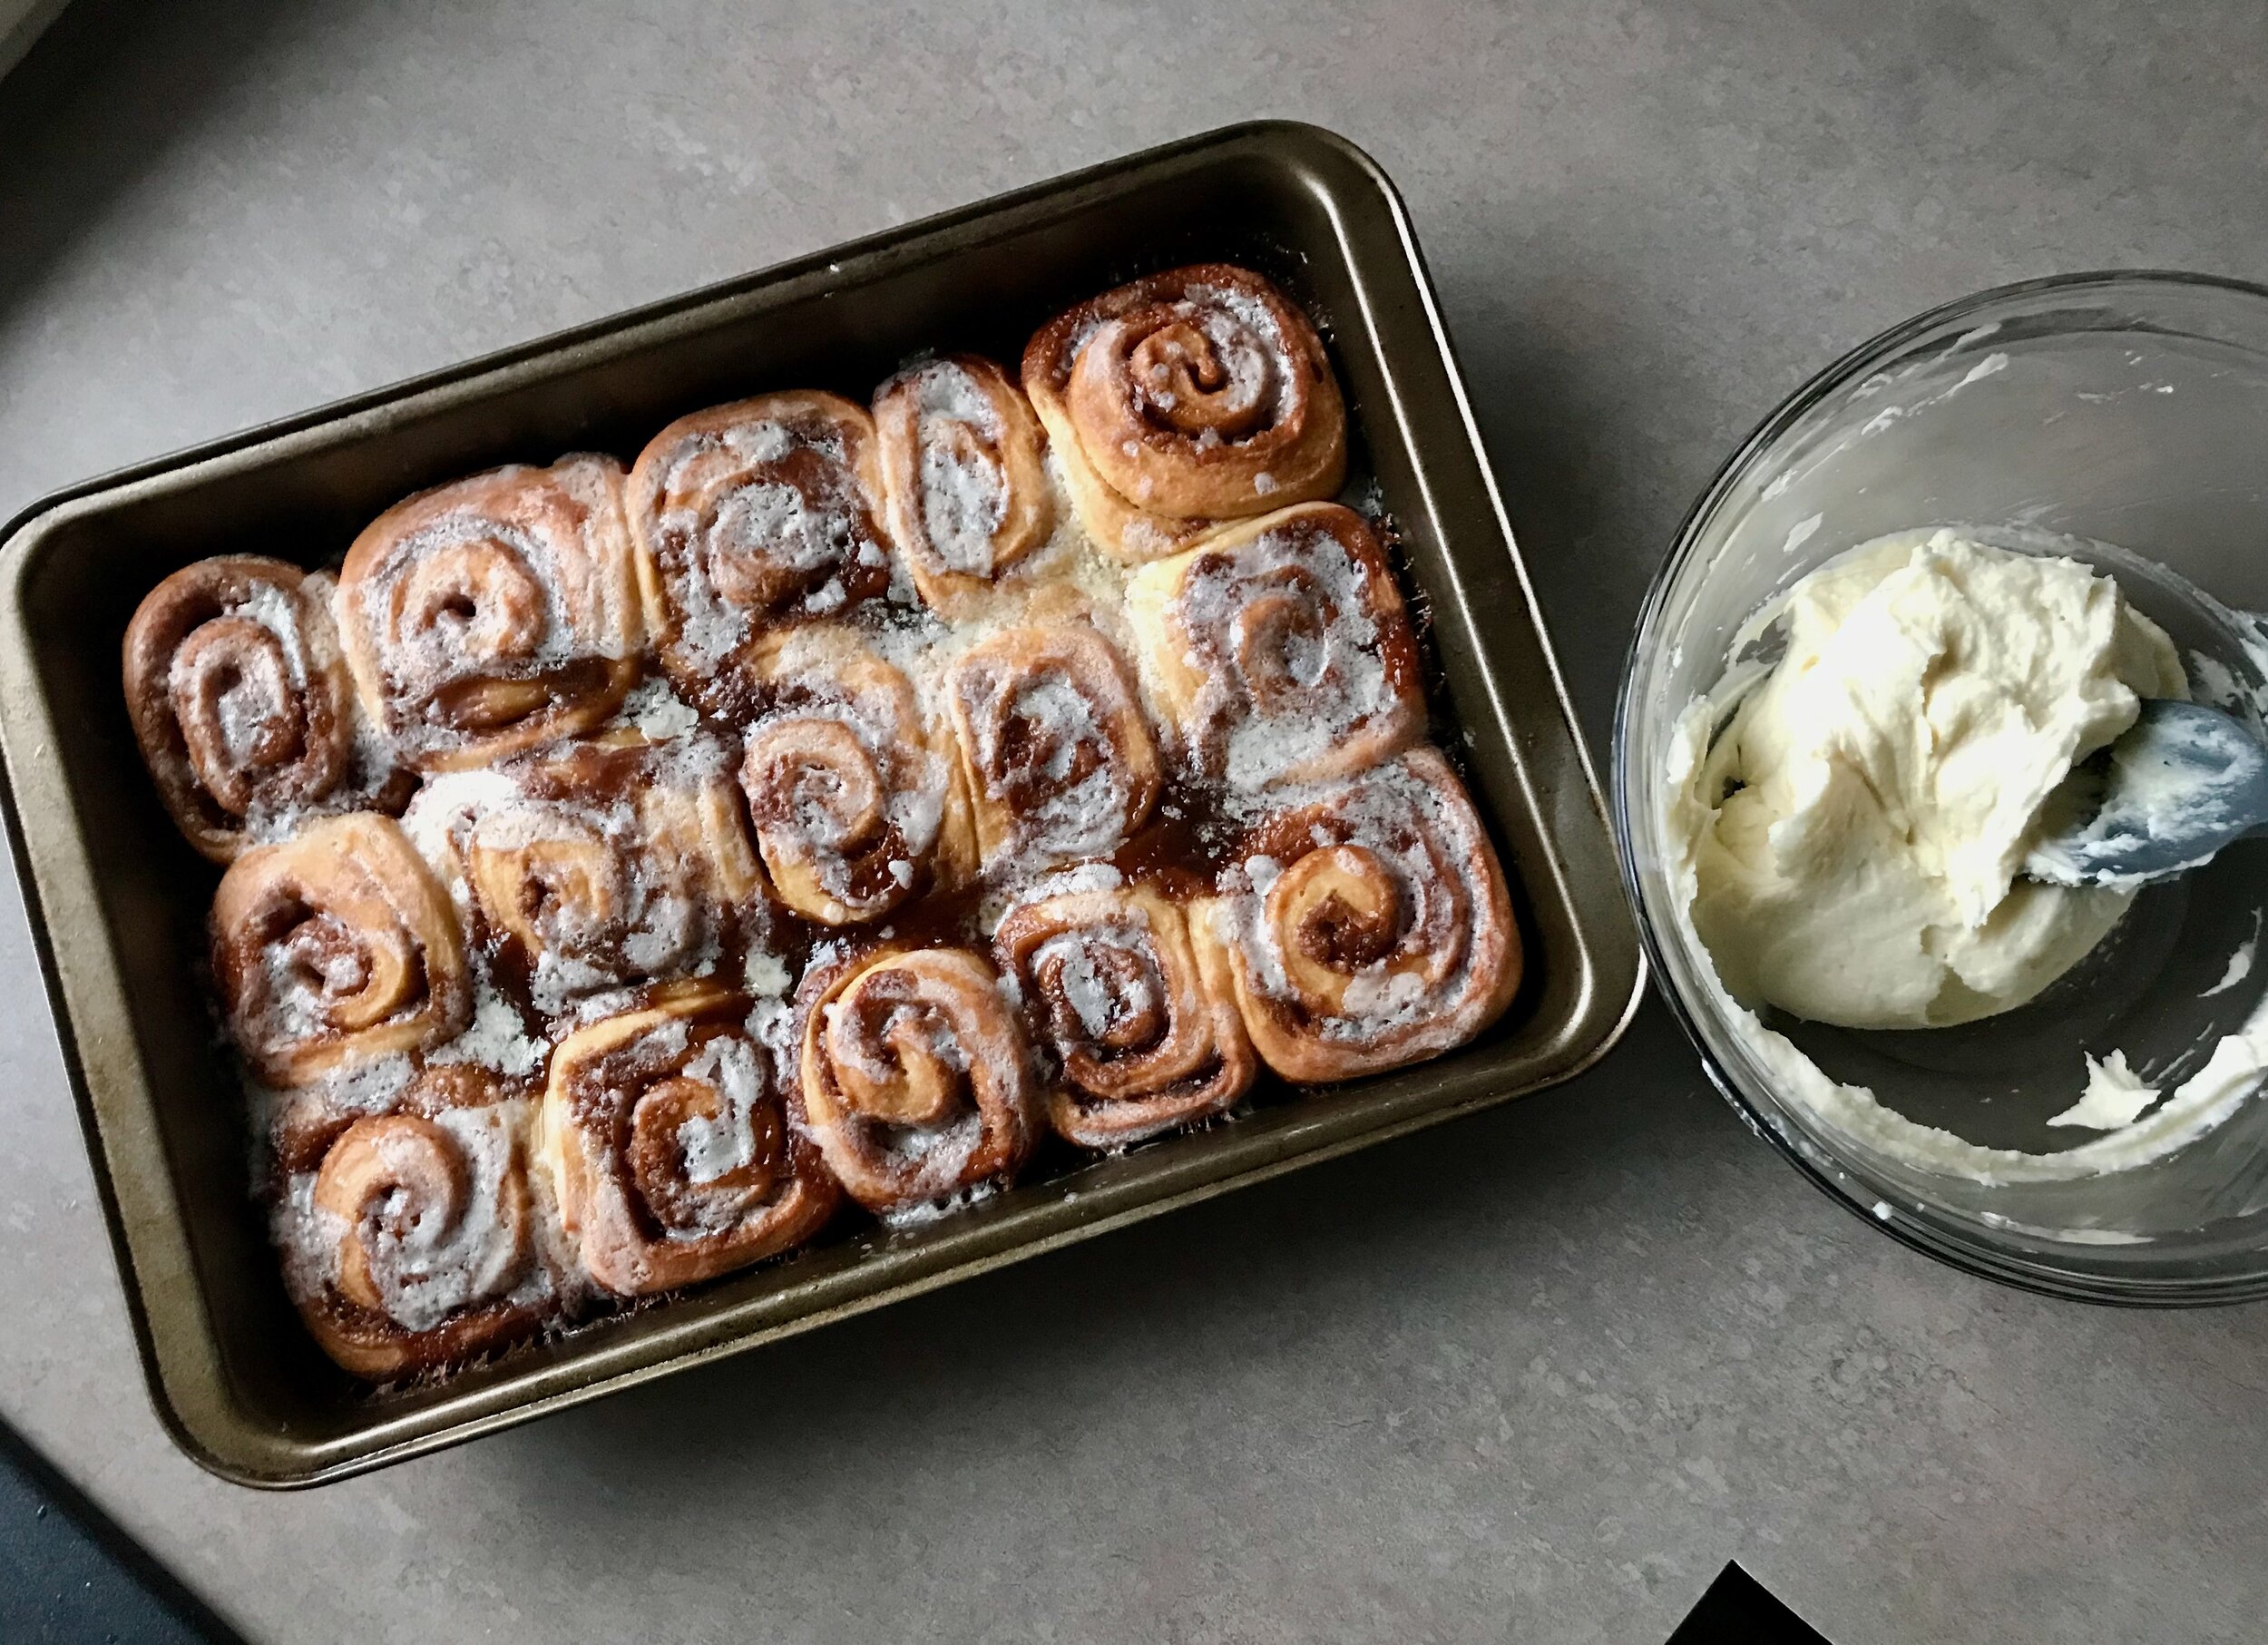
I had a lot of fun with this recipe. I don’t make brioche often, and it always surprises me how much butter you can add to a dough! Wow! The dough turned out silky and smooth and butter (obviously! :) ) It rolled out super easily. I ended up shaping the rolls on Christmas Eve and baking Christmas morning. Didn’t seem to be a problem at all. They ended up baking quite a bit shorter time than the recipe called for. I baked for 38 minutes and they could have possibly gone a minute or two less. Start checking at 30 minutes.

I topped these with a random assortment of leftovers! I had some mascarpone glaze that I beat some leftover cream cheese into and it was very tasty. I think a cream cheese frosting is a great idea for these.

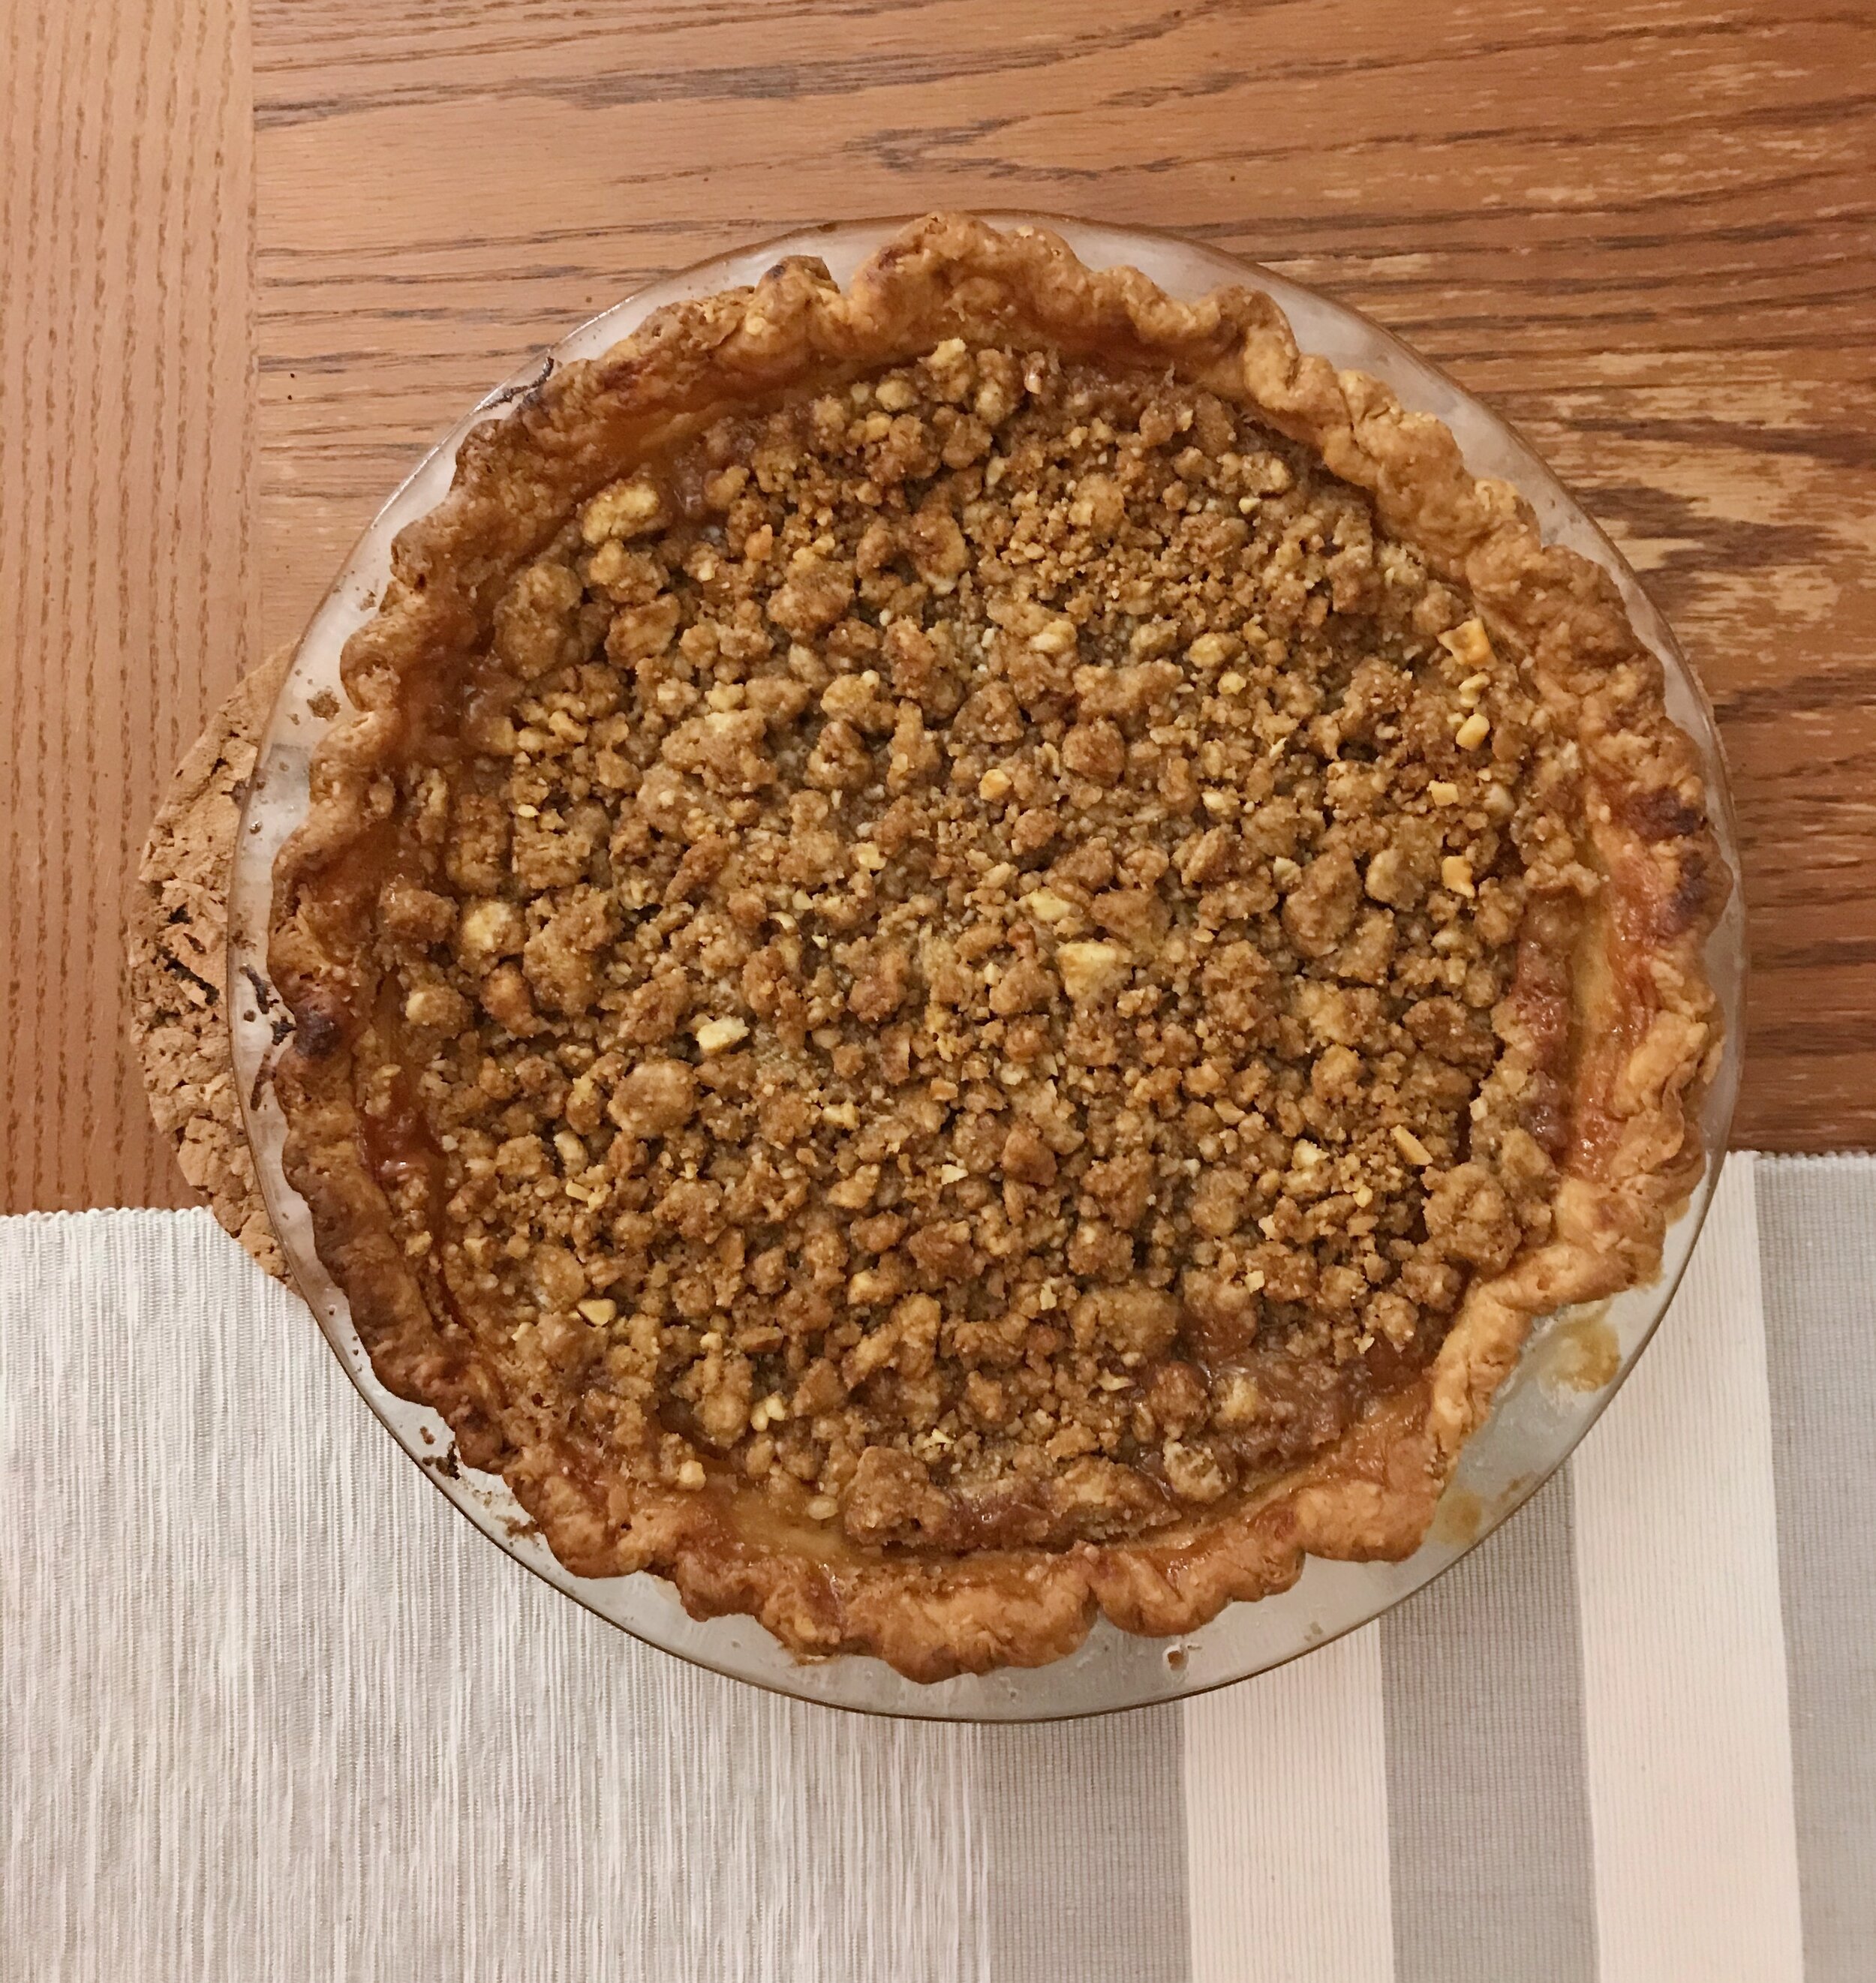
They turned out dense and rich as brioche should. Very yummy. I think on a day-to-day basis I prefer a lighter, fluffier cinnamon roll, but these were wonderful and fun and perfect for Christmas!

——————————————————————————————

Sourdough Cinnamon Rolls
From The Perfect Loaf

Brown Sugar Cinnamon Spread

  • 215g light brown sugar

  • 40g all-purpose flour

  • 2 tablespoons unsalted butter, melted

  • 2 teaspoons cinnamon

  • 1/4 teaspoon salt

Mix or whisk everything together in a bowl so there are few clumps remaining. Keep covered until needed.

Sourdough Briocher Dough:
Total dough weight: 1250g
Yield: 12-15 rolls

  • 477 grams all-purpose or bread flour

  • 133 grams cold milk

  • 191 grams large eggs (About 4)

  • 191 grams butter

  • 48 grams white sugar

  • 11 grams salt

  • 200 grams mature, 100% hydration liquid sourdough starter

Directions:
First, take out butter and cut into 1/4” to 1/2” squares, let sit in a bowl for 30 minutes to warm to room temperature while gathering and mixing other ingredients.

Initial Incorporation:
In a medium bowl add the cold eggscold whole milksugar, and mature sourdough starter. Whisk together until incorporated.

Add the flour and salt to the bowl of a stand mixer fitted with the hook attachment. Set the mixer to low (level “1” on my machine) and slowly start to pour the liquid into the mixer bowl. Add a little at a time over the course of 3 minutes. Once finished the dough will look very wet and have clumps, let it rest for 10 minutes before further strengthening.

Strengthen Dough:
After the 10 minute rest turn the mixer to medium speed (number “4” on my machine) and mix for about 5-6 minutes until the dough starts to come together and all clumps have disappeared. The dough should start to pull from the sides of the bowl but it will not completely remove from the bottom. If the dough just doesn’t want to come together and it’s overly wet add a little flour, a tablespoon at a time until it comes together.

Incorporate Butter:
Add the butter to the dough one square at a time, waiting until the previous block is absorbed before adding the next. It incorporates easiest if placed right where the hook meets the dough. Continue until all the butter is added and there are no butter patches visible, this could take 8-10 minutes at low/medium mix speed.

Bulk Fermentation
Transfer the mixed dough to a bulk container and let ferment for 2 hours at 75ºF. Do 3 to 4 sets of stretch and folds during bulk spaced out by 30 minutes. If the dough is very strong after the third set, skip the last set but let the dough rest for a full 2 hours.

Chill Dough
Place the covered bulk container into the fridge for at least 2 hours (I like 3-4 hours), or overnight. The timing here is very flexible, I’ve done overnight batches that turn out fantastic. This way the rolls could be prepared the day before, shaped and proofed first thing the morning, and then baked so they’re fresh for breakfast (or late breakfast, depending on when you get up). The dough does need to be completely cold and firm to the touch before rolling out, do not shortcut this step.

Shape Rolls
Before rolling out the dough make the Brown Sugar Cinnamon mixture

Flour your work surface. Then, remove the chilled dough from the fridge and turn it out to the floured surface. Flour the top of the dough and the rolling pin and begin rolling the dough. Roll it out to an 11” x 21” rectangle. Sprinkle the dry Brown Sugar Cinnamon mixture evenly over the dough.

Starting at the long end nearest you, roll up the dough and cinnamon/sugar filling into a log. Cut the log into even slices (12 to 15 total). Transfer the cut discs to a baking pan with some space around each one.

Proof:
Place the baking pan with cut dough somewhere warm, around 77ºF, to let proof for 2 hours. During proof, the rolls will relax out and start to puff up, eventually, they may touch each other but it depends on how much space you have between rolls.

Bake:
Preheat oven to 350ºF during the last 30 minutes of proof. Place the baking pan in the oven and bake for 40-50 minutes until the rolls look well colored. Top with glaze or frosting once cooled.

Banket

IMG_5631.jpeg
IMG_5630.jpeg

It’s been a few years since I made banket. I want to make it every year but it doesn’t always happen. This year I was determined to do it and so I did! And a lot of it! This was the best batch that I’ve made yet. It took one test batch with an almond past filling explosion to get the ratio of filling to pastry correct but after that the remainder baked up beautifully! The problem seems to happen if you try to overfill the pastry. When I rolled out the first batch I didn’t make them quite as long and so there was a thicker piece of filling rolled up inside that couldn’t be held in when expanding while baking.

IMG_5627.jpeg

After figuring out how long to roll out the dough I was able to make some beautiful sticks of delicious pastry! They always leak a little bit of filling, but you get to cut that off and nibble on it. Not a problem at all.

The dough is so tender and extremely flakey. I used a food processor to make the dough and it comes together very quickly and easily.

IMG_5637.jpeg
What happens when you fill them a bit too full!

What happens when you fill them a bit too full!

Try some chocolate!

Try some chocolate!

This year I ended up making several batches due to high demand from friends and family. Each batch ended up being only 3/4 of the recipe posted, and I made 9 banket each time, so a little shorter than the posted recipe. You can make them however big or small you want.

I also tried a couple of different things this year in the filling. I added some chopped chocolate to one, and some leftover mascarpone frosting to another. Delicious. I think it would be a lot of fun to experiment with lots of different fillings.

——————————————————————————————

Banket
Ingredients

Dough

  • 4 cups flour

  • ¼ cup sugar

  • 1 teaspoon salt

  • ½ teaspoon baking powder

  • 1 pound cold butter, cut into small pieces

  • scant 1 cup cold water

Filling

  • 1 pound of almond paste

  • 2 eggs

  • 2 cups sugar

  • 1 teaspoon vanilla

To Finish

  • 1-2 Egg yolks

Directions
Dough: mix together the flour, sugar, salt and baking powder. Add the pieces of cold butter and cut into the flour mixture with a pastry blender until the butter is about pea sized. Make a well in the middle and add cold water, mix until a shaggy dough is formed, don’t over mix. Wrap in plastic and refrigerate overnight.

For the filling, break up almond paste in a bowl. Add eggs, sugar, and vanilla. Mix well. Cover bowl with plastic wrap and refrigerate overnight.

The next day cut divide both the dough and the filling into 8 equal portions, use a scale if you have it.

Take one piece of dough and roll out into a long, thin rectangle, approximately 13x4 inches. Place one piece of filling on the rolled out dough, spreading it along the length of dough, a little closer to one side, forming an even line. Roll up the long way, folding the ends under. Pinch together slightly so the filling doesn’t ooze out.

Dock the rolls with a fork, brush with egg yolks.

At this point you can stick the pans in your freezer until the Banket is frozen hard. Then you can wrap them up and bake off as needed.

Bake at 400 degrees for 25-30 minutes until golden brown. Let cool before slicing into 1-2 inch pieces, enjoy!

Pumpkin Dinner Rolls

IMG_5661.jpeg
IMG_5653.jpeg

I had a work Christmas party this week. It was low key and relaxing, just how I like it. We were all asked to bring something to share. I offered to bring bread (the host was providing soup so I thought these two things would go well together). It was my day off work so I was able to spend the time to bake a two different breads. I started with my simple go-to sourdough, but didn’t want to leave it at just that so I did a quick online search and came up with these pumpkin dinner rolls.

I had some leftover pumpkin in the freezer from earlier in the fall so thought this would be a great use for it. The recipe was easy and came together very well. I did end up scaling the recipe down just a tad so I knew it would fit in my pan. I decreased all the ingredients amounts by 25% (so the recipe is 75% of the original). 15 rolls fit nicely in a 9x13 pan so that’s what I did. I baked it as directed for 25 minutes.

The pumpkin flavor was definitely present. The rolls were ever so slightly sweet but not overly rich or dessert like. The sweetness of the raisins and the hint of cinnamon made the final rolls just a little more special. The original recipe called for crystallized ginger in addition to the raisins but I didn’t have any. I would probably increase the raisins just a tad if I make these again, I’d like a little extra pop of sweetness.

———————————————————————————————————————————————————————————————

Pumpkin Dinner Rolls
Adapted from King Arthur Flour
Ingredients

  • 425 grams all purpose flour

  • 3/4 teaspoon cinnamon

  • 1/8 teaspoon ginger

  • Pinch cloves

  • 38 grams brown sugar

  • 1 1/8 teaspoon salt

  • 2 1/4 teaspoon instant yeast

  • 128 grams pumpkin

  • 1 egg

  • 128 grams water

  • 43 grams butter

  • 96 grams raisins

Directions
Mix and knead all of the dough ingredients except the fruit in the bowl of a stand mixer with the dough hook, until you've made a soft, fairly smooth dough, 6-8 minutes. Pumpkin varies in water content, so add extra water or flour if needed. Right at the end, knead in the fruit. Place the dough in a lightly greased bowl, cover the bowl, and allow the dough to rise for 1 1/2 hours, until it's almost double in bulk.

Turn the dough out onto a lightly greased surface, gently deflate it, and divide it into 15 pieces, roughly 60 grams each. Roll each piece into a ball. Place rolls in a lightly greased 9x13 inch pan, 3 rolls by 5 rolls.

Set aside, covered lightly, to rise for 1 hour, or until the rolls look puffy. Preheat the oven to 350°F. Bake the rolls for 25 until they're lightly browned and the center of one reads 190°F on an instant-read thermometer.

Remove the pans from the oven and turn the rolls out onto a rack to cool. Serve warm or at room temperature.

Stollen Bars

IMG_5541.jpeg

I love stollen at Christmas time. The bakery down the street makes a fantastic one. It’s so buttery and rich, one of my favorite things. It’s something that I think would be fun to make one day, but it would be a project to make and not one I have felt the need to try. It’d be fun and rewarding, but when there is such a great option down the street I don’t really feel the need.

IMG_5536.jpeg

However, when these stollen bars popped up on my Instagram feed I knew that THIS was something I could get on board with! A quick bar that hits all the same notes as stollen, but without the commitment, perfect!

IMG_5539.jpeg

They turned out absolutely delicious. Nothing light and healthy about this recipe, perfect for Christmas giving. The combination of almond extract and orange zest was reminiscent of blue moon ice cream which was a fun surprise!

I followed the recipe to a T with the one exception of replacing the marzipan with almond paste since I already was buying almond paste for making banket and it turned out just fine. It did end up baking about 10-12 minutes longer than called for but not a big deal. A fun and festive recipe that I would certainly make again.

——————————————————————————————

Stollen Bars
My Name is Yeh
Ingredients

  • 2 c (260g) all-purpose flour

  • 2/3 c (75g) almond flour

  • 1 tsp baking powder

  • 1 tsp cinnamon

  • 3/4 tsp kosher salt

  • 1/4 tsp ground cardamom

  • a pinch of ground cloves

  • a pinch of allspice

  • 3/4 c (168g) unsalted butter, divided, at room temperature

  • 4 oz (112g) cream cheese, room temperature

  • 1 c (200g) sugar

  • zest of 1 orange

  • 1 large egg

  • 1/2 tsp almond extract

  • 1/3 c (53g) dried cherries

  • 1/3 c (53g) golden raisins

  • 1 c (112g) roasted pistachios

  • 8 oz (227g) marzipan, chopped into 3/4” pieces [or substitute almond paste which is what I did and it turned out great]

  • 1/3 c (40g) powdered sugar

Directions
Preheat the oven to 350º. grease an 8” square pan and line with parchment paper so that 1” wings come up on two sides. set it aside.

in a medium bowl, whisk together the flour, almond flour, baking powder, cinnamon, salt, cardamom, cloves, and allspice. in a stand mixer fitted with a paddle, beat together 1/2 cup of the butter, the cream cheese, sugar, and orange zest on medium high until pale and fluffy, 3-4 minutes. add the egg and almond extract and beat until combined. reduce the speed to low and then beat in the dry ingredients followed by the cherries, raisins, and pistachios. fold in the marzipan pieces by hand. scrape into the pan and spread it out evenly with your hands or a rubber spatula. bake until golden around the edges and lightly browned on top; begin checking for doneness at 28 minutes. [Mine ended up taking close to 40 minutes give or take, so keep a close eye on it]

spread the remaining 1/4 cup of butter all over the top while it’s still hot out of the oven so that the butter melts and then sprinkle with powdered sugar. let cool in the pan and then cut into squares and enjoy! keep in an airtight container at room temperature or in the fridge for up to two weeks.

Chewy Molasses Cookies

IMG_5554.jpeg

It was Christmas cookie time this past weekend. I took a few days off of work and got some good work done. I painted a wall that had been languishing with just primer on it for weeks, I did a little Christmas decorating, I spent time outdoors, I put new hooks on the wall in the entryway which means my coats won’t be constantly falling onto the floor, all good things. But the best part of the weekend was having time to enjoy baking and delivering Christmas cookie packages.

IMG_5547.jpeg

This molasses cookie recipe has been an absolute MUST every single year since I first made it back in 2013. It’s the only recipe that has appeared at Christmas every single year. Quite a feat! [check out this post from Jan 2014).

It is just the best. It’s buttery, sweet and salty, chewy and full of the perfect balance of spices. It’s always the cookie that takes people by surprise and makes them ask for the recipe. Since first making this recipe I’ve made a few minor changes. The blog I originally got it from had adapted it from this Bon Appetit recipe. After making it a few times I realized that it didn’t make sense how the blogger had changed it. She called for you to melt the butter and then beat it until “light and fluffy” which just doesn’t make sense, or work, with melted butter. So I went to the original recipe which made things much simpler, just melt the butter, add the rest of the wet ingredients, and then mix in the dry. Easy!

IMG_5562.jpeg

The original recipe calls for either light or dark molasses. I’ve made these with both and I much prefer the dark molasses. It adds more of a bitterness which contrasts well with the sweet sugary coating. I would recommend using dark molasses, but either will work.

The only other thing to notice is that the original recipe calls for 1/2 teaspoon of kosher salt, while the other blog called for 1/2 teaspoon of salt. So I’ve been using 1/2 teaspoon of regular/table salt for years which means the cookies are saltier than the original recipe likely intended. Is this a problem? Absolutely not. In fact, I think the extra bite of salt in these cookies is part of what makes them so good. I would not cut back on the salt, or substitute with kosher salt because I love them how they are!

——————————————————————————————

Molasses Cookies
Ingredients

  • 2 cups (260 grams) all-purpose flour

  • 2 teaspoons baking soda

  • 1 1/2 teaspoon ground cinnamon

  • 1 teaspoon ground ginger

  • 3/4 teaspoon ground cardamom

  • 1⁄2 teaspoon salt

  • 1 large egg

  • 1⁄2 cup (1 stick) unsalted butter, melted

  • 1⁄3 cup granulated sugar

  • 1⁄3 cup robust-flavored (dark) molasses

  • 1⁄4 cup (packed) dark brown sugar

  • Coarse sanding or raw sugar (for rolling)

Directions
Place racks in lower and upper thirds of oven; preheat to 375°. Whisk flour, baking soda, cinnamon, ginger, cardamom, and salt in a small bowl. Whisk egg, butter, granulated sugar, molasses, and brown sugar in a medium bowl. Mix in dry ingredients just to combine.

Place sanding sugar in a shallow bowl. Scoop out dough by the tablespoonful and roll into balls (if dough is sticky, chill 20 minutes). Roll in sugar and place on 2 parchment-lined baking sheets, spacing 2” apart.

Bake cookies, rotating baking sheets halfway through, until cookies are puffed, cracked, and just set around edges (overbaked cookies won’t be chewy), 8–10 minutes. Transfer to wire racks and let cool.

Roasted Delicatata Squash with Brown Butter and Pomegranate

IMG_5454.jpeg

I was intivted to a friends Thanksgiving the Saturdayafter thanksgiving. The hosts were providing the turkey and asked everyone to bring a side or dessert. After all of the Thanksgiving prep and cooking I wanted something very simple to contribute. I was inspired a few days before the party by a roasted squash recipe I saw on Instagram.

I used the picture and the name as a starting point but just did my own thing when putting it together. I wrote out the recipe below as best I can remember although I didn’t measure anything when I made it. I roasted the squash with a little oil and maple syrup at 400 for 25-30 minutes which turned out to be a perfect temperature and timing to nicely brown the pieces and get the tender without drying them out or making them get tough. I arranged the squash on a plate and drizzled and sprinkled with everything else. Simple and delicious. I used balsamic, but you could also use pomegranate molasses or date molasses. You could drizzle with just plain melted butter, or a good finishing oil, and you could sprinkle with other fruit, herbs, seeds or nuts (dried cherries or cranberries, pistachios, sunflower or pumpkin seeds, fresh parsley or cilanto, you get the idea).

I thought it turned out great! Got some good review from friends. A fun, different composed salad for a group. Would definitely do this or something similar again.

——————————————————————————————————————————————————————————————-

Roasted Delicatata Squash with Brown Butter and Pomegranate
Ingredients

  • 2 medium-to-large delicata squash

  • 2-3 tablespoons olive oil

  • 1-2 tablespoons maple syrup

  • Kosher salt

  • 4-6 tablespoons butter

  • Balsamic vinegar

  • Pomegranate arils

  • Fresh chives

Directions
Preheat the oven to 400 degrees. Cut the squash in half the long way, scoop out the seeds and then slice eat half of squash into 1/2 inch half-moons. Toss the squash with olive oil, maple syrup and kosher salt to taste. Arrange in a single layer on two baking sheets. Roast for 25-30 minutes until lightly browned and tender, flipping squash about 20 minutes into roasted to more evenly brown both sides.

While the squash is cooking brown the butter. Place the butter in a light-colored pan over low-to-medium heat. Stir the butter or rotate the pan the entire time it is on the heat to keep it moving. Once melted, the butter will begin to foam and sizzle around the edges. Keep stirring. After about 5-10 minutes the butter will turn golden brown. Some foam will subside and the milk solids at the bottom of the pan will be toasty brown. It will smell intensely buttery and nutty. Immediately remove the pan from heat and pour the butter into heat-proof bowl to stop the cooking process or it may burn if left in the hot pan. Set aside until the squash is done.

Remove squash from oven and let cool slightly. Arrange squash in layers on a large platter. Drizzle with the browned butter and balsamic vinegar to taste. Sprinkle with pomegranate arils and chopped chives. Serve warm. As it cools the butter may start to solidify somewhat but it is still perfectly delicious.

Lemony Brussel Sprout Kale Salad with Leeks, Pancetta and Pecorino

IMG_5427.jpeg

I’ve been loving Brussel sprouts this fall. Not that this is a new love for me, but over the past month or two I’ve been eating a lot of them, so I decided that I wanted Brussel sprouts for Thanksgiving this year.

IMG_6637.jpeg

I tried a few different ideas prior to the holiday to see what I thought would be best. I tried a Roasted Brussels Sprouts with Warm Honey Glaze from Bon Appetit to start. It was good but not quite as good as I hoped. I decided that I wanted more of a fresh, lemony recipe. I thought about the flavors I like and the ways I’ve made Brussels in the past and I came up with my own recipe.

IMG_5452 (1).jpeg

I decided to use lots of lemon zest and juice for freshness and brightness. I wanted a punch of flavor with the cheese so I went with a sharp and salty Pecorino. And for something fun that I don’t typically do I decided to add crispy pancetta on the top, using some of the pancetta fat to roast the Brussel sprouts. A little garlic, some kale for bulk, and dried cherries for a little sweetness were the final touches.

I have to say, I loved this combination. I thought it was pretty fantastic, and I would definitely do it again and again! I wrote out a general idea of what I did below. I didn’t really measure anything when I did it, but this is pretty close.

——————————————————————————————

Lemony Brussel Sprout Kale Salad with Leeks, Pancetta and Pecorino
Ingredients

  • 1/2 lb pancetta

  • 2 quarts of Brussel sprouts

  • 2 large leeks

  • Butter

  • 1-2 cloves of garlic, thinly sliced

  • 1 lemon, zested and juiced

  • 1 cup grated Pecorino Romano Locatelli cheese

  • 1 pound kale, torn into bite sized pieces

  • Dried cherries

Directions
Cut the pancetta into small cubes and sauté until the fat has rendered and the pancetta is slightly crispy. Remove the pancetta pieces from the pan and reserve the fat.

Preheat oven to 450 degrees. Halve Brussel sprouts, toss with the reserved pancetta fat and kosher salt and roast in a single layer for 15-20 minutes (length of time will depend on your over and your desired done-ness of the Brussel sprouts).

In the meantime, thinly slice the leeks into rounds and saute in a little butter and kosher salt until wilted and tender and starting to brown. Add the garlic during the last few seconds of cooking to warm slightly, then remove from heat. Add the kale and the lemon juice and zest and mix it altogether so the kale wilts slightly in the heat of the leeks.

Once the Brussel sprouts are done add them to the leek-kale mixture and stir to combine. Add in the pecorino cheese and dried cherries and toss a few more times. Transfer the salad to a serving bowl and top with the pancetta, and sprinkle with a few more cherries and a little extra cheese. Serve warm or room temperature.

Dutch Apple Pie

When I was younger I didn’t really appreciate pie. I was, and always will be, a cake girl, but I have grown to love and appreciate a good pie as well. For Thanksgiving this year I felt like making a pie, and settled on Dutch apple because I love crumb topping, and I love apples. I settled on a recipe that originally came from America’s Test Kitchen, but I found it on The Splendid Table website. I figured I couldn’t go wrong!

IMG_5391.jpeg

I was right! This pie turned out so so well. I didn’t end up using the crust as stated in the original recipe (posted below) because I had a crust I had made a few times recently that turned out so well I wanted to stick to what I knew worked. The recipes are actually quite similar, but mine uses yogurt while this one calls for sour cream.

IMG_5407.jpeg

For the crumb topping, I actually increased the amount because in my opinion you can never have too much streusel! I upped it to 8 tablespoons of butter and then increased everything else by 1.33x. I did not think it was too much! I would do this again for sure!

——————————————————————————————

Dutch Apple Pie
From The Splendid Table
Ingredients

Crust [I did not use this crust recipe, see below]

  • 1/4 cup ice water

  • 4 teaspoons sour cream

  • 1 1/4 cups (6 1/4 ounces) all-purpose flour

  • 1 1/2 teaspoons granulated sugar

  • 1/2 teaspoon salt

  • 8 tablespoons unsalted butter, cut into 1/4-inch pieces and frozen for 15 minutes

Filling

IMG_5399.jpeg
  • 2 1/2 pounds apples, peeled, cored, halved, and sliced 1/4 inch thick

  • 1/2 cup melted vanilla ice cream

  • 1/2 cup raisins (optional)

  • 1/2 cup (3 1/2 ounces) granulated sugar

  • 1 tablespoon lemon juice

  • 1 teaspoon vanilla extract

  • 1 teaspoon ground cinnamon

  • 1/2 teaspoon salt

Topping

  • 1 cup (5 ounces) all-purpose flour

  • 1/2 cup packed (3 1/2 ounces) light brown sugar

  • 6 tablespoons unsalted butter, melted

  • 1/2 teaspoon salt

Directions
We prefer Golden Delicious or Gala apples here, but Fuji, Braeburn, or Granny Smith varieties also work well. You may substitute 1/2 cup of heavy cream for the melted ice cream, if desired. This pie is best when baked a day ahead of time and allowed to rest overnight. Serve with vanilla ice cream.

FOR THE CRUST: Combine water and sour cream in bowl. Process flour, sugar, and salt in food processor until combined, about 5 seconds. Scatter butter over top and pulse until butter is size of large peas, about 10 pulses. Add sour cream mixture and pulse until dough forms clumps and no dry flour remains, about 12 pulses, scraping down sides of bowl as needed.

Turn dough onto sheet of plastic wrap and form into 4-inch disk. Wrap tightly in plastic and refrigerate for 1 hour. (Wrapped dough can be refrigerated for up to 2 days or frozen for up to 1 month. If frozen, let dough thaw completely on counter before rolling.)

FOR THE FILLING: Toss all ingredients in large bowl until apples are evenly coated. Let sit at room temperature for at least 1 hour or up to 2 hours.

Adjust oven rack to lower-middle position and heat oven to 350 degrees. Let chilled dough sit on counter to soften slightly, about 10 minutes, before rolling. Roll dough into 12-inch circle on lightly floured counter. Loosely roll dough around rolling pin and gently unroll it onto 9-inch pie plate, letting excess dough hang over edge. Ease dough into plate by gently lifting edge of dough with your hand while pressing into plate bottom with your other hand.

Trim overhang to 1/2 inch beyond lip of plate. Tuck overhang under itself; folded edge should be flush with edge of plate. Crimp dough evenly around edge of plate using your fingers. Wrap dough-lined plate loosely in plastic and refrigerate until dough is firm, at least 30 minutes.

FOR THE TOPPING: Stir all ingredients in bowl until no dry spots remain and mixture forms clumps. Refrigerate until ready to use.

Place dough-lined plate on parchment paper–lined rimmed baking sheet. Working with 1 large handful at a time, distribute apple mixture in plate, pressing into even layer and filling in gaps before adding more. Take care not to mound apple mixture in center of plate. Pour any remaining liquid from bowl into pie. Break topping (it will harden in refrigerator) into pea-size crumbs and distribute evenly over apple mixture. Pat topping lightly to adhere.

Bake pie on sheet until top is golden brown and paring knife inserted in center meets no resistance, about 1 hour 10 minutes, rotating sheet halfway through baking. Let pie cool on wire rack for at least 4 hours or preferably overnight. Serve.

———————————————————————————————————————————————————————————————

Alternative Crust [This is the crust I used in the pie pictured above]
Yogurt Pie Crust
Ingredients

  • 1 1/4 cup unbleached white flour chilled in the freezer for 15 minutes (I used spelt and it worked beautifully)

  • 1/4 tsp. salt

  • 8 tbsp. (1/2 cup) cold unsalted butter

  • 1/4 cup full-fat yoghurt (if liquidy, drain it first so it is thick and creamy)

  • 2 tsp. fresh lemon juice

  • 1/4 cup ice water

Directions
First, make sure your flour and butter are chilled. In a medium mixing bowl, mix the flour and salt together, then cut the butter into the flour with a pastry blender, a food processor, or two knifes, until the butter is evenly distributed with the largest chunks about the size of peas (these chunks of butter are what will give your crust its delightful flakiness). In a small bowl, mix together the ice cold water, cold yoghurt, and 2 teaspoons of lemon juice. Pour this mixture into the flour. With a wooden spoon, gently mix together, just until you can get it into a ball. It doesn't have to be perfectly mixed, you want to avoid overworking the dough. Flatten the ball into a disc and wrap in plastic or parchment paper and chill in the fridge for at least 1 hour before using.